Page is loading ...

Pg. 1
GracieBee
TM
Quilting Frame
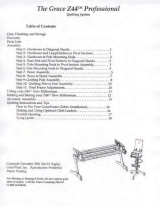
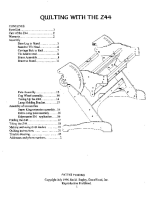
Table of Contents
Caring of your GracieBee Frame .........................2
Correspondence and Technical Support ....................2
Warranty Information . . . . . . . . . . . . . . . . . . . . . . . . . . . . . . . .2
Parts Lists . . . . . . . . . . . . . . . . . . . . . . . . . . . . . . . . . . . . . . . .3
Assembly
Stand Assembly . . . . . . . . . . . . . . . . . . . . . . . . . . . . . . .4
Rail Assembly .................................4
Marking Rails with Reference Marks . . . . . . . . . . . . . . . . .5
Clamping the Rails . . . . . . . . . . . . . . . . . . . . . . . . . . . . .5
Quilting Instructions . . . . . . . . . . . . . . . . . . . . . . . . . . . . . . . 6-9
Preparing the Backing / Lining . . . . . . . . . . . . . . . . . . . . .6
Mounting the Backing / Lining . . . . . . . . . . . . . . . . . . . . .6
Laying out the Batting ...........................7
Preparing the Quilt Top . . . . . . . . . . . . . . . . . . . . . . . . . .7
Mounting the Quilt Top . . . . . . . . . . . . . . . . . . . . . . . . 7-8
Rolling the Quilt . . . . . . . . . . . . . . . . . . . . . . . . . . . . . . .8
Using the Carrying Handles . . . . . . . . . . . . . . . . . . . . . . . . . . . .9

Pg. 2
Care of Your GracieBee
TM
The frame may be sealed and/or stained with an application of tung oil which will help
preserve the wood and will help to prevent warping. Test stain on an inconspicuous place. Many
different nishes and/or stains may be suitable for sealing and beautifying your GracieBee
TM
. You
may want to consult your local paint retailer for nishes which will apply easily and dry hard, not oily.
Caution
-Store frame in a dry place--preferably with poles and braces in vertical positions if not
assembled.
-Do not use frame or it’s parts for purposes other than those outlined in these instructions.
-Do not use the GracieBee
TM
Quilting Frame as a table.
Five-Year Limited Warranty
GraceWood, Inc will replace or repair, at our choosing, any part of the GracieBee Quilting
System which may be shown to be defective. This warranty does not cover parts damaged
through misuse, improper storage, improper assembly, loss, natural events and willful or accidental
destruction. Defective parts may be returned only with a valid RMA# which may be obtained by
Calling GraceWood, Inc at 1-800-264-0644 or 1-801-485-6688.
Note: Warranty card must be lled out, stamped and mailed to the address on the card within 30
days of purchase!
Contact Information
For technical support or any other correspondence concerning your GracieBee,
call 1-800-264-0644
or email robin@graceframe.com
or fax 1-801-908-8888
or write to:
The Grace Company
PO Box 27823
Salt Lake City, UT 84127
For details on accessories and other information, see us online at www.graceframe.com.
About the Grace Quilting Frame
The Grace Quilting Systems have been developed over the past decade with several original
design innovations. Thanks to feedback from many of the thousands of quilters who have purchased
and do use the GraceFrame we have been able to make Quilting Frames that will really enhance
the entire process of hand quilting from beginning to the end. Our Greatest Desire is to promote
the Great American Art of Hand Patchwork Quilting and to create Quilting Frames and Tools which
will truly enhance your Productivity, Quality, Comfort, and (Most of all) Quilting Friendships. If you
have any suggestions that will help us to improve our product or service, please contact the Grace
Company.
Thank you and Happy Quilting!

Pg. 3
(4) Six Foot
Rail Extensions
(4) Four Foot
Rail Extensions
(4) Two Foot
Rail Extensions
(4) Upright
Stand Leg
(2) Wood Handle
(4) Steel Rail Connector
(4) Upper Stand Base
(4) Lower Stand Base
(4) C-Clamp
(4) 1/4” Washered
Wing Nut
(2) 1/4” x 10”
Carriage Bolt (short)
(2) 1/4” x 12” Carriage
Bolt (long)
GracieBee
TM
Parts List

Pg. 4
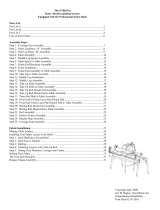
Section 1. Setting up the GracieBee
TM
Frame
Step 1. Set up the four stands
Parts Needed: 4-Upper Stand Base
4-Lower Stand Base
4-Upright Stand Leg
• Each stand is comprised of one (1) upper
stand base, one (1) lower stand base, and
one (1) upright stand leg.
• To assemble, slide a lower stand base and
an upper stand base together, lining up the
grooves as shown. make sure the pieces are
pushed completely together.
• Next, with the base pieces sitting feet
down, insert one upright stand leg down at a
45 degree angle over the base until it stops.
This may be a tight t with a new frame, but
it will loosen with use.
Step 2. Planning and Sizing the Rails
Parts Needed: 4-Six Foot Rail Extension
4-Four Foot Rail Extension
4-Two Foot Rail Extension
4-Steel Rail Connector
• Lay out your quilt lining at and measure the four
sides to determine the rail sizes needed. Remember
that your rail sizes will need to be one or two inches
larger than your lining measurements.
Example-- When quilting a 90” x 108” size quilt, you
will connect a six-foot and four-foot rail to create the
longer rail size, and a six-foot and two-foot rail for
the shorter rail.
• Repeat this process for the other three stands. Position the stands
in their approximate four corner spaces for the size quilt which will be
quilted.
• Once you have determined the quilt size, assembly the rails.
• The GracieBee
TM
offers three rail sizes to choose from: size-foot, four-foot, and two-foot.
There are four rails for each size. To create your quilt size, you can join any two or three rails
together using the four steel connecting sleeves provided. 24 different size combinations are
possible. Sides may range in length from 2 to 16 feet.
Tip-- The steel connecting sleeves may be adjusted if they are too tight or loose.
Lower Stand Base
Upper Base Stand
Base
Upright Stand Leg
Steel Connecting Sleeve
Rails

Pg. 5
**Optional Rail Preparation
• You may nd it helpful to put reference lines
on the rails before assembling the frame and
mounting the fabric.
• One line straight down the center of each
rail (or 1- 1/8” from the edge) will be a good
reference to tack the quilt edge to.
• Lines placed across the rail every 1 or 2 inches
will be helpful as a clamping reference to keep the
frame square and the sides even.
Step 3. Laying and Clamping the Rails
Parts Needed: 4-Assembled Stands
4-Assembled and Sized Rails
4-C Clamps
• Position the stands in the four corners of
your quilting area.
• Lay the two shorter rails opposite each
other, resting them on the stands.
*TIP-- Make sure the rails are placed so
that the open sides of the connecting
sleeves are facing up. This will allow
continuous thumb-tacking across the rail.
• Place the two longer rails on the top of
the ends of the short rails, opposite each
other. The longer rails will be rolled later
during the quilting process.
• Next, fasten rails together at the corners
using the four c-clamps.
• The clamps and rails will need to be
adjusted as the fabric is installed.
Mark Center at 1-1/8”
Cross Every One Or Two Inches
Short Rail Axis
Stand
Long Rails On Top
C-Clamps

Pg. 6
Section 2. Mounting the Fabric
Step 1. Tacking Lining to Longer Rails
*TIP-- The quilt lining and top will mount best
if they are cut straight and square. The seams
in the lining should be sewed with a loose stitch.
• The lining should always be 2 inches larger
than the top on all four sides.
• If you have seams in your lining, iron them
open and at so they will be easier to quilt
through.
• Line up your longest edge of the lining fabric
with the straight edge of one of the longer rails.
• Beginning at the center of the rail, thumb
tack the lining to the rail, keeping the two
aligned.
Step 2. Tacking Fabric
to Shorter Rails
• Fabric may now be
tacked along the short
axis while pulling just
enough side tension to
remove any sagging or
wrinkles.
• Thumbtack to
the two shorter rails
following the same
center-to-end method
used on the longer rails.
• Lay fabric naturally and evenly along rail. Do not stretch fabric from tack to tack.
• Place tacks about twelve inches apart to both ends of the rail. Gaps between tacks will be
lled in when the quilt top is mounted.
• Repeat the process on the opposite long rail.
*TIP-- Large-head tacks work very well. Be sure you seat the tacks completely, so the head of
the tack is holding the fabric, rather than the tack stem. This will prevent fabric tear-out.
• Pull any sagging out of the lining by adjusting the rails in the corners with the clamps.
Long Rail
Short Rail
Quilt Lining
Thumb Tacks
Correct
Incorrect
Short Rail
Long Rail
Quilt Lining Installed

Pg. 7
Step 3. Applying the Batting
• Layer the batting evenly over the installed
lining, aligning it with the edges on all four sides.
DO NOT stretch the batting!
Step 4. Preparing the Quilt Top
• Cut your quilt top straight and
square on all sides.
• Cut a 2” wide tacking strip for
each side of the top. This can be
out of unbleached muslin cut on
the straight of the fabric.
• Baste the tacking strip on all
four sides of the top. . . baste with
a long machine stitch or by hand.
• This should make your quilt top
about the same size as the lining.
Step 5. Mounting the Quilt Top
• Place the nished and prepared Quilt Top over the lining and batting.
• Starting in the center of the long side of the quilt, thumbtack the tacking strip to the rail.
This keeps tack holes out of the quilt top and allows the quilt stitches to go completely to the
edge of the quilt.
• Place tacks about 3 to 6 inches apart.
Batting
Lining
Seat Tacks Completely
Quilt Top
Tack Strip
Quilt Top
2” Tack Strip

Pg. 8
• Tack as you did with the lining, beginning with the two longer rails, and then the shorter rails.
• Lay fabric naturally and evenly along rail. DO NOT stretch fabric from tack to tack.
• Pull the wrinkles out of the top fabric by adjusting the corners with your c-clamps and rails.
• Tighten the layers smooth and even.
Step 6. Rolling the Quilt
• The quilt will be ready to roll after the stitching is complete across the entire long rail side of
the frame.
• Remove the c-clamps on the side to be rolled.
• Remove tacks on the short rails on both sides.
• Slightly fold back fabric in the corner of the end of the long rail being rolled; so the rails may
be reclamped easily.
• Roll under.
• Roll both sides equally toward the unnished center until quilt is nished.
Roll Under
Roll Both Long Rail Sides Evenly
Short Rail

Pg. 9
Please Send Any Helpful Comments about the GracieBee
TM
or these instructions to The Grace Company.
We do listen to and value all comments from any quilter. The quilting methods outlined in this
booklet are, by no means, the only methods which will make mounting the quilt successful. Quilters
are urged to experiment and nd new ways to exploit the features of the frame or to try any time-
tested techniques handed down over the years. The GracieBee
TM
quilting frame is designed with the
best materials available, with a larger quilting group in mind. Our greatest desire is to enhance the
group quilting experience using the GracieBee
TM
Quilting Frame.
Using your Carrying Handles
The easiest way to store or carry your frame is to stack all the rails together onto the 1/4” x
12” Carriage Bolts (long), with the longest rails on the bottom. You should slide the metal sleeves
onto the end of a couple of rails. Place a wooden handles onto the bolt ends, and slide it down
against the parts. Thread a washered wing nut onto bolt end and tighten down to the handle. You
will follow the same procedure for the legs and bases, making sure the legs are on the bottom.
/