Page is loading ...

J400, J500, J600
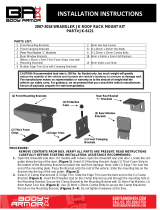
Hard Top Mount Instructions
Parts List:
2- Gutter Mount (Part A) 4- Rubber Strips (Various Sizes)
2- Gutter Mount (Part B) 4- 1/4”-20 x 5/8“ Screws
2- Gutter Mount (Part C) 8- 1/4-20 x 3/4” Hex Screws
2- Back Mount 2- 1/4-20 x 1 1/4” Hex Screws
2- Strap Mounts 14- 1/4”-20 Nylon Nuts
4- Slider Brackets (Part D)
2- 1/4”-20 x 2” Torx Screws
1- Torx Wrench
INSTALLATION
1) Connect Gutter mount Parts B & C with two 1/4”-20 x 5/8” screws
and two 1/4“-20 nylon nuts. (fig. A)
2) Connect Slider Bracket (Part D) to the top end of the Gutter
Mount using the 1/4”-20 x 3/4” hex screws and 1/4”-20 nylon nuts.
Keep the screws loose. (fig. A)
3) Silde Slider Bracket (Part D) attached to the gutter Mount into the
front crossbar. (fig. B)
4) Connect Slider Bracket (Part D) to the top end of the Back
Mount using the 1/4”-20 x 3/4” hex screws and 1/4”-20 nylon nuts.
(fig. A)
5) Slide Slider Bracket (Part D) attached to the Back Mount into
the back crossbar. (fig. B)
6) Place rack on hard top. Align rack front to back. Center rack
side to side. Once desired position is reached tighten the
1/4”-20 nylon nuts under the Gutter Mounts on the front crossbar
only. Take the 1/4”-20 x 1 1/4”screw and slide it through the hole
at the bottom of Gutter Mount (Part B).
Use one screw for each adapter. (fig. A)
7) Take Gutter Mount (Part A) and slide it over the 1/4”-20 x 1 1/4”
screw. Use the 1/4”-20 nylon nuts to tighten and secure the
bracket. Make sure to use the provided Rubber Strip. (fig. C)
Attention: Secure front Gutter Mounts
before ajdusting Back Mounts!
fig. A
fig. B
fig. C

J400, J500, J600
Hard Top Mount Instructions
8) Remove all screws that secure the Hard Top to the Jeep with
the provided Torx Wrench.
9) Slightly lift the Hard Top and place the provided Rubber Strip.
Align the Rubber Strip straight under the Back Mount. Take the
Strap Mount and slide it over the Rubber Strip. (fig. F)
10) Slide the 1/4”-20 x 2” torx screw into outer hole of the Back
Mount. Align screw with the nut at the top of the Strap Mount.
Connect the screw, but keep it LOOSE.
11) Align Back Mount to the conture of the Hard Top. Make sure
the Back Mount is tight against the Hard Top and there is
NO GAP. Once desired position is reached tighten the
1/4”-20 nylon nuts under the Back Mounts. (fig. G)
12) Tighten the 1/4”-20 x 2” torx screws on the both ends of the
Back Mounts with provided Torx Wrench.
13) Make sure all screws and nuts are tight and rack is secure
to the Hard Top.
14) Replace all the screws and tighten Hard Top to Jeep with
provided Torx Wrench.
fig. F
GOOD NO GOOD
fig. G
/