INSTALLATION GUIDE
INSTALLATIEGIDS
GUIDE D’INSTALLATION
MONTAGEANLEITUNG
Disclaimer
If you install the product in a way that diers from this manual, this will void all
guarantees. Before installation check that the product meets all your requirements
and is not damaged. By proceeding with installation, you accept the condition of the
product.
Disclaimer
Indien u het product plaatst op een manier die afwijkt van deze handleiding, vervalt
alle garantie. Controleer voor plaatsing of het product aan al uw eisen voldoet en niet
beschadigd is. Indien u overgaat tot plaatsing, aanvaardt u de staat waarin het product
zich bevindt.
Clause de non-responsabilité
Si vous installez le produit d’une manière diérente de celle présentée dans ce manuel,
toutes les garanties seront invalidées. Contrôlez avant le placement si le produit répond
à toutes vos exigences et n’est pas endommagé. En procédant au placement, vous
acceptez l’état dans lequel se trouve le produit.
Haftungsausschluss
Wenn Sie das Produkt nicht genau nach den Angaben in dieser Montageanleitung ein-
bauen, verfällt die Garantie. Überprüfen Sie vor dem Einbau des Produkts, ob sämtliche
Voraussetzungen erfüllt sind und das Produkt nicht beschädigt ist. Sobald Sie mit der
Montage beginnen, sehen Sie, in welchem Zustand sich das Produkt befindet.
Tools needed
Cleaning
Important
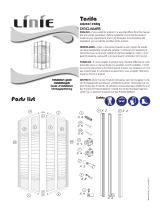
Shower panel • Douchepaneel • Panneaux de douche • Duschpaneel
66288_INSTALL_INT_ver2019.1.1
Shower
p
anel
Do
metal
!
FLEX TILE ADHESIVE C2
3mm
6mm
rubber
gummi
caouthouc

STORAGE - OPSLAG - STOCKAGE - LAGERUNG
PREPARATION - VOORBEREIDING - PRÉPARATION - VORBEREITUNG
48 h
<10°!
OPTION

PROTECT
Watertight corner tape
Read the manufacturer’s instructions!
Waterdichte hoekband
Lees de instructies van de fabrikant!
Bande d’étanchéité pour angle
Lisez les instructions du fabricant!
Wasserdichte Ecke Band
Lesen Sie den Anweisungen des Herstellers!
12
X
X
YY
X>Y
1 2
INSTALLATION - INSTALLATIE - INSTALLATION - INSTALLATION
Order of work - Werkvolgorde - Ordre de travail - Reihenfolge der Arbeit
AB
X
1
Be sure to mount the back
side against the wall!
Let erop dat je de achterzijde
tegen de muur plaatst!
Méfiez-vous de placer le dos
contre le mur!
Achten Sie darauf, die
Rückseite an die Wand zu
montieren!
FRONT
min 3 mm
tub
panel
Uitzetvoeg
Joint de dilatation
Dehnungsfuge
Expansion joint

X
X
X
2
Always cut on the corner side of the installation.
Zaag steeds aan de hoekzijde van de opstelling.
Toujours couper du coté du coin de l’installation.
Immer sägen auf der Eckseite des Aufbaus.
Only use sharp tools.
Cut or drill at high speed.
Gebruik alleen scherp gereedschap.
Zaag en boor op hoge snelheid.
Utilisez uniquement des outils acérée.
Couper ou percer à haute vitesse.
Verwenden Sie nur scharfe Werkzeuge.
Sägen und bohren mit hoher Geschwindigkeit.
ABCD
TUB
FRONT
FRONT
FRONT FRONT FRONT

X1
X2
Z
X1
X2
Z2 Z1
4
3
2
1
Slow rotation
Trage rotatie
Rotation lente
Langsame Rotation
Min Ø 3mm
min 3 mm! min 3 mm!
1
2
65
7OPTION
CHECK

12 13
Wait 48 hours for
further finishing!
Wacht 48u voor
verdere afwerking!
Attendez 48 heures
pour plus de finition!
Warten Sie 48
Stunden für die
weitere Bearbeitung!
14
810
911
FLEX TILE ADHESIVE C2S2
EN12004
Flex tile adhesive C2S2 (2 components)
Read the manufacturer’s instructions!
Flex tegellijm C2S2 (2 componenten)
Lees de instructies van de fabrikant!
Colle carrelage Flex C2S2 (2 componenten)
Lisez les instructions du fabricant!
Flex fliesenkleber C2S2 (2 Komponenten)
Lesen Sie den Anweisungen des Herstellers!
3mm
6mm
Double gluing
Dubbele verlijming
Double encollage
Doppelverklebung
min 3 mm!
24h
48h
min 3 mm!
10
min 1,5 mm
Uitzetvoeg
Joint de dilatation
Dehnungsfuge
Expansion joint
/
