GF-856
GF-856
QUICK REFERENCE GUIDE
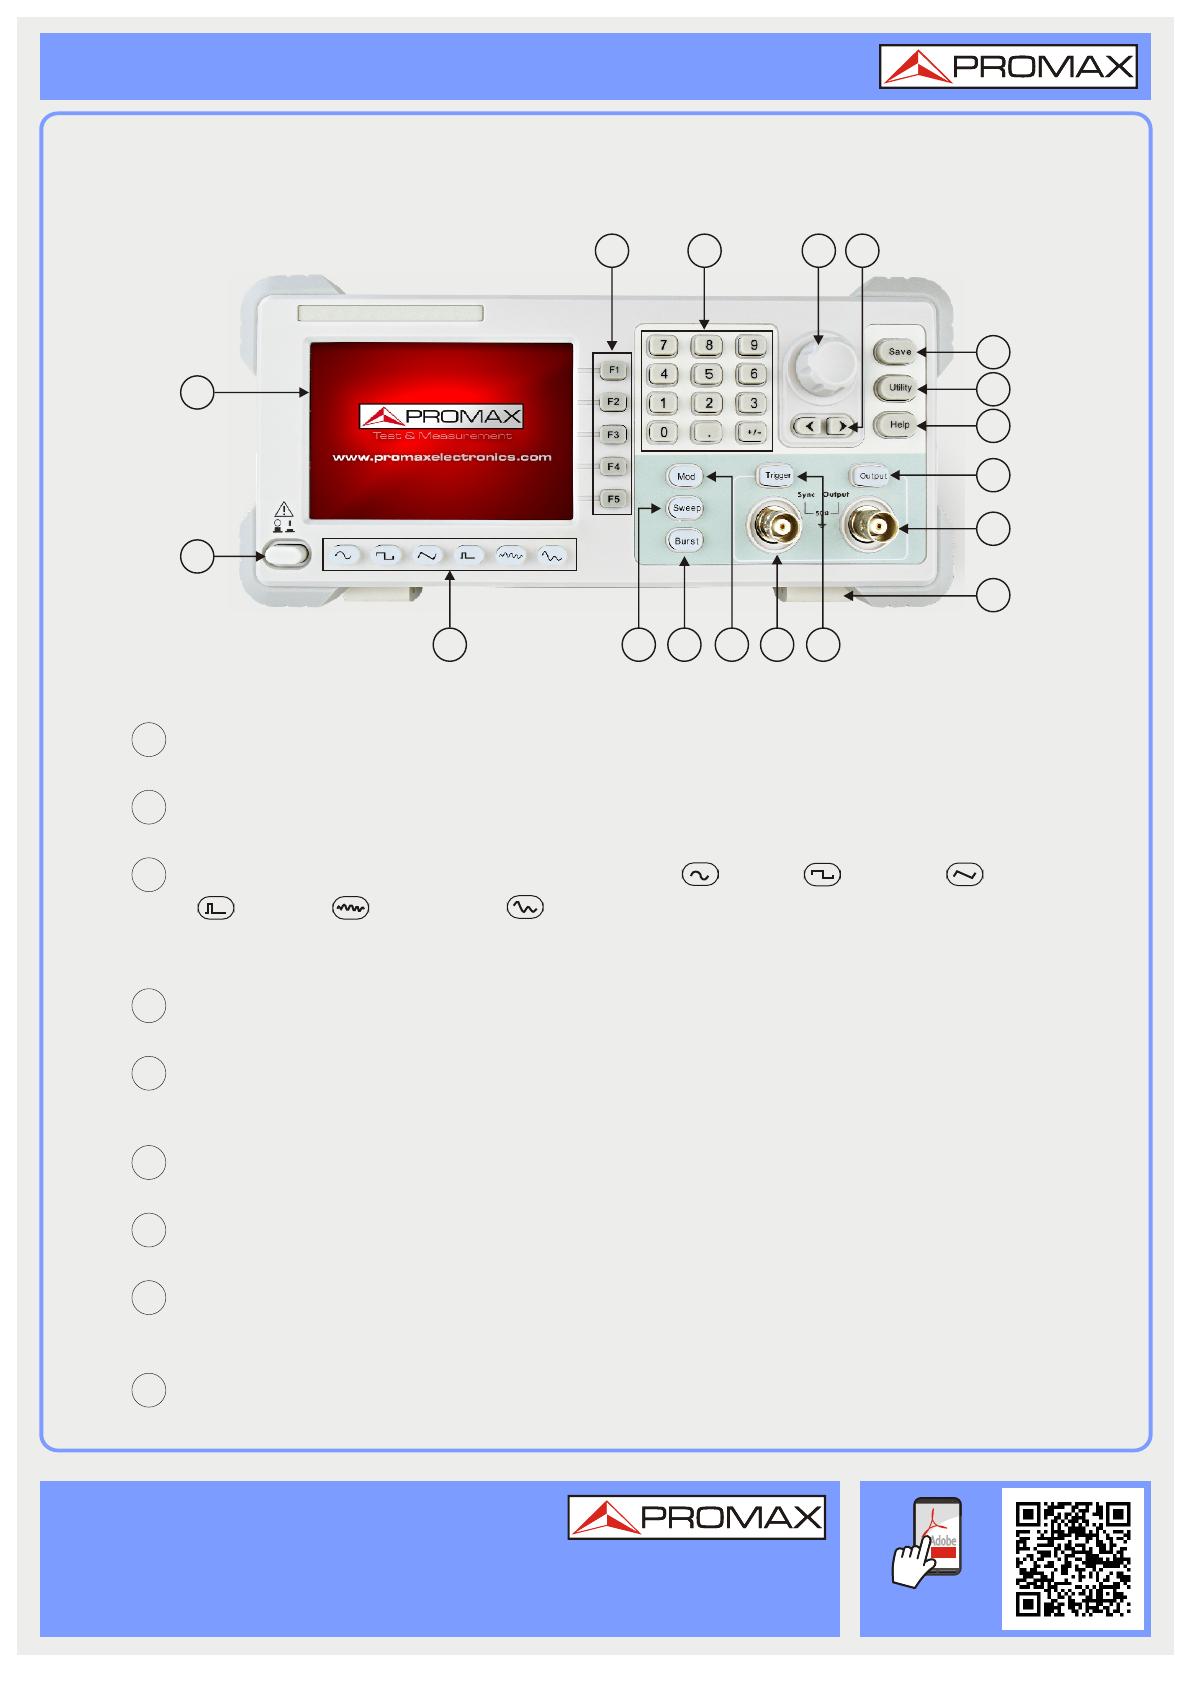
FRONT PANEL
LCD: Display the user interface.
1
Find the user's manual on the download area at:
www.promaxelectronics.com
USER MANUAL
DOWNLOAD
v1.0
01-09-2016 (0 DG0233)
1
2
3
4
5
6
7
8
9
10
11
12
13
14
15
16
17
18
PDF
Sync output terminal: Output sync sign.
7
Modulation: Generate the Modulated waveforms.
6
DC button: Generate burst for Sine, Square, Ramp, Pulse and Arbitrary
waveform.
5
Sweep button: Sweep Sine, Square or Ramp waveform.
4
Power button: Turn on/off the generator.
2
9
Foot stool: Make the instrument to be tilted for ease of operation.
8
Trigger key: Activate or deactivate the sync signal output. The button
is lit when it is in the On state.
Waveform selection buttons: Include : Sine, Square, Ramp,
Pulse, Noise and Arbitrary waveform. When a waveform is
selected, the backlight of the button turns on.
3


