Page is loading ...

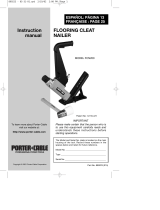
Model No: RMM4
2 in 1 HARDWOOD FLOORING
CLEAT NAILER & STAPLER
INSTRUCTION AND TECHNICAL
MANUAL

IMPORTANT SAFETY INSTRUCTIONS
WARNING: When using pneumatic tools, basic safety precautions
should always be followed to reduce the risk of personal injury,
including the following:
READ AND FOLLOW ALL INSTRUCTIONS.
There are certain applications for which this tool was designed. we
strongly recommends that this tool NOT be modified and /or used for
any application other than for which it was designed. If you have any
questions relative to its application DO NOT use the tool until you have
written us and we have advised you.
1
!
PARTS LIST
12
Item
1
2
3
4
5
6
7
8
9
10
11
12
13
14
15
16
17
18
19
20
21
22
23
24
25
26
27
28
29
30
31
32
33
34
Description
Rubber cap
O-ring 30.3 2.65
Screw
Spring washer
Cylinder cap
Screw
Spring washer
Actuator part A
Snap ring
Half block
O-ring 33.3 2.65
Actuator part B
O-ring 57.4 3.5
Plunger
O-ring 21 2
O-ring 14.2 2.5
Body
Cylinder
O-ring 17.5 2.6
O-ring 38.5 4.5
Poppet
Piston assembly
O-ring 58.7 3.5
Bumper
Seal
Arm
Air plug
Sleeve
Screw
Guide body
Pin
Front plate
Screw
Screw
Item
35
36
37
38
39
40
41
42
43
44
45
46
47
48
49
50
51
52
53
54
55
56
57
58
59
60
61
62
63
64
65
66
67
68
Description
Spring washer
Washer
Protect block
Pin
Screw
Base plate
Screw
Pad
Washer
Feeder assembly
Spring bracket
Screw
Fixed magazine A
Washer
Screw
Screw
Plate
Limit nut
Stopped plate A
Screw
Screw
Fixed magazine B
Bushing
Spring
Pin
Movable magazine
Hex key
Sheath
Rail A
Oriented plate
Rail B
Sleeve
Stopped plate B
Pull handle
1.USE SAFETY GLASSES. To
prevent eye injuries, the tool operator
and all persons in the work area must
wear safety glasses with permanently
attached, rigid, plastic side shields.
These safety glasses must conform to
ANSI Z87.1 requirements (approved
glasses have “Z87” printed or stamped
on them). Fig.1.
2.WEAR EAR PROTECTION to
safeguard against possible hearing
loss. Fig.1.
3.OPERATOR AND BYSTANDERS
WEAR HARD HAT to safeguard against
possible injuries. Fig.1.
4.USE CLEAN, DRY, REGULATED
compressed air at 70 to 120 PSI, (4.8 to
8.3 BAR ). Fig.2.
5.DO NOT CONNECT TOOL to
pressure which potentially exceeds
200 PSI (13.8BAR)
6.ONLY USE AIR HOSE THAT IS
RATED for a maximum working
pressure of 150 PSI or 150% of the
maximum system pressure, which
ever is greater.
7.NEVER USE OXYGEN, CARBON
DIOXIDE, combustible gases or any
other bottled gas as a power source for
this tool: explosion and serious
personal injury could result. Fig.3.
Fig.2
Fig.3
Z87
Fig.1

8.CONNECT TOOL TO AIR SUPPLY
HOSE with a coupling that removes all
pressure from the tool when the
coupling is disconnected. Fig.4.
9.DISCONNECT TOOL FROM AIR
SUPPLY HOSE before doing tool
maintenance, clearing a jammed
fastener, leaving work area, moving
tool to another location, handing the
tool to another person, or making
adjustments. Fig.5.
10.NEVER USE A TOOL that is
leaking air, has missing or damaged
parts, or requires repair. Make sure all
screws and caps are securely
tightened.
11.DO NOT USE TOOL WITHOUT
SAFETY WARNING LABEL. If label is
missing, damaged or unreadable,
contact your Service Center for a
replacement. Fig.6.
12.ONLY USE PARTS, FASTENERS,
recommended by us.
13.REMOVE ALL FASTENERS from
tool before connecting to air supply.
The tool’s driving mechanism may
cycle when tool is connected to the air
supply. F i g . 7 .
Fig.4
Fig.6
Fig.5
Fig.7
2
WARNING
TO PREVENT SERIOUS INJURY
FROM FASTENERS AND FLYING
DEBRIS:
READ OPERATION MANUAL
OPERATOR AND OTHERS IN
WORK AREA SHOULD ALWAYS
WEAR SAFETY GLASSES
DIS CONNECT AIR WHEN
CLEARING A JAMMED STAPLE
OR TOOL NOT IN USE
DO NOT USE OXYGEN OR
COMBUSTIBLE GASES
DO NOT EXCEED 120 PSI
1
2
EXPLODED VIEW DRAWING
11

14.ALWAYS ASSUME THE TOOL
CONTAINS FASTENERS. Keep the
tool pointed away from yourself and
others at all times. No horseplay.
Respect the tool as a working
implement. Fig.8.
15.USE THE MALLET TO RACK THE
WOOD STRIP, NOT THE NAILER.
Fig.9.
Fig.8
2. Tool does nothing or
operates sluggishly.
Tighten screws.
Install “OVERHAUL” Maintenance Kit.
SOLUTIONS
PROBLEMS
SYMPTOM
1. Air leak near top of tool
Loose screws.
Worn or damaged
o-rings or seals.
3. Air leak near bottom of
tool.
Inadequate air supply.
Inadequate lubrication.
Worn or damaged
o-ring or seals.
Verify adequate air supply.
Put 10 to 15 drops of oil into air inlet.
Install “DRIVER” Maintenance Kit.
Install “OVERHAUL” Maintenance Kit.
Tighten screws.
Install “OVERHAUL” Maintenance Kit.
Loose screws.
Worn or damaged.
O-rings or bumper.
TROUBLESHOOTING
CAUTION: Disconnect tool from air supply before performing
any Service Procedure.
4. Tool jams frequently.
Incorrect fasteners.
Damaged fasteners.
Magazine or nose
screws loose.
Magazine is dirty.
Pusher spring damaged.
Driver is worn or damaged.
Verify approved fasteners of correct size.
Replace w/undamaged fasteners.
Tighten screws.
Clean magazine.
Replace spring.
Install “DRIVER” Maintenance Kit.
Fig.9
5. Other. Local agencies.
UNPACK
When unpacking, check to make sure that all the parts are included.
If any parts are missing or broken, please call seller.
Description
Nailer
S3 Hex Key
S4 Hex Key
S5 Hex Key
Wrench-Special
Mallet
Base Plate
Air Tool Oil
Instruction manual
Qty
1
1
1
1
1
1
1
1
1
anyone other than these agencies.
Should you have any questions about your tool, feel free to us at any
time. In any communications, please give all information shown on the
nameplate of your tool (model number, type, serial number, etc.).
16.DO NOT USE THE METAL END
OF THE MALLET TO STRIKE THE
PLUNGER, use the rubber capped end
17. FIRE FASTENERS INTO WORK
SURFACE ONLY: never into materials
only.
too hard to penetrate.
Fig.11
19. DO NOT DRIVE FASTENERS
on top of other fasteners: the
fasteners can ricochet causing
personal injury. Fig.11
3
10

Fig.24
Fig.25
A
9
MAINTENANCE
CLEAN AND INSPECT DAILY
CAUTION: Disconnect tool from air supply before cleaning
and inspection. Correct all problems before placing the too
back in use.
Wipe tool clean and inspect for wear or damage. Use non-flammable
cleaning solutions to wipe exterior of tool only if necessary. DO NOT
SOAK tool with cleaning solutions. Such solutions can damage internal
parts.
Inspect mechanism to assure system is complete and functional: no
loose or missing parts, no binding or sticking parts.
Keep all screws tight. Loose screws can cause personal injury or
damage tool.
If tool is used without an in-line oiler: place 10 or 15 drops of Air Tool
Oil into the air inlet of the tool at the beginning of each workday.
IMPORTANT: Do not over lubricate the Nailer, excess oil mist or
drops will be vented with spent air when over lubricated. Excess
oil could stain purge excess oil, before you begin nailing.
SERVICE AND REPAIRS
All quality tools eventually require servicing of replacement of parts
due to wear from normal use. Some user serviceable components are
described In the TROUBLESHOOTING Section. All repairs made by
workmanship. We cannot guarantee repairs made or attempted by
local agencies are fully guaranteed against defective material and
Anyone
4
Fig.27
Fig.26
SPECIFICATIONS
Characteristic
Minimum Operating Air Pressure
Maximum Operating Air Pressure
Staple Length Range
Staple Size
Staple Capacity
Length Range
Size
Capacity
Air Inlet
Air Consumption
Tool Weight
L-shaped Nail
L-shaped Nail
L-shaped Nail
Value
70 PSI
120 PSI
1" -- 2"
16 Gauge
92
1-1/2" -- 2"
15-1/2 Gauge
100
1/4" NPT
4.5 CFM
12 lbs

CLEARING A JAMMED FASTENER
1. CAUTION: Disconnect tool from air supply. Fig.22.
2. Remove any remaining fasteners from the nailer.
A. Pull the movable magazine to up lock place. Fig.23
B. Remove any remaining fasteners from the nailer. Fig. 24
3. Use the hex wrench to remove the three screws (A) Fig.25.
4. Slide out the Driver Guide Plate and Gate assembly. Fig. 26
5. Pull the Driver Guide Plate and Gate assembly apart and remove the
Jammed Fastener. Fig.27.
6. Replace the Driver Guide Plate and Gate with three screws.
8
OPERATING INSTRUCTIONS
FOREWORD
RMM4 is a heavy duty, 2 in 1 pneumatic flooring nailer. It is designed to
install tongue and groove hardwood flooring with L-shaped nail or staple.
Flooring in thicknesses of 1/2D , 5/8D, 3/4D, and 25/32D can be installed-
using 1-1/2” and 2” length nail respectively.
POWER SOURCE
This tool is designed to operate on clean, dry, compressed air at
regulated pressures between 70 and 120 PSI (Pounds per Square
Inch). The preferred system would include a filter, a pressure regulator,
and an automatic oiler located as close to the tool as possible (within
15 feet is ideal).
All compressed air contains moisture and other contaminates that are
detrimental to internal components of the tool. An air line filter will
remove most of these contaminates and significantly prolong the life of
the tool. If an in-line oiler is not available: place 10 to 15 drops of Air
Tool Oil, into the tool’s air inlet at the beginning of each workday.
IMPORTANT: Do not over lubricate the Nailer, excess oil mist or
drops will be vented with spent air when over lubricated. Excess
oil could stain the wood flooring, walls or furnishings. Dry fire the
Nailer, without nails, to purge excess oil, before you begin nailing.
The tool is equipped with a 1/4N male “quick connector”. The tool must
always be connected to the air supply with a coupling such that all
pressure is removed from the tool when the coupling is disconnected.
-
WARNING: All air line components (hoses, connectors,
filters, regulators, etc.) must have a minimum working
pressure rating of 150 PSI (10.3BAR) or 150% of
maximum system potential, whichever is higher.
Do not connect this tool to a system with maximum potential.
Only connect tool to air supply with a coupling that will
release all pressure from the tool when disconnected.
Disconnect tool from air supply before performing
maintenance, clearing a jammed fastener, leaving work
area, moving tool to another person, or making adjustments.
5
Fig.23Fig.22
!
!
!
!
EMPLOYER’S RESPONSIBILITIES
WARNING: Employer enforce compliance with the safety warnings
And all other instructions contained in this manual.
Keep this manual available for use by all people assigned to use this
tool.
For personal safety and proper operation of this tool, read and follow all
or these instructions carefully.
!
NOTE: When Using Tool to install Pre-finished Flooring
The RMM4
Pre-finished hardwood flooring. Care must be used however
when installing pre-finished flooring to ensure that the finish
is not damaged by the tool. It is recommended that the tool be
inspected for damage [especially the base plate (A) Fig.17]
and tested on a sample section to be certain that the tool and
technique of use do not mar the finish. This procedure should
be followed before each job due to variations in flooring and
was designed for installing both unfinished and
tool condition.
WARNING: Keep tool pointed in a safe direction at all times.
WARNING: Never attempt to drive a fastener into material
that is too hard, the fastener can ricochet causing personal
Injury.
WARNING: Disconnect tool from air supply before
performing maintenance, clearing a jammed fastener,
leaving work area, moving tool to another location, handing
the tool to another person, making adjustments.

!
PREPARING THE TOOL
1. After reading and understanding this entire manual, connect tool to
air supply. (See Fig. 12).
WARNING: Keep tool pointed away from yourself and others
at all times.
Always connect tool to air supply before loading fasteners.
Always wear Z87 approved safety glasses, and hearing
protection when preparing or operating the tool.
Never use a tool that leaks air or needs repair.
Fig.16
6
It is not necessary to hit the rubber cap hard to activate it. Never hit the
tool hard with excessive force, as this will damage the tool.
DO NOT USE THE METAL END OF THE MALLET TO STRIKE THE
RUBBER CAP, use the rubber end only.
7
2 inch
31/32N
25/32N FLOORING
1-1/2 inch
25/32N
1/2N FLOORING
Fig.21
Fig.18
Fig.12
Fig.13
Fig.15
Fig.14
USING THE TOOL
Complete all steps of PREPARING THE TOOL before using the tool.
First position and closely fit together (rack) the flooring strip with the
(metal)mallet. Position the tool on the tongued edge of the flooring strip
(see Fig. 17) aligning the driver guide against the front of the flooring strip.
Strike the rubber cap with the rubber mallet
The tool will then drive the staple or cleat at the correct 45 degree angle as
shown in Fig. 18-21. The proper length of flooring nail to use with various
thicknesses of flooring is also shown in Fig. 18-21.
Fig.17
A
B
2. Pull the movable magazine to up lock place. Fig.13.
3. Put the strip of L-shaped nail or staple into fixed magazine. Fig.14 or
Fig. 15.
4. Push the movable magazine forward until it was locked. Fig.16
1-1/2inch
11/16N
5/8N FLOORING
2 inch
31/32N
3/4N FLOORING
Fig.19
Fig.20
/