Page is loading ...

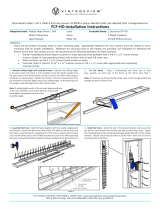
2. Attach E1’s to Corners and Middle of the First Panel - Lay
one panel down on its narrow edge on a clean soft surface such
as carpeting, blanket or towel, being careful not to scratch the
panel. Insert an E1-SCREW through the hole in one of the bottom
corners. Align the end of the E1-SCREW with the threads on the
end of an E1 and fully tighten, being careful to not over tighten as
this may damage the panel, the threads in the E1 or both. Repeat
this process for the other 3 corners and the middle row.
Tip: A cordless drill with a 4mm driver tip will save considerable
time during assembly. Be sure to use a low torque setting, typically
around #3, on your drill’s clutch, if so equipped, to prevent
damaging any components from overtightening.
1. Prepare the Panels - Remove the protective paper lm from
both sides of the panels. Acrylic can scratch relatively easily, so do
not use anything sharp such as a razor blade to remove the lm.
Tip: Start peeling the top edge of the lm with a ngernail and
slowly roll the lm over the outside of an empty cardboard tube
from the E1 bottle support rods.
Required tools: 4mm Hex Wrench (included)
Recommend cordless drill with variable torque
clutch (set to low setting, typically #3) with
4mm driver tip
E1
Panel
E1-SCREW
E1-STUD
3. Attach E1’s to Remaining Holes in Panel – Carefully lift the
panel to stand on the unsecured ends of the E1’s, like a table. Align
the top of an E1 with a hole and pivot the rod into place and secure
with an E1-SCREW. Repeat this process for the remaining holes.
E1 Series Assembly Instrucons
Wine Master Cellars, LLLP • 10645 E 47th Ave, Denver, CO 80239 • phone: 866.650.1500 • fax: 866.650.1501 • VintageView.com

4. Ax the Second Panel – Carefully lift and rotate the partially
assembled unit to rest on the panel with the unsecured ends
upright, like a bed of nails. Lay the second panel on the ends of the
E1’s and one at a time, align each E1 with the corresponding hole
and secure it in place with an E1-SCREW (Fig. A.). If assembling
a multi-section unit, use the E1-STUD instead (Fig. B.). It is
recommended that the E1’s be secured row-by-row working down
the panel, as this will allow the easiest alignment of the E1 with
the holes. For single section units, the assembly is complete, skip
to Step 6.
Tip: The E1-STUD’s may be quickly screwed in by gently tightening
them in the chuck of a drill with approximately 3/4 of the stud
exposed, screwing them in until the at spot in the middle of the
stud is just below the surface of the panel and then releasing the
end of the stud from the chuck.
Maintenance and Care
To ensure that this product securely and beautifully stores your wine
for its intended lifespan, it is critical that it is properly maintained.
The acrylic panels should NEVER be cleaned with alcohol or alcohol
based cleaners. Be careful, as many popular glass cleaners are
alcohol based and use of them may result in signicant degredation
of the clarity of the panels. Only warm soapy water and soft cloths
should be used for cleaning. Additionally, the screws should be
checked for tightness at least once per year. Should any connection
be identied as loose, tighten as appropriate.
For full warranty information, please visit:
VintageView.com/support/warranty
Please call us toll free at 866-650-1500 for assembly assistance or to request replacement parts.
VintageView.com
5. Attach the E1’s to Exposed Studs (for Extensions only) –
With all of the studs installed, begin securing the panel in place
by installing E1’s along the top, middle and bottom rows. Once
the second panel is rmly locked in place, the unit may be stood
upright for ease of access while installing the remaining E1’s.
Tip: The E1’s may be quickly installed by gently tightening one end
of the tube in the chuck of a drill and screwing the other end onto
the exposed E1-STUD. Remember to keep the drill set at a low
torque so as not to overtighten or damage anything.
6. Secure to Wall – It is highly recommended that all units be
secured to a wall for optimal stability. This may be accomplished
by either directly fastening a panel to the wall by pre-drilling a
hole through the panel and screwing or bolting into the wall or by
using an “L” bracket. Please contact your VintageView dealer for
information regarding brackets of custom shapes or sizes.
Fig. A Fig. B
/
