Angelcare AC403 Owner's manual

Category
Babyphones
Type
Owner's manual

Angelcare AC403 is a movement and sound baby monitor that aids in monitoring your child while they sleep. With the movement alarm activated, it will alert you if no movement is detected, even without the sensor pad plugged in. You can adjust the microphone sensitivity to suit your needs and the monitor will transmit when it detects sound from your baby or in their room. The cord safety feature ensures that the sensor pad cord is kept out of reach of your baby.

Angelcare AC403 is a movement and sound baby monitor that aids in monitoring your child while they sleep. With the movement alarm activated, it will alert you if no movement is detected, even without the sensor pad plugged in. You can adjust the microphone sensitivity to suit your needs and the monitor will transmit when it detects sound from your baby or in their room. The cord safety feature ensures that the sensor pad cord is kept out of reach of your baby.

OWNER’S MANUAL
MOVEMENT & SOUND BABY MONITOR
Model AC403
for your peace of mind
Movement Alarm
Your monitor comes with the movement alarm activated.
When switching on your monitor it will alarm, with or without
the Sensor Pad plugged in, if no movement is detected.
Deactivate the movement function to use the monitor without
the Sensor Pad.
Batteries
Insert the enclosed rechargeable batteries into the Parent
Unit. If inserted incorrectly the Parent Unit will not charge
when placed in the charging cradle. The battery icon will flash
briefly on the Parent Unit screen to indicate charging.
Cord Safety
Ensure the Nursery Unit is at least 1 metre away from your
baby’s cot. The Sensor Pad cord must always be kept out of
reach of baby and secured using the cord cover kit provided.
Voice-activated Sound Transmission
Your monitor will transmit when it detects sound from
your baby or in their room. You can adjust the microphone
sensitivity to suit your needs.
DON’T
FORGET
IMPORTANT ADVICE FOR INITIAL SETUP
PLEASE FOLLOW THE INSTRUCTIONS CAREFULLY FOR CORRECT SETUP
Please DO NOT return this product to the store. For assistance please
contact our helpline on 0345 009 1789 or email [email protected]o.uk
Mon – Fri 10am – 4pm, excluding bank holidays.
1. THIS PRODUCT CANNOT REPLACE
RESPONSIBLE ADULT SUPERVISION. This
pro du ct is de sig ne d to aid in th e m oni to rin g
of your child. When using the monitor, you
mu st st ill provid e t he su pe r vi sio n n ec es sa r y
for the continued safety of your child.
Monitoring of premature babies, or those
considered to be at risk, should always
be carried out under the supervision of a
health professional. This monitor SHOULD
NOT be used as a medical device, nor as
a device to prevent Sudden Infant Death
Syndrome (SIDS).
2. WARNING Strangulation Hazard
Children have STRANGLED in cords. Keep
adapter cords out of
the reach of children
(more than 1 m away).
NEVER use Sensor
Pad(s) without the
protective cord
covering. Check
protective cord
covering before each
use. Immediately discontinue use of Sensor
Pad(s) if protective covering is damaged
or broken.
3. Never use extension cords with AC
adapters. ONLY use the AC adapters
provided.
4. When an AC Adapter is plugged into
an electrical outlet, DO NOT touch the
exposed end.
5. A LWAY S b e s u r e t h a t b o t h t h e t r a n s m i t t e r
and receiver are working properly and are
within range of each other. Test monitor
before first use, periodically and when
changing location of the Nursery Unit.
6. ALWAYS be sure to immediately check
on baby whenever an alarm sounds.
7. DO NOT use monitor near water (such
as bath tub, sink, etc.).
CAUTION
RISK OF ELECTRIC SHOCK
DO NOT OPEN
DO NOT EXPOSE TO RAIN OR MOISTURE
8. Keep monitor AWAY from heat sources
(such as stoves, radiators, etc.).
9. A LWAY S p l a ce bo t h t he N u rs e r y Uni t a n d
Parent Unit on a flat surface in an upright
position and allow for proper ventilation.
DO NOT place on sofas, cushions, beds,
etc. which may block ventilation.
10. This monitor uses public airwaves to
transmit signals. The Parent Unit may
pick up signals or interference from
other nursery monitors in your area. Your
monitor may even be picked up by other
households. To protect your privacy, make
sure both units are turned OFF when not in
use. If you experience interference, change
the channel on both units.
11. This produ ct is NOT a toy. DO NOT allow
children to play with it.
12. This pro duc t conta ins sm all par t s. Adul t
assembly required. Exercise care when
unpacking and assembling the product
and keep small parts away from children.
13. Use and store the monitor at a
temperature between 10 °C and 40 °C.
BATTERY WARNING
14. Use ONLY AAA RECHARGEABLE
batteries for the Parent Unit. DO NOT
mix old and new batteries. DO NOT
mix alkaline, standard or rechargeable
batteries. Insert batteries with correct
polarity. DO NOT short-circuit supply
terminals. ONLY use the recommended
batteries or equivalent (volts and size)
and the correct adapter. Remove batteries
when product is stored for long periods
of time or when batteries are exhausted.
Dispose exhausted batteries properly. DO
NOT recharge non-rechargeable batteries.
Rechargeable batteries are ONLY to be
charged under adult supervision. Keep all
batteries away from children.
WARNING
TABLE OF CONTENT
WARNINGS ......................................................................................3
AC403 SETUP REQUIREMENTS .......................................................7
STEP 1 - Charging the Parent Unit (15 hours) ..............................8
STEP 2 - Installing the Sensor Pad ...............................................10
STEP 3 - Setting up the Nursery Unit ........................................... 13
STEP 4 - Turning on your Monitor ................................................. 14
STEP 5 - Testing and Getting to know your monitor .............. 16
STEP 6 - Activating and deactivating
additional functions ......................................................... 20
Troubleshooting .................................................................................. 25
Limited warranty ................................................................................. 27
Technical specifications .................................................................... 28
UK1014
OWNER’S MANUAL
KEEP YOUR OWNER’S MANUAL FOR FUTURE REFERENCE.
PLEASE READ THE WARNINGS AND INSTRUCTIONS CAREFULLY BEFORE
ASSEMBLING & USING THE PRODUCT.
FAILURE TO FOLLOW THE WARNINGS AND THE INSTRUCTIONS COULD RESULT
IN SERIOUS INJURY OR DEATH OR DAMAGES TO THE PRODUCT.
THE SENSOR PAD FEATURE IS NOT FOR USE WITH ADULTS, CHILDREN OR INFANTS
OLDER THAN 24 MONTHS.
THE SENSOR PAD IS NOT INTENDED TO BE USED TO DETERMINE IF A CHILD IS OUT
OF THE CRIB.
WARNING
Adult assembly required.
Keep small parts away from children when assembling.
This Angelcare Monitor is a Personal Care Product. Please DO NOT return this to the store
where you purchased it from. If you have any questions or require assistance please call the
Angelcare Helpline on 0345 009 1789 or email [email protected]o.uk.
The Baby Helpline is open Monday to Friday, 10am to 4pm. The helpline is closed on bank
holidays.
For additional FAQs and to download instruction manuals visit; www.angelcare.co.uk.
To order spare parts for your Angelcare Baby Monitor visit; www.megababy.co.uk.
3
2
15. IMPORTANT SAFETY INSTRUCTIONS
15.1 Read these instruc tions - All the safet y
instructions should be read before the
product is operated.
15.2 Keep these instructions. The safety
and operating instructions should be
retained for future reference.
15.3 H e ed a ll w ar ni ng s Al l w ar ni ng s o n t he
product and in the operating instructions
should be adhered to.
15.4 Follow all instructions All operating
and use instructions should be followed.
15.5 Water and moisture - DO NOT use
this apparatus near water. For example,
near a bath tub, wash bowl, kitchen sink,
laundry tub, in a wet environment or near
a swimming pool and the like. Care should
be taken so that objects DO NOT fall onto
units and that liquids are not spilled into
either unit or Sensor Pad through its
openings.
15.6 Cleaning - Disconnect all units before
cleaning. DO NOT immerse in water any
part of the Nurser y Unit, Parent Unit. Clean
only with dry cloth. DO NOT spray with
cleaning products or solvents. Wipe Sensor
Pad with a cloth moistened very slightly
with an antiseptic or mild detergent.
15.7 Ventilation - DO NOT block any
ventilation openings. Allow for proper
ventilation when units are in use. DO NOT
cover the Nursery Unit or Parent Unit with
any object such as a blanket . DO NOT place
it in a drawer or in any location which
would muffle the sound or interfere with
the normal flow of air.
15.8 Heat sources - DO NOT install near
any heat sources such as radiators, heat
registers, stoves, TVs or other apparatus
(including amplifiers) that produce heat.
Heat can damage the case or electrical
parts.
15.9 Power cord protection - Protect the
Sensor Pad cord and Adapter’s power
cord from being walked on or pinched by
furniture or other items Power supply
cords should be routed so that they are not
likely to be walked on or pinched by items
upon or against them, paying particular
attention to cords and plugs, convenience
receptacle, and the point where they exit
from the product.
15.10 Accessories - Only use attachments/
accessories specified by the manufacturer.
DO NOT place this product on an unstable
cart, stand, tripod, bracket or table. The
product may fall, causing serious injury
to a child or adult and serious damage to
the product. Use ONLY with a cart, stand,
tripod, bracket or table recommended by
the manufacturer or sold with the product.
Any mounting of the product should follow
the manufacturer’s instructions.
15.11 Unplug this appliance during lightning
storms or when not used for long periods
of time.
15.12 Servicing - DO NOT attempt to
service this product yourself as opening
or removing covers (except battery doors)
may expose you to dangerous voltage or
other hazards.
15.13 Replacement parts - When
replacement parts are required, be sure
the replacement parts specified by the
manufacturer have the same characteristic
as the original part. Unauthorized
substitution may result in fire, electric
shock or other hazards.
15.14 Usage - This baby monitor is
intended as an aid . It is NOT a substitute for
responsible and proper adult supervision
and should not be used as such. Use this
appliance ONLY for its intended use as
described in this manual.
15.15 Power Sources - Operate this
product only from the type of power
source indicated on the type plate of the
adaptor.
If you are unsure of the type of
power supply to your home, consult your
dealer or local power company.
15.16 Overloading - DO NOT overload
wall outlets, extension cords or integral
convenience receptacles as this can result
in a risk of fire or electric shock.
15.17 Object and Liquid Entry - NEVER
push objects of any kind into this product
through casing slots as they may touch
dangerous voltage points or short out
parts that could result in a risk of fire or
electric shock. NEVER spill liquid of any
kind on the product.
15.18 Antenna - The antenna used for this
transmitter must be installed to provide a
separation distance of at least 20 cm from
all persons and must not be collocated or
operating in conjunction with any other
antenna or transmitter.
15.19 Power Lines - An outside antenna
system should NOT be located in the
vicinity of overhead power lines or other
electric light or power circuit, or where it
can fall into such power lines or circuits as
contact with them may be fatal.
15.20 WARNING Strangulation Hazard
Children have STRANGLED in cords. Keep
a d a p t e r c o r d s o u t o f t h e
reach of child ren (more
than 1 m away). NEVER
use Sensor Pad(s)
without the protective
cord covering. Check
protective cord
covering before each use. Immediately
discontinue use of Sensor Pad(s) if
protec tive covering is damaged or broken .
15.21 I n t e r f e r e n c e - T h i s m o n i t o r u s e s p u b l i c
airwaves to transmit signals. The Parent
Unit may pick up signals or interference
from other nursery monitors in your area.
Your monitor may even be picked up by
other households. To protect your privacy,
make sure both units are turned OFF when
not in use. If you experience interference,
change the channel on both units.
15.22 Vibration Source - When th e monitor
is in use, DO NOT use a crib mobile or
other crib accessories that may produce
vibrations. Other sources of vibrations
may include fans, washing machines, loud
music , etc . These sources of vibration may
interfere with the performance of your
Angelcare
®
monitor and the alarm will
not sound if it continues to detect any
movement oth er than your babys . Be sure
all vibration sources are eliminated before
using the monitor.
You may experience false alarms for several
reasons. The most common reason is the
Nurse ry Unit has not bee n turned OFF af ter
you have removed your baby from the crib.
Another reason is the Sensor Pad has not
been placed under the mattress properly.
Be sure the Sensor Pad is on a flat, firm
surface with the printed side facing up.
The sensitivity level may also need to be
adjusted. Refer to step 5.3 . Always be sure
to immediately check on baby whenever
an alarm sounds.
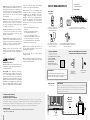
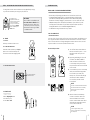
15.23 Sensor Pad - If the crib has a
spring or slat base, place a hard board
between the crib base and the Sensor Pad
measuring at least 33 x 33 cm and 6 mm
thick. Only use your Angelcare
®
monitor in
a stationar y sleeping environment such as
a crib where the Sensor Pad can rest on a
completely flat, firm surface.
16. IMPORTANT SAFETY INSTRUCTIONS
RELATED TO USE OF BATTERIES
16.1 U s e O N LY t h e t y pe a n d s ize of bat te r ie s
specified in the owners manual. There is a
risk of explosion if batteries are replaced
with an incorrect type.
16.2 Use ONLY AAA rechargeable
bat teries and/or the AC Adapters provided
for the Parent Unit. You must use only
rechargeable batteries in the Parent Unit.
DO NOT use alkaline batteries or you will
severely damage the unit.
16.3 Charge the batteries for 15 hours prior
to first use. Be sure to have the monitor in
the OFF position during this period. ONLY
use the AC Adapters included with your
monitor.
16.4 DO NOT use these adapters with any
other equipments.
16.5 When unplugging the AC Adapter
from the Nur ser y Unit , be sure it is switched
to the OFF position. If it isn’t, the unit
will revert to battery mode if batteries
are installed.
16.6 DO NOT use rechargeable batteries
in the Nursery Unit. Use alkaline batteries
ON LY.
16.7 DO NOT dispose batteries in fire. They
may explode. Check with local regulations
for possible special disposal instructions.
16.8 Exercise care in handling batteries
in order not to short out the batteries
with conducting materials such as rings,
bracelets and keys. Overcharging, short
circuiting, reverse charging, mutilation, or
incineration of batteries must be avoided
to prevent one or more of the following
occurrences: release of toxic materials,
release of hydrogen and/or oxygen gas,
rise in surface temperature.
16.9 D O N OT at tem pt to rech ar ge bat te rie s
provided with or identified for use with
this product that are not intended to be
charged. The batteries may leak corrosive
electrolyte or explode.
16.10 DO NOT attempt to rejuvenate the
batteries provided with or identified for
use with this product by heating them.
Sudden release of batter y electroly te may
occur, causing burns or irritation to eyes
or skin.
5
4
Keep
at least
1 m
IMPORTANT
6
5
4
32 1
16.11 If and when necessary, the batteries
must be replaced with identical new ones or
equivalent (volts and size). If a battery to be
replaced is connected with other batteries
in series, replace the other batteries at the
same time as well. DO NOT mix old and
new batteries.
16.12 Reverse polarity installation of the
batteries in the end product must be
avoided. Reverse insertion of batteries
can cause charging, and that may result
in leakage or explosion.
16.13 Remove batteries from this product
if you store the product over 30 days
because the batteries could leak and
damage the product.
16.14 Discard ‘dead batteries as soon as
possible since ‘dead batteries are more
likely to leak in a product. If a battery has
leaked or vented, it should be replaced
immediately using protective gloves.
16.15 DO NOT store this product, or the
batteries provided with or identified for
use with this product, in high-temperature
areas.
WARNING
(North America Only)
17.1 Modifications not authorized by the
manufacturer may void users authority to
operate this device.
17.2 NOTE: This equipment has been
tested and found to comply with the limits
for a Class B digital device, pursuant to
Part 15 of the FCC Rules. These limits are
designed to provide reasonable protection
against harmful interference in a residential
installation. This equipment generates, uses
and can radiate radio frequency energy
and, if not installed and used in accordance
with the instructions, may cause harmful
interference to radio communications.
17.3 However, there is no guarantee that
interference will not occur in a particular
installation. If this equipment does cause
harmful interference to radio or television
reception, which can be determined by
turning the equipment OFF and ON, the
user is encouraged to try to correct the
interference by one or more of the following
measures:
Reorient or relocate the receiving
antenna.
Increase the separation between
the equipment and receiver.
Connect the equipment into an
outlet on a circuit different from that
to which the receiver is connected.
Consult the dealer or an experienced
radio/TV technician for help.
17.4 This device complies with part 15 of
the FCC Rules. Operation is subject to the
following two conditions:
(1) This device may not cause harmful
interference, and
(2) This device must accept any interference
received, including interference that may
cause undesired operation.
YOU MUST PREPARE:
One hardboard (not included)
Thickness: 6 mm
Minimum dimensions:
33 cm x 33 cm
Maximum dimensions:
equal to the mattress size
WHAT YOU WILL NEED (NOT INCLUDED):
1 Parent Unit (AC403) or
2 Parent Units (AC403-2PU
and AC403-2PU-2SP)
2 AC Adapters (AC403) or
3 AC Adapters (AC403-2PU
and AC403-2PU-2SP)
Nursery Unit
1 Sensor Pad (AC403) or 2 Sensor Pads
(AC403-2PU-2SP) with pre-installed cord covers
3 Rechargeable AAA Batteries (AC403) or
6 Rechargeable AAA Batteries (AC403-2PU
and AC403-2PU-2SP)
4 AAA Alkaline
Batteries
for Nursery Unit
MOVEMENT &
SOUND MONITOR
Model AC403
IMPORTANT
The hardboard must be larger than the
Sensor Pad surface area or in the case of the
AC403-2PU-2SP of two Sensor Pads.
Sensor Pad
BABY’S ROOM:
SETUP REQUIREMENTS
4X
3X
INCLUDED:
Miniature Philips
Screwdriver
FCC AND IC REGULATIONS
RF radiation exposure statement
The Nursery Unit complies with FCC RF radiation exposure limits set forth for an uncontrolled
environment. Caution: To maintain the compliance with the FCC’s RF exposure guideline, install
the Nursery Unit at least 20 cm from from ALL persons. The transmitter of this device must
not be co-located or operating in conjunction with any other antenna or transmitter.
Industry Canada
This product meets the applicable Industry Canada technical specifications.
CAN ICES-3 (B)/NMB-3(B)
2X
6
5
4
32 1
Hardboard
IMPORTANT
Place the crib near a supporting wall and far from air currents. Install the Nursery
Unit on a flat, stable surface facing the crib at a distance of at least 1 meter.
Make sure to plug the adapter to the socket outlet nearest to the equipment
and that it is easily accessible.
7
6
STEP 1 - CHARGING THE PARENT UNIT (15 HOURS)
2 3
1) Remove the battery cover and insert
the Rechargeable Batteries (included).
2) Connect the AC Adapter to the Parent
Unit and into an electrical outlet.
3) Charge the unit for 15 continuous hours
(prior to first use).
NOTE:
To optimize your battery performance
please refer to Battery Guidelines in the
Trouble Shooting section.
15
IMPORTANT
Never use regular
alkaline batteries
in the Parent Unit;
they may explode.
1
1.1 - BATTERIES
HOW TO CHECK THE BATTERIES:
Unplug the AC Adapters from both units.
If the Nursery Unit Power Indicator
does not show or if the Low Battery
Indicator does show, replace
the batteries.
If the Parent Unit screen does not
light up or it switches off, recharge
the batteries.
HOW TO CHARGE THE BATTERIES
IN THE PARENT UNIT:
Plug the AC into the Parent Unit and
a working electrical outlet. Your Parent
Unit can function with the batteries
at 1/2 capacity but it is recommended
that they are fully charged before
unplugging from the AC Adaptor
and power outlet for maximum use.
PARENT UNIT BATTERY ALARM
Alarm activates when batteries need to be recharged.
Parent Unit will emit a beep sound every 15 seconds.
Battery Alarm icon will show on screen.
The Power Indicator
on the Nursery Unit
The Low Battery Indicator
on the Nursery Unit
empty 1/2 full full
PARENT UNIT:
Front View Rear View
E
G
H
I
C
D
A) LCD Screen
B) Power ON/OFF
C) MENU Button
D) Channel Button
E) Sound Volume
UP/DOWN and HOLD
F) Speaker
G) Belt Clip
H) Battery Cover
I) AC Adapter Outlet
F
B
A
9
8
WARNING
STRANGULATION HAzARD.
Children have been STRANGLED by cords.
Keep adapter cords out of the reach of children
(more than 1 m away).
Because of the serious strangulation risk to infants
and toddlers, parents and caregivers should never
place the Nursery Unit within 1 m of a crib.
•NEVER use Sensor Pad without the cord covers.
Check cord covers before each use to ensure it is
securely placed under the leg of the crib. Discontinue
use of Sensor Pad if any cord covers are damaged or
broken.
•NEVER use extension cords with AC adapters. ONLY
use the AC adapters provided. This product is not a
toy. Never allow children to play with it.
6
5
4
3
2
1
6
5
4
3
2
1
Fig 1
Fig 2
1) Use the crib leg by the wall closest to
the Nursery Unit (Fig 1). In cases where
the Nursery Unit is across the room, use
the leg closest to the Nursery Unit to
position the covered wire (Fig 2). It is
always preferable that the covered cord
run along a wall.
2.2 SELECT THE CRIB LEG YOU WILL BE USING TO SECURE THE CORD COVERS
RECOMMENDED
1) Remove the mattress from the crib.
2) Place the Sensor Pad - printed side up
- on top of the hardboard at the center
of the crib.
3) Run the connection pin, warning label
and the first 5 cord covers down along
the backside’s of the crib leg, between
the mattress support and the inside
edge of the crib.
4) Bring the first 4 cord covers down
the floor, and keep the 5
th
cord cover
vertically, along the backside of the crib
leg, (between the mattress and the
inside edge of the crib).
5) Remove any cord slack to make sure
no parts of the cord are loose.
3
2.3 - INSTALL THE SENSOR PAD ON THE MATTRESS SUPPORT
6
5
4
3
1
2
OR
4
5
5
STEP 2 - INSTALLING THE SENSOR PAD
6
5
4
32 1
Cord covers 1, 2, 3, 4:
Position on floor
Cord cover 4:
Contains double sided
tape to securely install
beneath crib leg
Cord cover 5:
Position vertically
between mattress
support and floor
Cord cover 6:
Place under
the mattress
Sensor Pad with pre-installed cord covers
2.1 - SELECT A LOCATION FOR THE NURSERY UNIT
Select a location for the Nursery Unit that
is at least 1 m away from the crib.
Keep
at least
1 m
IMPORTANT
6
5
4
32 1
Sensor Pad(s)
11
10
6
8cm
6
7
4132
CLIC!
4
3
2
1
8
The Sensor Pad functions with any size
and type of mattress except memory-foam
mattresses and hollow frame mattresses.
The hardboard maintains a constant
pressure on the Sensor Pad, enabling it to
detect the baby’s movements even when
the baby is at the edges of the crib.
10
9
WARNING
STRANGULATION HAzARD
Remove all slack from Sensor Pad Cord.
When lowering the mattress support
as your child grows, slide the vertical
Cord Cover (5) upward so it remains
approximately in the center between
the mattress support and the floor. Slide
the Sensor Pad Cord through the Floor
Cover to eliminate any additional slack.
The Sensor Pad is not designed for use
with adults, children or infants older
than 24 months.
Discontinue used of the Sensor Pad
when child is older than 24 months.
Remove sensor pad from crib and store
for future use.
BEFORE FIRST TIME USE: To test
that the unit is ready for use, refer to
instruction manual on how to test that
the installation has been done
6) Place the 6
th
cord cover approximately
8 cm from the edge of the mattress
support.
7) Snap together the remaining cord
covers that will run along the floor.
8) Remove any cord slack to make sure
no parts of the cord are loose.
9) Peel off the double-sided tape on the
4
th
cord cover and place it securely
under the crib leg.
10) Install the Nursery Unit on a flat, stable
surface facing the crib at a distance of
at least 1 m and plug the Sensor Pad
cord into the Nursery Unit.
11) Check to make sure the Sensor Pad has
not moved from position.
12) Place the mattress back inside the crib.
STEP 3 - SETTING UP THE NURSERY UNIT
1) Remove the battery cover and insert
4 AAA Alkaline Batteries (not included).
2) Place the Nursery Unit at a minimum
of 1 m away from the crib.
3) Connect the AC Adapter to the Nursery
Unit and plug into an electrical outlet.
NOTE:
The batteries maintain power
supply in case of power outage.
NURSERY UNIT:
Front View Rear View
A
K
I
M
A) Microphone
B) Movement ‘TIC’
Indicator (flashing)
C) Power ON Indicator
D) Low Battery Indicator
E) Speaker
F) Night Light Switch ON/OFF
G) Power ON/OFF
H) Pager Button
I) Sensor Pad Outlet
J) Slots for ventilation
K) AC Adapter Outlet
L) Sensor Pad Sensitivity Dial
M) Battery Cover
B
C
E
L
D
J
F G
H
1
32
6
5
4
32 1
1 m
13
12
STEP 4 - TURNING ON YOUR MONITOR
1) Press the Parent Unit ON/OFF button
for 2 seconds.
2) Slide ON the Nursery Unit Power
ON/OFF button.
NOTE:
The screen of the Parent Unit will show
the channel of transmission (C1 to C8) and
after 5 seconds the room temperature and
function icons.
The connecting process should be done
within 30 seconds. If this sequence is not
completed within 30 seconds you will need
to switch the units off and start again.
CHANNEL SELECTION
1 2
When the Parent Unit is turned
ON and the Nursery Unit is OFF:
No channel icon will appear
on the screen but the Nursery
Unit icon will blink.
After 1 minute the Parent Unit
will start to beep. The Parent
Unit will continue to beep
for 5 seconds and then shut
itself off.
1) Press and hold the select button
to enter the channel mode.
2) Pressing either the UP or DOWN arrow
will change the channel your monitor
transmits on. (C1 to C8)
3) Press the select button again
to confirm your channel selection.
NOTE :
If the transmission is not clear, or if you hear
interference sounds, you should change
the channel.
1
2
3
TO SELECT THE CHANNEL:
If there is a lost connection
between the 2 units
(refer to troubleshooting):
The Out-of-range icon
(if activated) will blink
on the screen and the
Parent Unit will beep.
SOUND TRANSMISSION (VOX)
Nursery Unit:
Appears when options are being
set for the Nusery Unit
Out-of-Range:
Indicates the loss of connection
between the Parent Unit and
Nursery Unit.
Parent Unit:
Appears when options are being
set for the Parent Unit
Temperature Display:
Indicates room temperature
Low Temperature:
Appears when low temperature
alert is ON
High Temperature:
Appears when high temperature
alert is ON
Channel Display:
Indicates selected channel
Alarm mode icons:
Indicates selected alarm mode
Sound alarm
Sound alarm
and vibration
Vibration only
Volume/VOX sensitivity Level:
Indicates the volume and
VOX sensitivity level.
IMPORTANT ICONS
Detection Mode Icons:
Indicates selected dectection mode:
Movement Only
Sound only
‘TIC’, Sound & Movement
Sound & Movement
‘TIC’ & Movement
Battery Level icon:
Indicates battery level
Empty
1/2 Full
Full
Charging
15
14
5.1 - MENU ACCESS AND CHANGING THE SETTINGS
STEP 5 - TESTING AND GETTING TO KNOW YOUR MONITOR
The Angelcare
®
monitor can be used with the pre-program factory settings
or you can also customize your settings to your preference.
The MENU settings are accessed by using the MENU button on the Parent Unit.
The MENU functions are in a loop. Each time you press the menu button briefly you
move on to the next MENU function. The MENU functions are in the following order:
PRESS 1 TIME: ‘TIC’, Movement & Sound .….….….….….….….….….….….…. STEP 5.2 & STEP 5.3
PRESS 2 TIMES: Out of Range.….….….….….….….….….….….….….….….….….….….….….….….…. STEP 5.4
PRESS 3 TIMES: Sound Transmission ….….….….….….….….….….….….….….….….….….….….…. STEP 5.5
PRESS 4 TIMES: Alarm ….….….….….….….….….….….….….….….….….….….….….….….….….….….…. STEP 5.7
PRESS 5 TIMES: Temperature .….….….….….….….….….….….….….….….….….….….….….….….…. STEP 5.9
All changes and adjustments
made in the main menu
and sub-menu will not be
activated unless you confirm
them by pressing the
SELECT button followed by
the EXIT button.
NOTE:
By continuing to press the MENU button you will
be continuously moving through the loop. Once
you have selected your preferred settings you
must press SELECT and then EXIT or your changes
will not be saved.
5.2 - SENSOR PAD
SENSOR PAD FUNCTIONS:
TIC’: Allows you to detect baby’s
movements as well as hear a TIC sound
at each movement. (This function can
ONLY be activated in conjunction with
the Movement Function).
Sound Only: Allows you to detect
the baby’s sounds ONLY. Movement
detection will be deactivated.
Movement Only: Allows you to detect the
baby’s movements with the TIC sound.
IMPORTANT
When in MENU or SUB-MENU mode
NO sound, alarm or vibration will be
emitted from either the Parent Unit
or the Nursery Unit even if they were
activated before pressing the MENU
or SUB-MENU mode.
IF THE ALARM DOES NOT SOUND
Avoid contact with crib while Sensor Pad is in operation.
Place crib near a supporting wall.
Adjust Sensor Pad sensitivity level.
5.3 - CHANGING THE MOVEMENT AND SOUND MONITORING FUNCTIONS
1) Press the MENU button once and
the flashing icons will appear.
2) Use the UP and DOWN Arrows to select
your preferred detection mode.
3) Press the SELECT button to confirm
your choice.
4) Press the MENU to view the next option,
or EXIT if you wish to stop programming.
1) Move your hand lightly on the mattress.
Pendulum icon will appear
on Parent Unit indicator bar.
It will move as you move your
hand and trigger a ‘TIC’ sound.
2) Remove your hand from the mattress.
After 15 seconds you will hear a
‘TIC’ pre-alarm sound, and 5 seconds
later the Movement Alarm will trigger.
3) Repeat by moving your hand lightly
in all four corners of the mattress.
Ensure the Nursery Unit Movement
Indicator is still flashing.
1 2
TO SET DETECTION MODE:
TO TEST THE SENSOR PAD:
movement or “tic” mode need to be activated:
MOVEMENT ALARM
If NO movement is detected after 15 seconds you will hear a single ‘TIC’ pre-alarm sound from
the Nursery Unit.
If after a further 5 seconds there is still NO movement detected both the Parent Unit and Nursery
Unit speakers will emit loud warning sound.
Nursery Unit icon flashes on the Parent Unit
Green light on the Nursery Unit will turn off to indicate NO movement is being detected.
3
2
1
If you press the MENU button for too long
the unit will go in to connection mode and the
Out-of-Range indicator will start flashing. If this
happens, wait 20 seconds and then press
the MENU to start again.
Movement Only
Sound Only
‘TIC’, Sound & Movement
Sound & Movement
‘TIC’ & Movement
IMPORTANT
When in MENU or SUB-MENU modes,
sound transmission between Parent
and Nursery Units will be temporarily
deactivated.
17
16
TO STOP THE ALARM
Place your hand
back on the
mattress.
Press
any key
to put on
Hold (see
section 5.8)
Shut the Nursery
Unit OFF
OR OR
You can adjust the Nursery Unit
sensitivity dial to change your Sensor Pad
from less sensitive to very sensitive.
This sensitivity dial is located on the back
of the Nursery Unit.
NOTE:
If you are experiencing false alarms,
adjust the sensitivity level.
TO ADJUST THE SENSOR PAD SENSITIVITY LEVEL:
5.4 - OUT OF RANGE SETTINGS
IMPORTANT
The Sensor Pad is not designed for use with adults, children or infants older
than 24 months.
Once you are finished using the Sensor Pad, please remove it from the baby’s
crib and store it away.
For optimal results begin with the sensitivity
level dial on the 3
rd
bar, adjusting the sensitivity
by half a bar increases or decreases as required.
Your monitor has an Out-of-Range function that advises you when your two units
are not communicating. Out-of-Range situations can be caused by distance or
by physical interferences.
RANGE:
Approx up to 250 meters (open field)
TO ACTIVATE THIS FUNCTION:
IMPORTANT
If the Out-of-Range function is activated and you turn the Nursery Unit OFF
the Out-of-Range Alarm will sound and/or vibrate (depending on the alarm mode
chosen). Turn the Nursery Unit ON again to reactivate the link.
1
2
ON
OFF
1) Press MENU button 2 times.
The Out-of-Range Indicator
will blinks.
2) Using the UP and DOWN Arrows,
turn the function ON or OFF.
3) Press the SELECT button and then
EXIT to confirm your choice.
OUT-OF-RANGE ALARM
Alarm activates when your two units are not communicating.
The Parent Unit will emit a double beep every 8 seconds.
Out of Range Icon will flash on the screen.
The Out-of range Icon will also flash
when channel is being changed or
the unit is reconnecting
TO STOP THE OUT-OF-RANGE ALARM:
Press 2 seconds
to turn the Parent
Unit OFF
OR
Turn the Nursery
Unit ON
3
5.5 - SOUND TRANSMISSION (VOX)
Your monitor is ‘Sound Activated’. This means that it will transmit sounds only when it
detects them. It will detect even the softest levels of crying.
To save power, after 10 seconds, the sound transmission will stop if no sound is detected.
Once sound is detected transmission will automatically activate.
TO TEST SOUND:
Ask someone to speak into the Nursery
Unit or place the unit near a radio to ensure
that sound is being picked up.
IF YOU HEAR NO SOUND:
Check that both units are switched ON.
Check that both units are plugged into
functioning electrical outlets.
Check the batteries in both units
(replace or recharge them as necessary
per unit).
Bring the Parent Unit closer
to the Nursery Unit.
IMPORTANT
To avoid feedback (whistling), keep both
units at least 3 meters apart.
19
18
1
2
3
ADJUST THE SOUND LEVEL
PUT IN TEMPORARY MUTE MODE
Raise volume
Lower volume
Press the SOUND/OFF
button once to mute
the sound
(see section 5.6).
TO ADJUST SOUND SENSITIVITY (VOX):
The sensitivity of the microphone is adjustable and has 4 levels (the most sensitive is
level 4). This means that sound will only transmit based on the level that you set.
5.6 - TEMPORARY MUTE
Allows you to put your monitor
in temporary MUTE mode.
TO ACTIVATE MUTE:
Press the SOUND/OFF button.
TO DEACTIVATE MUTE:
Press the SOUND/OFF button again
to hear sounds.
NOTE:
The Sound Icon will blink
on the Parent Unit whilst
the Temporary MUTE
is activated.
After 2 minutes the sound function
will be automatically reactivated.
If you press too long on the
SOUND/OFF button it will shut
down the Parent Unit.
1) Press MENU button 3 times.
Sensitivity Level icon will appear.
2) With the arrow keys select desired
microphone sensitivity level.
3) Press SELECT button to confirm
your choice.
VOX
Sensitivity
Level
(4 levels)
1) Press and hold the Down Volume
arrow for 2 seconds.
The Hold Icon will appear on the screen.
The Parent Unit will emit a double beep
every minute to remind you that your
monitor is on HOLD.
2) To deactivate this function, press
and hold the Down Volume arrow
for 2 seconds.
5.7 - ALARM SETTINGS
Allows you to select your preferred
alarm mode.
IMPORTANT
Vibration option will work when the
following alarm functions are activated:
Out-of-range
Temperature alert
No movement detection
for 20 seconds.
Sound alarm will replace vibration
mode when the Parent Unit
is charging.
Sound alarm
Sound alarm
and vibration
Vibration only (the alarm will
not sound on Parent Unit but
it will on Nursery Unit).
1
2
1) Press MENU button 4 times.
The Nursery Unit
Indicator blinks.
2) Using the arrows, select
the desired alarm mode.
NOTE:
Vibration mode not available in some countries.
5.8 - HOLD
Allows you to put your Angelcare monitor on HOLD.
1
2
IMPORTANT
When your monitor is in HOLD mode, the movement alarm will not go off and the sound
will not be transmitted. When your monitor is in Sound only mode, the HOLD function
cannot be activated.
IMPORTANT
When your monitor is on HOLD, the movement-detection feature and movement alarm
are disabled.
IMPORTANT
When in MENU or SUB-MENU mode NO sound, alarm or vibration will be emitted
from either the Parent Unit or the Nursery Unit even if they were activated before
pressing the MENU or SUB-MENU mode.
21
20
5.9 - TEMPERATURE
TO ACTIVATE THE TEMPERATURE ALARM:
TO SET TEMPERATURE RANGE:
1) Press the MENU button 5 times.
The Temperature Indicator
(Low and High) will appear.
2) Using the arrows, turn the function ON.
3) Press the SELECT button to confirm
your choice.
4) Press the MENU button and the
Snow Flake (Low Temperature icon)
will appear.
5) Press the arrows to set the LOW
temperature alarm (5 to 19˚Celsius)
6) Press the SELECT button to confirm
your choice.
7) Press the MENU button and the Sun
(High Temperature icon) will appear.
8) Use the arrows to set HIGH temperature
alarm (22 to 40˚Celsius).
9) Press the SELECT button and then
the EXIT button to confirm your choice.
TEMPERATURE ALARM
Alarm activates when the temperature reaches the maximum or minimum set temperature.
Parent Unit will emit 3 consecutive beeps, every 5 seconds if the temperature reaches levels out
of your chosen range. The relevant icon will flash on the Parent Unit screen to alert you.
1) Press the MENU button 5 times.
The Temperature Indicator
(Low and High) will appear.
2) Using the arrows, to turn the function
ON or OFF.
3) Press SELECT button to confirm
your choice.
1
2
1
3
6 9
4 7
2
5
8
Detection Mode:
Sound & Movement
Temperature Unit: Celsius
Temperature Alarm: OFF
Temperature Alarm Setting:
High 30
o
C
Low: 19
o
C
Alarm Mode: Sound Only
Out of Range: OFF
Sound transmission (VOX): ON
DEFAULT SETTINGS
YOU ARE NOW READY
TO USE YOUR MONITOR
The Angelcare
®
monitor can be used with the pre-program factory settings
or you can also customize your settings to your preference.
IMPORTANT
Test your monitor before first use.
Test your monitor regularly to ensure it is functioning correctly.
Test your monitor every time you move the Sensor Pad to a different place.
23
22
STEP 6 - ACTIVATING AND DEACTIVATING ADDITIONAL FUNCTIONS
The Angelcare
®
monitor can be used with the pre-program factory settings
or you can also customize your settings to your preference.
All changes and
adjustments made in the
main menu and sub-menu
will not be activated
unless you confirm them
by pressing the SELECT
button followed by the
EXIT button.
IMPORTANT
When in MENU or SUB-MENU mode
NO sound, alarm or vibration will be
emitted from either the Parent Unit
or the Nursery Unit even if they were
activated before pressing the MENU
or SUB-MENU mode.
6.1 - PAGER
Allows you to locate the Parent Unit.
TO LOCATE THE PARENT UNIT:
Press and release the Nursery Unit Pager
button on the rear of the Nursery Unit.
The Parent Unit will emit a paging sound.
TO STOP THE PAGING SOUND:
Press the Power button
on the Parent Unit
Slide the Night Light button
on the Nursery Unit
to turn it ON or OFF.
6.2 - NIGHT LIGHT
3
4
1) Turn OFF the Parent Unit and switch it
back ON. LCD will only show ‘——‘ with
back light on and nursery unit icon
will flash.
2) By pressing and holding for 3 seconds
the Parent Unit “MENU/CONNECT”
button, the Parent Unit will be set in
to connectivity mode (you will hear a
beep tone and the antenna icon will flash
for 15 seconds).
3) To set the Nursery Unit in to connectivity
mode, press and hold the Page button
for 4 seconds (on the back of the
Nursery Unit). The Power LED will light
and a beep tone will be emitted as
the connection procedure should
be completed.
NOTE:
If step 3 is not followed within the duration,
the Parent Unit will exit the connectivity
mode and you will need to start this
process again.
4) When the Parent Unit and Nursery
Unit are connected, the parent unit
emits a confirmation tone and will
show the channel number which will be
replaced by the temperature (normal
screen) a few seconds later.
1
2
NOTE:
If the TIC light is flashing, do not
press the “Page” button or the link may
be interrupted.
LOSS OF CONNECTIVITY
In the case of loss of connectivity, the first step is to bring the Parent Unit and Nursery Unit
closer together and make sure that both units are ON to restore the connection. If there is
still no connection and no out of range warning after the above has been done, then and
only then should the re-connection procedure below be done.
TROUBLESHOOTING
TAKING CARE OF YOUR RECHARGEABLE BATTERIES
Ensure that you fully charge your batteries for 15 hours before their first use.
To maintain maximum battery life it is recommended that you fully discharge
your batteries periodically. Battery performance can be diminished by leaving
the batteries constantly charging. If your parent unit is not in use, please turn it off.
Inadequate battery power can impair the performance of your monitor. If you are
not happy with the performance of your Parent Unit/Monitor please replace the
rechargeable batteries (3 or 6 x NiMH Rechargeable Batteries).
It is advisable to change the batteries every 6 months.
Re-connection procedure:
25
24
FALSE ALARMS
Verify the connection between Sensor Pad and Nursery Unit. Unplug and reconnect
the cord.
Make sure there is no bedding between the mattress and the Sensor Pad.
If the crib has a spring or slat base, place a hardboard between the crib base and
the Sensor Pad measuring at least 33 cm x 33 cm and 6 mm thick.
Make sure the Sensor Pad is positioned as described under the setup requirements.
Sensitivity may need to be adjusted, refer to step 5.3.
ALARM WILL NOT SOUND
Avoid contact with the crib when the monitor is ON.
Place the crib near a solid supporting wall to avoid Sensor Pad from detecting
movement from outside the crib.
You may need to increase the sensitivity, refer to step 5.3.
NO SOUND IS BEING TRANSMITTED
Ensure that both units are switched ON.
Check that the sound has not been turned down on the Parent Unit. Increase
the volume level on the Parent Unit, refer to step 5.5.
Check on the Parent Unit screen to see if the monitor is in temporary MUTE mode
instead of ON mode. Deactivate the temporary MUTE function, refer to step 5.6.
If there is no power to any unit check/replace the batteries, recharge the Parent Unit
& check the AC Adaptors are working. Change electrical outlets if required.
Bring the Parent Unit and Nursery Unit closer together.
NURSERY UNIT POWER ON INDICATOR (GREEN LIGHT) DOES NOT LIGHT UP
Turn the switch behind the left wing ON.
Check connections or change to another electrical outlet.
WEAK RECEPTION
Bring units closer together.
Change the position of one or both units.
Place units on a flat surface away from baby’s reach.
Replace the batteries or recharge Parent Unit.
STATIC, DISTORTION, INTERFERENCES
(FROM OTHER MONITORS, WIRELESS PHONES, WALKIE-TALKIES, ETC...)
Rotate the Parent Unit or move it away from source of interference.
Try a different channel, refer to Step 4.
FEEDBACK (LOUD NOISES EMITTED FROM THE PARENT UNIT)
Move the units farther apart (at least 3 meters apart).
Decrease the volume on the Parent Unit.
THE PARENT UNIT SCREEN IS BLACK (PARENT UNIT IS OFF)
Turn the Parent Unit back ON by pushing and holding the power button.
Replace the batteries or recharge the Parent Unit.
If you experience a problem that is not noted in this manual,
please do not return the product to the store. If you are not completely
satisfied or have any questions:
United States and Canada: please contact us at: angelcare@cdecinc.ca
Other countries: please contact your local Distributor.
We may have a simple solution to your problem.
LIMITED WARRANTY
Angelcare
®
warrants to the original owner of this product that Angelcare
®
rechargeable,
movement and sound monitor (model AC403) is free from any material and workmanship
defects, for a period of one (1) year (rechargeable batteries not included) from the date
of the original purchase. If this monitoring system fails to function properly when used as
directed under normal conditions within the one year period, Angelcare
®
will either repair
or replace the product, at our discretion, free of charge. Please contact your distributor.
The product must be accompanied by a proof of purchase, either a bill of sale or other
proof that the monitoring system is within the warranty period. Angelcare
®
will bear the
cost of repairing or replacing the product and shipping it back to you.
This warranty does not apply to a product which has been damaged as a result of
improper maintenance, an accident, improper voltage supply or any other form of
misuse. The warranty is also void if the owner repairs or modifies the product in any
way. Angelcare
®
is not liable for any incidental or consequential damages with regard
to this product. The warranty also excludes any liability other than what is stated above.
No other warranty is given.
LEGAL RIGHTS VARY FROM COUNTRY TO COUNTRY. SOME COUNTRIES DO NOT ALLOW
THE EXCLUSION OR LIMITATION OF INCIDENTAL OR CONSEQUENTIAL DAMAGES, SO
THE ABOVE LIMITATIONS MAY NOT APPLY TO YOU.
WE ARE NOT IN ANY WAY RESPONSIBLE FOR ANY OUTCOME RESULTING FROM
THE USE OF THIS PRODUCT.
IMPORTANT!
This Angelcare
®
monitor is a personal care product. Please do not return this product
to the store. If you have questions or need help, please call your distributor before
returning this product.
27
26
TECHNICAL SPECIFICATIONS
Range:
Open field : up to 250 m
Number of Channels:
USA/Canada: 8 channels.
Europe: 8 channels.
Power Supply:
4 AAA alkaline batteries (not included)
or 100-240V AC/7.5V DC adapter
for Nursery Unit.
3 AAA rechargeable batteries and
100-240V AC/7.5V DC adapter
for the Parent Unit.
Caution: To reduce the risk of electric
shock, do not expose this product to rain
or moisture.
Danger of explosion if batteries are
incorrectly replaced. The included Batteries
are 3 AAA NIMH rechargeable batteries,
manufactured by GPI INTERNATIONAL
LIMITED (GN60AAAHC, 1.2V 600mAh) or
by HIGHPOWER TECHNOLOGY CO., LTD
(HFR-44AAAJ600, 1.2V 600mAh).
ErP COMPLIANCE
SOUTH AFRICA-BRAZIL-ECUADOR-EUROPEAN UNION
Use only Angelcare
®
Brand power supply-model number T07505V001
GERMANY
Use only Angelcare
®
Brand power supply-model number T07505F002
AUSTRALIA
Use only Angelcare
®
brand power supply-model number T07505S002
NORTH AMERICA
Use only Angelcare
®
brand power supply-model number T07505U002
UK-MALTA-ASIA-CYPRUS
Use only Angelcare
®
brand power supply-model number T07505B001
PROTECT THE ENVIRONMENT
This electronic equipment contains reusable material and must not be disposed
with domestic waste. Please take it to a collecting point for electric and electronic
equipment (ask your local authorities for details).
They may only be replaced by 3 AAA
NIMH rechargeable batteries.
Batteries:
DO NOT mix old and new batteries.
DO NOT mix alkaline standard
(carbon-zinc), or rechargable
(NI-CD, NIMH, etc) batteries.
Transmission:
Settings transmission from the Parent Unit
to the Nursery Unit is made on the 2.4 GHZ
frequency. Transmission from the Nursery
Unit to the Parent Unit is made on the
864 MHz frequency in Europe/Asia/Africa
and on the 927 MHz frequency for North
America/Ecuador/Oceania.
Hereby, Angelcare Monitors Inc, declares
this baby monitor is in compliance with the
essential requirements and other relevant
provisions of Directive 1999/5/EC.
The EU declaration of conformity can be
obtained through your local distributor.
Please refer to address in the manual.
29
28
31
30
This Angelcare Baby Monitor is a Personal Care Product. Please DO NOT return
this to the store, but contact us initially for advice and assistance:
Angelcare Helpline on 0345 009 1789
Website: www.angelcare.co.uk
Email: helpline@babyhelpline.co.uk
NOTE: Helpline is open Monday to Friday, 10am to 4pm, excluding bank holidays.
IM403-INT-061114
  • Page 1 1
  • Page 2 2
  • Page 3 3
  • Page 4 4
  • Page 5 5
  • Page 6 6
  • Page 7 7
  • Page 8 8
  • Page 9 9
  • Page 10 10
  • Page 11 11
  • Page 12 12
  • Page 13 13
  • Page 14 14
  • Page 15 15
  • Page 16 16
  • Page 17 17

Angelcare AC403 Owner's manual

Category
Babyphones
Type
Owner's manual

Angelcare AC403 is a movement and sound baby monitor that aids in monitoring your child while they sleep. With the movement alarm activated, it will alert you if no movement is detected, even without the sensor pad plugged in. You can adjust the microphone sensitivity to suit your needs and the monitor will transmit when it detects sound from your baby or in their room. The cord safety feature ensures that the sensor pad cord is kept out of reach of your baby.

Ask a question and I''ll find the answer in the document

Finding information in a document is now easier with AI