Page is loading ...

OWNER’S MANUAL
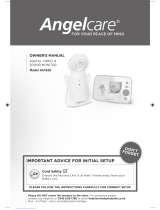
Model AC115
Baby Sound and Movement Monitor
Cord Safety
Ensure the Nursery Unit is at least 1 metre away from your baby’s cot.
The Sensor Pad cord must always be kept out of reach of baby and
secured using the cord cover kit provided.
For assistance, FAQs or guidance with your monitor
please visit our Customer Support page at angelcare.co.uk
TABLE OF CONTENTS
WARNINGS...............................................................................................................................................................................2
SETUP REQUIREMENTS ................................................................................................................................................................. 3
Charging the Parent Unit (10 hours) ..........................................................................................................................................4
Positioning the movement Sensor Pad ..................................................................................................................................... 5
Setting up the Nursery Unit ..........................................................................................................................................................8
Turning on your monitor ................................................................................................................................................................9
Testing and getting to know your monitor ............................................................................................................................. 11
Activating and deactivating additional functions ................................................................................................................17
Troubleshooting .............................................................................................................................................................................. 18
Limited warranty ..............................................................................................................................................................................21
Technical specifications .................................................................................................................................................................21
02mf6A_Manuel_AC115_UK_12657.indd 1 18-01-08 10:22

1. THIS PRODUCT CANNOT REPLACE RESPONSIBLE ADULT SUPERVISION.
This product is designed to aid in the monitoring of your baby. When
using the monitor, you must still provide the supervision necessary for the
continued safety of your baby. Monitoring of premature babies, or those
considered to be at risk, should always be carried out under the supervision
of a health professional. This monitor SHOULD NOT be used as a medical
device, nor as a device to prevent Sudden Infant Death Syndrome (SIDS).
2. WARNING Strangulation Hazard — Children have STRANGLED in cords.
Keep adapter cords out of the reach
of children (more than 1 meter away).
NEVER use Wired Sensor Pad(s)
without the protective cord covering.
Check protective cord covering before
each use. Immediately discontinue use
of Wired Sensor Pad(s) if protective
covering is damaged or broken.
3. Never use extension cords with AC
adapters. ONLY use the AC adapters
provided.
4. When an AC Adapter is plugged into
an electrical outlet, DO NOT touch the exposed end.
5. ALWAYS be sure that both the transmitter and receiver are working
properly and are within range of each other. Test monitor before first use,
periodically and when changing location of the Nursery Unit.
6. ALWAYS be sure to immediately check on baby whenever an alarm
sounds.
7. DO NOT use monitor near water (such as bath tub, sink, etc.).
CAUTION
RISK OF ELECTRIC SHOCK
DO NOT OPEN
DO NOT EXPOSE TO RAIN OR MOISTURE
8. Keep monitor AWAY from heat sources (such as stoves, radiators, etc.).
9. ALWAYS place both the Nursery Unit and Parent Unit on a flat surface
in an upright position and allow for proper ventilation. DO NOT place on
sofas, cushions, beds, etc. which may block ventilation.
10. This monitor uses public airwaves to transmit signals. The Parent Unit
may pick up signals or interference from other nursery monitors in your
area. Your monitor may even be picked up by other households. To protect
your privacy, make sure both units are turned OFF when not in use. If you
experience interference, change the channel on both units.
11. This product is NOT a toy. DO NOT allow children to play with it.
12. This product contains small parts. Adult assembly required. Exercise
care when unpacking and assembling the product and keep small parts
away from children.
13. Use and store the monitor at a temperature between 10 °C and 40 °C.
BATTERY WARNING
14. Use ONLY AAA RECHARGEABLE batteries for the Parent Unit. DO NOT
mix old and new batteries. DO NOT mix alkaline, standard or rechargeable
batteries. Insert batteries with correct polarity. DO NOT short-circuit
supply terminals. ONLY use the recommended batteries or equivalent
(volts and size) and the correct adapter. Remove batteries when product
is stored for long periods of time or when batteries are exhausted. Dispose
exhausted batteries properly. DO NOT recharge non-rechargeable batteries.
Rechargeable batteries are ONLY to be charged under adult supervision.
Keep all batteries away from children.
15. IMPORTANT SAFETY INSTRUCTIONS
15.1 Read these instructions - All the safety instructions should be read
before the product is operated.
15.2 Keep these instructions. The safety and operating instructions should
be retained for future reference.
15.3 Heed all warnings – All warnings on the product and in the operating
instructions should be adhered to.
15.4 Follow all instructions – All operating and use instructions should
be followed.
15.5 Water and moisture - DO NOT use this apparatus near water. For
example, near a bath tub, wash bowl, kitchen sink, laundry tub, in a wet
environment or near a swimming pool and the like. Care should be taken
so that objects DO NOT fall onto units and that liquids are not spilled into
either unit or Sensor Pad through its openings.
15.6 Cleaning - Disconnect all units before cleaning. DO NOT immerse in
water any part of the Nursery Unit, Parent Unit. Clean only with dry cloth.
15.7 Ventilation - DO NOT block any ventilation openings. Allow for proper
ventilation when units are in use. DO NOT cover the Nursery Unit or Parent
Unit with any object such as a blanket. DO NOT place it in a drawer or in any
location which would muffle the sound or interfere with the normal flow of air.
15.8 Heat sources - DO NOT install near any heat sources such as radiators,
heat registers, stoves, TVs or other apparatus (including amplifiers) that
produce heat. Heat can damage the case or electrical parts.
15.9 Power cord protection - Protect the Sensor Pad cord and Adapter’s
power cord from being walked on or pinched by furniture or other items
– Power supply cords should be routed so that they are not likely to be
walked on or pinched by items upon or against them, paying particular
attention to cords and plugs, convenience receptacle, and the point where
they exit from the product.
15.10 Accessories - Only use attachments/accessories specified by the
manufacturer. DO NOT place this product on an unstable cart, stand,
tripod, bracket or table. The product may fall, causing serious injury to
a child or adult and serious damage to the product. Use ONLY with a
cart, stand, tripod, bracket or table recommended by the manufacturer
or sold with the product. Any mounting of the product should follow the
manufacturer’s instructions.
15.11 Unplug this appliance during lightning storms or when not used for
long periods of time.
15.12 Servicing - DO NOT attempt to service this product yourself as opening
or removing covers (except battery doors) may expose you to dangerous
voltage or other hazards.
15.13 Replacement parts - When replacement parts are required, be sure
the replacement parts specified by the manufacturer have the same
characteristic as the original part. Unauthorized substitution may result
in fire, electric shock or other hazards.
15.14 Usage - This baby monitor is intended as an aid. It is NOT a substitute
for responsible and proper adult supervision and should not be used as such.
Use this appliance ONLY for its intended use as described in this manual.
15.15 Power Sources - Operate this product only from the type of power
source indicated on the type plate of the adaptor.
If you are unsure of the type
of power supply to your home, consult your dealer or local power company.
15.16 Overloading - DO NOT overload wall outlets, extension cords or
integral convenience receptacles as this can result in a risk of fire or
electric shock.
15.17 Object and Liquid Entry - NEVER push objects of any kind into this
product through casing slots as they may touch dangerous voltage points
or short out parts that could result in a risk of fire or electric shock. NEVER
spill liquid of any kind on the product.
15.18 Antenna - The antenna used for this transmitter must be installed
to provide a separation distance of at least 20 cm from all persons and
must not be collocated or operating in conjunction with any other antenna
or transmitter.
OWNER’S MANUAL
KEEP YOUR OWNER’S MANUAL FOR FUTURE REFERENCE.
PLEASE READ THE WARNINGS AND INSTRUCTIONS CAREFULLY BEFORE ASSEMBLING & USING THE PRODUCT.
FAILURE TO FOLLOW THE WARNINGS AND THE INSTRUCTIONS COULD RESULT IN SERIOUS INJURY OR DEATH OR DAMAGES
TO THE PRODUCT.
THE SENSOR PAD FEATURE IS NOT FOR USE WITH ADULTS, CHILDREN OR INFANTS OLDER THAN 24 MONTHS.
THE SENSOR PAD IS NOT INTENDED TO BE USED TO DETERMINE IF A CHILD IS OUT OF THE COT.
WARNING
Adult assembly required.
Keep small parts away from children when assembling.
We, at Angelcare
®
, stand behind all of our products.
If you are not completely satisfied or have any questions,
United States and Canada: Please contact us at: [email protected]
Other countries: Please contact your local distributor.
WARNINGS
2
02mf6A_Manuel_AC115_UK_12657.indd 2 18-01-08 10:22

15.19 Power Lines - An outside antenna system should NOT be located
in the vicinity of overhead power lines or other electric light or power
circuit, or where it can fall into such power lines or circuits as contact
with them may be fatal.
15.20 WARNING Strangulation Hazard — Children have STRANGLED in
cords. Keep adapter cords out of the reach of children (more than 1 meter
away). NEVER use Sensor Pad(s) without the protective cord covering.
Check protective cord covering before each use. Immediately discontinue
use of Sensor Pad(s) if protective covering is damaged or broken.
15.21 Interference - This monitor uses public airwaves to transmit signals.
The Parent Unit may pick up signals or interference from other nursery
monitors in your area. Your monitor may even be picked up by other
households. To protect your privacy, make sure both units are turned
OFF when not in use. If you experience interference, change the channel
on both units.
15.22 Vibration Source - When the monitor is in use, DO NOT use
a bedside crib, cot mobile or other cot accessories that may produce
vibrations. Other sources of vibrations may include fans, washing
machines, loud music, etc. These sources of vibration may interfere
with the performance of your Angelcare
®
monitor and the alarm will not
sound if it continues to detect any movement other than your baby’s.
Be sure all vibration sources are eliminated before using the monitor.
15.23 You may experience false alarms for several reasons. The
most common reason is the Nursery Unit has not been turned OFF
after you have removed your baby from the cot. Another reason is
the Sensor Pad has not been placed under the mattress properly.
Be sure the Sensor Pad is on a flat, firm surface with the printed side facing
up. The sensitivity level may also need to be adjusted. Refer to Step 5.4.
Always be sure to immediately check on baby whenever an alarm sounds.
15.24 Sensor Pad - If the cot has a spring or slat base, place a hard board
between the cot base and the Sensor Pad measuring at least 33 x 33 cm
and 6 mm thick. Only use your Angelcare
®
monitor in a stationary sleeping
environment such as a cot where the Sensor Pad can rest on a completely
flat, firm surface. The Sensor Pad is made of plastic and does not permit
the air to circulate. Therefore, mildew build up could develop underneath
the mattress in the Sensor Pad area. We suggest rotating the mattress
regularly to prevent any mildew.
16. IMPORTANT SAFETY INSTRUCTIONS RELATED TO USE OF BATTERIES
16.1 Use ONLY the type and size of batteries specified in the owner’s manual.
There is a risk of explosion if batteries are replaced with an incorrect type.
16.2 Use ONLY AAA rechargeable batteries and/or the AC Adapters
provided for the Parent Unit. You must use only rechargeable batteries
in the Parent Unit. DO NOT use alkaline batteries or you will severely
damage the unit.
16.3 Charge the batteries for 10 hours prior to first use. Be sure to have the
monitor in the OFF position during this period. ONLY use the AC Adapters
included with your monitor.
16.4 DO NOT use these adapters with any other equipment.
16.5 When unplugging the AC Adapter from the Nursery Unit, be sure it
is switched to the OFF position. If it isn’t, the unit will revert to battery
mode if batteries are installed.
16.6 DO NOT use rechargeable batteries in the Nursery Unit. Use alkaline
batt e ries ONLY.
16.7 DO NOT dispose batteries in fire. They may explode. Check with local
regulations for possible special disposal instructions.
16.8 Exercise care in handling batteries in order not to short out the batteries
with conducting materials such as rings, bracelets and keys. Overcharging,
short circuiting, reverse charging, mutilation, or incineration of batteries
must be avoided to prevent one or more of the following occurrences:
release of toxic materials, release of hydrogen and/or oxygen gas and
rise in surface temperature.
16.9 DO NOT attempt to recharge batteries provided with or identified for
use with this product that are not intended to be charged. The batteries
may leak corrosive electrolyte or explode.
16.10 DO NOT attempt to rejuvenate the batteries provided with or identified
for use with this product by heating them. Sudden release of battery
electrolyte may occur, causing burns or irritation to eyes or skin.
16.11 If and when necessary, the batteries must be replaced with identical new
ones or equivalent (volts and size). If a battery to be replaced is connected
with other batteries in series, replace the other batteries at the same time
as well. DO NOT mix old and new batteries.
16.12 Reverse polarity installation of the batteries in the end product must
be avoided. Reverse insertion of batteries can cause charging, and that
may result in leakage or explosion.
16.13 Remove batteries from this product if you store the product over 30
days because the batteries could leak and damage the product.
16.14 Discard ‘dead’ batteries as soon as possible since ‘dead’ batteries
are more likely to leak in a product. If a battery has leaked or vented, it
should be replaced immediately using protective gloves.
16.15 DO NOT store this product, or the batteries provided with or identified
for use with this product, in high-temperature areas.
Model AC115
Sound and Movement Monitor
SETUP REQUIREMENTS
INCLUDED:
Parent Unit Nursery Unit Tabletop stand
(for Nursery Unit)
* Always place Angelcare
®
logo
side up *
Wired Movement Sensor Pad
6 Pre-threaded cord
covers with Split USB
cable
AC adapter
(for Nursery Unit)
AC adapter
(for Parent Unit)
2 Rechargeable AAA Batteries
(for Parent Unit)
2X
3
E
N
02mf6A_Manuel_AC115_UK_12657.indd 3 18-01-08 10:22

YOU MUST PREPARE:
One hardboard (not included)
Thickness: 6 mm
Minimum dimensions:
33 x 33 cm
Maximum dimensions:
equal to the mattress size
WHAT YOU WILL NEED (NOT INCLUDED):
2 AAA Alkaline
Batteries
(for Nursery Unit)
IMPORTANT
The hardboard must be larger than
the Sensor Pad surface.
Miniature Philips
Screwdriver
Hardboard
2X
STEP 1 - CHARGING THE PARENT UNIT (10 HOURS)
10
2
3
1
Battery
compartment
1) Remove the battery
compartment on the
rear. Insert the provided
rechargeable batteries into
the compartment.
2) Connect the USB plug to
the Parent Unit.
3) Connect the power
adapter to an electrical
outlet.
4) Charge the unit for
10 continuous hours prior
to first use.
PARENT UNIT:
TIC Indicator
Micro USB
charging port
Power
On/Off
Menu/
Exit Menu
UP/
Volume +
Down/
Volume -
Rechargeable
battery
compartment
Confirm Selection/
Pause Sensor Pad
Talk Back
Button
OK
4
02mf6A_Manuel_AC115_UK_12657.indd 4 18-01-08 10:22

WARNING
STRANGULATION HAZARD.
Children have STRANGLED in cords:
• Keep adapter cords out of the reach of children
(more than 1 meter away).
• Because of the serious strangulation risk to infants
and toddlers, parents and caregivers should never
place the Nursery Unit within 1 meter of a cot.
• NEVER use Sensor Pad without the cord covers.
Check cord covers before each use to ensure it is
securely placed under the leg of the cot. Discontinue
use of Sensor Pad if any cord covers are damaged or
broken.
• NEVER use extension cords with adapters. ONLY
use the adapters provided. This product is not a toy.
Never allow children to play with it.
STEP 2 - POSITIONING THE MOVEMENT SENSOR PAD
2.1 - SELECT A LOCATION FOR THE NURSERY UNIT
IMPORTANT
Place the cot near a supporting wall and far from air currents. Install the Nursery Unit on
a flat, stable surface facing the cot at a distance of at least 1 meter. Make sure to plug
the adapter to the socket outlet nearest to the equipment and that is easily accessible.
Place the Nursery
Unit at least
1 meter
from the cot
5
E
N
02mf6A_Manuel_AC115_UK_12657.indd 5 18-01-08 10:22

1) Insert jack 1 into the Sensor Pad and twist it clockwise to lock it.
6 5 4 3 2 1
2.2 - SELECT THE COT LEG TO SECURE THE CORD COVERS
6
5
4
3
2
1
6
5
4
3
2
1
Figure 1 Figure 2
RECOMMENDED
OR
Use the cot leg by the wall closest to the Nursery Unit (Figure 1). In cases where the
Nursery Unit is across the room, use the leg closest to the Nursery Unit to position the
covered wire (Figure 2). It is always preferable that the covered cord run along a wall.
2.3 - INSTALL THE SENSOR PAD ON THE MATTRESS SUPPORT
IMPORTANT
If your cot does not have a solid, stable surface for the Sensor
Pad, you will need to place a support under it, to ensure correct
operation of the system.
This hardboard support should be at least 6 mm thick and should
have minimum dimensions of 33 x 33 cm. This support board must
be larger than the Sensor Pad surface area.
The Sensor Pad functions with any size and type of mattress except memory-foam
mattresses, hollow frame mattresses and water beds. The hardboard maintains a
constant pressure on the Sensor Pad, enabling it to detect baby’s movements even
when baby is at the edge of the cot.
Hardboard
6
02mf6A_Manuel_AC115_UK_12657.indd 6 18-01-08 10:22

Sensor Pad
6
5
4
3
1
2
2
3
1) Remove the mattress
from the cot.
2) Place the Sensor Pad –
Angelcare
®
logo side up
– on top of the
hardboard.
3) Run the connection pin,
warning label and the first
5 cord covers down along
the rear of the cot leg,
between the mattress
support and the inside
edge of the cot.
4
5
4) Bring the first 4 cord
covers down the floor,
and keep the 5th cord
cover vertically, along
the rear of the cot leg,
between the mattress
and the inside edge of
the cot.
5) Remove any cord slack
to make sure no parts
of the cord are loose.
8 cm
6) Place the 6th cord
cover approximately
8 cm from the edge of
the mattress support.
4132
CLICK!
7
7) Snap together the
remaining cord covers
that will run along the
floor.
4
3
2
1
8 9
8) Remove any cord slack
to make sure no parts
of the cord are loose.
9) Peel off the double-
sided tape on the 4
th
cord cover and place
it securely under the
cot leg.
7
E
N
02mf6A_Manuel_AC115_UK_12657.indd 7 18-01-08 10:22

WARNING
STRANGULATION HAZARD
• Remove all slack from Sensor Pad Cord.
• When lowering the mattress support
as your baby grows, slide the vertical
Cord Cover downward so it remains
approximately in the center between
the mattress support and the floor. Slide
the Sensor Pad Cord through the Floor
Cover to eliminate any additional slack.
• The Sensor Pad is not designed
for use with adults, children or infants
older than 24 months.
• Discontinue use of the Sensor Pad
when baby is older than 24 months.
Deactivate the Movement Function and
remove the Sensor Pad from cot and
store for future use.
• BEFORE FIRST TIME USE: To test
that the unit is ready for use, refer to
instruction manual on how to test that
the installation has been done correctly.
STEP 3 - SETTING UP THE NURSERY UNIT
Select a location for the Nursery Unit that is at least 1 meter away from the cot.
1
1) Remove the batteries cover and
insert 2 AAA Alkaline Batteries
(not included)
Note:
The batteries are a back up
power supply in case of power
outage.
Sensor Pad
5
6
4 3 2 1
MUST BE AT LEAST
1 METER DISTANCE
2
2) Install the Nursery Unit on a flat,
stable surface facing the cot at
a distance of at least 1 meter
and plug the Sensor Pad cord
into the Nursery Unit.
3) Check to make sure the Sensor
Pad has not moved from its
position.
4) Place the mattress back inside
the cot.
5
5) Connect the USB plug to the
Nursery Unit and the USB plug
with the power adapter and
then to an electrical outlet.
8
02mf6A_Manuel_AC115_UK_12657.indd 8 18-01-08 10:22

Note: Each time you power ON your Nursery Unit, the internal thermometer will need to
calibrate to ensure accuracy. This automatic process will take approximately 30 minutes.
The colour changing temperature display, by default, will be turned “OFF”. You may turn
this feature “ON” in the settings mode on your Parent Unit.
NURSERY UNIT:
Power ON/OFF Light Indicator
Low Batteries Light Indicator
Temperature
Indicator
ON/OFF /
Pager
Pause Movement
Sensor Pad
Movement
Sensor Pad
sensitivity
switch
Power
ON/OFF
Speaker
Micro USB
Port
Microphone
Sensor Pad Indicator/
Temperature Indicator
Battery
Compartment
STEP 4 - TURNING ON YOUR MONITOR
YOU ARE NOW READY TO USE YOUR MONITOR
The Angelcare
®
monitor can be used with the pre-program factory settings or you can also
customize your settings to your preference.
DEFAULT SETTINGS
Detection Mode:
Movement: ON
Sound: ON
Sound transmission (VOX): OFF
TIC Function: OFF
VOX Sensitivity: Level 2 (of 4)
Temperature Unit: Celsius
Temperature Alarm: OFF
Temperature Alarm Setting: High: 30˚C
Low: 19˚C
9
E
N
02mf6A_Manuel_AC115_UK_12657.indd 9 18-01-08 10:22

TURN ON YOUR MONITOR
Press ON/OFF on
the Parent Unit
for 2 seconds.
Press ON/OFF on
the Nursery Unit
for 2 seconds.
NOTE:
The screen of the Parent Unit flashes
the out-of-range icon until it displays
the room temperature and function
icons. The connection process should
be complete within 30 seconds. If this
sequence is not completed within 30
seconds you will need to switch the
units off and repeat.
When the Parent Unit is ON and Nursery Unit is OFF or, if there is a
lost connection between the 2 units;
-The Out-of-Range icon on the Parent Unit will blink
-The Parent Unit will beep 3 times every 15 seconds
IMPORTANT ICONS
Movement only
Good connection
Full
Sound activated
transmission (VOX ON)
Detection mode icons:
Indicates which functions are activated
VOX icon: Indicates when the
Nursery Unit is in VOX mode
Connection icon: Indicates the
connection quality between the
Parent Unit and the Nursery Unit
Sound only
Medium connection
1/2
Continuous sound
transmission (VOX OFF)
Sound Sensitivity Indicator
Temperature display
Temperature alerts icons:
Battery level icon: Indicates
Parent Unit battery life
Movement, Sound
& “TIC”
Poor connection
Empty
Charging
Movement & Sound
Too Warm
Out-of-range
Movement & “TIC”
Too Cold
10
02mf6A_Manuel_AC115_UK_12657.indd 10 18-01-08 10:22

STEP 5 - TESTING AND GETTING TO KNOW YOUR MONITOR
The Angelcare
®
monitor can be used with the pre-programmed factory settings or you can
customize your settings to your preference.
All changes and
adjustments made in the
main menu will not be
saved unless you confirm
them by pressing the
EXIT button.
IMPORTANT
When in MENU mode, sound
transmission between the Parent and
Nursery Units will be temporarily
deactivated. The TIC indicator will flash
rapidly if no movement is detected.
5.1 - MENU ACCESS AND CHANGING THE SETTINGS
The MENU settings are accessed by pressing and HOLDING the MENU button on the Parent
Unit. The MENU functions are in a loop. Each time you press the OK button briefly you
move on to the next setting. Once you have selected your preferred settings you must
press EXIT MENU or your changes will not be saved. The MENU functions are in the
following order:
PRESS AND HOLD: Movement & ‘’TIC” .….….….….….….….….….….….….….….….….….….….…. STEP 5.2
PRESS 1 TIME: Sound ….….….….….….….….….….….….….….….….….….….….….….….….….….….….…. STEP 5.5
PRESS 2 TIMES: Sound Transmission (VOX) .….….….….….….….….….….….….….….….….…. STEP 5.6
PRESS 4 TIMES: Temperature .….….….….….….….….….….….….….….….….….….….….….….….…. STEP 5.7
5.2 - ACTIVATING/DEACTIVATING THE SENSOR PAD
SET THE MOVEMENT DETECTION
Allows you to detect baby’s movements.
2
1) Press and HOLD the MENU button
until the Movement monitoring
icon blinks.
2) Use the UP and DOWN arrows to
activate or deactivate movement
detection.
3) Press the OK button to go to the next
setting or press the EXIT button to
confirm your choice.
SET THE TIC FUNCTION
Allows you to detect baby’s movements as well as hear a TIC sound.
IMPORTANT
To activate the ‘’TIC’’ Function, the movement detection activated.
11
E
N
02mf6A_Manuel_AC115_UK_12657.indd 11 18-01-08 10:22

2
1) Press and HOLD the MENU Button
then press the OK button until the
“TIC”
icon blinks.
2) Use the UP and DOWN arrows to
activate or deactivate the TIC function.
3) Press the OK button to go to the
next setting or press the EXIT
button to confirm your choice.
TO TEST THE SENSOR PAD
MOVEMENT FUNCTION NEEDS TO BE ACTIVATED:
1 2
1) Move your hand lightly on the mattress.
NOTE:
The Parent Unit will emit a
“TIC” sound (when activated) and
will flash every 5 seconds.
2) Remove your hand from the mattress.
After 15 seconds you will hear a
“TIC” pre-alarm sound, and 5 seconds
later the Movement Alarm will trigger.
3) Repeat by moving your hand lightly
in all four corners of the mattress.
MOVEMENT ALARM
• If NO movement is detected after 15 seconds you will hear
a single “TIC” pre-alarm sound from the Nursery Unit.
• If after a further 5 seconds there is still NO movement
detected on the surface of the mattress, the Parent Unit
and Nursery Unit will emit loud continuous beeps
- this is the Movement Alarm.
• Nursery Unit light will flash red.
• Sensor Pad Icon and sound level bar on Parent Unit will flash.
IF THE ALARM DOES NOT SOUND
• Avoid contact with cot while Sensor Pad is in operation.
• Place cot near a supporting wall.
• Adjust Sensor Pad sensitivity level.
• Turn OFF cot mobile, fans, loud music or anything else that may cause vibration.
TO STOP THE ALARM
Place your hand
back on the
mattress.
Press PAUSE button
on the Nursery Unit
Press any
button on the
Parent Unit.
OR OR
12
02mf6A_Manuel_AC115_UK_12657.indd 12 18-01-08 10:22

5.3 - PAUSING AND RESTARTING THE SENSOR PAD
Allows you to pause the Sensor Pad if you remove baby from the cot, e.g. for feeding or comforting.
Pause/Unpause Sensor Pad
1) From the Parent Unit, press and
hold Pause Sensor Pad button
for at least 2 seconds.
OR
From the Nursery Unit, press
the Pause button.
2) To unpause the Sensor Pad,
from the Parent Unit, press the
Pause Sensor Pad button (OK
button)
OR
From the Nursery Unit, press
the Pause button.
IMPORTANT
• If you do not pause the Sensor Pad, the alarm will sound if there is no movement
detected on the surface of the mattress after 20 seconds.
• Ensure to unpause the Sensor Pad before putting back in the cot.
5.4 - ADJUST THE SENSOR PAD SENSITIVITY LEVEL:
To ensure adequate monitoring of your baby’s movements, you can adjust the sensitivity of the
Sensor Pad. Set a high sensitivity for a newborn and a lower sensitivity as baby grows and gains
weight. A thicker mattress will also need a higher sensitivity. Slide the Nursery Unit sensitivity
level button to select between low, medium or high level.
For optimal results begin with medium
sensitivity level, adjusting the sensitivity
by increasing or decreasing if required.
NOTE:
If you are experiencing false alarms,
adjust the sensitivity level.
IMPORTANT
• The Sensor Pad is not designed for use with adults, children or infants older than
24 months.
• Once you are finished using the Sensor Pad, please deactivate the movement
function, remove it from the baby’s cot and store it away.
13
E
N
02mf6A_Manuel_AC115_UK_12657.indd 13 18-01-08 10:22

5.5 - SOUND
TO ACTIVATE SOUND:
2
1) Press and hold the MENU Button
then press the OK button until the
Sound Monitoring
icon blinks.
2) Using the UP and DOWN arrows to
turn the function ON or OFF.
3) Press the OK button to go to the
next setting or press the EXIT
button to confirm your choice.
TO TEST SOUND:
Ask someone to speak into the Nursery
Unit or place the unit near a radio to ensure
that sound is being picked up.
IMPORTANT
To avoid feedback (whistling), keep both
units at least 3 meters apart.
IF YOU HEAR NO SOUND:
• Check that both units are powered ON.
• Check that both units are plugged into
functioning electrical outlets.
• Check the batteries in both units
(replace or recharge them if necessary).
• Bring the Parent Unit closer to the
Nursery Unit.
ADJUST THE
SOUND LEVEL
PUT IN
MUTE MODE
PUT IN DIALOGUE
MODE
Raise
volume
Lower
volume
Press the VOLUME - until L0
is being displayed. When in
MUTE the sound icon will
flash to indicate this.
Press and
hold talk
button to
speak to
baby
14
02mf6A_Manuel_AC115_UK_12657.indd 14 18-01-08 10:22

5.6 - VOICE ACTIVATION (VOX ON) OR CONTINUOUS SOUND (VOX OFF) MODE
Allows you to select your option on how you monitor sound: VOX (voice activation picks
up sound based on the setting of the sensitivity level) or Continuous (sound monitoring is
continuously on, picking up all sounds).
2
1) Press and hold the MENU button then
press the OK button until the VOX
icon
blinks.
2) Use the UP and DOWN arrows to
activate or deactivate the VOX
function.
3) Press the OK button to go to the next
setting or press the EXIT button to
confirm your choice.
TO ADJUST SOUND SENSITIVITY (VOX)
The sensitivity of the microphone is adjustable and has 4 levels (the most sensitive is
level 4). This means that sound will only transmit based on the level that you set.
2
TO
1) When the Sound Transmission is ON
(VOX ON) press and hold the MENU
button then press OK button until
VOX ON
icon blinks.
2) Use the UP and DOWN arrows to select
desired microphone sensitivity level.
3) Press the OK button to go to the next
setting or press the EXIT button to
confirm your choice.
5.7 - TEMPERATURE
TO SELECT TEMPERATURE IN CELSIUS OR FAHRENHEIT
2
1) Press and hold the MENU button then
press OK button until the
˚C / ˚F icon blinks.
2) Use the UP and DOWN arrows to
select temperature in Celsius or
Fahrenheit.
3) Press the OK button to go to the next
setting or press the EXIT button to
confirm your choice.
15
E
N
02mf6A_Manuel_AC115_UK_12657.indd 15 18-01-08 10:22

TO ACTIVATE THE TEMPERATURE ALARM
2
1) Press and hold the MENU button
then press OK button until the
Temperature Indicator
icon
blinks.
2) Use the UP and DOWN arrows
to activate or deactivate the
temperature alarm.
3) Press OK button to confirm your
choice and set the Temperature
range as below.
TO SET TEMPERATURE RANGE
NOTE:
Make sure to turn ON Temperature alarm to be able to set Temperature range.
4
4) The Low Temperature icon will
blink. Use the UP and DOWN arrows
to set the LOW temperature alarm
(5 to 19° Celsius).
5) Press the OK button to confirm your
choice.
The low temperature range is 5 to 19°C and
high temperature range is 22 to 37°C.
6
6) The High Temperature icon will
blink. Use the UP and DOWN arrows
to set the HIGH temperature alarm
(22 to 37° Celsius).
7) Press the OK button to go to the next
setting or press the EXIT button to
confirm your choice.
TEMPERATURE ALARM
• Alarm activates when the temperature reaches the maximum or minimum set
temperature.
• Parent Unit will emit 3 consecutive beeps, every 5 seconds if the temperature reaches
levels out of your chosen range. The relevant icon will flash on the Parent Unit screen
to alert you.
16
02mf6A_Manuel_AC115_UK_12657.indd 16 18-01-08 10:22

STEP 6 - ACTIVATING AND DEACTIVATING ADDITIONAL FUNCTIONS
6.1 - ACTIVATE OR DEACTIVATE TEMPERATURE INDICATOR ON NURSERY UNIT
With this option the Nursery Unit Temperature Indicator will light up in colour when the
temperature goes above or below your preferences. If the temperature goes above your
set preferences and this option is turned ON, the light on the Nursery Unit will turn to red
instead of the default white. If the temperature goes below the set preferences, then the
light will turn blue.
Red - Room temperature is too hot
Blue - Room temperature is too cold
White - Room temperature is good
ON/OFF
Temperature
light
6.2 - OUT OF RANGE SETTINGS
Your monitor has an Out-of-Range alarm that advises you when your two units are not
communicating. Out-of-Range situations can be caused by distance or by physical interferences.
RANGE:
Open field (Open area without obstructions): up to 230 meters.
OUT-OF-RANGE ALARM
• Alarm activates when your two units are not communicating.
• The Parent Unit will emit a triple beep every 16 seconds.
• Out-of-Range Icon will flash on the screen.
IMPORTANT
If you turn the Nursery Unit OFF the Out-of-Range Alarm will sound. Turn the Nursery
Unit ON again to reactivate the link.
TO STOP THE OUT-OF-RANGE ALARM:
Press 2 seconds
to turn the Parent
Unit OFF
Turn the Nursery
Unit ON
OR
17
E
N
02mf6A_Manuel_AC115_UK_12657.indd 17 18-01-08 10:22

6.3 - PAGER
Allows you to locate the Parent Unit.
Press and hold
the Temperature
Light button
TO LOCATE THE PARENT UNIT
Press and hold the Temperature Light
button on the side of the Nursery Unit.
The Parent Unit will emit a paging
sound.
TO STOP THE PAGING SOUND
Press any button on the Parent Unit or
the Pager button on the Nursery Unit.
TROUBLESHOOTING
TAKING CARE OF YOUR RECHARGEABLE BATTERIES
• Ensure that you fully charge your batteries for 10 hours before their first use.
• To maintain maximum battery life it is recommended that you fully discharge your
batteries periodically. Battery performance can be diminished by leaving the batteries
constantly charging. If your Parent Unit is not in use, please turn it off.
• Inadequate battery power can impair the performance of your monitor. If you are
not happy with the performance of your Parent Unit please replace the rechargeable
batteries (2 x NiMH Rechargeable Batteries).
• It is advisable to change the batteries every 6 months.
Power On/Off Light Indicator
Low Battery Light Indicator
Flashing green
Nursery unit is using the
back-up batteries
Flashing yellow Nursery Unit batteries are low
Steady green Monitor is activated
Sensor Pad Light Indicator
Temperature Indicator
Flashing red
No movement is detected or
Sensor Pad is disconnected
Flashing white Monitor is paused
Steady Red Room temperature is too hot
Steady Blue Room temperature is too cold
Steady White Room temperature is good
LOSS OF CONNECTIVITY BETWEEN THE PARENT UNIT AND THE NURSERY UNIT
• In the case of loss of connectivity, the first step is to bring the Parent Unit and Nursery
Unit closer together and make sure that both units are ON to restore the connection. If
there is still no connection and no out-of-range warning after the above has been done,
then and only then should the re-connection procedure below be done.
18
02mf6A_Manuel_AC115_UK_12657.indd 18 18-01-08 10:22

3
1) Turn Parent Unit OFF.
2) Turn Nursery Unit OFF and then turn
it ON.
3) Press the Power ON/OFF button on the
Nursery Unit 4 consecutive times.
The Sensor Pad
Indicator Light on
the Nursery Unit will
flash quickly in green
(indicates Nursery Unit
is in linking mode).
GREEN
5
6
4) Turn the Parent Unit ON. The Out-of-
Range
icon should blink.
5) Press and hold the Talk Back button
on the Parent Unit until a beep tone is
heard.
6) Press OK button on the Parent Unit.
The Out-of-Range
icon should blink
faster to indicate that the Parent Unit is
in linking mode.
The Parent Unit will display H1-H2 icon during
the reconnection procedure. The reconnection
is successful if the Parent unit shows the regular
screen view.
FALSE ALARMS
• Turn OFF the Nursery Unit.
• Make sure there is no bedding between the mattress and the Sensor Pad.
• If the cot has a spring or slat base, place a hardboard between the cot base and the
Sensor Pad measuring 6 mm thick and should have minimum dimensions of 33 x 33 cm.
• Make sure the Sensor Pad is positioned as described under the setup requirements.
• You may need to increase the sensitivity, refer to Step 5.4.
ALARM WILL NOT SOUND
• Avoid contact with the cot when the monitor is ON.
• Place cot near a solid supporting wall to avoid Sensor Pad from detecting movement
from outside the cot.
• Turn OFF cot mobile, fans, loud music or anything else that may cause vibration.
• You may need to decrease the sensitivity, refer to Step 5.4.
NURSERY UNIT POWER ON INDICATOR (GREEN LIGHT) DOES NOT LIGHT UP
• Check connections or change to another electrical outlet.
• Press the Nursery Unit ON/OFF button for 2 seconds to turn the Nursery Unit ON.
19
E
N
02mf6A_Manuel_AC115_UK_12657.indd 19 18-01-08 10:22

WEAK RECEPTION
• Bring units closer together.
• Change the position of one or both units.
• Place units on a flat surface out of baby’s reach.
• Replace the batteries or recharge the Parent Unit.
STATIC, DISTORTION, INTERFERENCES (FROM OTHER
MONITORS, WIRELESS PHONES, WALKIE-TALKIES, ETC...)
• Rotate the Parent Unit or move it away from source of interference.
FEEDBACK (LOUD NOISES EMITTED FROM THE PARENT UNIT)
• Move units further apart (at least 3 meters apart).
• Decrease volume on the Parent Unit.
THE PARENT UNIT SCREEN IS BLACK (PARENT UNIT IS OFF)
• Turn the Parent Unit back ON by pushing and holding the power button.
• Replace the batteries or recharge the Parent Unit.
SENSOR PAD LIGHT INDICATOR FLASHING RED
(MONITOR IS BARELY DETECTING MOVEMENT)
• Make sure there is no bedding between the mattress and the Sensor Pad.
• The Sensor Pad must rest on a completely flat and firm surface. If the cot has a spring
or slat base, place a hard board between the cot base and the Sensor Pad measuring
6 mm thick and should have minimum dimensions of 33 x 33 cm.
• Make sure Sensor Pad is positioned as described under the setup requirements.
• You may need to increase the sensitivity, refer to Step 5.4.
NO POWER
• Check or replace batteries.
• Make sure Monitor is ON.
NURSERY UNIT POWER ON INDICATOR (GREEN LIGHT) DOES NOT LIGHT UP
• Check connections or change to another electrical outlet.
• Press the Nursery Unit ON/OFF button for 2 seconds to turn the Nursery Unit ON.
20
02mf6A_Manuel_AC115_UK_12657.indd 20 18-01-08 10:22
/