Page is loading ...

page 1
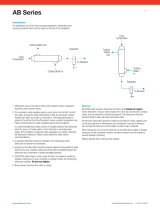
Cyclon Series User Manual
USER MANUAL
CYCLON 330-345 AIR COMPRESSORS
Serial Numbers from:
Cyclon 330 F166/0101 Cyclon 337 F167/0151 Cyclon 345 F168/0101
CONTENTS
Page
1. Safety Procedures 5
2. General Description 11
3. Leading Particulars 19
4. Installation 21
5. Commissioning 25
6. Operation 35
7. Maintenance 47
8. Fault Finding 57
Appendix 1 – Electrical Connections 61
Appendix 2 – The Pressure Systems &
Transportable Gas Container
Regulations 1989 63
Illustrations Page
Control Panel 13
Air/Oil System 15
Regulation System On/Off Control 16
Regulation System Modulating Control 17
Negative Regulator Settings 33
Control Panel 38
Remote Start/Stop 44
Remote Load/Unload 44
Group Fault Relay – Example 45
Servicing Points 51
Drive Belt Adjustment 55
Electrical Connection Diagrams 62
Air Compressor Circuit Diagrams 64
C20160-1576, Issue 3, March 1997
Cyclon Series User Manual

CompAir BroomWade Limited
page 2
Air-end Serial Number:
Motor Serial Number:
Reclaimer Certificate Number:
Delivery Date:
OWNERSHIP DATA
TECHNICAL DATA
MODEL:
Serial Number:
Year:
Maximum Pressure:
kW:
Motor rpm:
V. Ph. Hz.
M3/min:
LOCAL COMPAIR BROOMWADE DISTRIBUTOR
Name:
Address:
Telephone: Fax:
Contact Names: Parts:
Service:
Compressor Lubricant:
Lubricant Capacity:
Motor Bearing Grease:
(if applicable)

page 3
Cyclon Series User Manual
MODEL DESIGNATION
The Model Designation code identifies specific models as follows:
DESIGNATION CYCLON 3 3 0 0 7
ABBCC
A = AIR-END SIZE CYCLON 3
B = MOTOR RATING (kW) 30KW
C = NOMINAL DELIVERY PRESSURE 7·5 BAR(110PSI)
This publication relates to all standard operating pressure versions of the following models:
Cyclon 330 Cyclon 337 Cyclon 345
ASSOCIATED PUBLICATIONS
Model Title Part No.
Cyclon 105-345 Repair Manual AC20160-1606 (Issue 1)
Cyclon 330 to 345 Parts List (Multi-Lingual) C20160-1575 (Issue 2)
These publications may be obtained through CompAir BroomWade distributors.
➤

CompAir BroomWade Limited
page 4
WARRANTY
The conditions of the CompAir BroomWade
Warranty are set out in the company’s standard
Conditions of Sale available from the Distributor
supplying the machine.
MAINTENANCE
To ensure the continued trouble-free operation of
the compressor unit it is important that periodic
maintenance and servicing are carried out in
accordance with the information given in the
‘Maintenance’ section of this manual. If any
replacement or repair is needed use only CompAir-
BroomWade Genuine Parts.
!
!
WARNING
GENUINE PARTS
AUTHORISED SERVICE AGENTS
USE ONLY
●The use of replacement parts or
lubricating oils not supplied or approved
by CompAir BroomWade may lead to
failures in service which would not be
covered by warranty.
●Any unauthorised modifications or
failure to maintain this equipment in
accordance with the maintenance
instructions may make it unsafe. The
use of replacement parts not supplied or
approved by CompAir BroomWade may
create hazardous conditions over which
CompAir BroomWade has no control.
●Such hazardous conditions may lead to
accidents that can be life threatening,
cause substantial bodily injury or result
in damage to the equipment. CompAir
BroomWade can bear no responsibility
for equipment in which unapproved
replacement parts are included.

page 5
Cyclon Series User Manual
SAFETY PROCEDURES
Page
General 6
Warnings, Cautions and Notes 6
General Safety Precautions 7
Installation Precautions 7
Operational Precautions 7
Maintenance and Repair Precautions 8
Precautions in the Event of Fire 9
1

CompAir BroomWade Limited
page 6
2. WARNINGS, CAUTIONS AND NOTES
2.1 Warnings
Warnings call attention to operations or procedures
involving specific hazards which could cause injury
or death and are identified by the following symbols
on the unit and in the text of the manual.
WARNING: RISK OF DANGER
WARNING: RISK OF ELECTRIC
SHOCK
WARNING: RISK OF HOT
SURFACES
WARNING: CONSULT MANUAL
WARNING: RISK OF HIGH
PRESSURE
WARNING: DRIVE BELT
2.2 Cautions
Incorrect operational procedures causing possible
damage to the compressor unit are identified by a
‘CAUTION’ in the text of this manual.
2.3 Notes
Methods to make the job easier and points which
require particular attention are identified by a ‘Note’
in the text of the manual.
1. GENERAL
Most accidents which occur during the operation
and maintenance of machinery are the result of
failure to observe basic safety rules or precautions.
An accident can often be avoided by recognising a
situation that is potentially hazardous.
When handling, operating or carrying out
maintenance on the unit, personnel must use safe
engineering practices and observe all relevant
local health and safety requirements and
regulations. The attention of users in the UK is
drawn to the Health and Safety at Work Act, 1974,
the Regulations of the Institution of Electrical
Engineers and the Pressure Systems and
Transportable Gas Container Regulations 1989.
CompAir BroomWade cannot anticipate every
possible circumstance which might represent a
potential hazard. The WARNINGS in this manual
are therefore not all-inclusive. If the user employs
an operating procedure, an item of equipment or a
method of working which is not specifically
recommended by CompAir BroomWade he must
ensure that the unit will not be damaged or made
unsafe and that there is no risk to persons or
property.
The standard build of all CompAir BroomWade
products are not intended for use in either
explosive or potentially explosive atmospheres as
defined in Directive 94/9/EC.
An explosive atmosphere is a mixture with air,
under atmospheric conditions, of flammable
gases, vapours, hazes or dust in which, after
ignition has occured, combustion propagates to
the entire unburned mixture and may cause a
hazard.
A potentially explosive atmosphere is an
atmosphere which could become explosive due to
local conditions.
Failure to observe the precautions given under
‘Safety Procedures’ may be considered dangerous
practice or misuse of the compressor unit.
SAFETY PROCEDURES
!
!

page 7
Cyclon Series User Manual – Safety Procedures
3. GENERAL SAFETY PRECAUTIONS
If using compressed air for cleaning purposes,
ensure safety regulations are complied with and
appropriate clothing and eye protection is worn.
Never direct compressed air onto your skin or at
other people.
Never use compressed air to clean loose dirt from
clothing.
Before releasing compressed air through a hose
make sure that the free end is held securely so
that it cannot whip and cause injury.
Avoid injury by using a hoist to lift heavy loads.
Check that all chains, hooks, shackles and slings
are in good condition and are of the correct
capacity. They must be tested and approved
according to local safety regulations.
Cables, chains or ropes must never be applied
directly to lifting eyes. Always use an appropriate
shackle or hook, properly positioned. Arrange
lifting cables so that there are no sharp bends.
Use a spreader bar to avoid side loads on hooks,
eyes and shackles.
When a load is on a hoist stay clear of the danger
area beneath and around it. Keep lifting
acceleration and speed within safe limits and
never leave a load hanging on a hoist for longer
than is necessary.
4. INSTALLATION PRECAUTIONS
Installation work must only be carried out by
competent personnel under a qualified supervisor.
A fused isolating switch must be fitted between the
main power supply and the compressor.
Ensure that air drawn into the air intake will not be
contaminated with flammable fumes or vapours,
since this could cause an internal fire or explosion.
Precautions must be taken to ensure that no injury
is caused to passers-by through loose clothing
being sucked into the air intake.
Ensure that the air delivery pipe from the
compressor to the user’s pipework or receiver is
free to expand and that no flammable material is
within the vicinity.
A shut-off valve must be fitted in the delivery air
line to enable the compressor unit to be isolated.
This is particularly important if more than one unit
is to be coupled in parallel or connected to an
existing air supply system.
The minimum pressure/non-return valve is not
intended as an isolating valve and should not be
relied upon for this purpose. In addition, it may be
necessary to install shut-off valves elsewhere in
the system to allow a dryer or other equipment to
be by-passed.
A pressure relief valve must be installed between
any compressor unit and the shut-off valve/s. A
pressure relief valve is fitted on the reclaimer
vessel as standard equipment.
A pressure relieving device must be fitted to every
pressure vessel, or equipment containing air at
above atmospheric pressure, when installed
downstream of the unit.
5. OPERATIONAL PRECAUTIONS
The compressor unit must only be operated by
competent personnel under a qualified supervisor.
Do not run the compressor with doors open or
covers removed.
Never remove or tamper with the safety devices,
guards or insulation materials fitted to the unit.
The compressor must only be operated at the
supply voltage and/or frequency for which it is
designed.
When mains power is switched on, lethal voltages
are present in the electrical circuits and extreme
caution must be exercised whenever it is
necessary to carry out any work on the electrical
system.

CompAir BroomWade Limited
page 8
Do not open the starter compartment or touch
electrical components while voltage is applied
unless it is necessary for measurements, tests or
adjustments. Such work should be carried out only
by a qualified electrician equipped with the proper
tools and wearing appropriate body protection
against electrical hazards.
On a unit equipped with an Automatic Start/Stop
system, attach a sign stating ‘THIS UNIT MAY
START WITHOUT WARNING’ next to the display
panel.
On a unit equipped with an Automatic Restart
device, attach a warning notice stating ‘THIS UNIT
HAS BEEN MODIFIED AND WILL START
AUTOMATICALLY ON APPLICATION OF
POWER’ next to the display panel and on the
inside of the unit next to the starter contactors.
If the unit is equipped with a Remote Control
device, attach warning notices stating ‘THIS UNIT
CAN BE STARTED REMOTELY’ in prominent
locations, one on the outside of the unit, the other
inside the control compartment.
As a further safeguard, take adequate precautions
to make sure there is no one checking or working
on the unit before attempting to switch on remotely
controlled equipment. Attach a ‘CHECK THAT
ALL PERSONNEL ARE CLEAR OF THE UNIT
BEFORE STARTING’ or similar warning notice to
the remote start equipment.
During normal operation no internal part of the
compressor unit should reach a temperature above
120°C and protection devices are fitted to prevent
excessive temperatures occurring. If there is any
indication that the compressor is overheating it
must be shut down and the cause investigated.
Beware of burns from hot metal parts, hot oil and
water when working on a unit which has recently
been shut down.
The compressor must not be operated at
pressures above the nominal pressure given on
the data plate.
The compressor must not be operated in ambient
temperatures outside of those given under
‘Leading Particulars’.
The ‘Noise at Work Regulations 1989’ suggest that
ear protectors should be worn where noise levels
are 85 dB(A) or higher. With all covers in place,
the noise levels of the compressors described in
the manual are substantially lower than this figure
unless installed in an already noisy environment.
Be aware that high noise levels can interfere with
communication.
6. MAINTENANCE AND REPAIR
PRECAUTIONS
Maintenance, repairs or modifications must only be
carried out by competent personnel under a
qualified supervisor.
If replacement parts are needed use only CompAir
BroomWade Genuine Parts.
Before removing any panels from the enclosure, if
fitted, or dismantling any part of the unit, carry out
the following preparatory operations:-
1. Isolate the compressor unit from the main
electrical power supply. Lock the isolator in
the ‘OFF’ position and remove the fuses.
2. Attach a label to the isolator switch and
display panel carrying the warning ‘WORK IN
PROGRESS – DO NOT APPLY VOLTAGE’
Do not switch on electrical power or attempt
to start the unit if a warning label is attached.
3. Close the isolating valve between the
compressor unit and the user’s pipework.
Close the isolating valve in the cooling water
inlet pipe. Attach a label to each valve
carrying the warning ‘WORK IN PROGRESS
– DO NOT OPEN’
4. Ensure that the blowdown system has
operated to release all pressure from the oil
separator vessel.
5. Check that the pressure gauge registers zero.

page 9
Cyclon Series User Manual – Safety Procedures
Use only lubricating oils and greases approved by
CompAir BroomWade. Make sure that the selected
lubricants comply with all relevant safety
regulations, especially with regard to the risk of
explosion or fire and the possibility of
decomposition or the generation of hazardous
gases.
Always clean up oil spills from the surrounding
floor and outside of the compressor unit before
and after maintenance work.
Make sure that all instructions concerning
operation and maintenance are strictly followed
and that the complete unit, with all accessories
and safety devices, is kept in good running order.
The accuracy of pressure and temperature gauges
must be regularly checked. They must be renewed
when acceptable tolerances are exceeded.
Protection devices must be tested as described in
the ‘Maintenance’ section of this manual.
Keep the compressor unit clean at all times.
Protect components and exposed openings by
covering with clean cloth or tape during
maintenance and repair work.
Protect the motor, air intake, electrical and
regulation components against the entry of
moisture, e.g. when steam cleaning.
Precautions must be taken when carrying out any
repair operation which generates heat, flames or
sparks. The adjacent components must always be
screened with non-flammable material and if the
operation is to be carried out near any part of the
oil system, or close to a component which may
contain oil, the system must first be thoroughly
purged, preferably by steam cleaning.
Never use a light source with an open flame to
inspect any part of the unit.
In no circumstances must any welding work or
other modification be carried out on the oil
separator or any other pressure vessel.
Before dismantling of any part of the compressor
unit ensure that all heavy movable parts are
secured.
After completion of repair or maintenance work
ensure that no tools, loose items or rags are left on
or inside any part of the machine.
Check the direction of rotation of the motor when
starting up the compressor initially and after any
work on the electrical connections or switchgear.
Do not use any flammable liquid to clean valves,
filter elements, cooler air passages, air pipes or
any component carrying a flow of air during normal
operation. If chlorinated hydrocarbon non-
flammable fluids are used for cleaning, safety
precautions must be taken against any toxic
vapours which may be released.
Do not use carbon tetrachloride.
Precautions must be taken when using acids,
alkalis and chemical detergents for cleaning
machine parts and components. These materials
cause irritation and are corrosive to the skin, eyes,
nose and throat. Avoid splashes and wear suitable
protective clothing and goggles. Do not breathe
mists. Ensure that water and soap are readily
available.
When disposing of condensate, old oil, used filter
elements and other parts and waste material of any
kind make sure that there is no pollution of any
drain or natural water-course and that no burning of
waste takes place which could cause pollution of
the air. Protect the environment by using only
approved methods of disposal.
7. PRECAUTIONS IN THE EVENT OF FIRE
Use extreme caution when handling components
that have been subjected to fire or very high
temperatures. Some components may contain
fluoroelastomer materials which decompose under
these conditions to form highly corrosive residues.
Skin contact can cause painful and penetrating
burns resulting in permanent skin and tissue
damage.

CompAir BroomWade Limited
page 10

page 11
Cyclon Series User Manual
GENERAL DESCRIPTION
Page
Compressor 12
Air-End 12
Electronic Controller 12
Protection and Safety Equipment 12
Relief Valve 12
Blowdown System 12
Minimum Pressure Non-return Valve 12
Air/Oil System 14
Description 14
Operation 14
Regulation System 16
Description 16
On/Off Control 16
Modulating Control (Optional) 17
2

CompAir BroomWade Limited
page 12
GENERAL DESCRIPTION
1. COMPRESSOR
The unit is a fully enclosed, air cooled, single-
stage, rotary screw compressor. The compressor
air-end is belt driven by an electric squirrel-cage
induction motor. The drive belts are mounted on
pulleys fitted to the shafts of the drive motor and
air-end.
The compressor unit consists of the drive motor,
air-end, oil separator vessel, oil separator filter, oil
cooler, aftercooler, cooling fan, starter assembly
and controller.
The complete compressor unit is mounted on a
baseframe and is housed in a steel panelled
acoustic enclosure. A service panel allows access
for routine maintenance.
2. AIR-END (CYCLON 3)
The air is compressed in a single-stage, positive
displacement, oil injected rotary screw air-end. The
air-end is of the Cyclon type and comprises an
intermeshing pair of helical screw rotors, male and
female, mounted horizontally within an enclosed
casing with drive being applied to the male rotor.
The male rotor in the Cyclon air-end is larger in
diameter than the female rotor and has four lobes
which mesh with five flutes on the female rotor. The
rotors are asymmetric in profile to reduce blowback
between the lobes on the compression cycle to a
minimum, thus maximising overall sealing and
efficiency.
The rotors are fitted with bearings at each end to
provide radial and axial support, maintain adequate
shaft stiffness and to give minimum clearance and
low leakage between the rotor tip diameter and the
casing.
At the delivery end the male rotor is fitted with a
single taper roller bearing and the female rotor has
a pair of matched taper roller bearings. These
bearings provide axial and radial support of both
rotors and control the very fine end clearances
between the rotors and the casing.
Heavy duty parallel roller bearings are fitted to both
rotors at the inlet end to provide radial support and
to sustain the drive load of the male rotor.
3. ELECTRONIC CONTROLLER
The electronic control system is microprocessor
based with an LED display panel, incorporating
advanced control and monitoring features.
4. PROTECTION AND SAFETY EQUIPMENT
In addition to the protection and warning circuits
linked to the control panel the following protection
devices are fitted:
4.1 Relief Valve
A pressure relief valve is mounted on the primary
oil separator. If pressure continues to build up
when the demand for compressed air has ceased,
the relief valve will open at a pre-set level to
discharge the excess pressure to atmosphere.
4.2 Blowdown System
Whenever the compressor shuts down, either
automatically or by operation of a ‘STOP’ switch, all
pressure in the oil separator vessel is automatically
released by a blowdown system which vents the
pressure to atmosphere. This ensures that the
compressor is restarted in a no-load condition.
4.3 Minimum Pressure/Non-return Valve
Fitted on the filter manifold, the minimum pressure
valve remains closed until minimum pressure is
reached. This ensures a rapid build-up of pressure
when the compressor first starts and also prevents
high velocity, low pressure air reaching the user’s
pipework during the start-up period and carrying
over excessive amounts of oil.
When the compressor shuts down the non-return
valve prevents the pressure in the user’s pipework
feeding back into the oil separator and venting
through the blowdown system.

page 13
Cyclon Series User Manual – General Description
B1 View
B2 Start
B3 Stop
B4 Plus
B5 Minus
B6 Reset
D1 Display
E Emergency Stop Button
L1 Pressure (Delivery)
L2 Temperature
L3 Hours Run
L4 Hours Onload
L5 Air Filter Alarm
L6 Motor Fault
L7 Auto/Remote Start
L8 Running
L9 Power On
CONTROL PANEL
P1 bar
T1 °C
P2
T1 °CP1 bar
P2
L1
D1 B1
B2 E
B3
B4
B5
B6
L2
L3
L4
L5
L6
L7
L8
L9

CompAir BroomWade Limited
page 14
5. AIR/OIL SYSTEM
5.1 Description
The air/oil system comprises an air intake filter,
suction regulator, air-end, oil separator vessel, oil
separator filter, minimum pressure/non-return
valve, aftercooler, oil cooler with thermostatic
bypass valve and an oil filter. The flow of oil
through the circuit is achieved through the pressure
differential existing between the primary oil
separator and the oil injection point in the air-end.
5.2 Operation
Air enters the compressor unit through the intake
filter (2) and open suction regulator (1) to the inlet
port of the air-end (7). The air is trapped by the
turning rotors and mixes with the oil which enters
the casing through the oil injection point.
Continued rotor rotation increases the pressure and
temperature of the air/oil mixture which passes
from the air-end discharge pipe into the oil
separator (4) where primary separation takes place
by centrifugal force. Most of the oil is separated at
this stage and drops to the bottom of the vessel.
The remaining air/oil mixture then passes through
an oil separation element (5) where final separation
takes place. The separated oil collects in the
bottom of the filter and is scavenged back into the
air-end through a small diameter pipe.
The filtered air then passes from the oil separator
filter by way of the minimum pressure/ non-return
valve (3). Provided the air pressure at this stage is
above 3.5 to 4·0 bar the air passes through the
aftercooler (9) where it is cooled before passing to
the delivery outlet.
If the air pressure in the primary separator vessel
falls below 3.5 to 4·0 bar the minimum pressure
valve will close. The valve also incorporates a non-
return valve which operates to prevent delivery air
passing back into the separator when the
compressor is running off-load.
Oil from the bottom of the separator flows under
pressure to the oil cooler (10) and during normal
running the oil passes through the cooler to
maintain the correct temperature. A thermostatic
bypass valve (14) is installed in the inlet manifold of
the oil cooler.
When the compressor is started, the cold oil in the
system bypasses the cooler and flows through the
oil filter (8) directly to the air-end. As the oil and air
mixture is compressed by the rotors in the air-end,
the temperature of the oil increases.
When the oil has reached its normal operating
temperature the bypass valve closes and the oil is
directed through the oil cooler. The cooled oil then
flows to the oil filter where it is cleaned before
entering the air-end.
The quantity of oil injected into the air-end is
controlled by a restrictor orifice in the air-end
casing. Oil is injected under pressure through the
restrictor orifice into the rotors and a gallery
supplies oil to the air-end bearings.

page 15
Cyclon Series User Manual – General Description
AIR/OIL SYSTEM
8. Oil Filter
9. Aftercooler
10. Oil Cooler
11. Fan
12. Delivery Air Outlet
13. Scavenge Line
14. Thermostatic Bypass Valve
1. Suction Regulator
2. Intake Air Filter
3. Minimum Pressure/NR Valve
4. Primary Oil Separator
5. Oil Separation Element
6. Discharge Pipe
7. Air-end
9
11
12 2 7 1 1354
14
10
8
6
3

CompAir BroomWade Limited
page 16
6. REGULATION SYSTEM
6.1 Description
The compressor is regulated through a combination
of electronic, pneumatic, electrical and mechanical
devices. Two modes of regulation are used: ‘On/
Off’ is fitted as standard, and ‘Modulating’ as an
optional extra.
6.2 On/Off Control
In the ‘On/Off’ mode, the compressor is regulated
by the pressure transmitter, which continuously
monitors the pressure in the user’s pipework, a run-
on time sequence within the controller and an
unloader solenoid valve.
The compressor operates in response to varying air
demand in either the on-load condition with the
suction regulator inlet valve fully open, or off-load
with the inlet valve fully closed.
When the controller switches the compressor to run
off-load, a run-on time sequence is activated. This
allows the compressor to run for a pre-set
(adjustable) period of time in the off-load condition.
If this time elapses before the pressure in the
user’s pipework has fallen to the lower set point,
the compressor stops and enters the ‘Standby’
condition.
The compressor will remain in the ‘Standby’
condition until the pressure transmitter senses that
the pressure in the user’s pipework has fallen to the
lower set point. The controller will then re-start the
compressor.
If the pressure in the user’s pipework falls to the
lower set point before the run on time has elapsed,
the controller will re-initialise the time sequence
and switch the compressor to run on-load.
8. Separator Filter
9. Pressure Relief Valve
10. Separator Vessel
11. Air-end
12. Drive Motor
13. Intake Pressure Switch
14. Air-end Discharge Temperature Sensor
1. Air Intake Filter
2. Suction Regulator
3. Venting Valve
4. Unloader Solenoid Valve
5. Minimum Pressure/Non-return Valve
6. Pressure Transmitter
7. Aftercooler
M
+-
14
1
13
11 10
9
8
57
6
4
3
2
12
REGULATION SYSTEM – ON/OFF CONTROL

page 17
Cyclon Series User Manual – General Description
6.3 Modulating Control (Optional)
In the ‘Modulating’ mode the opening and closing of
the suction regulator inlet valve is controlled by the
negative regulator. As the demand for compressed
air rises and falls, the valve modulates between
fully open and fully closed.
When the compressor is started and runs up to
load, the minimum pressure valve opens and air
under pressure passes from the separator vessel
into the user’s pipework. If the air pressure in the
user’s pipework is below the setting of the negative
regulator, the output signal from the negative
regulator will cause the suction regulator inlet valve
to open and the compressor will run on-load.
M
1
15
13 12
11
10 9
8
7
5
3
2
14 16
64
+-
Rising pressure in the separator vessel will cause
the output signal from the negative regulator to fall,
progressively closing the inlet valve to match air
flow to demand.
If the pressure in the user’s pipework rises above
the setting of the negative regulator and reaches
the upper set point, the controller de-energises the
unloader solenoid valve. The valve closes, shutting
off the regulation air supply to the suction regulator.
The suction regulator inlet valve closes and the
compressor runs in the off-load condition.
When the pressure in the user’s pipework falls to
the lower set point the compressor reverts to
running on-load.
1. Air Intake Filter
2. Suction Regulator
3. Venting Valve
4. Negative Regulator
5. Unloader Solenoid Valve
6. Shuttle Valve
7. Pressure Transmitter
8. Aftercooler
9. Minimum Pressure / Non-return Valve
10. Separator Filter
11. Pressure Relief Valve
12. Separator Vessel
13. Air-end
14. Drive Motor
15. Intake Pressure Switch
16. Air-end Discharge Temperature Sensor
REGULATION SYSTEM – MODULATING CONTROL

CompAir BroomWade Limited
page 18

page 19
Cyclon Series User Manual
LEADING PARTICULARS
3

CompAir BroomWade Limited
page 20
Model
Cyclon 330 Cyclon 337 Cyclon 345
Air-end Single stage oil injected screw Cyclon 3 3 3
Total oil capacity: litres 17·0 17·5 18·5
Delivery air connection: without optional flexible pipe Rp 1 1/2Rp 1 1/2Rp 1 1/2
with optional flexible pipe R 1 1/2R 1 1/2R 1 1/2
Ambient air temperature Minimum °C0 0 0
operating range: Maximum °C46 46 46
Delivery air pressure: Minimum (all models) bar 5 5 5
Maximum (see compressor data plate) bar 7·5-13 7·5-13 7·5-13
Typical delivery air temperature above ambient
(full load operation) °C 4 - 5 6 7 - 8
Typical cooling air outlet temperature above ambient: °C20 23 27
Main drive motor Nominal Rating
(for actual rating see motor data plate) kW 30 37 45
Nominal Speed rpm 2970 2970 2970
Typical total input power Note: For actual figures see
compressor data plate kW 35·1 44·0 54·1
Approximate weight DPV kg 849 875 936
of total package TEFV kg 939 945 1043
Dimensions: Length mm 1420 1420 1420
Width mm 990 990 990
Height mm 1650 1650 1650
Average sound level at 1 m (CAGI PNEUROP) dB(A) 68 69 70
LEADING PARTICULARS
/