Elkay SCF16FBSH Installation guide

Category
Kitchen sinks
Type
Installation guide
ATTENTION INSTALLER:
1) Elkay recommends that undermount sinks should be installed by a professional experienced installer.
2) WARNING: The enclosed cutout template will create a countertop opening that will expose approxi-
mately 1/2" of sink rim ledge. It is recommended that you discuss this with your customer and agree
that this finished appearance is the desired effect. Elkay is not responsible for improper sink or counter-
top installations. Due to the aesthetic qualities of the converging bowl radii, the template furnished
with each sink provides the only opening recommended for installation of Elkay undermount sinks. See
illustration above.
3) Elkay undermount sinks should only be fastened to a solid surface countertop (i.e. granite/Corian
®
/
Silestone
®
).
4) Elkay is not responsible for sink or countertop if damaged during installation.
5) Metal edges may be sharp – use caution when handling.
6) Follow all local plumbing and building codes.
7) Inspect sink for damage prior to beginning installation.
I
. Undermount Sinks
Specialty Collection
Installation Instructions
®
COUNTERTOP
MOUNTING
BRACKET
FASTENER
(NOT FURNISHED)
1-1/8"
SINK
SILICONE CAULK
(NOT FURNISHED)
1/2"
INSTALLING SINK
1. Position template on countertop. Locate the template
front to rear, so that sink will not interfere with the
cabinet.
2. Trace a line around the template. Cut along the inside
of this line to provide opening. This size opening will
provide approximately a 1/2" Reveal. (Please see item
#2 under Attention Installer.)
3. Locate and drill the mounting holes (following the
countertop manufacturer’s instructions) as shown
above. Holes should allow even spacing of mounting
brackets around the sink. Type of fasteners to be as
recommended by countertop supplier.
INSTALLING SINK
4. Fasten mounting brackets to countertop loosely.
5. Using a good quality silicone caulk, apply a bead
evenly all around the top of the sink flanges.
6. Position and align sink over the countertop opening.
Press silicone onto countertop.
7. Tighten fasteners until mounting brackets are snug
against sink.
8. Check alignment of sink to countertop opening.
9. Tighten down fasteners evenly. Be careful not to over-
tighten. Remove excess silicone.
STEP ONE
Place sink upside down on countertop surface.
Place sink in exact position for installation
and pencil completely around sink to create a sink
outline.
STEP TWO
Scribe actual opening 5/16 inside the sink outline,
all the way around.
STEP THREE
Cut out on inside of this line (following the manu-
facturers instructions). If sink comes with a faucet
deck, install faucet to sink and tighten.
STEP FOUR
Apply a silicone sealer around entire perimeter of
opening. Set bowl into opening.
STEP FIVE
From underside of sink, place one clamp near
center, tighten by hand enough to hold sink in
place. This applies to all four sides. Fasten balance
of clamps in position and hand tighten. (Usually 3
clamps on end, balance divided equally front and
back). Space clamps as equally as possible.
STEP SIX
From the top side, check seal between rim and
countertop. Adjust clamps to high spot if necessary.
STEP SEVEN
Tighten clamp evenly with screwdriver or socket
wrench in rotation until sink is seated with counter-
top. Caution: Do not overtighten clamps.
II
. Drop-in/
Self Rim Sinks
COUNTERTOP
SINK
CLAMP
PLASTIC
PAD
SEALER
1
7
POSITION SINK ON
COUNTER UPSIDE DOWN.
4
DRAW LINE AROUND SINK.
DRAW LINE 5/16" INSIDE SINK OUTLINE.
CUT ON INSIDE LINE.
5/16"
SINK
SINK OUTLINE
1-1/2" RADIUS
5
APPLY SILICONE
SEALER AROUND
CUTOUT.
6
2
3
CLAMP DEVICE FOR RECTANGLE AND SQUARE
COPPER AND BRASS SINKS
CLAMP DEVICE FOR OVAL AND ROUND COPPER,
BRASS AND STAINLESS STEEL SINKS
SINK
CLAMP
THREADED STUD
ATTACHED TO THE SINK
COUNTERTOP
COUNTERTOP
SINK
SEALER
COUNTERTOP
CLAMP DEVICE FOR RECTANGLE AND SQUARE
STAINLESS STEEL SINKS
SINK
SILICONE
SEALER
7
5
6
7
5
6
NUT
SILICONE
SEALER
COUNTERTOP
SINK
SILICONE
SEALER
CLAMP
PLASTIC
PAD
Water Spotting
The quality of your water can affect your sinks appear-
ance. In areas with hard water or high iron content, a
brown surface stain can form on the sink. Additionally,
in areas with a high concentration of minerals, or with
over-softened water, a white film may develop on the
sink. To combat this problem, we suggest that you
rinse your sink thoroughly and towel dry it after each
use.
Liquid Soap
Do not allow concentrated liquid detergent to dry on
your sink. Most brands contain chemical additives that
will affect the finish.
Chlorides
Today, chlorides are found in most all soaps, deter-
gents, bleaches and cleansers. Chlorides are especially
not friendly to the stainless steel surface. They should
not come in contact with the surface of the sink for
extended periods. When these chemicals are used in
your sink, it should be thoroughly rinsed.
Foods
Foods containing salt or are acidic in nature can cause
pitting and corrosion. Avoid prolonged exposure and
do not allow them to dry onto the sink surface. Rinse
your sink thoroughly and towel dry after each use.
Specialty Collection Use and Care Guide
Specialty Collection Stainless Steel Sinks
Easy Care and Cleaning Instructions
Your Specialty Collection stainless steel sink will retain
its original appearance if after each use, the sink is
rinsed thoroughly and towel dried. Never use abrasive
cleaners or steel wool.
Specialty Collection Brass and Copper Sinks
Brass and copper have distinctive material properties
and are typically softer than other common metals.
Brass and copper have a living finish and their surfaces
tarnish naturally. You can expect tarnish, scratches,
and dents to appear in your sink over time. These
effects will not influence your sinks basic function, but
will produce the unique and appealing look associated
with brass and copper products. (A Speciality
Collection sink that becomes tarnished is not defective
and should not be returned.)
Easy Care and Cleaning Instructions
After each use, rinse the sink and towel dry it thor-
oughly. Residue left in the sink or on the surface will
cause the sink to tarnish more quickly. It is easier to
clean the sink promptly, than to remove tarnish later. To
clean your sink, use an ordinary mild detergent and soft
cloth, rinse it thoroughly with clean water, and dry it
with a soft cloth or towel.
Do not use harsh alkaline-
based, ammonia-based, or harsh acidic-based
cleaning chemicals or products to clean your sink.
Abrasive cleaners and scouring pads will scratch the
surface of your sink. For added protection, coat with a
fine automotive wax.
Stains and Tarnish
Remember, brass or copper sinks do not have a
protective coating. As for any fine brass or copper fix-
tures, to remove stains and tarnish, use a good quality
brass or copper cleaner. Follow the manufacturers
instructions.
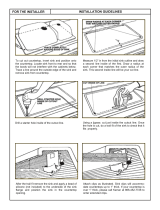
Oval and round shape sinks can be installed as either
undermount or drop-in/self rim applications. For under-
mount applications, install sink following undermount
instructions. For drop-in/self rim applications, install
sink following drop-in/self rim instructions (disregard
the 1-1/2" radius corners requirement).
NOTE: The template included for universal mount sinks
is for undermount installations only. Do not use the
template for drop-in/self rim installations.
III
.
Universal Mount Sinks
Specialty Collection
Installation Instructions
®
®
Elkay
2222 Camden Court
Oak Brook, IL 60523
©2005 Elkay
Printed in U.S.A.
www.elkayusa.com
(Rev. A 11/05) PART NO. 74180026
SPECIALTY COLLECTION WARRANTY
Elkay warrants to the original purchaser of an Elkay Specialty Collection sink that Elkay will, at its
option, replace, without charge, such product if it fails due to a manufacturing defect for a lifetime of
normal residential use. Product replacement does not include transportation cost or labor installation
cost. This warranty covers only the sink when a self-rimming drop-in sink is installed in a conventional
countertop surface or an undermount sink is installed in a conventional solid surface countertop in
residential applications. Elkay reserves the right to examine product in question and its installation
prior to replacement. This warranty does not apply to defect or damage caused by:
1. Failure to follow the recommended procedures for installation, care and maintenance.
2. Tarnish and discoloration.
3. Dents or scratches.
This warranty applies only to Specialty Collection sinks:
1. Used only in residential applications.
2. Which fail due to manufacturing defect.
3. Which have not been moved from original installation location.
Other Warranty Conditions
Our warranty does not cover product failure or damage caused by abusive treatment, misuse, envi-
ronmental factors, improper care and cleaning, damage due to handling or faulty installations or
claims of defect related to tarnish and discoloration. This warranty is extended only to the original
consumer purchaser of the product. This warranty does not cover shipping costs, labor costs, or any
other charges for such items as installation or replacement of the sink, diagnosis or replacement of
any faucet or component part, or any other expense or loss.
All incidental or consequential damages are specifically excluded. No additional warranties,
express or implied are given. Any implied warranty, including one of merchantability or fitness
for a particular purpose, is limited to the duration of this written warranty.
Some states do not allow the exclusion or limitation of incidental or consequential damages or limi-
tations on how long an implied warranty lasts, so the above limitations or exclusions may not apply
to you.
This warranty gives you specific legal rights, and you may also have other rights which vary from state
to state.
TO OBTAIN SERVICE UNDER WARRANTY
1. Write to: Elkay
Attention: Consumer Services
2222 Camden Court
Oak Brook, IL 60523
2. Include a letter containing the following information:
a. Date of purchase and installation
b. Description of nature of defect
c. Model number or description of model and/or component part if possible.
  • Page 1 1
  • Page 2 2
  • Page 3 3
  • Page 4 4

Elkay SCF16FBSH Installation guide

Category
Kitchen sinks
Type
Installation guide

Ask a question and I''ll find the answer in the document

Finding information in a document is now easier with AI