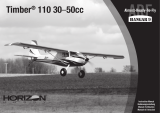
Evolution HAN5060 Owner's manual

Category
Engine
Type
Owner's manual

This manual is also suitable for

2
•SAFETY WARNINGS AND PRECAUTIONS
Read and follow all instructions and safety precautions
before use. Improper use can result in fi re, serious injury and
damage to property.
Components
Use only with compatible components. Should any
compatibility questions exist, please refer to the product
instructions, component instructions or contact the
appropriate Horizon Hobby offi ce.
Flight
Fly only in open areas to ensure safety. It is recommended
ying be done at radio control fl ying fi elds. Consult local
ordinances before choosing a fl ying location.
Propeller
Keep loose items that can become entangled in the propeller
away from the prop. This includes loose clothing or other
objects such as pencils and screwdrivers. Keep your hands
away from the propeller as injury can occur.
Batteries
Always follow the manufacturer’s instructions when using
and disposing of any batteries. Mishandling of Li-Po
batteries can result in fi re causing serious injury and
damage.
Small Parts
This kit includes small parts and should not be left
unattended near children as choking and serious injury could
result.
•SAFE OPERATING RECOMMENDATIONS
Inspect your model before every fl ight to ensure it is
airworthy.
Be aware of any other radio frequency user who may
present an interference problem.
Always be courteous and respectful of other users in your
selected fl ight area.
Choose an area clear of obstacles and large enough to
safely accomodate your fl ying activity.
Make sure this area is clear of friends and spectators
prior to launching your aircraft.
Be aware of other activities in the vicinity of your fl ight
path that could cause potential confl ict.
Carefully plan your fl ight path prior to launch.
Abide by any and all established AMA National Model
Aircraft Safety Code.
NOTICE
All instructions, warranties and other collateral documents are subject to change at the sole discretion of
Horizon Hobby, LLC. For up-to-date product literature, visit horizonhobby. com and click on the support tab for
this product.
Meaning of Special Language
The following terms are used throughout the product literature to indicate various levels of potential harm
when operating this product:
NOTICE: Procedures, which if not properly followed, create a possibility of physical property damage AND a
little or no possibility of injury.
CAUTION: Procedures, which if not properly followed, create the probability of physical property damage
AND a possibility of serious injury.
WARNING: Procedures, which if not properly followed, create the probability of property damage, collateral
damage, and serious injury OR create a high probability of superfi cial injury.
WARNING: Read the ENTIRE instruction manual to become familiar with the features of the product
before operating. Failure to operate the product correctly can result in damage to the product, personal
property and cause serious injury.
This is a sophisticated hobby product. It must be operated with caution and common sense and requires
some basic mechanical ability. Failure to operate this Product in a safe and responsible manner could result
in injury or damage to the product or other property. This product is not intended for use by children without
direct adult supervision. Do not use with incompatible components or alter this product in any way outside
of the instructions provided by Horizon Hobby, LLC. This manual contains instructions for safety, operation
and maintenance. It is essential to read and follow all the instructions and warnings in the manual, prior to
assembly, setup or use, in order to operate correctly and avoid damage or serious injury.
Age Recommendation: Not for children under 14 years. This is not a toy.
USING THE MANUAL
This manual is divided into sections to help make assembly easier to understand. Boxes () have been placed
next to each step. These help keep track of steps that have been completed.
6
108.3 in (275 cm)
1663.0 sq in (107.3 dm2) Total/Totale
78.2 in (199 cm)
16.5–17.5 lb (7.48–7.94 kg)
2-Stroke Gas/2-Takt Benziner/
2 temps Essence/2-Tempi Gas
30cc
Electric Power/Elektro Antrieb/
Moteur électrique (EP)/Motore elettrico
Power 160
5-channel (or greater) with 8 servos
5-Kanal (oder mehr) mit 8 servos
5 voies (ou plus) avec 8 servos
A 5 canali (o più) con 8 servo
Spinner•Spinner•Cône•Ogiva dell’elica
31/4-inch (83mm) (not included/nicht im Lieferumfang
enthalten/non inclus/non inclusa)
•SPECIFICATIONS•SPEZIFIKATIONEN
•SPÉCIFICATIONS•SPECIFICHE
•LARGE PARTS LAYOUT•BAUTEILE (OHNE KLEINTEILE)
•GRANDES PIÈCES•SCHEMA DEI COMPONENTI GRANDI
8
8
8
11
11
9
10
1
5
3
2
4
7
6
7
•REPLACEMENT PARTS•ERSATZTEILE•PIÈCES DE RECHANGE•RICAMBI
English Deutsch Français Italiano
1. HAN506001 Fuselage Rumpf Fuselage Fusoliera
2. HAN506002 Left Wing with Aileron and Flap Tragfl äche Links mit Querruder und Klappe Aile gauche avec aileron et volet Semiala sinistra con alettone e fl ap
3. HAN506003 Right Wing with Aileron and Flap Tragfl äche Rechts mit Querruder und Klappe Aile droite avec aileron et volet Semiala destra con alettone e fl ap
4. HAN506004 Stabilizer and Elevator Set Höhenruderset Set Plan horizontal et Gouverne de profondeur Set stabilizzatore ed elevatore
5. HAN506005 Fin and Rudder Finne u. Seitenruder Dérive et sa gouverne Direzionale e timone
6. HAN506006 Cowling Motorhaube Capot moteur Carenatura
7. HAN506007 Wing Tube Tragfl ächenverbinder Clé d’aile Tubo dell’ala
8. HAN506008 Landing Gear Set Fahrwerk Set Train d’atterrissage Set del carrello di atterraggio
9. HAN506009 Window Set Fenster Set Jeu de fenêtres Set fi nestrature
10. HAN506011 Fuselage Hatches (2) Rumpfklappen (2) Trappes du fuselage (2) Portelli fusoliera (2)
11. HAN506013 Wheel Pants Radverkleidung Carénage de roue Copriruote
•SMALL PARTS (NOT SHOWN)•KLEINTEILE (NICHT ABGEBILDET)•PETITES PIÈCES (NON REPRÉSENTÉES)•PARTI DI PICCOLE DIMENSIONI (NON MOSTRATE)
HAN506010 Hardware Set Kleinteile Set Sachet de visserie Set dei pezzi
HAN506014 Decal Sheet Dekorbögen Planche de décoration Foglio con decalcomanie
HAN497507 Assembled Gas Tank Eingebauter Benzintank Réservoir à carburant assemblé Serbatoio del carburante assemblato
8
•REQUIRED RADIO EQUIPMENT (NOT INCLUDED)•ERFORDERLICHE RC AUSRÜSTUNG (NICHT IM LIEFERUMFANG)
•EQUIPEMENT RADIO REQUIS (NON FOURNIS)•APPARECCHIATURE RADIO (NON COMPRESO)
Part # English Deutsch Français Italiano
SPMAR8000 AR8000 8-Channel DSMX
®
Receiver AR8000 8-Kanal DSMX Receiver Récepteur 8 voies DSMX AR8000 Ricevitore AR8000 DSMX a 8 canali
SPMSA6180 (8) A6180 Digital Aircraft Servo Spektrum A6180 Digital Flug Servo Servo A6180 Digital A6180 Servo digitale per aereo
SPMB3000LFRX 3000mAh 2S 6.6V LiFe Rx Battery 3000mAh 2S 6.6V LiFe Empfänger Akku Batterie RX Li-Fe 2S 6.6V 3000mA Batteria RX 3000mAh 2S 6.6V LiFe
EVOA112 Evolution 3 Wire Ignition/Rx Switch Evolution Zündschalter Interrupteur Evolution 3 fi ls Allumage/RX Evolution, interruttore a 3 fi li accensione/ricevitore
SPMA3001 (2) 6-inch Heavy-Duty Servo Extension Servokabelverlängerung 150 mm (6 inch) Rallonge de servo, 150 mm Estensione servo 6 pollici
SPMA3004 (4) 18-inch Heavy-Duty Servo Extension Servokabelverlängerung 460 mm (18 inch) Rallonge de servo, 460 mm Estensione servo 18 pollici
SPMA3005 (2) 24-inch Heavy-Duty Servo Extension Servokabelverlängerung 600 mm (24 inch) Rallonge de servo, 600 mm Estensione servo 24 pollici
JRPA215 (2) HD Servo Arms HD Servo Arms Bras de servo renforcés HD squadrette servo
•2-STROKE GAS/PETROL•2 TAKT BENZIN MOTOR•2 TEMPS ESSENCE• BENZINA 2 TEMPI
EVOE33GX Evolution
®
33GX 33cc (2.00 cu. in.) Gas/Petrol Engine Evolution 33GX 33cc (2.00 cu. in.) Benzinmotor Moteur 33cc (2.00 cu. in.) essence 33cc (2.00 cu. in.) Motore a benzina
APC17080W Competition Pattern Prop, 17 x 8 Competition Propeller, 17 x 8 Hélice 17 x 8 Competition Elica da competizione, 17 x 8
HAN116 Fuel Dot Filler with “T” Coupler Hangar 9 Tanknippel mit T Stück u. Überlauf Fitting Point de remplissage de carburant avec coupleur en T Bocchettone di riempimento carburante con
SPMB1450LFRX 1450mAh 2S 6.6V LiFe Rx Battery Spektrum 1450mAh 2S 6.6V Li-Fe Empfängerakku Batterie RX Li-Fe 2S 6.6V 1450mA Batteria Rx 1450mAh 2S 6.6V LiFe
HAN99005 3
1
/
4
inch Aluminum Spinner P-51 Hangar 9 3
1
/
4
Aluminium Spinner Cône aluminium 3
1
/
4
’ Type P-51 Ogiva alluminio da 82mm P-51
EVOA112 Evolution 3 Wire Ignition/Rx Switch Evolution Zündschalter Interrupteur Evolution 3 fi ls Allumage/RX Evolution, interruttore a 3 fi li accensione/ricevitore
HAN99057 3/8 x 24 Propeller Adapter Kit Hangar 9 3/8 x 24 Prop. Adapter Kit Adaptateur d’hélice 3/8x24 3/8 x 24 kit adattatore elica
•ELECTRIC POWER•ELEKTROANTRIEB•MOTEUR ELECTRIQUE (EP)•MOTORE ELETTRICO
EFLM4160A Power 160 Brushless Outrunner Motor, 245Kv E-fl ite Power 160 BL AL-Motor 245U/V Moteur Power 160 Brushless à cage tournante 245Kv Power 160 Motore brushless cassa rotante, 245Kv
CSE010010500 Phoenix Edge 80HV, 50V 80-Amp ESC Phoenix Edge 80HV, 50V 80-Amp ESC/Regler Contrôleur brushless HV 80A Phoenix Edge 80HV, 50V 80-Amp ESC
EFLAEC508 EC5™ Battery Series Harness, 10 AWG E-fl ite EC5 Akkukabel seriell, 10Awg Cordon de branchement de batteries en série, Interruttore batteria serie EC5, 10AWG
prises EC5
EFLB50005S30 (2) 5000mAh 5S 18.5V 30C LiPo, 10AWG EC5
E-fl ite 5000mAh 5S 18.5V 30C LiPo, 10AWG EC5 Batterie Li-Po 18.5v 5S 5000mA 30C, EC5 5000mAh 5S 18.5V 30C LiPo, 10AWG EC5
APC19100E Electric Propeller, 19 x 10E Elektro Propeller, 19 x 10E Hélice électrique 19 x 10E Elica per motore elettrico 19 x 10E
HAN99005 3
1
/
4
inch Aluminum Spinner P-51 Hangar 9 3
1
/
4
Aluminium Spinner Cône aluminium 3 1/4’ Type P-51 Ogiva alluminio da 82mm P-51
SPMA3003 12-inch Heavy-Duty Servo Extension Servokabelverlängerung 304mm (12 inch) Rallonge de servo, 304mm Estensione servo 12 pollici
HAN506012 EP Mount Set E-Motorhalter Set Jeu de renforts moteur EP Set di montaggio motore elettrico
9
•OPTIONAL ITEMS (NOT INCLUDED)•OPTIONALE TEILE (NICHT IM LIEFERUMFANG)•ELÉMENTS OPTIONNELS (NON FOURNIS)•ARTICOLI OPZIONALI (NON COMPRESO)
Part # English Deutsch Français Italiano
SPM9548 TM1000 DSMX Full Range Aircraft Telemetry Module Spektrum DSMX Full Range Telemetriemodul TM1000 Module de télémétrie avion TM1000 DSMX Modulo telemetria per aereo a piena portata
TM1000 DSMX
JRPG370A Aircraft Rate Gyro (For rudder use) Aircraft Rate Gyro (For rudder use) Gyro pour avion (Dérive) Gyro per aereo (per uso sul timone)
EFLA110 Power Meter E-fl ite Lastmessgerät Wattmètre Misuratore di potenza
HAN3626 Self-Stick Weights, 6 oz Selbstklebe Chassisgewichte 6 oz Poids autocollants, 170 grammes Pesi auto-adesivi da 170 gr
•OPTIONAL FLOATS•OPTIONALE SCHWIMMER•FLOTTEURS OPTIONNELS•GALLEGGIANTI OPZIONALI
HAN4580 1/4-Scale Cub Floats Hangar 9 Schwimmersatz : 1/4 Flotteurs pour Piper Cub 1/4 Galleggianti Cub scala 1/4
SPMSA6150 (2) A6150 HV High Torque Waterproof Metal Gear Servo Spektrum A6150 HV High Torque Servo m. Servo A6150 HV étanche, pignons métal A6150 Servo impermeabile alta coppia con
Metallgetriebe ingranaggi in metallo
SPMA3000 (2) 3-inch Heavy-Duty Servo Extension Servokabelverlängerung 75 mm (3 inch) Rallonge de servo, 75 mm Estensione servo 3 pollici
SPMA3008 (2) Heavy-Duty Y-Harness, 6-inch Spektrum Hochleistungs Y- Servokabel 15,24cm Cordon Y, 150mm Prolunga ad Y Heavy Duty, 15cm
JRPA025 (2) Deluxe Charge Jack Assembly Deluxe Ladebuchse Connecteur de charge Vari Jack per caricatore Deluxe
•OPTIONAL TUNDRA LANDING GEAR•OPTIONALES TUNDRA FAHRWERK•TRAIN AMORTI OPTIONNEL•CARRELLO OPZIONALE TUNDRA
HAN454008 PA-18 Landing Gear without Wheels PA-18 Fahrwerk ohne Räder PA-18 Train d’atterrissage sans roues PA-18 Carrello senza ruote
DUB600RV Big Wheels, 6 inch Große Räder, 152 mm Roues 6 pouces (15cm) Ruote grandi 152mm
•REQUIRED ADHESIVES (NOT INCLUDED)•ERFORDERLICHE KLEBSTOFFE (NICHT IM LIEFERUMFANG)•TYPES DE COLLES (NON FOURNIS)•ADESIVI NECESSARI (NON COMPRESO)
PAAPT09 Thin CA Sekundenkleber dünnfl üssig Colle cyano fi ne Sottile CA
PAAPT03 Medium CA Sekundenkleber mittel Colle cyano moyenne Medio CA
PAAPT15 Zip Kicker Aerosol, 2 oz Zip Kicker Aerosol, 2 oz Zip Kicker, bombe aérosol, 59ml Zip Kicker Aerosol, 2 oz
PAAPT35 15-minute Epoxy 15 Minuten Epoxy Époxy 15 minutes Colla epoxy 15 minuti
PAAPT39 30-minute Epoxy 30 Minuten Epoxy Époxy 30 minutes Colla epoxy 30 minuti
PAAPT42 Threadlock Schraubensicherungslack Frein-fi let Frenafi letti
10
•REQUIRED TOOLS (NOT INCLUDED)•BENÖTIGTES WERKZEUG (NICHT IM LIEFERUMFANG)•OUTILS REQUIS (NON FOURNIS)•ATTREZZI NECESSARI (NON COMPRESO)
English Deutsch Français Italiano
Box wrench: 7/16 inch, 1/2 inch, 5/8 inch Ringschlüssel 7/16 inch, 1/2 inch, 5/8 inch Clé hexagonales 7/16, 1/2 et 5/8 Chiavi: 7/16 inch, 1/2 inch, 5/8 inch
Crimping tool Crimpzange Pince à sertir Pinza crimpatrice
Drill Bohrer Mini-perceuse Trapano
Drill bit: 1/16-inch, 5/64 inch, 1/8 inch Bohrer: 1,5 mm, 2mm, 3mm Forêt : 1,5 mm, 2mm, 3mm Punte per trapano: 1,5 mm, 2mm, 3mm
Felt-tipped pen Faserstift Feutre fi n effaçable Pennarello
Flat fi le Flachfeile Lime plate Lima piatta
Hemostat Klemme Pince Hemostat Pinzetta
Hex wrench: 1.5mm, 2mm, 2.5mm, 3mm, Inbusschlüssel: 1,5mm, 2mm, 2,5mm, 3mm, Tournevis hexagonal : 1.5mm, 2mm, 2,5mm, 3mm, Chiave esag.: 1.5mm, 2mm, 2,5mm, 3mm,
5/64 inch, 3/32 inch, 7/64 inch, 1/8 inch, 5/32 inch 5/64 inch, 3/32 inch, 7/64 inch, 1/8 inch, 5/32 inch 5/64 inch, 3/32 inch, 7/64 inch, 1/8 inch, 5/32 inch 5/64 inch, 3/32 inch, 7/64 inch, 1/8 inch, 5/32 inch
Hobby and craft square Rechteck Equerre de modélisme Riga a squadra
Hobby knife: #11 blade Hobbymesser mit # 11 Klinge Couteau : Lame numéro 11 Taglierino: #11 lama
Hobby scissors Hobbyschere Ciseaux Forbici per hobby
Isopropyl alcohol Isopropyl Alkohol Alcool isopropylique Alcol isopropilico
Low-tack tape Klebeband m. geringer Klebekraft Adhésif de masquage Nastro a bassa aderenza
Medium grit sandpaper Schleifpapier mittel Papier à poncer grain moyen Carta vetrata media
Paper towels Papiertücher Papier absorbant Asciugamani di carta
Phillips screwdriver: #1, #2 Phillips Schraubendreher: #1,#2 Tournevis cruciforme: #1, #2 Cacciavite a croce: #1, #2
Pin vise Handbohrer Porte forets Trapano manuale
Pliers Zange Pince Pinze
Razor saw Säge Lame de rasoir Sega Razor
Ruler Lineal Réglet Righello
Scissors Schere Ciseaux Forbici
Side cutters Seitenschneider Pince coupante Lama laterale
T-pins T- Nadeln Epingles Spilli a T
11
•BEFORE STARTING ASSEMBLY
Remove parts from bag.
Inspect fuselage, wing panels, rudder and stabilizer for
damage.
If you fi nd damaged or missing parts, contact your place
of purchase.
If you fi nd any wrinkles in the covering, use a heat gun
(HAN100) and covering glove (HAN150) or covering iron
(HAN101) with a sealing iron sock (HAN141) to remove them.
Use caution while working around areas where the colors
overlap to prevent separating the colors.
Charge transmitter and receiver batteries.
Center trims and sticks on your transmitter.
For a computer radio, create a model memory for this
particular model.
Bind your transmitter and receiver, using your radio
system’s instructions.
IMPORTANT: Rebind the radio system once all control
throws are set. This will keep the servos from moving to their
endpoints until the transmitter and receiver connect. It will
also guarantee the servo reversal settings are saved in the
radio system.
•VOR DEM ZUSAMMENBAU
Entnehmen Sie zur Überprüfung jedes Teil der Verpackung.
Überprüfen Sie den Rumpf, Tragfl ächen, Seiten- und
Höhenruder auf Beschädigung.
Sollten Sie beschädigte oder fehlende Teile feststellen,
kontaktieren Sie bitte den Verkäufer.
Zum Entfernen von Falten in der Bespannung verwenden
Sie den Heißluftfön (HAN100) und Bespannhandschuh
(HAN150) oder das Folienbügeleisen (HAN141). Bitte achten
Sie bei überlappenden Farben, dass Sie diese sich bei dem
Bearbeitung nicht trennen.
Laden des Senders und Empfängers.
Zentrieren der Trimmungen und Sticks auf dem Sender.
Sollten Sie einen Computersender verwenden, resetten Sie
einen Speicherplatz und benennen ihn nach dem Modell.
Sender und Empfänger jetzt nach den Bindeanweisung
des Herstellers zu binden.
WICHTIG: Wir empfehlen dringend nachdem alle
Einstellungen vorgenommen worden sind, das Modell
neu zu binden. Dieses verhindert, dass die Servos in die
Endanschläge laufen bevor sich Sender und Empfänger
verbunden haben. Es garantiert auch, dass die
Servoreverseeinstellungen in der RC Anlage gesichert sind.
•AVANT DE COMMENCER L’ASSEMBLAGE
Retirez toutes les pièces des sachets pour les inspecter.
Inspectez soigneusement le fuselage, les ailes et les
empennages.
Si un élément est endommagé , contactez votre revendeur.
Si l’entoilage présente quelques plis, vous pouvez les lisser
en utilisant le pistolet à air chaud (HAN100) et le gant
(HAN150) ou le fer à entoiler (HAN101) avec la chaussette
de protection (HAN141). Agissez soigneusement dans les
zone ou plusieurs couleurs d’entoilage sont superposées afi n
d’éviter de les séparer.
ll est recommandé de préparer tous les éléments du
système de la radio.
Cela inclus, la charge des batteries comme la mise au
neutre des trims est des manches de votre émetteur.
Si vous utilisez une radio programmable, sélectionnez une
mémoire libre afi n d’y enregistrer les paramètres de ce
modèle.
Nous vous recommandons d’affecter maintenant le
récepteur à l’émetteur en suivant les instructions fournies
avec votre radio.
IMPORTANT: Il est hautement recommandé de
ré-affecter le système une fois que les courses seront
réglées. Cela empêchera les servos d’aller en butée lors de
la connexion du système. Cela garantit également que la
direction des servos est enregistrée dans l’émetteur.
•PRIMA DI INIZIARE IL MONTAGGIO
Togliere tutti i pezzi dalla scatola.
Verifi care che la fusoliera, l’ala e i piani di coda non siano
danneggiati.
Se si trovano parti danneggiate, contattare il negozio da
cui è stato acquistato.
Se si trovano delle rughe nella ricopertura, si possono
togliere usando una pistola ad aria calda (HAN100) e guanto
per ricopertura (HAN150), oppure un ferro per ricopertura
(HAN101) con la sua calza di protezione (HAN141). Usare
cautela quando si lavora in aree del rivestimento dove ci
sono dei colori sovrapposti, per evitare la loro separazione.
Caricare il trasmettitore e la batteria di volo.
Centrare stick e trim sul trasmettitore.
Con una radio computerizzata creare una nuova memoria
per questo modello.
Facendo riferimento alle istruzioni del radiocomando,
connettere (bind) trasmettitore e ricevitore.
IMPORTANTE: Ripetere la procedura di connessione
una volta regolate le corse, per evitare che i servi vadano a
ne corsa. Garantirà anche che le impostazioni di inversione
del servo vengano salvate nel sistema radio.
12
•ASSEMBLY SYMBOL GUIDE•MONTAGE SYMBOLE•GUIDE DES SYMBOLES POUR ASSEMBLAGE•GUIDA AI SIMBOLI DI ASSEMBLAGGIO
15
OIL
L
R
L
R
x2
CG
Use thin CA
Dünnfl üssigen
Sekundenkleber verwenden
Utilisez de la colle
cyanoacrylate fi ne
Usare colla ciano acrilica fi ne
Use a felt-tipped pen
Verwenden Sie einen Faserstift
Utilisez un feutre fi n effaçable
Usare un pennarello
Use 15-minute epoxy
Verwenden Sie 15 Minuten Epoxy
Utilisez de l’époxy 15 minutes
Usare una resina epossidica con
indurimento di 15 minuti
Apply oil
Öl verwenden
Appliquez lubricant
Applicare olio
Apply threadlock
Schraubensicherungslack verwenden
Utilisez du frein fi let
Applicare fuido threadlock
Assemble right and left
Links und rechts montieren
Assemblez à droite et à gauche
Assemblare destra e sinistra
Repeat multiple times
(as indicated)
Vorgang wiederholen
(wie angezeigt)
Répétez comme indiqué
Ripetere piu’ volte
(come indicato)
Canopy Glue
Kabinenhaubenkleber
Colle à verrière
Colla per capottine
Use hobby knife with
#11 blade
Verwenden Sie ein Hobbymesser mit #
11 Klinge
Utilisez un Couteau: Lame numéro 11
Usare taglierino per hobbistica con
lama numero 11
•FASTENERS•VERBINDUNGSELEMENTE•VISSERIE•ELEMENTI DI FISSAGGIO
BHCS
Flat Washer
Unterlegscheibe
Rondelle plate
Rondella piatta
Self-Tapping Screw
Selbstschneidene Schraube
Vis auto-taraudeuse
Vite autofi lettante
Threaded rod, threaded both ends
Gewindestangen, zwei Gewinde
Tringlerie fi letée des 2 côtés
Barretta con entrambe estremità fi lettate
Threaded rod, threaded one end
Gewindestange
Tringlerie fi letée d’un seul côté
Barretta con una estremità fi lettata
Setscrew
Madenschraube
Vis sans tête
Grano
Socket Head Cap Screw
Inbusschraube
Vis BTR
Vite a brugola
Hex Nut
Sechskantmutter
Ecrou hexagonal
Dado esagonale
Button Head Cap Screw
Halbrundschraube
Vis à tête bombée
Vite a brugola a testa bombata
Machine Screw
Maschinenschraube
Vis pas métal
Vite testa a croce
Nylon Wing Bolt
Tragfl ächenbolzen
Vis nylon de fi xation d’aile
Vite nylon per ali
Ball Link
Kugelgelenk
Articulation à rotule
Attacco a sfera
Metal Clevis
Gabelkopf
Chape métallique
Forcella metallica
M
13
1
x8
Use side cutters to trim one end of each fl ap hinge to the
length shown. The shortened end will fi t into the fl ap.
Kürzen Sie mit einem Cutter eine Seite des Scharniers auf die
abgebildete Länge.
Utilisez une pince coupante pour raccourcir une des
extrémités de la charnière du volet à la longueur indiquée. La
partie raccourcie sera insérée dans le volet.
Usare un tronchesino per accorciare una estremità delle
cerniere dei fl ap alla lunghezza indicata. La parte più corta è
da inserire nel fl ap.
The aileron and flap for each wing panel are
stapled together for the right and left wing panels.
Die Querruder und Klappen sind für jede
Tragflächenseite zusammen geheftet.
L’aileron et le volet pour chaque
panneau d’aile sont reliés ensemble pour
les panneaux d’aile droits et gauches.
L’alettone e il flap di ogni semiala
sono collegati insieme.
3
L
R
L
R
Fit the fl ap to the wing using the hinges.
Passen Sie die Klappe an die Tragfl äche mit den
Scharnieren an.
Placez le volet sur l’aile en utilisant les charnières.
Montare il fl ap sull’ala usando le cerniere.
4
L
R
L
R
Use a pin vise and 1/16-inch (1.5mm) drill bit to drill a hole
in the center of the aileron hinge slots in both the aileron
and trailing edge of the wing.
Bohren Sie auf der Flächen- und Ruderseite mit einem 1,5mm
Handbohrer in die Mitte der Scharnierschlitze je ein Loch.
Utilisez un porte-foret équipé d’un foret de 1.5mm pour
percer un trou au centre de chaque rainure de charnière des
ailerons au bord de fuite de l’aile.
Con una punta da 1,5mm forare al centro della fessura per
le cerniere dell’alettone, sia sull’alettone che sul bordo di
uscita dell’ala.
2
L
R
L
R
Slide the hinge into position. Position as shown, checking to
make sure it can move freely.
Schieben Sie das Scharnier in Position und überprüfen dabei
dass es sich frei bewegen kann.
Glisser la charnière en position. Positionner comme illustré,
en contrôlant le libre mouvement.
Mettere le cerniere in posizione, come si vede dalla fi gura,
accertandosi che si possano muovere liberamente.
•FLAP HINGING•ANSCHLAGEN DER KLAPPEN•ARTICULATION DES VOLETS•INCERNIERARE I FLAP
14
6
L
R
L
R
Slide the hinges into position with the T-pin resting against
the edge of the control surface.
Schieben Sie die Scharniere in die Schlitze und achten
darauf, dass die T-Nadel an der Kante des Ruders anliegt.
Mettre en place les charnières en les faisant glisser dans
leurs fentes respectives, avec l’épingle en appui contre le
bord de la gouverne.
Far scorrere in posizione le cerniere con il perno a T
appoggiato contro il bordo della superfi cie di controllo.
7
L
R
L
R
Fit the aileron to the wing panel and remove the T-pins from
the hinges. The gap between the aileron and wing must be
as close as possible.
Setzen Sie das Querruder in die Tragfl äche und entfernen
die T-Nadeln von den Scharnieren. Der Spalt zwischen dem
Ruder und der Tragfl äche sollte so gering wie möglich sein.
Installez l’aileron sur l’aile et retirez les épingle des
charnières. L’écart entre l’aileron et l’aile doit être le plus
réduit possible.
Inserire l’alettone sull’ala e togliere gli spilli a T dalle
cerniere. Lo spazio tra l’alettone e l’ala deve essere il più
piccolo possibile.
8
L
R
L
R
Use a piece of low-tack tape to hold the aileron in position.
The gap between the wing tip and aileron should be rather
small to fi t the fl ap into position on the wing.
Kleben Sie ein Stück Klettband um das Querruder in Position
zu halten. Die Lücke zwischen Tagfl ächenende und Querruder
sollte eher klein ausfallen, damit die Passung der Klappe
besser ist.
Utiliser du ruban adhésif de masquage pour maintenir
l’aileron en position. L’écart entre l’extrémité de l’aile et
l’aileron doit être le plus faible possible.
Usare un pezzo di nastro a bassa adesività per tenere
in posizione l’alettone. Lo spazio tra l’estremità alare e
l’alettone dovrebbe essere abbastanza piccolo per tenere il
ap in posizione sull’ala.
5
x8
Place a T-pin in the center of each hinge for the ailerons.
Setzen Sie eine T-Nadel in die Mitte der Scharniere für
die Querruder.
Placer une épingle au centre de chaque charnière d’aileron.
Mettere uno spillo a T al centro di ogni cerniera.
15
9
L
R
L
R
Adjust the position of the fl ap hinges so the fl ap aligns with
the aileron. When aligned, there should be a small gap of
1/32–1/16 inch (1–2mm)between the fl ap leading edge and
the wing. The purpose of the gap is allow the fl aps to reach
the neutral position without straining the servo.
Justieren Sie Position der Klappenscharniere so, dass die
Klappe auf einer Höhe mit dem Querruder ist. Nach dem
Ausrichten sollte nur eine kleine Lücke (1-2mm) zwischen
der hinteren Kante der Tragfl äche und Vorderkante der
Tragfl äche sein. Der Abstand sollte so groß sein, dass die
Klappe ohne das Servo zu überlasten auf neutral gefahren
werden kann.
Ajustez les positions des charnières de façon à aligner les
les volets avec les ailerons. Il doit avoir un écart de 1 à 2mm
entre l’aile et le bord d’attaque du volet. Cet écart permet au
volet de se replacer au neutre sans faire forcer le servo.
Regolare la posizione delle cerniere in modo che il fl ap si
allinei all’alettone. Lo spazio che ne risulta tra il bordo di
entrata del fl ap e l’ala dovrebbe essere di 1-2mm. Lo scopo
della fessura è quello di permettere al fl ap di raggiungere la
posizione neutra senza forzare il servo.
10
x8
Apply a small amount of oil to the fl ex point of the hinge to
prevent epoxy from entering the hinge.
Geben Sie einen kleinen Tropfen Öl auf das Scharniergelenk
um zu verhindern das dort Klebstoff eindringt.
Appliquer une petite quantité d’huile au point de rotation
de la charnière pour empêcher l’époxy de pénétrer dans
la charnière.
Mettere una piccola quantità di olio sul perno delle cerniere
per evitare che la colla le blocchi.
12
L
R
L
R
15
Use a toothpick to apply epoxy to both the exposed hinge and
the holes in the wing. Fit the fl ap to the wing, and check the
gap between the wing and fl ap.
Geben Sie mit einem Zahnstocher Epoxy auf das andere Ende
der Scharniere und die Öffnungen in der Tragfl äche. Passen
Sie die Klappe an die Tragfl äche an und prüfen bitte den
Spalt zwischen Tragfl äche und Klappe.
Utilisez un cure dent pour appliquer la colle epoxy dans les
trous de l’aile. Appliquez la colle epoxy sur l’extérieur de la
charnière toujours avec le cure-dent.
Sempre con uno stuzzicadenti applicare dell’altra colla
sulle estremità libere delle cerniere. Inserire i fl ap sull’ala,
verifi cando che ci sia un piccolo spazio tra ala e fl ap.
11
x8
15
Use a toothpick to apply epoxy inside each of the holes for
the fl ap hinges. Apply epoxy to the outside of the hinge using
a toothpick. Insert the hinges into the fl ap, making sure the
short end of the hinges are inserted into the fl ap.
Geben Sie mit einem Zahnstocher Epoxy in die Innenseite der
Löcher für die Klappenscharniere. Stecken Sie Scharniere
in die Klappe und achten dabei darauf die richtige = kurze
Seite in die Klappe zu stecken.
Utiliser un cure-dent pour appliquer de l’époxy à l’intérieur
de chacun des orifi ces destinés aux charnières des volets.
Appliquer de l’époxy à l’extérieur de la charnière en utilisant
un cure-dent. Insérez les charnières dans le volet en prenant
soin de bien insérer la partie courte dans le volet.
Con uno stuzzicadenti mettere della colla epoxy all’interno
di ogni foro per le cerniere dei fl ap. Mettere altra colla
epoxy all’esterno della cerniera, usando sempre lo
stuzzicadenti. Inserire le cerniere nei fl ap accertandosi che
sia la parte più corta.
16
13
L
R
L
R
Use a small amount of isopropyl alcohol and a paper towel to
remove any excess epoxy from around the hinges.
Entfernen Sie mit etwas Reinigungsalkohol und einem
Papiertuch überschüssigen Kleber von der Tragfl äche.
Utilisez de l’alcool dénaturé et du papier absorbant pour
retirer l’excès de colle autour des charnières.
Con un po’ di alcool isopropilico e un fazzoletto di carta
togliere la colla eccedente intorno alle cerniere.
14
L
R
L
R
Check the alignment of the fl ap to the aileron and make any
nal adjustments to the hinges, then use low-tack tape to
hold the fl ap in position until the epoxy fully cures.
Prüfen Sie die Ausrichtung der Klappe zu dem Querruder und
führen die fi nalen Einstellungen an den Scharnieren durch.
Fixieren Sie die Klappe mit Kreppband bis der Klebstoff
vollständig getrocknet ist.
Contrôlez l’alignement du volet par rapport à l’aileron et si
nécessaire effectuez un dernier ajustement des charnières,
puis utilisez de l’adhésif de masquage pour maintenir le
volet en position durant le séchage de la colle epoxy.
Verifi care l’allineamento tra fl ap e alettoni e regolare le cerniere,
poi, usando del nastro a bassa adesività, tenere i fl ap in
posizione fi nché la colla epoxy non è completamente asciutta.
15
L
R
L
R
Once the epoxy has fully cured, apply a few drops of thin CA
where the hinges enter the fl ap and wing to fully secure their
position.
Ist der Epoxykleber vollständig getrocknet geben Sie ein
paar Tropfen dünnfl üssigen Sekundenkleber an die Stellen
wo das Scharnier in die Klappe eintritt, um die Verklebung
vollständig zu sichern.
Une fois le séchage de la colle époxy terminé, appliquez
quelques gouttes de colle CA au niveau des jonctions des
charnières pour sécuriser leur position.
Quando la colla è asciutta, mettere alcune gocce di colla CA
liquida nel punto in cui le cerniere entrano nei fl ap e nell’ala
per fi ssarle saldamente.
•HINGING THE AILERONS
•MONTAGE DER QUERRUDER
•POSE DES CHARNIÈRES DES AILERONS
•INCERNIERARE GLI ALETTONI
1
L
R
L
R
Remove the tape from the aileron at the wing tip. Position
the aileron so that the gap between the tip and aileron, and
between the fl ap and aileron, are the same.
Entfernen Sie das Klebeband vom Querruder an der
Tragfl ächenspitze. Positionieren Sie das Querruder so, dass
der Spalt zwischen Flächenspitze und Querruder sowie
zwischen Klappe und Querruder gleich ist.
Retirez le morceau d’adhésif maintenant l’aileron à
l’extrémité de l’aile. Positionnez l’aileron de façon à avoir un
écart identique entre le volet et l’extrémité de l’aile.
Togliere il nastro dagli alettoni all’estremità dell’ala.
Posizionare gli alettoni in modo che lo spazio tra le estremità
alari e i fl ap sia lo stesso.
17
2
L
R
L
R
Apply thin CA to the top and bottom of each hinge. Once the
CA cures, gently pull on the fi xed surface and control surface
to make sure the hinges are glued securely. If not, apply
additional CA to secure each of the hinges.
Tragen Sie oben und unten an jedem Scharnier eine dünne
Linie Sekundenkleber auf. Wenn der Klebstoff ausgehärtet
ist, ziehen Sie vorsichtig am Ruder und Ruderblatt um
sicherzustellen, dass die Scharniere fest angeklebt sind. Ist
dies nicht der Fall, tragen Sie noch etwas Sekundenkleber
auf, um die Scharniere zu befestigen.
Appliquer de la colle cyano fi ne sur le dessus et le dessous
de chaque charnière. Une fois la colle cyano sèche, tirer
doucement sur la surface fi xe et la gouverne pour vérifi er si
les charnières sont solidement collées. Si ce n’est pas le cas,
appliquer davantage de colle cyano pour assurer la fi xation
des charnières.
Applicare uno strato sottile di colla CA nella parte alta e in
quella bassa di ciascuna cerniera. Una volta che la colla CA
si sarà seccata, sollevare delicatamente la superfi cie fi ssa e
la superfi cie di controllo per accertarsi che le cerniere siano
saldamente incollate. Se non lo sono, applicare altra colla
CA per bloccare entrambe le cerniere.
1
L
R
L
R
Use a piece of low-tack tape to hold the aileron in position
when installing the control horn.
Fixieren Sie das Querruder mit Kreppband bei der Montage
des Ruderhornes.
Utilisez de l’adhésif de masquage pour maintenir l’aileron en
position durant l’installation du guignol.
Usare un pezzo di nastro a bassa adesività per tenere gli
alettoni in posizione mentre si installano le squadrette.
2
L
R
L
R
Use a felt-tipped pen to mark the aileron servo cover near
the trailing edge of the wing.
Markieren Sie die Querruderservoabdeckung in der Nähe der
Hinterkante der Tragfl äche mit einem Faserstift.
Utilisez un feutre fin effaçable pour tracer un repère sur
le couvercle du servo d’aileron à proximité du bord de
fuite de l’aile.
Usare un pennarello per segnare la copertura dei servi vicino
al bordo di uscita dell’ala.
3
L
R
L
R
Move the aileron through its range of throw to break in
the hinges.
Bewegen Sie das Querruder in seinem Bewegungsspielraum
um die Scharniere gängig zu machen.
Actionnez plusieurs fois l’aileron sur tout son débattement
pour roder les charnières.
Muovere gli alettoni in tutta la loro corsa per fare un
rodaggio alle cerniere.
•AILERON AND FLAP SERVO INSTALLATION
•EINBAU DES QUERRUDER- UND DES KLAPPENSERVOS
•INSTALLATION DES SERVOS D’AILERON ET DE VOLET
•INSTALLAZIONE SERVI ALETTONI E FLAP
18
3
L
R
L
R
Remove the aileron servo cover from the wing, and use a felt-tipped pen to mark the trailing edge inside the cover. The servo
output will face toward the trailing edge when installed. Remove the mark on the outside of the cover and prepare the servo
mounting screws holes by following the steps outlined for the fl ap servo installation.
Entfernen Sie die Querruderservoabdeckung von der Tragfl äche und markieren mit einem Faserstift die Hinterkante auf der
Innenseite der Abdeckung. Der Servoabtrieb zeigt zur Hinterkante. Entfernen Sie die Markierung auf der Oberseite und bereiten
die Servoschraublöcher wie bereits bei dem Einbau der Klappenservos vor.
Retirez de l’aile la trappe du servo d’aileron, prenez soin de repérer l’orientation du support de servo en utilisant un feutre fi n.
La tête du servo sera orientée vers le bord de fuite de l’aile quand il sera installé. Effacez la marque tracée à l’extérieur et
préparez les trous des vis de fi xation en suivant les instructions d’installation des servos des volets.
Togliere dall’ala la copertura del servo, e usando un pennarello segnare al suo interno da che parte si trova il bordo di
uscita. L’uscita del servo sarà rivolta verso il bordo di uscita, quando installato. Togliere il segno all’esterno della copertura e
preparare i fori per le viti di fi ssaggio del servo seguendo la procedura utilizzata prima per l’installazione dei servi per i fl ap.
Inspect the glue joint between the servo mount and hatch. Apply medium CA to secure if the joint appears loose.
Prüfen Sie die Verklebung zwischen dem Servohalter und Haube. Sichern
Sie die Verklebung mit mittelflüssigen Sekundenkleber.
Inspectez le joint de colle reliant le support de servo au couvercle.
Appliquez de la colle CA si le collage vous paraît insuffisant.
Controllare gli incollaggi tra il supporto servo e il portello di copertura. Mettere
della colla CA media per rinforzare se la giuntura non sembra perfetta.
4
L
R
L
R
Secure the aileron servo using the hardware included with the servo and a 2mm hex wrench. With the servo centered, secure
the servo arm to the servo using the screw provided with the servo and a 2.5mm hex wrench. Use side cutters to remove the
arms that will interfere with the operation of the servo, leaving only the arm that is perpendicular to the servo centerline and
is exiting the slot in the servo cover.
Montieren Sie das Servo mit den im Lieferumfang befi ndlichen Schrauben und einem 2,5mm Inbusschlüssel für den Servoarm.
Entfernen Sie mit einem Seitenschneider alle Servorarme bis auf den einen der rechtwinklig zur Servomittenline ist und durch
den Schlitz der Servoabdeckung paßt.
Fixez le servo d’aileron à l’aide des accessoires inclus avec celui-ci et une clé BTR de 2mm. Placez le servo au neutre,
installez le palonnier à la perpendiculaire de la ligne centrale du servo en utilisant la vis fournie avec le servo et une clé BTR
2.5mm. Utilisez une pince coupante pour supprimer les parties inutilisées du palonnier.
Fissare il servo alettoni usando le sue viti e una chiavetta esagonale da 2mm. Con il servo centrato, fi ssare la sua quadretta
con la vite fornita insieme al servo e una chiavetta esagonale da 2,5mm. Usare un tronchesino per togliere dalla squadretta
i bracci che non servono e che potrebbero interferire con i movimenti, lasciando solo quello perpendicolare alla linea centrale
del servo che esce dalla fessura praticata sulla copertura del servo.
The linkage will attach to the hole that is 13/16 inch (20mm) from the center of the servo arm.
Die Anlenkung wird in das Loch gesteckt das 20mm von der Mitte des Servoarms ist.
La tringlerie sera reliée au trou se situant à 20mm de la tête du servo.
Il rinvio si collega al foro che si trova a 20mm dal centro della squadretta del servo.
19
5
L
R
L
R
Secure a 24-inch (600mm) extension to the servo lead using
string or dental fl oss.
Sichern Sie eine 24-inch Servoverlängerung (600mm) mit
einer Schlaufe aus festen Garn oder Zahnseide.
Fixer une rallonge (600mm) au câble du servo avec de la
celle ou du fi l dentaire.
Fissare saldamente una prolunga da 600mm al connettore
che esce dal servo, usando del fi lo interdentale.
7
L
R
L
R
Remove the fl ap servo cover from the wing, and use a felt-
tipped pen to mark the trailing edge inside the cover. The servo
output will face toward the trailing edge when installed. The
mark on the outside of the cover can then be removed.
Entfernen Sie die Servoklappenabdeckung und markieren
mit einem Faserstift die Hinterkante in der Abdeckung.
Der Servoausgang zeigt zur Hinterkante wenn eingebaut.
Die Markierung auf der Oberseite der Abdeckung kann
entfernt werden.
Retirez de l’aile la trappe du servo de volet, prenez soin
de repérer l’orientation du support de servo en utilisant
un feutre fin. La tête du servo sera orientée vers le bord
de fuite de l’aile quand il sera installé. Effacez la marque
tracée à l’extérieur.
Togliere dall’ala la copertura per il servo dei fl ap e usando
un pennarello, segnare al suo interno il bordo di uscita.
L’uscita del servo sarà rivolta verso il bordo di uscita
quando installato. Togliere il segno all’esterno della
copertura e preparare i fori per le viti di fi ssaggio del servo
seguendo la procedura utilizzata prima per l’installazione
dei servi per i fl ap.
8
L
R
L
R
Tie the string located inside the wing to the end of the 24-
inch (600mm) extension. Pull the extension to the opening
for the fl ap servo.
Knoten Sie den Faden an das Ende der 600mm
Verlängerung. Ziehen Sie das Ende der Verlängerung durch
die Öffnung des Klappenservos.
Nouez la fi celle située dans l’aile autour de l’extrémité
de la rallonge de 600mm. Tirez la rallonge dans l’aile par
l’ouverture du servo de volet.
Legare il cordino posizionato all’interno dell’ala al terminale
della prolunga da 600mm. Tirare la prolunga attraverso
l’apertura per il servo dei fl ap.
6
L
R
L
R
Use a felt-tipped pen to mark the fl ap servo cover near the
trailing edge of the wing.
Markieren Sie mit einem Faserstift die Klappenabdeckung an
der hinteren Kante der Tragfl äche.
Utilisez un feutre fi n effaçable pour tracer un repère sur le
couvercle du servo de volet à proximité du bord de fuite de l’aile.
Con un pennarello segnare la copertura del servo dei fl ap
vicino al bordo di uscita dell’ala.
20
9
L
R
L
R
M2 x 12
x6
Use a #1 Phillips screwdriver to tighten the screws that
secure the aileron servo cover to the wing.
Schrauben Sie die Abdeckung mit einem #1 Phillips
Schraubendreher fest.
Utilisez un tournevis Phillips #1 pour serrer les vis de fi xation
du couvercle de servo d’aileron.
Usare un cacciavite Phillips #1 per stringere le viti che
ssano la copertura del servo all’ala.
11
L
R
L
R
Use a hobby knife and #11 blade to remove the control
horn backplate from the control horn. The backplate can
be discarded.
Schneiden Sie mit einem Hobbymesser die Rückplatte vom
Ruderhorn ab. Die Rückplatte wird nicht benötigt.
Utilisez un couteau de modélisme et une lame #11 pour
séparer la platine arrière du guignol. La platine arrière ne
serra pas utilisée.
Usando un tagliabalsa con lama #11, togliere la piastrina
posteriore dalla squadretta perché non verrà usata.
12
L
R
L
R
Position the control horn at the mark made in the previous step.
Set the control horn back from the bevel 3/32 inch (2mm). Mark
the locations for the control horn mounting screws.
Positionieren Sie das Ruderhorn an der Markierung und
2mm von der Kante entfernt. Markieren Sie die Positionen
für die Bohrlöcher.
Placez le guignol sur les marques tracées à l’étape précédente.
le guignol doit être placé 2mm en arrière de l’arrête de
l’aileron. Marquez les emplacements des vis de fi xation.
Posizionare la squadretta di controllo sul segno fatto nel
passaggio precedente. Posizionare la squadretta di controllo
2 mm dietro alla ruota dentata. Segnare le posizioni per le
viti di montaggio della squadretta di controllo.
10
L
R
L
R
Use a square against the hinge line of the aileron and
aligned with the center of the slot for the servo arm to mark
the locations for the aileron control horn.
Zeichnen Sie mit einem Lineal die Gestängelinie von
der Mitte des Servoschlitzes um die Position des
Queruderhorns zu ermitteln.
Utilisez une équerre, placez-la contre la ligne de charnière
de l’aileron et alignez-la par rapport à la rainure du bras de
servo pour défi nir la position du guignol d’aileron.
Appoggiare una squadra lungo la linea di cerniera degli
alettoni allineandola con il centro delle fessure per
le squadrette dei servi per segnare la posizione delle
squadrette degli alettoni.
21
13
L
R
L
R
Use a pin vise and 1/16-inch (1.5mm) drill bit to drill the
holes for the control horn mounting screws. Use care not to
accidentally drill through the top of the aileron.
Bohren Sie mit dem Handbohrer 1,5mm die
Befestigungslöcher für das Ruderhorn. Bitte achten
Sie darauf nicht versehentlich durch die Oberseite des
Querruders zu bohren.
Utiliser un porte-foret et un foret de 1,5 mm pour percer les
trous destinés aux vis de fi xation du guignol de commande.
Veiller à ne pas percer accidentellement le dessus de l’aileron.
Usare un trapano manuale e una punta per trapano da 1,5
mm per fare i fori per le viti di montaggio della squadretta di
controllo. Fare attenzione a non perforare accidentalmente la
parte superiore dell’alettone.
14
L
R
L
R
M2 x 12
x6
Use a #1 Phillips screwdriver to thread a screw into each hole, cutting threads in the surrounding wood. Remove the screws,
then apply a few drops of thin CA in each hole to harden those threads. Once the CA fully cures, secure the aileron control
horn to the aileron using the screws listed and a #1 Phillips screwdriver.
Drehen Sie mit einem #1 Philipps Schraubendreher die Schrauben in jedes Loch um die Gewinde zu schneiden. Drehen Sie
die Schrauben wieder heraus und geben ein paar Tropfen dünnfl üssigen Sekundenkleber in die Öffnung um die Gewinde zu
härten. Montieren Sie nach härten des Klebers das Ruderhorn mit einem #1 Philips Schraubendreher.
Utilisez un tournevis Phillips #1 pour visser une vis dans chacun des trous pour tailler les fi lets dans le bois. Retirez les vis
et placez une goutte de colle CA dans chaque trou pour renforcer les fi lets. Une fois le séchage de la colle terminé. Utilisez le
tournevis Phillips #1 pour visser les vis listées.
Usare un cacciavite Phillips #1 per avvitare una vite in ogni foro e fi lettare il legno circostante. Togliere le viti e mettere nei
fori alcune gocce di colla CA per indurire la fi lettatura. Quando la colla è asciutta, fi ssare agli alettoni le loro squadrette
usando le viti indicate.
Remove the tape holding the aileron at this time.
Entfernen Sie das Klebeband dass das Querruder sichert.
Vous pouvez maintenant retirer l’adhésif maintenant l’aileron en position.
A questo punto togliere il nastro adesivo che fissava gli alettoni.
15
x4
x4
M
Cut a piece of silicone fuel tubing (not included) to a length of
1/4 inch (6mm). Slide the tubing over the barrel of the clevis.
Schneiden Sie ein Stück Silikonschlauch (nicht im
Lieferumfang) auf 6mm Länge. Schieben Sie den Schlauch
über den Fuß des Gabelkopfes.
Coupez un morceau de durite silicone (non fournie) de 6mm
et glissez-le sur la chape métallique.
Tagliare un tubetto di silicone (non incluso) lungo circa 6mm
e inserirlo sul barilotto della forcella.
23
20
L
R
L
R
Center the fl ap servo using the radio system. Place the servo
arm on the servo so the arms are perpendicular to the servo
center line. Do not secure the servo at this time.
Zentrieren Sie das Klappenservo mit der Fernsteuerung.
Setzen Sie den Servoarm so auf, dass die Arme rechtwinklig
zur Servomittenlinie sind. Schrauben Sie das Servo jetzt noch
nicht fest.
Placez le servo au neutre, installez le palonnier à la
perpendiculaire de la ligne centrale du servo. Ne pas fi xer le
servo durant cette étape.
Con il radiocomando centrare il servo dei fl ap. Fissare
la squadretta del servo in modo che il suo braccio sia
perpendicolare alla linea centrale del servo. A questo punto
non fi ssare ancora il servo.
21
L
R
L
R
Attach the servo arm to the fl ap servo so the arm is
perpendicular to the servo center line. Use a 2.5mm hex
wrench to tighten the screw securing the arm. With the
output facing the trailing edge of the wing, use side cutters
to remove the unused arms.
Setzen Sie den Servoarm auf das Klappenservon so auf,
dass er rechtwinklig zur Servomittenlinie ist. Drehen Sie die
Schraube mit einem 2.5mm Inbusschlüssel fest. Der Abtrieb
zeigt zur Hinterkante der Tragfl äche. Schneiden Sie nicht
genutzte Servoarme mit einem Seitenschneider ab.
Installez le palonnier à la perpendiculaire de la ligne
centrale du servo en utilisant la vis fournie avec le servo
et une clé BTR 2.5mm. Utilisez une pince coupante pour
supprimer les parties inutilisées du palonnier. La tête du
servo sera orientée vers le bord de fuite de l’aile.
Fissare la squadretta al servo dei fl ap in modo che sia
perpendicolare alla sua linea centrale. Stringere la vite
della squadretta con una chiavetta esagonale da 2,5mm.
Con l’uscita rivolta verso il bordo di uscita dell’ala, con
un tronchesino tagliare i bracci della squadretta che non
vengono usati.
23
x4
x4
M
Cut a piece of silicone fuel tubing (not included) to a length of
1/4 inch (6mm). Slide the tubing over the barrel of the clevis.
Schneiden Sie ein Stück Silikonschlauch (nicht im
Lieferumfang) auf 6mm Länge. Schieben Sie den Schlauch
über den Fuß des Gabelkopfes.
Coupez un morceau de durite silicone (non fournie) de 6mm
et glissez-le sur la chape métallique.
Tagliare un tubetto di silicone (non incluso) lungo circa 6mm
e inserirlo sul barilotto della forcella.
22
L
R
L
R
Secure the fl ap servo to the mount using the screws provided
with the servo and a 2mm hex wrench.
Schrauben Sie das Klappenservo mit den Schrauben aus
dem Lieferumfang und einem 2mm Inbusschlüssel fest.
Fixez le servo de volet à l’aide des accessoires inclus avec
celui-ci et une clé BTR de 2mm.
Fissare al supporto il servo dei fl ap usando le sue viti con
una chiavetta esagonale da 2mm.
24
24
x2
x4
4-40
4-40 x 3
3
/
4
inch
x2
Thread 4-40 nuts and the clevises prepared in the previous
step onto the threaded rod. Start with the length shown, which
will be adjusted to the proper length later in the manual.
Drehen Sie die 4.40 Muttern und den Gabelkopf den Sie
im letzten Schritt vorbereitet haben auf das Gestänge.
Justieren Sie die Länge wie abgebildet, die Feineinstellung
wird später durchgeführt.
Vissez les écrous 4-40 et les chapes précédemment
préparées à la tringlerie. Commencez par les placer à la
distance indiquée sur l’illustration, la longueur sera ajustée
par la suite.
Avvitare sulla barra fi lettata i dadi 4-40 e le forcelle preparate
prima. Iniziare con la lunghezza indicata che potrà essere
variata in seguito secondo le istruzioni di questo manuale.
25
L
R
L
R
Attach the linkage to the outer hole of the servo arm, which
is 5/8 inch (16mm) from the center of the arm.
Schließen Sie die Anlenkung an den äußeren Arm des Servos
an der 16mm von der Mitte entfernt ist.
Connectez la tringlerie ou trou du bras de servo se situant à
16mm du centre.
Fissare la barretta di rinvio al foro più esterno della squadretta
servo, che si trova a 16mm dal centro del braccio.
27
L
R
L
R
Tie the string to the extensions for both the fl ap and aileron
servos at the opening for the fl ap servo.
Knoten Sie die Schnur an die Servokabelverlängerungen der
Klappen- und Querruderkabel.
Nouez la fi celle située dans l’aile autour des rallonges de volet
et d’aileron, au niveau du compartiment du servo de volet.
Legare uno spago alle prolunghe per i servi di fl ap e alettoni
attraverso l’apertura per il servo dei fl ap.
26
L
R
L
R
Secure a 6-inch (150mm) extension to the servo lead using
string or dental fl oss.
Sichern Sie eine 9inch Servoverlängerung (150mm) mit einer
Schlaufe aus festen Garn oder Zahnseide.
Fixer une rallonge (150mm) au câble du servo avec de la
celle ou du fi l dentaire.
Fissare saldamente una prolunga da 150mm al connettore
che esce dal servo, usando del fi lo interdentale.
25
28
L
R
L
R
Use the string to pull the extensions to the wing root. Remove the string and fi t the extensions into the notch as shown in the
second photo.
Ziehen Sie die Verlängerung mit der Schnur durch die Tragfl äche. Entfernen Sie danach die Schnur und führen die Stecker zur
Sicherung in die Nase der Öffnung.
Tirez délicatement les rallonges à travers l’aile jusqu’à l’emplanture. Retirez la fi celle et glissez les rallonges dans l’encoche
comme sur la deuxième photo.
Con lo spago tirare le prolunghe fi no alla radice dell’ala. Togliere lo spago e inserire le prolunghe nell’intaglio apposito, come
si vede dalla seconda immagine.
Wrap a small piece of low-tack tape around the extension for the flap servo near
the connector so it can be easily identified when attaching the wing.
Wickeln Sie ein kleines Stück Kreppband um die Verlängerung des Klappenservo um
es später bei dem Zusammenbau der Tragfläche leichter zu identifizieren.
Entourez la rallonge des volets d’un petit morceau d’adhésif à proximité de la
prise afin de l’identifier facilement quand vous reliez l’aile au fuselage.
Avvolgere un pezzo di nastro a bassa adesività intorno alla prolunga per il servo dei flap,
vicino al connettore, per poterli riconoscere facilmente quando si monta l’ala.
29
L
R
L
R
Insert the fl ap servo assembly into the wing with the servo
output facing the trailing edge. Guide the linkage out
through the hole in the wing trailing edge near the fl ap
control horn.
Setzen Sie den Deckel mit dem montierten Klappenservo
in die Tragfl äche mit dem Abtrieb zur Flächenhinterkante.
Führen Sie die Anlenkung durch die Öffnung zum Ruderhebel
der Klappe.
Insérez le servo de volet et son support dans son
emplacement, la tête du servo orientée vers le bord de fuite de
l’aile. Glissez la tringlerie et faites la sortir par l’orifi ce situé
au bord de fuite de l’aile à proximité du guignol du volet.
Inserire il servo dei fl ap fi ssato al suo supporto all’interno
dell’ala con l’albero di uscita rivolto verso il bordo di uscita
dell’ala. Guidare il rinvio attraverso il foro nel bordo di uscita
dell’ala, vicino alla squadretta dei fl ap.
30
L
R
L
R
Attach the linkage to the fl ap control horn.
Schließen Sie die Anlenkung am Klappenruderhorn an.
Connectez la tringlerie du volet à son guignol.
Collegare il rinvio alla squadretta dei fl ap.
  • Page 1 1
  • Page 2 2
  • Page 3 3
  • Page 4 4
  • Page 5 5
  • Page 6 6
  • Page 7 7
  • Page 8 8
  • Page 9 9
  • Page 10 10
  • Page 11 11
  • Page 12 12
  • Page 13 13
  • Page 14 14
  • Page 15 15
  • Page 16 16
  • Page 17 17
  • Page 18 18
  • Page 19 19
  • Page 20 20
  • Page 21 21
  • Page 22 22
  • Page 23 23
  • Page 24 24
  • Page 25 25
  • Page 26 26
  • Page 27 27
  • Page 28 28
  • Page 29 29
  • Page 30 30
  • Page 31 31
  • Page 32 32
  • Page 33 33
  • Page 34 34
  • Page 35 35
  • Page 36 36
  • Page 37 37
  • Page 38 38
  • Page 39 39
  • Page 40 40
  • Page 41 41
  • Page 42 42
  • Page 43 43
  • Page 44 44
  • Page 45 45
  • Page 46 46
  • Page 47 47
  • Page 48 48
  • Page 49 49
  • Page 50 50
  • Page 51 51
  • Page 52 52
  • Page 53 53
  • Page 54 54
  • Page 55 55
  • Page 56 56
  • Page 57 57
  • Page 58 58
  • Page 59 59
  • Page 60 60
  • Page 61 61
  • Page 62 62
  • Page 63 63
  • Page 64 64
  • Page 65 65
  • Page 66 66
  • Page 67 67
  • Page 68 68
  • Page 69 69
  • Page 70 70
  • Page 71 71
  • Page 72 72

Evolution HAN5060 Owner's manual

Category
Engine
Type
Owner's manual
This manual is also suitable for

Ask a question and I''ll find the answer in the document

Finding information in a document is now easier with AI