Page is loading ...

www.lnchome.comPage: ‐1‐/4
ItemNumber:A0224108
WARNING(Toreducetheriskoffire,electricshock,orinjurytopersons):
1. Wesuggestinstallationbyalicensedelectrician.
2. Pleasereadtheinstructioncarefullyandsaveitasyoumayneeditatlatertime.
3. Beforeyoustart,NEVERattemptanyworkwithoutshuttingofftheelectricityuntiltheworkisdone.A).Gotothe
mainfuse,orcircuitbreaker,boxinyourhome.Placethemainpowerswitchinthe“OFF”position.B).Placethewall
switchinthe“OFF”position.
4. Mounting surface should be clean, dry, flat, strong enough and 1/4”largerthanthecanopyonallside.Anygaps
betweenthemountingsurfaceandcanopyexceeding3/16”shouldbecorrectedasrequired.
5. Makesurethattheceilingorwallcanstandtheweightofthelampbeforefixture.
6. Makesurethevoltageyouareusingis120V.Themaximumwattageis60Wperbulb.
7. Keepthelampawayfromacidicandbasicobjectsincaseofdamagingthesurfaceofthelamp.
8. Whenreplacingbulb,youshouldturnofforunplugthelampandyoumustwaituntilitiscoolasbulbsgethotquickly.
9. Thesafetyinstructionsappearinginthismanualarenotmeanttocoverallpossibleconditionsthatmayoccur.Itmust
beunderstoodthatcommonsense,cautionandcaremustbeusedwithanyelectricalproducts.
IMAGEFORFINISHEDPRODUCT:

www.lnchome.comPage: ‐2‐/4
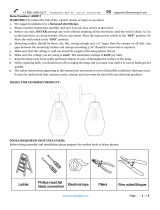
TOOLSREQUIRED(NOTINCLUDED):
Beforedoingassemblyandinstallationpleasepreparetheneededtoolsasbelowpicture
PARTSINCLUDING:
(A) Mounting plate A (1)
(C) Green ground screw C (1)
(E) Canopy E (1)
(F) Threaded ball F (2)
(G) Socket cap G (1)
(H) Shade H (1)
( I ) Ring I
ACCESSORIESENCLOSED:
(B) Mounting screw B (2)
(D) Plastic Wire Connectors D (3)
ASSEMBLY&INSTALLATIONINSTRUCTIONS:
1. Openthepackageandtakeoutallthepartsoraccessories,
thenplacethemonacleanflatplace.
2. Turnoffpower
3.UnscrewRingIfromsocket(REFERTOCHARTA1)

www.lnchome.comPage: ‐3‐/4
4.TightenshadeHtosocketcapGbyscrewingtheringI(REFERTOCHARTA2)
5.UnscrewthreadedballFandtakeoutmountingplate
AfromcanopyE.(REFERTOCHARTA2)
6.AttachmountingplateAtooutletboxbymountingscrewB(REFERTOCHARTA3)
7.Connectwireasbelow(REFERTOCHARTA4)

www.lnchome.comPage: ‐4‐/4
IMPORTANTNOTE:
ConnectgroundwireaccordingtobelowchartConnectwiresaccordingtobelowchart
8.PushcanopyEtowall,carefullypassingmountingscrewsthroughholesincanopyE.andthentightenitwiththreaded
ballF (REFERTOCHARTA5)
9.Installbulb(notincluded)(REFERTOCHARTA6)
10.
Checkeverythinginstalledcorrect,thenyoucouldturnonthelight.
/


