Page is loading ...

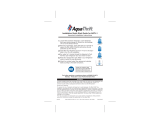
Installation Quick Start Guide for AQT-A1
Important Installation Instructions
REMOVE
1
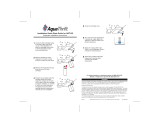
Locate your existing filter. Remove the old filter from
the filter mount by turning it counterclockwise as
shown in the picture.
PREPARE
2
Carefully remove the plug on top of the new filter
(twisting it back and forth eases the plug out). Be
careful not to remove the o-ring located under the
plug. IF THE O-RING IS MISSING, PLEASE CALL
(866) 218-8473 FOR HELP.
3
Check that the o-ring is seated evenly on top of the
filter. The o-ring is required for a proper seal to the
filter mount.
4
Your new filter is designed slightly different from the
original filter it replaces. It has a notch on the top edge
(see picture) and the o-ring inside the top. When the
filter is placed in the filter mount it may require more
effort to turn the filter because of the o-ring.
INSTALL
5
Place the top of the new filter into the refrigerator filter
mount. Be sure that the START arrow on the filter label
is aligned with arrow on the filter mount.
6
Twist the filter clockwise until the STOP arrow on the
label is aligned with the arrow on the mount. The
arrows must be aligned to activate the water valve
located inside the filter mount. IF THE VALVE IS NOT
FULLY ACTIVATED THE WATER FLOW WILL BE
SLOWER THAN NORMAL. In some instances the
partially activated valve may cause a “chattering”
noise in the water line.
7
Check the water flow by filling a glass from the
refrigerator water dispenser. If the water flow is slow
or there is “chattering”, remove and reinstall the filter
making sure it is seated securely and the arrows are
aligned. Check again. PLEASE CALL (866) 218-8473
IF YOU NEED ASSISTANCE.
FLUSH
8
Run water from the dispenser for 5 minutes at .5 gpm
(about 2½ gallons) to clear the system and prevent
sputtering.
9
Check the filter for any leaks. Inspect the mount area
and filter bottom for any sign of moisture.
COMPLETE
10
Reset the "replace filter" light. Refer to your
refrigerator owner's manual for reset procedure.
11
Attach the included water filter replacement calendar
label according to the label instructions.
12
Replace filter every six months for best results.
Reset Water Filter
9/2014 P/N 803081
RAM ASSOCIATES LLC • P.O. Box 3303 • Nashua, NH 03061
For further questions or assistance please call (866) 218-8473.
Monday - Friday 8am to 5pm Pacific Standard Time
Tested and Certified by NSF
International against NSF/ANSI
Standard 42 for materials and
structural integrity requirements.
WARNING
A newly-installed water filter cartridge may cause water to spurt from the dispenser until
all the air is removed. Do not use with water that is microbiologically unsafe or of
unknown quality without adequate disinfection before or after the system.
Protect from freezing.
To reduce the risk of property damage due to water leakage, this filter MUST be
installed in accordance with the manufacturer’s specifications and instructions. This filter
must be replaced every 6 months, at the rated capacity, or sooner if reduced water flow
occurs. Failure to follow instructions and operation specifications will void your warranty.
Further, manufacturer assumes no responsibility or liability for damages arising out of
misuse of the product. The filter bypass plug MUST be used when a filter replacement
cartridge is not installed.
The risk associated with small parts can cause choking if swallowed. Keep children
away from small parts during the replacement of the water filter.
/


