Cleveland 21CET16 User manual

Category
Small kitchen appliances
Type
User manual
Part No. CET-OPM Rev A 1/01
Operators Manual
Use and Care Instructions
Electric Models, SteamCraft Ultra 3, 5, 10
Series: 21CET8, 21CET16, 24CEA10
1333 East 179
th
Street
Cleveland, Ohio 44110
Phone: (216) 481-4900
Fax: (216) 481 3782
FOR THE USER
IMPORTANT
A QUALIFIED CLEVELAND RANGE TECHNICIAN MUST
PERFORM ALL SERVICE.
RETAIN THIS MANUAL FOR YOUR REFERENCE
You may wish to record the following items for future use.
Model Number _________________________
Serial Number __________________________
Date of Installation _______________________
WARNING
Improper installation, adjustment, alterations,
services or maintenance can cause property
damage, injury or death. Read the
installation, operating and maintenance
instructions thoroughly before installing or
servicing this equipment.
WARNING
Disconnect power before servicing
OPERATORS MANUAL
Table of Contents
Chapter Page
SECTION 1: INTRODUCTION ______________________________________________ 1
A. OPERATIONAL SAFETY __________________________________________________ 1
B. PRODUCT INFORMATION ________________________________________________ 2
(1) Serial Number ______________________________________________________ 2
(2) Model Number ______________________________________________________ 2
(3) Product information Plate ______________________________________________ 2
C. PRODUCT DESCRIPTION ________________________________________________ 3
SECTION 2: COMPARTMENT CONTROL PANELS _____________________________ 4
A. DIAL TIMER CONTROL PANEL ___________________________________________ 4
(1) Cooking Operations – Dial Timer Control Panel ____________________________ 4
(2) Manual and Timed Mode _______________________________________________ 4
a. Manual Mode _____________________________________________________ 4
b. Timed Mode ______________________________________________________ 4
B. KEYPAD TIMER CONTROL PANEL ________________________________________ 5
(1) Cooking Operations – Keypad Control Panel ________________________________ 5
(2) Manual and Timed Modes ______________________________________________ 5
a. Manual Mode ____________________________________________________ 5
b. Timed Mode and Use of the Timer _____________________________________ 5
SECTION 3: GENERAL OPERATION ________________________________________ 7
A. EXTERNAL MAIN POWER SWITCH _________________________________________ 7
B. DOOR INTERLOCK SWITCH (Optional) ______________________________________ 7
C. POWER ON (AUTOMATIC FILL) ___________________________________________ 7
D. INSPECTING THE COOKING COMPARTMENT ________________________________ 8
E. PREHEATING THE STEAMER _____________________________________________ 8
F. DESCALING REQUIRED LIGHT FEATURE ___________________________________ 8
SECTION 4: COOKING WITH THE STEAMER _________________________________ 9
A. OPERATING AND COOKING PROCEDURE – TIMED MODE _____________________ 9
B. OPERATING AND COOKING PROCEDURE – MANUAL MODE ___________________ 10
(1) Using the Timer in Manual Mode _________________________________________ 10
(2) Manual Cooking Procedure ____________________________________________ 10
SECTION 5: SHUTDOWN AND CLEANING PROCEDURES ______________________ 11
A. STEAM GENERATOR BLOWDOWN ________________________________________ 11
(1) Power Off (Automatic Blowdown) ________________________________________ 11
(2) Blowdown Frequency ________________________________________________ 11
(3) Blowdown Procedure ________________________________________________ 12
B. SHUTDOWN AND CLEANING _____________________________________________ 12
SECTION 6: PREVENTATIVE MAINTENANCE AND TROUBLESHOOTING _________ 14
A. MAINTENANCE _________________________________________________________ 14
(1) Maintenance Records ________________________________________________ 14
(2) Daily Maintenance ___________________________________________________ 14
(3) Weekly Maintenance _________________________________________________ 14
(4) Weekly/Monthly Maintenance Descale Steam Generator _____________________ 16
B. OPERATOR’S TROUBLESHOOTING GUIDE _________________________________ 17
(Continued on Next Page)
(Table of Contents Continued)
SECTION 7: STEAM COOKING GUIDELINES _________________________________ 21
A. INTRODUCTION ________________________________________________________ 21
B. SIZING UP PAN CAPACITY _______________________________________________ 22
(1) Serving Sizes – How Much? How Many? __________________________________ 22
(2) Reference Charts for Typical Pan Capacities _______________________________ 22
C. CONVECTION STEAMER – SUGGESTED TIMER SETTING GUIDELINES ___________ 23
D. STEAMING TIPS -LOBSTER -CRAB -SHRIMP _______________________________ 25
(1) Live lobsters and Crabs ________________________________________________ 25
(2) Lobster Tail 8 oz. ____________________________________________________ 25
(3) King Crab Legs ______________________________________________________ 25
(4) Shrimp _____________________________________________________________ 25
SECTION 8: LIMITED WARRANTY __________________________________________ 26
1
SECTION 1: INTRODUCTION
To use a SteamCraft Convection Steamer safely and effectively, each operator must read and
understand this Manual completely before starting operation. The owners and operators of the steamer
should retain this Manual in an easily accessible location for future reference and training.
The owner(s) and operator(s) of the steamer must be aware that steam can cause serious injuries and
equipment damage. Pay particular attention to the Operational Safety section of this chapter, and the
WARNINGS and CAUTIONS displayed in this manual and on the equipment.
A. OPERATIONAL SAFETY
The safe and effective operation of any steamer depends upon proper installation, use, maintenance,
and repair. Operational safety must encompass all of these factors. This Operational Safety section
outlines the minimum safety policies that should be considered when using one or more SteamCraft
steamers. It is assumed that any operational safety program must be tailored to the specific site and use
of the equipment.
Burn hazards are present in any professional food service operation. When using the steamer, observe
the following precautions.
Remember at all times that steam can cause severe burns.
When checking inside the steamer always open the door slowly and stand to the side and
back away from the steamer. Water leaking from the door gasket can be a sign of a blocked
drain. If the drain is blocked, hot water can accumulate inside the compartment and spill out
when the door is opened.
Make sure the compartment is turned OFF. Open the door slightly to allow steam to vent before
looking or reaching into cooking compartment.
Do not reach into the cooking compartment until the steam has cleared.
Do not reach into steamer or handle hot items without wearing heatproof gloves. Wet or damp
gloves conduct heat, and may cause burns when touching hot items.
Do not use anything but your hands to operate the ON/OFF controls.
Do not block the vents on the side, rear or underside of the unit or otherwise obstruct the flow
of ventilation air to the steamer. Do not store articles on top of the unit.
The steamer requires a minimum of service if properly operated and maintained by trained personnel.
The following steps will help keep the steamer in a safe, efficient operating condition.
(1) Do not store or leave combustible materials near the steamer. Keep the area around and under
the steamer free of combustible materials.
(2) Non slip draining mats should be on the floor in front of the steamer to prevent slipping
accidents from spilled water.
WARNING
DO NOT ATTEMPT TO START OR OPERATE a SteamCraft
steamer during a power outage.
DEATH, INJURY, AND EQUIPMENT DAMAGE could result from the
improper installation of a steamer.
Before starting a recently installed or repaired steamer, be sure it has
been installed by qualified personnel according to the instructions
found in the separate Installation and Maintenance Manual.
2
(3) Train all personnel who will use the steamer. Make sure personnel know how to operate the
steamer, clean the interior and exterior, drain the unit, and descale the steam generator.
(4) Operating personnel must be able to recognize problems, and report them so that corrective
actions can be taken by trained personnel as outlined in the troubleshooting charts found in the
back of this manual and in the separate Installation and Maintenance Manual.
(5) Conduct regular steamer inspections. Check for water line leaks, door seal and drain leaks,
clogged drain, steam generator scale buildup, and steamer control malfunctions.
(6) Follow the instructions for steamer maintenance found in this manual and the additional literature
provided with the steamer.
(7) Before each use of the steamer, inspect the drain and screen for blockage. Inspect the door
gasket assembly, and slide racks for proper installation and cleanliness.
(8) Allow only Cleveland Range authorized service representatives to service the steamer.
(9) Use only factory authorized repair parts.
(10) Maintain written records of steamer maintenance and service. Each record should include at
least:
The date of the service or maintenance.
A description of the service, maintenance or repair performed. Include part numbers if
applicable.
Copies of purchase order(s) and invoice(s) for repair parts and service.
The name and signature of the person performing the maintenance or service.
B. Product Information
(1) Serial Number
The Serial number is located at the back of the unit. During manufacture, SteamCraft
Steamers are assigned individual serial numbers. Whenever any inquiry is made with
Cleveland Range regarding a steamer the serial number should be referenced.
(2) Model Number
This manual covers model numbers 21CET8, 21CET16 and 21CEA10.
(3) Product Information Plate
The Product Information Plate located on the rear (Model 21CET8 and 21CET16) or the left
side (Model 24CEA10) of the unit lists the model and serial number as well as the power
supply and the wiring requirements of the steamer.
3
C. Product Description
Models 21CET8, 21CET16
Descaling Port
Descaling Instructions
Compartment Timer
TIMED/MANUAL Operation
Switch
Main Power ON/OFF Switch
Descaling Required Switch
4” Adjustable Legs
Model 24CEA10
Descaling Ports (2 total, not visible)
Descaling Instructions
Compartment Timer
TIMED/MANUAL Operation
Switch
Main Power ON/OFF Switch
Descaling Required Switch
6” Adjustable Legs
Model 21CET8
(Pictured)
4
SECTION 2: COMPARTMENT CONTROL PANELS
The standard steamer control panel, illustrated in Figure 2-1 has a mechanical timer. An optional
electronic keypad timer illustrated in Figure 2-2 of SECTION 2, Part B and an ON/OFF control panel are
also available. The Electronic timer uses a temperature compensation circuit, which allows the timer to
count down only while the cooking compartment is at cooking temperature. The ON/OFF Control Panel,
which is not illustrated, operates exactly like the manual operation of the timed models except a selector
switch is used to turn the steam to the cooking compartments ON and OFF.
A. DIAL TIMER CONTROL PANEL
(1) Cooking Operations – Dial Timer Control Panel
For safe, efficient operation of the steamer, the operator must, at a minimum, comply with all cautions,
warnings and instructions in the detailed operating procedures and be familiar with the control panel
shown in Figure 2-1. The operator must be familiar with all the operating features explained in this
manual before attempting to operate the steamer.
(2) Manual and Timed Modes
The steamer has two operating modes: manual and timed. The TIMED/MANUAL rocker switch selects
the operating mode. Pressing the MANUAL end of the switch selects the manual-operating mode.
Pressing the TIMED end of the switch selects the timed operating mode. Cooking procedures are slightly
different for each mode.
a. Manual Mode
The manual mode provides continuous steaming. The operator starts and stops steaming
operations manually. See the Operating and Cooking Procedure – Manual mode in Section 4,
Part B for more information.
b. Timed Mode
The timer provides timed control of steaming, starts and stops cooking operations.
To use the timer, simply set the timer to the desired time. The steamer will begin steaming
operations as soon as the timer is set. When the timer reaches zero the steaming functions
will automatically end and a buzzer will sound for 3 seconds to alert the operator that the
cooking cycle is complete.
1. DIAL TIMER
This dial timer sets the operating time from 0 to 60 minutes. Turn
the dial clockwise until it points to the required number of minutes.
When it reaches 0, a buzzer sounds for 3 seconds.
2. TIMED/MANUAL Switch.
The TIMED/MANUAL switch selects the manual or timed operating
mode. Pressing the MANUAL (bottom) end of the switch selects
the manual mode. Pressing the TIMED (top) end of the switch
selects the timed mode.
3. POWER ON Switch and Indicator Light.
(SteamCraft Ultra 3 & 5) When the Red
indicator light is ON, power is ON to the unit and
the control panel.
4. POWER ON Switch and Indicator Light
(SteamCraft Ultra 10 ) “POWER ON” Control is
located below the top compartment control
panel. When the Red indicator light is ON,
power is ON to the unit and both control panels.
Figure 2-1 Dial Timer Control Panel
2
1
3
SteamCraft Ultra 3
& 5 Panel (Pictured)
SteamCraft Ultra 10
Power ON Control
4
5
B. KEYPAD TIMER CONTROL PANEL
(1) Cooking Operations – Keypad Control Panel
For safe, efficient operation of the steamer, the operator must, at a minimum, comply with all
cautions, warnings and instructions in the detailed operating procedures and be familiar with the
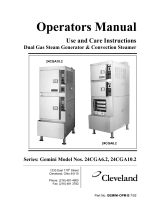
control panel shown in Figure 2-2. The operator must be familiar with all the operating features
explained in this manual before attempting to operate the steamer.
(2) Manual and Timed Modes
The steamer has two operating modes: manual and timed. The TIMED/MANUAL rocker switch
selects the operating mode. Pressing the MANUAL end of the switch selects the manual-operating
mode. Pressing the TIMED end of the switch selects the timed (automatic) operating mode.
a. Manual Mode
The manual mode provides continuous steaming. The operator starts and stops steaming
operations manually. See the Operating and Cooking Procedure – Manual Mode in Section 4,
Part B for more information.
b. Timed Mode and Use of the Timer
1. Timer Use and Temperature Compensation
The keypad timer control starts and stops steaming operation, and monitors cooking
time and compartment temperature for accurate, efficient, uniform steam cooking.
The keypad control uses a temperature compensation circuit that effects only the timer.
When operating, the timer ONLY COUNTS DOWN WHILE THE COOKING
COMPARTMENT IS AT COOKING TEMPERATURE. This provides totally automatic
control of the steaming operation and assures uniform cooking as the timer
automatically compensates for food product defrosting and/or compartments heat up
time. Whenever the steamer is not at cooking temperature 193°F, the timer pauses and
the display shows “PAUS”, once temperature is reached a digital display of the
remaining time is displayed. When the timer counts down to zero a buzzer will sound, to
indicate that cooking is complete and the steam generator will shut down.
The timer will operate similarly when the steamer is being operated in the manual mode
including counting down only when the steamer is at cooking temperature, except that
the timer does not start or stop the steaming cycle.
2. Timer Operation
a) Setting the Timer
To set the cooking time, the timer must first be zeroed. The timer can be set only when
the cooking time display is clear (00:00). The cooking time display contains four digits.
The left two digits are minutes, and the right two digits are seconds. The display 12:34 is
set for 12 minutes and 34 seconds. To set the cooking time:
1) Change the required cooking time to minutes and seconds.
2) Press the number keys for minutes, and then, for the seconds.
3) If the cooking time is 99 seconds or less, only press the number keys for seconds.
b) Starting/Stopping the Timer
Press the START/STOP key to start or stop the timer. When the START/STOP key is
pressed, the steam generator begins heating the water to steam. Shortly, steam fills the
cooking compartment.
1) The timer display reads “PAUS” until the cooking compartment reaches proper
cooking temperature, or when the timer cycle is paused by pressing the
START/STOP key again after the timer has started.
2) When the cooking compartment reaches proper cooking temperature, the timer
display shows the count down.
NOTE: A timer setting of 10 minutes may in fact take 11 or 12 minutes (or even longer,
if the unit was not preheated prior to the start of the cooking cycle) for the timer
to count down and the alarm to sound. This is normal. Heating the compartment
and food to cooking temperature uses the additional time.
6
c) Shutting Off Alarm/When Timer is Done
When the timer counts down to zero, the alarm sounds continuously, the generator
stops steaming, and steam flow to the cooking compartment gradually stops.
Press the START/STOP key to silence the alarm. The cooking time display returns to
the last time set. Either run this same setting again or clear and reset the timer.
1. TIMER Display.
This four-digit display indicates the minutes and seconds remaining
in the count down. The display reads from zero (00:00) to
99minutes and 99 seconds (99:99). It reads pause (PAUS) when
the Countdown is halted either by the START/STOP key or by the
Temperature compensating circuit.
2. Number Pad Keys.
These keys set the number of minutes and seconds in the timer
count down. Pressing the number keys 1 2 3 4 in this sequence,
sets the timer for 12 minutes and 34 seconds (12:34).
3. START/STOP Key.
This key starts and stops the timer. In TIMED mode the steaming
functions are linked to the timer. In MANUAL mode, the steaming
functions are independent of the timer.
4. CLEAR Key.
This key resets the timer to zero (00:00), after it has been stopped.
The timer must be zeroed by pressing this key before a new time
can be set.
5. TIMED/MANUAL Switch.
The TIMED/MANUAL switch selects the manual or timed Operating
mode. Pressing the MANUAL (bottom) end of the switch selects
the manual mode. Pressing the TIMED (top) end of the switch
selects the timed mode.
6. POWER ON Switch and Indicator Light
(SteamCraft Ultra 3 & 5) When the Red indicator
light is on, power is on to the unit and the control
panel.
7. POWER ON Switch and Indicator Light
(SteamCraft Ultra 10) “POWER ON” Control is
located below the top compartment control
panel. When the Red indicator light is ON,
power is ON to the unit and both control panels.
Figure 2-2 Electronic Key Pad Control Panel
CAUTION
Press switches with fingertips only. Do not use kitchen
utensils or anything sharp to operate the switches.
SteamCraft Ultra 10
Power ON Control
7
1
3
2
4
6
5
SteamCraft Ultra 3 & 5
Panel (Pictured)
7
SECTION 3: GENERAL OPERATION
A. EXTERNAL MAIN POWER SWITCH (Junction Box)
Usually the kitchen’s external main power switch is left ON. If the
external main power switch was left in the OFF position, turn it
ON as follows.
(1) Check that the water supply valves to the steamer are open.
(2) Turn the steamers ON/OFF Switch to the OFF position. The
TIMED/MANUAL switch and timer settings are not important
in this procedure. The control panel circuits are not powered
while the ON/OFF switch is set to OFF.
(3) Refer to the external main power switch in Figure 3-1, and turn
ON electric power to the steamer. The steam generator(s) will
immediately start blowdown cycles. The blowdown cycle lasts
3 minutes
B. DOOR INTERLOCK SWITCH (Optional)
The steamer compartments of a SteamCraft Steamer may be
equipped with optional automatic steam cutoff switches, which turn OFF the production of steam to a
cooking compartment whenever the door to that compartment is opened. NOTE: Even though the
production of steam ends as soon as a door is opened, it may take up to a minute for residual steam in
the system to clear from the steam lines and the cooking compartment. To avoid possible injury always
wait until this residual steam has cleared before reaching into the cooking compartment.
C. POWER ON (AUTOMATIC FILL)
When each steamer compartment is turned on, it automatically fills the steam generator with water. Use
this procedure at the beginning of a shift to prepare the steamer for operation without starting steam
generation. When ready to start steam cooking, begin either the Timed or Manual Operating Procedure.
NOTE: The steamer automatically goes into a standby heat mode, as soon as power is turned on to the
steamer. This is either accomplished by a thermostat or a timer, which will cycle the heating elements
ON and OFF to maintain a standby water temperature of approximately 193°F, once the unit has come
up to temperature. This insures that the steamer begins producing steam almost immediately when an
actual cooking operation is selected.
(1) Press the TIMED (top) end of the TIMED/MANUAL switch on the control
panel.
(2) Turn the POWER SWITCH (see Figure 3-2) to the ON Position on the
steamer. The red indicator light on the control panel lights, and water fills
the steam generator.
(3) When the generator is full, the steamer automatically stops water flow.
(4) Once the water has reached the safe level, the elements are cycled ON and
OFF and automatically start to heat the water to the standby heat
temperature.
S
teamer
DRAIN LINE
COLD WATER SUPPLY LINES
EXTERNAL MAIN
POWER SWITCH
Figure 3-1 External Main
Power Switch
Figure 3-2
POWER Switch
WARNING
SEVERE BURNS may result from exposure to steam.
Do not open the steamer door before steam flow stops. Stand back
when opening the compartment door. Open the door slightly to allow
steam to vent before looking or reaching into cooking compartment.
Do not reach into cooking compartment until the steam has cleared.
Do not reach into steamer or handle hot items without wearing
heatproof gloves. Wet or damp gloves conduct heat, and may cause
burns when touching hot items.
8
D. INSPECTING THE COOKING COMPARTMENT
At the back of the cooking compartment, a drain screen
covers the drain. Refer to Figure 3-3. The screen
prevents large food particles from entering and blocking
the drain line. Any blockage of the drain line or screen
can reduce drainage from the cooking compartment
resulting in reduced cooking performance, equipment
damage, and a hazard to the operator. A blocked or slow
drain may cause:
Hot water to collect in the compartment and spill out
when the compartment door opens.
Pressure fluctuations in the compartment, resulting in
steam leaks around the door gasket, or compartment
implosion.
Reduced convection in the compartment, reducing cooking performance.
Before every steaming operation, inspect the cooking compartment and remove any food scraps of
debris from the racks, walls, and floor of the compartment. Pay particular attention to the drain screen.
(1) DO NOT USE the steamer if water stands in the drain opening. Arrangements must be made
immediately to clean the drain in accordance with the instructions found in the Preventative
Maintenance and Troubleshooting section of this manual.
(2) Remove any food or debris that is blocking the drain or screen.
(3) Be sure the screen covers the drain. The screen prevents large pieces of food from entering and
blocking the drain.
E.
PREHEATING THE STEAMER
Preheating the steamers can help insure that the best productivity and consistent cooking is obtained. To
preheat each steamer, run a cooking cycle of approximately 15 minutes with no food in the cooking
compartments.
NOTE: If using a steamer with a keypad timer, set only a 1 minute cooking time for the purpose of
preheating, since the timer will only begin to countdown once the steamer has reached a
cooking temperature.
BEFORE PREHEATING, inspect and clean the compartment. After preheating, the
compartment will be too hot to inspect and clean safely.
F. DESCALING REQUIRED LIGHT FEATURE
When the programmed number of hours have elapsed, the “DESCALE
REQUIRED” light will turn on, indicating that descaling of the steam
generator must be done (See Figure 3-4). More information on this
feature and the descaling procedure can be found in the Maintenance
section of this manual, Section 6, Part A (4), Monthly Maintenance.
Note: Switch does not descale unit, it is just a reminder that steamer
must be descaled every 4-6 weeks.
CAUTION
Steam leaks around the door, cooking compartment flooding,
reduced cooking performance, and compartment implosion
can be caused by a blocked drain or drain screen. Inspect and
clean the drain and drain screen before each use.
Figure 3-3 Compartment Drain Screen
DRAIN SCREEN
Figure 3-4 Descaling
Required Light
9
SECTION 4: COOKING WITH THE STEAMER
A. OPERATING AND COOKING PROCEDURE – TIMED MODE
In timed mode, the timer starts and stops the steaming operation.
(1) Refer to INSPECT THE COOKING COMPARTMENT IN Section 3, Part D. Inspect and clean
the drain and cooking compartment as required.
(2) If necessary, refer to Preheating the Steamer, in Section 3, Part E, and preheat the cooking
compartment.
(3) Slide the pans of food into the slide racks inside the steamer. Do not place pans or anything else
on the bottom of the compartment.
For best cooking results, use shallow, 2-1/2 inch deep, perforated pans without covers.
These give the best heat transfer and shortest cooking time.
(4) Close the steamer door.
(5) Check the control panel settings. At this point the settings should be:
The ON/OFF switch is in the ON (top) position.
The TIMED/MANUAL switch is in the TIMED (top) position.
(6) Set the required cooking time. For KEYPAD MODELS press the START/STOP key. Shortly,
steam fills the cooking compartment.
(7) When the timer reaches zero, a buzzer will sound; the steam generator stops steaming, and
steam flow to the cooking compartment gradually stops. The cooking cycle is complete.
For DIAL CONTROL timers the buzzer will stop after 3 seconds.
For KEYPAD timers, press the START/STOP key to silence the alarm.
CAUTION
Some foods drip juices. Use a solid catch pan under
perforated pans when steaming food that will drip juices.
Failure to use a catch pan can cause a clogged drain.
WARNING
SEVERE BURNS may result from exposure to steam.
Do not open the steamer door before steam flow stops. Stand back
when opening the compartment door. Open the door slightly to allow
steam to vent before looking or reaching into cooking compartment.
Do not reach into cooking compartment until the steam has cleared.
Do not reach into steamer or handle hot items without wearing
heatproof gloves. Wet or damp gloves conduct heat, and may cause
burns when touching hot items.
WARNING
When checking inside the steamer always open the door slowly
and stand to the side and back away from the steamer. Water
leaking from the door gasket can be a sign of a blocked drain. If
the drain is blocked, hot water can accumulate inside the
compartment and spill out when the door is opened.
10
(8) Carefully open the cooking compartment door, and remove the pans from the slide racks.
If the steamer will be used again in a few minutes shut the door to maintain the cooking
compartment temperature.
If another use is not planned for more than half an hour, leave the cooking compartment
door slightly open to reduce internal pressure while the steam condenses and the
compartment cools.
If the steamer is not being used again during this shift, perform the Power OFF and Shut
Down and Cleaning Procedures.
B. OPERATING AND COOKING PROCEDURE – MANUAL MODE
Manual mode allows the operator to personally control the cooking functions. The operator starts and
stops the steaming operations, and sets the cooking time including time for steam generator,
compartment and food heat-up time. Use the manual-cooking mode for:
A continuous supply of steam.
Cooking times longer than the timer can measure.
Maintaining the compartment temperature between cooking batches.
(1) Using the Timer in Manual Mode
The timer may be used when the steamer is operating in the manual mode, but it will not start or
stop the steaming cycle.
(2) Manual Cooking Procedure
Follow this procedure when cooking with the steamer in manual mode.
1. Refer to INSPECT THE COOKING COMPARTMENT in Section 3, Part D. Inspect and
clean the drain and cooking compartment as required.
2. In manual mode, the operator can bring the compartment to cooking temperature by either
preheating or increasing the cooking time. If the operator chooses to preheat the cooking
compartment manually, refer to Section 3, Part E, PREHEATING THE STEAMER.
3. Slide the pans of food into the slide racks inside the steamer. Do not place pans or anything
else on the bottom of the compartment.
For best cooking results, use shallow, 2-1/2 inch deep, perforated pans without covers.
These give the best heat transfer and shortest cooking time.
4. Close the steamer door. Select the manual mode by pressing the MANUAL (bottom) end of
the TIMED/MANUAL rocker switch. The steaming cycle starts as soon as the switch is
pressed. Shortly, steam fills the cooking compartment.
5. If the timer is used to monitor cooking.
a) Set and if necessary start the timer. (Remember that if a KEYPAD timer is used in this
way it will only count down time when the steamer is at cooking temperature.)
b) When the timer reaches zero, the buzzer will sound, and cooking is done.
Remember, in manual mode, the timer does not stop the steaming functions.
CAUTION
Some foods drip juices. Use a solid catch pan under
perforated pans when steaming food that will drip juices.
Failure to use a catch pan can cause a clogged drain.
11
6. To stop manual mode steaming, press the TIMED (top) end of the TIMED/MANUAL rocker
switch. The generator stops steaming, and steam flow to the cooking compartment gradually
stops.
7. Carefully open the cooking compartment door, and remove the pans from the slide racks.
If the steamer will be used again in a few minutes shut the door to maintain the cooking
compartment temperature.
If another use is not planned for more than half an hour, leave the cooking compartment
door slightly open to reduce internal pressure while the steam is condensing and
cooling.
If the steamer is not being used again during this shift, perform the Power OFF and Shut
Down and Cleaning Procedures.
SECTION 5: SHUTDOWN AND CLEANING PROCEDURES
A. STEAM GENERATOR BLOWDOWN
(1) Power Off (Automatic Blowdown)
Blowdown occurs automatically when the steamer is turned off at its ON/OFF switch. During
blowdown, the steam generator drain solenoid is rinsed with fresh water, and the boiler is
drained. Blowdown at frequent intervals helps decrease mineral buildup in the steam generators,
and reduces the frequency of descaling and other maintenance.
(2) Blowdown Frequency
The supply water quality determines how often blowdown must be performed. The higher the
feed water, total dissolved solids, and particulate, the more frequently blowdown must be
performed. A determination should be made at the time of installation whether additional
blowdown frequency will be required as part of the daily maintenance based on the water quality
analysis done as part of the installation. This information should be noted in the daily
maintenance program developed for the equipment. If the local water supply meets the minimum
supply water quality standards, observe the following guidelines to establish proper blowdown
scheduling.
For units without a water treatment system, blowdown must be performed after every 4
hours of operation and at the end of each shift.
For units with a water treatment system, blowdown must be performed at the end of each
shift.
WARNING
SEVERE BURNS may result from exposure to steam.
Do not open the steamer door before steam flow stops. Stand back
when opening the compartment door. Open the door slightly to allow
steam to vent before looking or reaching into cooking compartment.
Do not reach into cooking compartment until the steam has cleared.
Do not reach into steamer or handle hot items without wearing
heatproof gloves. Wet or damp gloves conduct heat, and may cause
burns when touching hot items.
12
(3) Blowdown Procedure
When the steamer is turned off, its blowdown cycle starts and runs automatically. The complete
cycle takes approximately 3 minutes.
1. Turn the ON/OFF Switch to the OFF position to turn off the steamer. The red indicator light
in the ON/OFF switch turns off. Do not turn power off at the main power switch during
blowdown.
2. Automatically, the drain valve opens and begins to empty water from the steam generator.
3. The fill valve(s) opens for 3 minutes, to help cool the drain water and clean the drain valve.
4. At the end of the 3-minute blowdown cycle, the fill valve closes.
5. When blowdown is complete, the steamer can be restarted, or the shut down procedure
completed.
To restart the unit, refer to POWER ON (AUTOMATIC FILL) in Section 3,Part C.
To shut down the unit, refer to SHUT DOWN AND CLEANING, below.
B. SHUT DOWN AND CLEANING
This procedure should be performed at the end of each day or shift.
(1) Refer to Power OFF (Automatic Blowdown), and turn off the steamer compartment. Allow 3
minutes for the complete blowdown cycle.
(2) Open the steamer doors and allow steamer to cool.
(3) Remove the slide racks. Wash and rinse racks separately or clean them in a dishwasher
according to health requirements. Do not remove the drain screen.
WARNING
Do not use a hose or water jet to clean this appliance.
WARNING
Inside of steamer stays hot for a long time. Be careful
when cleaning inside steamer compartment.
WARNING
SEVERE BURNS may result from exposure to steam.
Do not open the steamer door before steam flow stops. Stand back
when opening the compartment door. Open the door slightly to allow
steam to vent before looking or reaching into cooking compartment.
Do not reach into cooking compartment until the steam has cleared.
Do not reach into steamer or handle hot items without wearing
heatproof gloves. Wet or damp gloves conduct heat, and may cause
burns when touching hot items.
13
(4) Remove any spilled food from inside compartment and clear any residue from the drain screen.
Clean the interior of the compartment thoroughly. Use a soft bristle brush to remove stubborn
food particles. Do not use abrasive cleaning compounds or steel wool. Rinse inside of steamer
compartment with clean water.
(5) Clean the door assembly.
Remove the inner door assembly (see Figure 5-1).
Note the keyhole slots in the outer door and the retaining pins on the inner door assembly.
Grasp the inner door assembly at the sides and lift up and then towards you to remove the
assembly.
Clean all surfaces of the inner door assembly, as well as the inside of the outer door, by
wiping with a damp cloth.
Rotate the inner door assembly 180° and replace it by sliding the retaining pins into the
keyhole slots. Either long edge of the gasket assembly can be positioned at the top. Periodic
rotating of the door assembly will increase the door gasket life.
Figure 5-1 Inner Door Assembly
(6) Replace the cleaned slide racks.
(7) Wipe the exterior with a damp cloth only. NEVER HOSE DOWN THE STEAMER. Electrical
components inside the unit will not function correctly if wet or damp.
(8) After cleaning, leave the steamer door open until the next steamer operation. This prevents
compartment odor buildup and increases gasket life
WARNING
Let rinse water drain through compartment drain opening. If water
does not drain freely, drain lines must be cleaned before cooking
again. Clogged or slow drains are dangerous because hot water can
collect in compartment and spill out when opening compartment door.
14
SECTION 6: PREVENTATIVE MAINTENANCE AND
TROUBLESHOOTING
A. MAINTENANCE
Maintenance on the steamer must be performed on a regular basis to keep the unit running properly. By
following the maintenance instructions in this Section and in the separate Installation Manual, problems
with the steamer will be kept to a minimum. As with any preventative maintenance schedule, the
frequency of steamer maintenance may need to be increased, depending on equipment usage and
water quality. If problems do occur, refer to the Troubleshooting Guide in this Section. For more
information on product and services, contact your sales representative.
(1) Maintenance Records
Make a file solely for maintenance records. Keep a written record of daily, weekly, monthly, and yearly
maintenance. These records will protect warranty coverage, help personnel to know when to perform
various maintenance procedures, and assist service personnel.
(2) Daily Maintenance
a. Blowdown Steam Generator
Blowdown each steam generator at least every four hours according to the steam generator
blowdown instructions in Section 5.
b. Clean the Steamer
Clean interior and exterior of the steamer according to the shutdown instructions in Section 5.
(3) Weekly Maintenance
Clean Drain
This steamer is equipped with a drain screen in the back of each cooking compartment. Never operate
the steamer without the screens in place. The screen prevents large food particles from entering and
blocking the drain line. Any blockage of the drain line can cause a pressure buildup in the compartment,
resulting in steam leaks around the door gasket. Drain line blockage also adversely affects convection
action of the steam in the compartment, which is necessary for optimum performance.
a. Inspect the drain screen and drain line for blockage. Rotate the drain screen 90 degrees to
inspect the drain opening. Clean the opening and restore the screen to its operating position.
b. Clean drain with an USDA approved drain cleaner, once a week. Follow the instructions of the
manufacturer of the cleaner.
c. Flush drain with clean water.
CAUTION
Steam leaks, pressure buildup in the cooking compartment
and poor steaming performance can be caused by a blocked
drain line or screen. Blocked or slow drains are dangerous
because hot water can collect in the compartment and spill out
when opening the compartment door.
15
(4) Weekly/Monthly Maintenance
Descale Steam Generator
Steam generators should be descaled at least once a month, depending on scale buildup. Alternately,
they can be descaled weekly with smaller amounts of solution, if this frequency better suits your
maintenance schedule. If you have serious steam generator scale buildup, a water treatment system
should be installed for the steamer or if this is not possible the frequency of descaling should be
increased. This unit is equipped with a Descaling reminder light to assist in the scheduling of this
maintenance. (Note: the descaling light has been factory set for an operating time of approximately 1
month or 300 hours of operation, if weekly descaling has been chosen it will be necessary to have the
descaling timer reset to reflect this schedule by a qualified service technician). When this light comes on
arrangements should be made to descale the steam generator as soon as feasible. Cleveland Range,
Inc. recommends the use of DISSOLVE
®
Descaler Solution, Cleveland Range Part No. 106174. No
other system of steamer descaling should be used.
NOTE: Part No. 106174 is the Part No. for a case (6 1-gallon containers) of DISSOLVE
®
descaler. It is
also available in 5-gallon containers as Part No. 1061741.
THESE INSTRUCTIONS ARE FOR USE WITH DISSOLVE
®
DESCALER SOLUTION ONLY.
Health Hazard Data, Effects of Overexposure – This product may cause a burning sensation to
eyes or skin.
Emergency and First Aid Procedures - In case of eye contact, immediately flush eyes with plenty
of water. If irritation persists seek medical attention. In case of skin contact wash with soap and
water. If inhaled, remove to fresh air and if burning persists, call a physician. If swallowed, drink 1 or
2 glasses of water and call a physician.
Spill or Leak Procedures – Rinse with plenty of water to dilute. Sodium carbonate or calcium
carbonate may be used to soak up liquid. Considered non-hazardous, spent material may be
disposed of in a sewer system with water flush.
WARNING
The liquid solution in Cleveland Range Descaler Solution Part No. 106174 can be harmful
if not handled properly. Follow these basic safety rules for handling and using this
product.
Wear protective clothing when mixing or applying chemical cleaners.
Wear rubber gloves, and splash goggles.
Avoid breathing fumes. If liquid comes in contact with skin, wash with soap and water.
If chemical contacts eyes, flush with water. If irritation persists seek medical attention
If chemical is swallowed or ingested, drink 1 or 2 glasses of water and call a physician.
CAUTION
Do not use any other product or method of descaling other than
the DISSOLVE
®
Descaler method using Part No. 106174.
16
Weekly/Monthly Maintenance (continued)
ATMOSPHERIC STEAM GENERATOR DESCALING PROCEDURE
(For DISSOLVE
®
Descaler Solution Part No. 106174)
1. This procedure will take approximately 1 hour and 30
minutes to complete. This entire procedure should be read
and fully understood, before beginning the actual
descaling operation.
2. Zero the timers or for manual only models set the selector
to OFF.
3. Open both doors to the cooking compartments.
4. Set the TIMED/MANUAL switches to TIMED.
5. Set the ON/OFF switch to the OFF position. (The Unit will
undergo a normal blowdown cycle, which Should take
approximately 3 minutes to complete).
6. When the unit has completed draining, turn the ON/OFF
switch to ON to refill the unit. Do not start the timer. Leave
the doors open.
NOTE: Be ready to pour in the descaling solution when the power is turned ON.
NOTE: DO NOT HEAT THE UNIT DURING DESCALING.
7. While the unit is filling with water, remove the descaling port plug(s) located at the top of the unit
(See Figure 6-1), and add 1 gallon of DISSOLVE
®
descaler solution (P/N 106174) to each port.
While adding liquid to the unit through the Descaler inlets; pour it in slowly so as to avoid
overflow.
8. When the automatic fill has ended, add an additional 1-gallon of water to each port.
9. Replace the cap and let the unit stand for 1 hour.
10. At the end of 1 hour, set the ON/OFF switch to the OFF position to blowdown the steamer. After
the 3-minute drain cycle completes turn the unit back ON. After the filling has stopped, add 1½
gallons of water to each port, and then turn the unit OFF. This will drain any residue from the
water level control assembly.
11. After the steamer has completed draining, close the steamer door(s), set the ON/OFF Switch to
the ON position. The unit will fill with water.
12. Set the timers for 20 minutes, and turn them on (KEYPAD MODELS). The unit will come up to
normal operating temperature.
13. At the end of 20 minutes of cooking, turn off the alarm (if necessary) and set the ON/OFF Switch
to the OFF position. The unit will go through a 3-minute drain cycle.
14. This is the final blowdown. The steamer is now ready for normal operation.
15. When done cleaning, reset the descale indicator light timer to zero by pressing the “DESCALE
REQUIRED” light rocker switches, and resume normal operation.
Optional Weekly Cleaning Intervals
Follow same process as above, except add one quart of DISSOLVE
®
(Part No. 106174) instead of
one gallon to each generator.
Figure 6-1 Descaler inlets
  • Page 1 1
  • Page 2 2
  • Page 3 3
  • Page 4 4
  • Page 5 5
  • Page 6 6
  • Page 7 7
  • Page 8 8
  • Page 9 9
  • Page 10 10
  • Page 11 11
  • Page 12 12
  • Page 13 13
  • Page 14 14
  • Page 15 15
  • Page 16 16
  • Page 17 17
  • Page 18 18
  • Page 19 19
  • Page 20 20
  • Page 21 21
  • Page 22 22
  • Page 23 23
  • Page 24 24
  • Page 25 25
  • Page 26 26
  • Page 27 27
  • Page 28 28
  • Page 29 29
  • Page 30 30

Cleveland 21CET16 User manual

Category
Small kitchen appliances
Type
User manual

Ask a question and I''ll find the answer in the document

Finding information in a document is now easier with AI