Datamax E-4206L User manual

Category
Label printers
Type
User manual
Operator’s Manual
Professional and Professional
+
Models
Professiona
l
Professiona
l
+
Copyright Information
CG Triumvirate is a trademark of Agfa Corporation.
CG Times based upon Times New Roman under license from the Monotype Corporation.
Windows is a registered trademark of the Microsoft Corporation.
All other brand and product names are trademarks, service marks, registered trademarks, or registered service
marks of their respective companies.
Limitation of Liability
In no event shall Datamax-O’Neil be liable to the purchaser for any indirect, special or consequential damages or
lost profits arising out of or relating to Datamax-O’Neil’s products, or the performance or a breach thereof, even
if Datamax-O’Neil has been advised of the possibility thereof. Datamax-O’Neil’s liability, if any, to the purchaser
or to the customer of the purchaser hereunder shall in no event exceed the total amounts paid to Datamax-
O’Neil hereunder by the purchaser for a defective product.
In no event shall Datamax-O’Neil be liable to the purchaser for any damages resulting from or related to any
failure or delay of Datamax-O’Neil in the delivery or installation of the computer hardware, supplies or software
or in the performance of any services.
Some states do not permit the exclusion of incidental or consequential damages, and in those states the
foregoing limitations may not apply. The warranties here give you specific legal rights, and you may have other
legal rights which vary from state to state.
Firmware (Software) Agreement
The enclosed Firmware (Software) resident in the Printer is owned by Licensor or its suppliers and is licensed for
used only on a single printer in the user’s Trade or Business. The User agrees not to, and not to authorize
or permit any other person or party to, duplicate or copy the Firmware or the information contained
in the non-volatile or programmable memory. The firmware (Software) is protected by applicable copyright
laws and Licensor retains all rights not expressly granted. In no event will Licensor or its suppliers be liable for
any damages or loss, including direct, incidental, economic, special, or consequential damages, arising out of
the use or inability to use the Firmware (Software).
Information in this document is subject to change without notice and does not represent a commitment on the
part of Datamax-O’Neil Corporation. No part of this manual may be reproduced or transmitted in any form or by
any means, for any purpose other than the purchaser's personal use, without the expressed written permission
of Datamax-O’Neil Corporation.
Important Safety Instructions
This printer has been carefully designed to provide years of safe reliable performance. As with all types of
electrical equipment, however, there are a few basic precautions that should be taken to avoid personal
injury or damage to the device:
Carefully read the installation and operating instructions provided with the printer.
Read and follow all warning and instruction labels on the printer.
Place the printer on a flat, stable surface.
Do not insert anything into the ventilation slots or openings on the printer.
Do not place the printer on or near a heat source.
Do not use the printer near water. Never spill liquid into the printer.
Be certain the power source is within the voltage rating and frequency listed for the printer. If you are unsure,
check with your dealer, an electrician, or local power company.
Do not place the power cord where it can be stepped on. If the power cord becomes damaged or frayed,
replace it immediately.
Only qualified, trained service technicians should attempt to repair the printer.
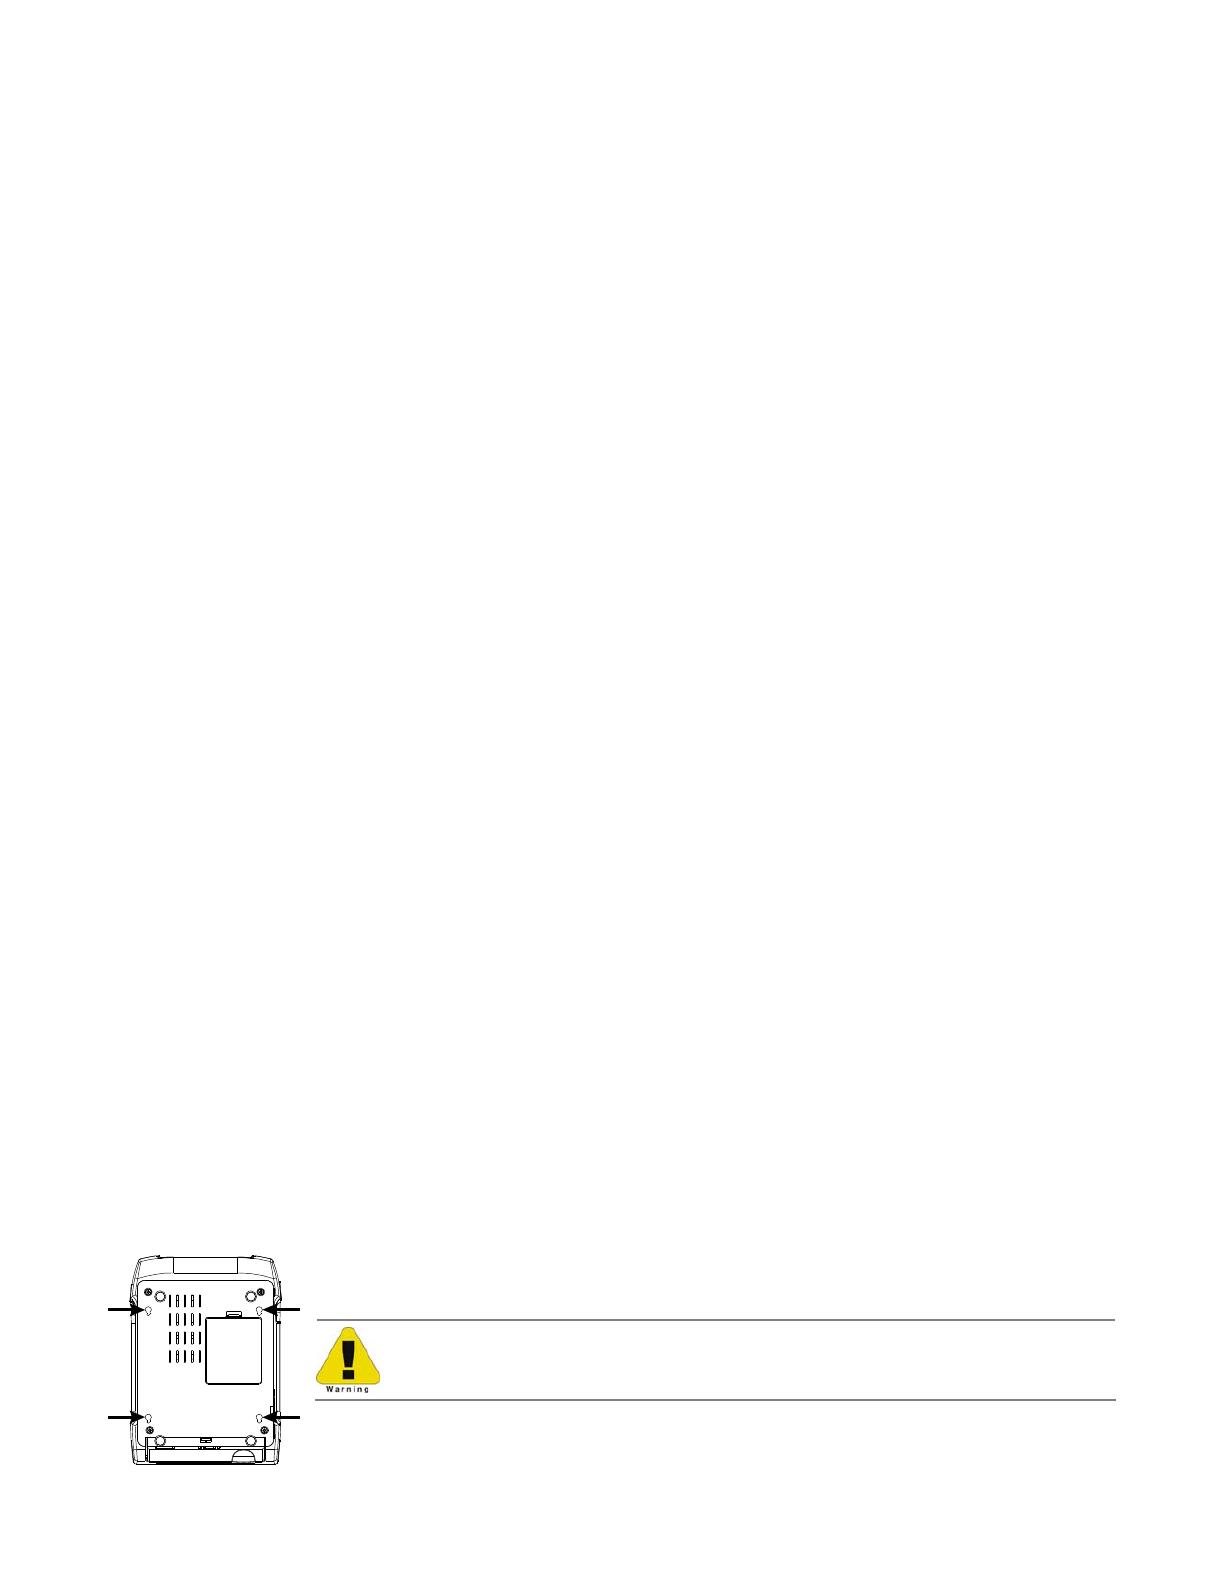
Cut-outs are not intended for wall-mount use.
Agency Compliance and Approvals
C US
Listed
UL60950-1, Second Edition, Information Technology Equipment
CSA C22.2 No. 60950-1-03, Second Edition
The manufacturer declares under sole responsibility that this product conforms to the
following standards or other normative documents:
EMC: EN 55022 (2006) Class A
EN 50024 (1998)
IEC 60950-1 :2001, Second Edition
Safety: This product complies with the requirements of IEC 60950-1:2001, Second Edition
Gost-R
GB4943-2001, GB9254-1998, GB17625.1-2003
FCC: This device complies with FCC CFR 47 Part 15 Class A.
Note: This equipment has been tested and found to comply with the limits for a Class A digital
device, pursuant to Part 15 of the FCC Rules. These limits are designed to provide
reasonable protection against harmful interference when the equipment is operated in a
commercial environment. This equipment generates, uses, and can radiate radio
frequency energy, and if not installed and used in accordance with the instructions in
this manual, it may cause harmful interference to radio communications. Operation of
this equipment in a residential area is likely to cause harmful interference in which case
the user will be required to correct the interference at his own expense.
All rights reserved
Copyright © 2012, Datamax-O’Neil
Part Number: 88-2358-01, Revision A
i
C
C
C
o
o
o
n
n
n
t
t
t
e
e
e
n
n
n
t
t
t
s
s
s
1
1
1
G
G
G
e
e
e
t
t
t
t
t
t
i
i
i
n
n
n
g
g
g
S
S
S
t
t
t
a
a
a
r
r
r
t
t
t
e
e
e
d
d
d
.
.
.
.
.
.
.
.
.
.
.
.
.
.
.
.
.
.
.
.
.
.
.
.
.
.
.
.
.
.
.
.
.
.
.
.
.
.
.
.
.
.
.
.
.
.
.
.
.
.
.
.
.
.
.
.
.
.
.
.
.
.
.
.
.
.
.
.
.
.
.
.
.
.
.
.
.
.
.
.
.
.
.
.
.
.
.
.
.
.
.
.
.
.
.
.
.
.
.
.
.
.
.
.
.
.
.
.
.
.
.
.
.
.
.
.
.
.
.
.
.
.
.
.
.
.
.
.
.
.
.
.
.
.
.
.
.
.
.
.
.
.
.
.
.
.
.
.
.
.
.
.
.
.
.
.
.
.
.
.
.
.
.
.
.
.
.
.
.
.
.
.
.
.
.
.
.
.
.
.
.
.
.
.
.
.
.
.
.
.
.
.
.
.
.
.
.
.
.
.
.
.
.
.
.
.
.
.
.
.
.
.
.
.
.
.
.
.
.
.
.
.
.
.
.
.
.
.
.
.
.
.
.
.
.
.
.
.
.
.
.
.
.
.
.
.
.
.
.
.
.
.
.
.
.
.
.
.
1
1
1
1.1 Introduction ........................................................................................................ 1
1.2 Unpacking the Printer ........................................................................................... 1
1.3 Kensington Security Slot ....................................................................................... 2
2
2
2
P
P
P
r
r
r
i
i
i
n
n
n
t
t
t
e
e
e
r
r
r
S
S
S
e
e
e
t
t
t
u
u
u
p
p
p
.
.
.
.
.
.
.
.
.
.
.
.
.
.
.
.
.
.
.
.
.
.
.
.
.
.
.
.
.
.
.
.
.
.
.
.
.
.
.
.
.
.
.
.
.
.
.
.
.
.
.
.
.
.
.
.
.
.
.
.
.
.
.
.
.
.
.
.
.
.
.
.
.
.
.
.
.
.
.
.
.
.
.
.
.
.
.
.
.
.
.
.
.
.
.
.
.
.
.
.
.
.
.
.
.
.
.
.
.
.
.
.
.
.
.
.
.
.
.
.
.
.
.
.
.
.
.
.
.
.
.
.
.
.
.
.
.
.
.
.
.
.
.
.
.
.
.
.
.
.
.
.
.
.
.
.
.
.
.
.
.
.
.
.
.
.
.
.
.
.
.
.
.
.
.
.
.
.
.
.
.
.
.
.
.
.
.
.
.
.
.
.
.
.
.
.
.
.
.
.
.
.
.
.
.
.
.
.
.
.
.
.
.
.
.
.
.
.
.
.
.
.
.
.
.
.
.
.
.
.
.
.
.
.
.
.
.
.
.
.
.
.
.
.
.
.
.
.
.
.
.
.
.
.
.
.
.
.
.
.
.
.
.
.
.
.
.
3
3
3
2.1 Introduction ........................................................................................................ 3
2.2 Connecting the Printer .......................................................................................... 3
2.2.1
Power Connections ..................................................................................... 3
2.2.2 Interface Connections ................................................................................. 4
2.2.3 USB Connection ......................................................................................... 5
2.3 Loading Media...................................................................................................... 9
2.3.1
Loading Roll Media...................................................................................... 9
2.3.2 Loading - External Media ........................................................................... 11
2.3.3 Loading Media with the Peel and Present Option............................................ 13
2.3.4 Loading Media with the Cutter Option.......................................................... 14
2.3.5 Adjustable Media Core Hangers (Pro+ models only)....................................... 15
2.4 Loading Ribbon .................................................................................................. 16
2.4.1
Using the Ribbon Core Adapters ................................................................. 19
3
3
3
P
P
P
r
r
r
i
i
i
n
n
n
t
t
t
e
e
e
r
r
r
O
O
O
p
p
p
e
e
e
r
r
r
a
a
a
t
t
t
i
i
i
o
o
o
n
n
n
.
.
.
.
.
.
.
.
.
.
.
.
.
.
.
.
.
.
.
.
.
.
.
.
.
.
.
.
.
.
.
.
.
.
.
.
.
.
.
.
.
.
.
.
.
.
.
.
.
.
.
.
.
.
.
.
.
.
.
.
.
.
.
.
.
.
.
.
.
.
.
.
.
.
.
.
.
.
.
.
.
.
.
.
.
.
.
.
.
.
.
.
.
.
.
.
.
.
.
.
.
.
.
.
.
.
.
.
.
.
.
.
.
.
.
.
.
.
.
.
.
.
.
.
.
.
.
.
.
.
.
.
.
.
.
.
.
.
.
.
.
.
.
.
.
.
.
.
.
.
.
.
.
.
.
.
.
.
.
.
.
.
.
.
.
.
.
.
.
.
.
.
.
.
.
.
.
.
.
.
.
.
.
.
.
.
.
.
.
.
.
.
.
.
.
.
.
.
.
.
.
.
.
.
.
.
.
.
.
.
.
.
.
.
.
.
.
.
.
.
.
.
.
.
.
.
.
.
.
.
.
.
.
.
.
.
.
.
.
.
.
.
.
2
2
2
1
1
1
3.1 Introduction ...................................................................................................... 21
3.2 LED Indicators ................................................................................................... 21
3.3 User Interface.................................................................................................... 22
3.3.1
Feed/Pause Mode ..................................................................................... 22
3.3.2 Test Mode ............................................................................................... 22
3.3.3 Menu Mode.............................................................................................. 23
3.4 Printer Configuration Tools .................................................................................. 24
3.5
Printer Configuration Utility (NETira CT)................................................................. 25
3.6 Windows Driver.................................................................................................. 27
3.7 Media Calibration ............................................................................................... 29
3.7.1 Quick Calibration...................................................................................... 29
3.7.2 Manual Calibration.................................................................................... 30
3.7.3 Advanced Entry Calibration........................................................................ 31
ii
4
4
4
M
M
M
e
e
e
n
n
n
u
u
u
S
S
S
y
y
y
s
s
s
t
t
t
e
e
e
m
m
m
.
.
.
.
.
.
.
.
.
.
.
.
.
.
.
.
.
.
.
.
.
.
.
.
.
.
.
.
.
.
.
.
.
.
.
.
.
.
.
.
.
.
.
.
.
.
.
.
.
.
.
.
.
.
.
.
.
.
.
.
.
.
.
.
.
.
.
.
.
.
.
.
.
.
.
.
.
.
.
.
.
.
.
.
.
.
.
.
.
.
.
.
.
.
.
.
.
.
.
.
.
.
.
.
.
.
.
.
.
.
.
.
.
.
.
.
.
.
.
.
.
.
.
.
.
.
.
.
.
.
.
.
.
.
.
.
.
.
.
.
.
.
.
.
.
.
.
.
.
.
.
.
.
.
.
.
.
.
.
.
.
.
.
.
.
.
.
.
.
.
.
.
.
.
.
.
.
.
.
.
.
.
.
.
.
.
.
.
.
.
.
.
.
.
.
.
.
.
.
.
.
.
.
.
.
.
.
.
.
.
.
.
.
.
.
.
.
.
.
.
.
.
.
.
.
.
.
.
.
.
.
.
.
.
.
.
.
.
.
.
.
.
.
.
.
.
.
.
.
.
.
.
.
.
.
.
.
.
.
.
.
3
3
3
7
7
7
4.1 Menu System Overview....................................................................................... 37
4.2 The User Menu................................................................................................... 37
4.3 The Advanced Menu............................................................................................ 38
4.4 Menu Details ..................................................................................................... 39
5
5
5
M
M
M
a
a
a
i
i
i
n
n
n
t
t
t
e
e
e
n
n
n
a
a
a
n
n
n
c
c
c
e
e
e
&
&
&
A
A
A
d
d
d
j
j
j
u
u
u
s
s
s
t
t
t
m
m
m
e
e
e
n
n
n
t
t
t
s
s
s
.
.
.
.
.
.
.
.
.
.
.
.
.
.
.
.
.
.
.
.
.
.
.
.
.
.
.
.
.
.
.
.
.
.
.
.
.
.
.
.
.
.
.
.
.
.
.
.
.
.
.
.
.
.
.
.
.
.
.
.
.
.
.
.
.
.
.
.
.
.
.
.
.
.
.
.
.
.
.
.
.
.
.
.
.
.
.
.
.
.
.
.
.
.
.
.
.
.
.
.
.
.
.
.
.
.
.
.
.
.
.
.
.
.
.
.
.
.
.
.
.
.
.
.
.
.
.
.
.
.
.
.
.
.
.
.
.
.
.
.
.
.
.
.
.
.
.
.
.
.
.
.
.
.
.
.
.
.
.
.
.
.
.
.
.
.
.
.
.
.
.
.
.
.
.
.
.
.
.
.
.
.
.
.
.
.
.
.
.
.
.
.
5
5
5
3
3
3
5.1 Introduction ...................................................................................................... 53
5.2 Cleaning the Printhead........................................................................................ 54
5.3 Ribbon Tension Adjustment ................................................................................. 56
5.4 Adjustable Media Sensor ..................................................................................... 57
5.5 Printhead Replacement ....................................................................................... 58
5.6 Platen Roller Replacement ................................................................................... 60
5.7 Updating Firmware ............................................................................................. 61
5.7.1 Boot 1 and Boot 2 Boot Loaders.................................................................. 61
6
6
6
T
T
T
r
r
r
o
o
o
u
u
u
b
b
b
l
l
l
e
e
e
s
s
s
h
h
h
o
o
o
o
o
o
t
t
t
i
i
i
n
n
n
g
g
g
.
.
.
.
.
.
.
.
.
.
.
.
.
.
.
.
.
.
.
.
.
.
.
.
.
.
.
.
.
.
.
.
.
.
.
.
.
.
.
.
.
.
.
.
.
.
.
.
.
.
.
.
.
.
.
.
.
.
.
.
.
.
.
.
.
.
.
.
.
.
.
.
.
.
.
.
.
.
.
.
.
.
.
.
.
.
.
.
.
.
.
.
.
.
.
.
.
.
.
.
.
.
.
.
.
.
.
.
.
.
.
.
.
.
.
.
.
.
.
.
.
.
.
.
.
.
.
.
.
.
.
.
.
.
.
.
.
.
.
.
.
.
.
.
.
.
.
.
.
.
.
.
.
.
.
.
.
.
.
.
.
.
.
.
.
.
.
.
.
.
.
.
.
.
.
.
.
.
.
.
.
.
.
.
.
.
.
.
.
.
.
.
.
.
.
.
.
.
.
.
.
.
.
.
.
.
.
.
.
.
.
.
.
.
.
.
.
.
.
.
.
.
.
.
.
.
.
.
.
.
.
.
.
.
.
.
.
.
.
.
.
.
.
.
.
.
6
6
6
3
3
3
6.1 Introduction ...................................................................................................... 63
6.2 Troubleshooting Tips........................................................................................... 63
6.3 Hex Dump Mode ................................................................................................ 65
A
A
A
S
S
S
p
p
p
e
e
e
c
c
c
i
i
i
f
f
f
i
i
i
c
c
c
a
a
a
t
t
t
i
i
i
o
o
o
n
n
n
s
s
s
.
.
.
.
.
.
.
.
.
.
.
.
.
.
.
.
.
.
.
.
.
.
.
.
.
.
.
.
.
.
.
.
.
.
.
.
.
.
.
.
.
.
.
.
.
.
.
.
.
.
.
.
.
.
.
.
.
.
.
.
.
.
.
.
.
.
.
.
.
.
.
.
.
.
.
.
.
.
.
.
.
.
.
.
.
.
.
.
.
.
.
.
.
.
.
.
.
.
.
.
.
.
.
.
.
.
.
.
.
.
.
.
.
.
.
.
.
.
.
.
.
.
.
.
.
.
.
.
.
.
.
.
.
.
.
.
.
.
.
.
.
.
.
.
.
.
.
.
.
.
.
.
.
.
.
.
.
.
.
.
.
.
.
.
.
.
.
.
.
.
.
.
.
.
.
.
.
.
.
.
.
.
.
.
.
.
.
.
.
.
.
.
.
.
.
.
.
.
.
.
.
.
.
.
.
.
.
.
.
.
.
.
.
.
.
.
.
.
.
.
.
.
.
.
.
.
.
.
.
.
.
.
.
.
.
.
.
.
.
.
.
.
.
.
.
.
.
.
.
.
.
.
.
.
.
.
.
.
6
6
6
7
7
7
B
B
B
W
W
W
i
i
i
r
r
r
e
e
e
l
l
l
e
e
e
s
s
s
s
s
s
a
a
a
n
n
n
d
d
d
W
W
W
i
i
i
r
r
r
e
e
e
d
d
d
L
L
L
A
A
A
N
N
N
S
S
S
e
e
e
t
t
t
u
u
u
p
p
p
.
.
.
.
.
.
.
.
.
.
.
.
.
.
.
.
.
.
.
.
.
.
.
.
.
.
.
.
.
.
.
.
.
.
.
.
.
.
.
.
.
.
.
.
.
.
.
.
.
.
.
.
.
.
.
.
.
.
.
.
.
.
.
.
.
.
.
.
.
.
.
.
.
.
.
.
.
.
.
.
.
.
.
.
.
.
.
.
.
.
.
.
.
.
.
.
.
.
.
.
.
.
.
.
.
.
.
.
.
.
.
.
.
.
.
.
.
.
.
.
.
.
.
.
.
.
.
.
.
.
.
.
.
.
.
.
.
.
.
.
.
.
.
.
.
.
.
.
.
.
.
.
.
.
.
.
.
.
.
.
.
.
.
.
.
.
.
.
.
.
.
.
.
.
.
.
.
.
.
.
7
7
7
1
1
1
B.1 Network Card Setup ........................................................................................... 71
B.2 Wireless Setup................................................................................................... 72
B.2.1 Wireless Setup – Infrastructure .................................................................. 73
B.2.1 Wireless Setup – Ad-Hoc ........................................................................... 74
B.3 Installing the Printer Driver.................................................................................. 76
C
C
C
B
B
B
l
l
l
u
u
u
e
e
e
t
t
t
o
o
o
o
o
o
t
t
t
h
h
h
S
S
S
e
e
e
t
t
t
u
u
u
p
p
p
.
.
.
.
.
.
.
.
.
.
.
.
.
.
.
.
.
.
.
.
.
.
.
.
.
.
.
.
.
.
.
.
.
.
.
.
.
.
.
.
.
.
.
.
.
.
.
.
.
.
.
.
.
.
.
.
.
.
.
.
.
.
.
.
.
.
.
.
.
.
.
.
.
.
.
.
.
.
.
.
.
.
.
.
.
.
.
.
.
.
.
.
.
.
.
.
.
.
.
.
.
.
.
.
.
.
.
.
.
.
.
.
.
.
.
.
.
.
.
.
.
.
.
.
.
.
.
.
.
.
.
.
.
.
.
.
.
.
.
.
.
.
.
.
.
.
.
.
.
.
.
.
.
.
.
.
.
.
.
.
.
.
.
.
.
.
.
.
.
.
.
.
.
.
.
.
.
.
.
.
.
.
.
.
.
.
.
.
.
.
.
.
.
.
.
.
.
.
.
.
.
.
.
.
.
.
.
.
.
.
.
.
.
.
.
.
.
.
.
.
.
.
.
.
.
.
.
.
.
.
.
.
.
.
.
.
.
.
.
.
.
.
.
.
.
.
.
.
.
7
7
7
9
9
9
C.1 Bluetooth Setup................................................................................................. 79
D
D
D
M
M
M
e
e
e
n
n
n
u
u
u
L
L
L
a
a
a
n
n
n
g
g
g
u
u
u
a
a
a
g
g
g
e
e
e
.
.
.
.
.
.
.
.
.
.
.
.
.
.
.
.
.
.
.
.
.
.
.
.
.
.
.
.
.
.
.
.
.
.
.
.
.
.
.
.
.
.
.
.
.
.
.
.
.
.
.
.
.
.
.
.
.
.
.
.
.
.
.
.
.
.
.
.
.
.
.
.
.
.
.
.
.
.
.
.
.
.
.
.
.
.
.
.
.
.
.
.
.
.
.
.
.
.
.
.
.
.
.
.
.
.
.
.
.
.
.
.
.
.
.
.
.
.
.
.
.
.
.
.
.
.
.
.
.
.
.
.
.
.
.
.
.
.
.
.
.
.
.
.
.
.
.
.
.
.
.
.
.
.
.
.
.
.
.
.
.
.
.
.
.
.
.
.
.
.
.
.
.
.
.
.
.
.
.
.
.
.
.
.
.
.
.
.
.
.
.
.
.
.
.
.
.
.
.
.
.
.
.
.
.
.
.
.
.
.
.
.
.
.
.
.
.
.
.
.
.
.
.
.
.
.
.
.
.
.
.
.
.
.
.
.
.
.
.
.
.
.
.
.
.
.
.
.
.
8
8
8
1
1
1
D.1 Changing the Menu Language .............................................................................. 81
D.2 Advanced File Handling Information...................................................................... 84
Chapter 1 – Getting Started 1
1
1
1
G
G
G
e
e
e
t
t
t
t
t
t
i
i
i
n
n
n
g
g
g
S
S
S
t
t
t
a
a
a
r
r
r
t
t
t
e
e
e
d
d
d
1
1
1
.
.
.
1
1
1
I
I
I
n
n
n
t
t
t
r
r
r
o
o
o
d
d
d
u
u
u
c
c
c
t
t
t
i
i
i
o
o
o
n
n
n
The E-Class Mark III printer (hereafter referred to as “the printer”) is user-friendly thermal printing device
that blends quality and durability in an affordable package to meet all of your labeling needs. This manual
provides the information necessary to operate and maintain the printer.
To begin printing labels or tags, refer to the instructions included with your software labeling program. For
your convenience, a Windows
®
printer driver can be found on the Accessories CD-ROM, or it can be
downloaded from our website at http://www.datamax-oneil.com
. (If you wish to write custom programs or
label formats, a copy of the Programmer’s Manual also is included for your reference, or the manual can be
downloaded.)
1
1
1
.
.
.
2
2
2
U
U
U
n
n
n
p
p
p
a
a
a
c
c
c
k
k
k
i
i
i
n
n
n
g
g
g
t
t
t
h
h
h
e
e
e
P
P
P
r
r
r
i
i
i
n
n
n
t
t
t
e
e
e
r
r
r
After removing the printer from the packaging material, check the contents of the box. In addition to the
printer, the following items should be present:
312
Power Supply
Accessories CD-ROM
Any special or additionally ordered items
Additional Requirements
The following items are necessary to generate labels:
Parallel, Serial, USB, or Ethernet cable, see
Section 2.2.2 for details.
Applicable media; see Appendix A for details.
Contact customer support or your sales representative
for advice on the media and software that may best be
suited for your application.
It is a good idea to save all packaging material for future use.
2 Chapter 1 – Getting Started
1
1
1
.
.
.
3
3
3
K
K
K
e
e
e
n
n
n
s
s
s
i
i
i
n
n
n
g
g
g
t
t
t
o
o
o
n
n
n
S
S
S
e
e
e
c
c
c
u
u
u
r
r
r
i
i
i
t
t
t
y
y
y
S
S
S
l
l
l
o
o
o
t
t
t
Professional + modules equipped with the Key Lock Option also include a built-in Kensington
Security Slot with a metal backing plate. The Kensington slot allows you to physically secure
the printer from being stolen by tethering it to a larger object like a desk or counter. There
are many security solutions offered by Kensington that are compatible with the slot.
Visit http://www.kensington.com
for a full line of locking options and accessories.
The Kensington Security Slot has been the industry standard since 1990, giving customers the
best option for physical security of computer and electronic equipment.
312
Kensington Security Slot
Chapter 2 – Printer Setup 3
2
2
2
P
P
P
r
r
r
i
i
i
n
n
n
t
t
t
e
e
e
r
r
r
S
S
S
e
e
e
t
t
t
u
u
u
p
p
p
2
2
2
.
.
.
1
1
1
I
I
I
n
n
n
t
t
t
r
r
r
o
o
o
d
d
d
u
u
u
c
c
c
t
t
t
i
i
i
o
o
o
n
n
n
This section explains how to connect your printer and load media (including ribbon, if equipped for thermal
transfer operation).
2
2
2
.
.
.
2
2
2
C
C
C
o
o
o
n
n
n
n
n
n
e
e
e
c
c
c
t
t
t
i
i
i
n
n
n
g
g
g
t
t
t
h
h
h
e
e
e
P
P
P
r
r
r
i
i
i
n
n
n
t
t
t
e
e
e
r
r
r
2.2.1 Power Connections
The printer is powered by an external auto-ranging power supply, which connects between the printer and an
electrical outlet. Ensure that the operating ranges of the power supply are compatible with your electrical
service, (see Appendix A for details) then connect power as follows:
Before connecting power to the printer, ensure that the Power Switch is in the OFF (O) position.
1) Connect the Power Supply to Power Jack of the printer.
2) Connect the AC Power Cord to the Power Supply.
3) Connect the AC Power Cord to an Electrical Outlet.
312
Power Supply
AC Power Cord
Power Jack
Electrical Outlet
4 Chapter 2 – Printer Setup
2.2.2 Interface Connections
Before connecting interface cables to the printer, ensure that the Power Switch is in the OFF (O) position.
312
Ethernet Port
USB Port
Serial Port
USB Host Port
Parallel Port
Cable Requirements
Choose the correct cable when interfacing the printer to the host:
The Parallel Port (optional) supports parallel communications via a 36-pin male mini-Centronics
connector. Bi-directional communications (forward and reverse channels) is supported when an IEEE
1284 compliant cable and supporting host software is used.
The Ethernet Port supports Wired LAN communications (see Appendix B for information).
The Serial Port supports RS-232C communications via a DB-9 connector with specific pin-outs
(interface cable part numbers and pin-outs are given below; contact your reseller to order). Serial port
settings are menu-selectable and must match the host settings.
Part # 32-2483-01
Part # 32-2301-01
The USB Port supports high-speed serial communications and requires a standard USB interface
cable.
The USB Host Port (optional). The USB Host Port allows the printer to accept external USB memory
devices for storing graphics, label formats, fonts, and firmware. The port can also accept an USB
keyboard for standalone, direct data (Line mode) input applications; see the Programmer’s Manual for
more information on how to utilize the port.
The printer automatically establishes communications with the first port through which valid data is
received. Afterward, a timeout period must be exceeded (or power must be cycled OFF and ON) to change
the established communications port.
Chapter 2 – Printer Setup 5
2.2.3 USB Connection
USB connection to PC requires installation of drivers for both the Port and the Windows Driver itself as
described in Steps A and B below. All the files necessary for installation are located on the Accessories CD-
Rom. Connect the printer to the host PC via a standard USB Cable and follow the steps below. The following
steps are for a typical Windows XP system, other versions of Windows may vary.
Step A: Windows Port Driver Installation:
1) Turn on the printer and wait until the start-up
initialization is complete. The PC will then detect
the printer and launch the “Found New Hardware
Wizard”.
2) Select the “No, not this time” radio button and
then click Next.
3) Select the “Install from a list or specific
(Advanced)” radio button and then click Next.
4) Select the “Search for the best driver in these
locations” radio button.
5) Check the “Include this location in the search”
checkbox and then click Browse.
6) Navigate to driver folder on the CD-ROM,
assuming your CD/DVD drive is labeled D: the
path would be as follows:
My Computer>D:>assets>windriver
7) Select the folder and then Click ‘OK’. Then Click
Next.
6 Chapter 2 – Printer Setup
8) When prompted click “Continue Anyway”
9) Windows will now load the drivers to assign the
necessary ports to the printer.
10) Click Finish to close the wizard. Proceed to Step
B to begin the installation of the Windows Printer
Driver.
Step B: Windows Printer Driver Installation:
1) The PC will launch the “Found New Hardware
Wizard” again.
2) Select the “No, not this time” radio button and
then click Next.
Chapter 2 – Printer Setup 7
3) Select the “Install from a list or specific
(Advanced)” radio button and then click Next.
4) Select the “Search for the best driver in these
locations” radio button.
5) Check the “Include this location in the search”
checkbox and then click Browse.
6) Navigate to driver folder on the CD-ROM,
assuming your CD/DVD drive is labeled D: the
path would be as follows:
My Computer>D:>assets>windriver
7) Select the folder and then Click ‘OK’. Then Click
Next.
8) Select the driver that matches your model
printer. (there may be multiple models listed)
and then click Next.
8 Chapter 2 – Printer Setup
9) When prompted click “Continue Anyway”
10) Windows will now install the necessary files for
the Windows printer driver.
11) Click Finish to close the wizard.
The printer can now be selected for use in the
printer dialogue box of any windows application.
Chapter 2 – Printer Setup 9
2
2
2
.
.
.
3
3
3
L
L
L
o
o
o
a
a
a
d
d
d
i
i
i
n
n
n
g
g
g
M
M
M
e
e
e
d
d
d
i
i
i
a
a
a
The printer is equipped with an Adjustable Media Sensor and may require adjustment to match your
media choice, refer to Section 4.4.
2.3.1 Loading Roll Media
Load media as follows:
1) Pull forward on the Cover Latches and lift up on the cover. Pro+ models have Key Lock option that
must be unlocked before the cover can be opened.
312
Cover Latches
Key Lock Option (Pro+
models only)
2) Slide the Media Guides outward.
Pro+ model Media Guides are equipped with Adjustable Media Core Hangers, see section 2.3.5.
3) Slide the Media Hangers outward and insert the Roll Media as shown. Allow the Media Hangers to
retract and grasp the media roll.
312
Media Hangers
Media Guides
Roll Media
10 Chapter 2 – Printer Setup
4) Pull out enough media to exit the front of
the printer. Adjust the Media Guides so
they are lightly touching the edge of the
media.
5) If using thermal transfer media (ribbon) proceed to Section 2.4 Loading Ribbon. Otherwise close
the printer’s Cover and press downward until latched. Pro
Pro+ models are equipped with a Cover Release Latch. Press outward on the latch to release cover.
312
Cover
Cover Release Latch
(Pro+ models only)
6) Press the
button to advance the media (if the Fault Light is lit, see Section 3.7.)
The printer is factory set to use gap media. If using another media type (for example, continuous
media), printer setup must be reconfigured; see Section 3.4
.
Chapter 2 – Printer Setup 11
2.3.2 Loading - External Media
Using Internal Media Chute Guides Accessory (Professional model only)
Load media as follows:
1) Slide the Media Guides outward.
2) Slide the Media Hangers outward and install the two Media Chute Guides into the Media Hangers.
Media Chute Guides
Media Hangers
External Media Guide
3) Position the Media Hangers to match the width of the media being used. Slide the Hanger Lock
against the Media Hanger to hold this position.
Media Hangers
Hanger Lock
12 Chapter 2 – Printer Setup
4) Route the media through the External Media Slot in the rear of the printer. Pull out enough media
to exit the front of the printer. Adjust the Media Guides so they are lightly touching the edge of
the media.
External Media Slot
Media Guides
External Media Supply
5) If using Thermal Transfer media (ribbon) proceed to Section 2.4 Loading Ribbon. Otherwise close
the printer’s Cover and press downward until latched.
6) Press the button to advance the media (if the Fault Light is lit, see Section 3.7.)
The printer is factory set to use gap media. If using another media type (for example, continuous
media), printer setup must be reconfigured; see Section 3.4
.
Chapter 2 – Printer Setup 13
2.3.3 Loading Media with the Peel and Present Option
Load media for peeling (if the printer is equipped with the option) as follows:
When using the Peel Mechanism do not exceed a print speed of 4 IPS.
To utilize “Tear mode” with Peel and Present Option installed; move the Peeler Door to its open position.
1) Load media as described in Section 2.3, (steps 1-3).
2) Remove about 8 inches (200mm) of labels from the Media Backing.
3) Open the Peeler Door. Route the Media Backing over the Platen Roller and Peel Bar, and then
behind the Peel Roller and Peeler Door, as shown below.
312
Media Backing
Peeler Door
Platen Roller
Peel Bar
Peel Roller
4) Close the Peeler Door.
5) If using Thermal Transfer media (ribbon) proceed to Section 2.4 Loading Ribbon. Otherwise close
the printer’s Cover and press downward until latched.
6) Press the
button to advance the media (if the Fault Light is lit, see Section 3.7.)
7) The printer will now peel each label and present it to the operator for removal. The indicator light
will flash orange and the next label will not feed/print until the previous label is removed.
The printer is factory set to use gap media. If using another media type (for example, continuous
media), printer setup must be reconfigured; see Section 3.4
.
14 Chapter 2 – Printer Setup
2.3.4 Loading Media with the Cutter Option
Load media for cutting (if the printer is equipped with the option) as follows:
1) Load media as described in Section 2.3, (steps 1-3).
2) Route the media through the opening in the Cutter.
312
Cutter
Media
3) If using Thermal Transfer media (ribbon) proceed to Section 2.4 Loading Ribbon. Otherwise close
the printer’s Cover and press downward until latched.
4) Press the button to advance the media (if the Fault Light is lit, see Section 3.7.). The printer
will now cut each label as it exits from the printer.
7) The printer will now peel each label and present it to the operator for removal.
If the printer is equipped with the Present Sensor Option, the indicator light will flash orange and the
next label will not feed/print until the previous label is removed.
The printer is factory set to use gap media. If using another media type (for example, continuous
media), printer setup must be reconfigured; see Section 3.4
.
  • Page 1 1
  • Page 2 2
  • Page 3 3
  • Page 4 4
  • Page 5 5
  • Page 6 6
  • Page 7 7
  • Page 8 8
  • Page 9 9
  • Page 10 10
  • Page 11 11
  • Page 12 12
  • Page 13 13
  • Page 14 14
  • Page 15 15
  • Page 16 16
  • Page 17 17
  • Page 18 18
  • Page 19 19
  • Page 20 20
  • Page 21 21
  • Page 22 22
  • Page 23 23
  • Page 24 24
  • Page 25 25
  • Page 26 26
  • Page 27 27
  • Page 28 28
  • Page 29 29
  • Page 30 30
  • Page 31 31
  • Page 32 32
  • Page 33 33
  • Page 34 34
  • Page 35 35
  • Page 36 36
  • Page 37 37
  • Page 38 38
  • Page 39 39
  • Page 40 40
  • Page 41 41
  • Page 42 42
  • Page 43 43
  • Page 44 44
  • Page 45 45
  • Page 46 46
  • Page 47 47
  • Page 48 48
  • Page 49 49
  • Page 50 50
  • Page 51 51
  • Page 52 52
  • Page 53 53
  • Page 54 54
  • Page 55 55
  • Page 56 56
  • Page 57 57
  • Page 58 58
  • Page 59 59
  • Page 60 60
  • Page 61 61
  • Page 62 62
  • Page 63 63
  • Page 64 64
  • Page 65 65
  • Page 66 66
  • Page 67 67
  • Page 68 68
  • Page 69 69
  • Page 70 70
  • Page 71 71
  • Page 72 72
  • Page 73 73
  • Page 74 74
  • Page 75 75
  • Page 76 76
  • Page 77 77
  • Page 78 78
  • Page 79 79
  • Page 80 80
  • Page 81 81
  • Page 82 82
  • Page 83 83
  • Page 84 84
  • Page 85 85
  • Page 86 86
  • Page 87 87
  • Page 88 88
  • Page 89 89
  • Page 90 90
  • Page 91 91
  • Page 92 92

Datamax E-4206L User manual

Category
Label printers
Type
User manual

Ask a question and I''ll find the answer in the document

Finding information in a document is now easier with AI