Page is loading ...

350 East Plumeria Drive
San Jose, CA 95134
USA
July 2013
202-10623-03
v1.0
Wireless N150 Access Point
WN604
User Manual
Downloaded from www.vandenborre.be

2
Wireless N150 Access Point WN604
© 2011 NETGEAR, Inc. All rights reserved
No part of this publication may be reproduced, transmitted, transcribed, stored in a retrieval system, or translated
into any language in any form or by any means without the written permission of NETGEAR, Inc.
Technical Support
Thank you for choosing NETGEAR. To register your product, get the latest product updates, get support online, or
for more information about the topics covered in this manual, visit the Support website at
http://support.netgear.com
Phone (US & Canada only): 1-888-NETGEAR
Phone (Other Countries): Check the list of phone numbers at
http://support.netgear.com/app/answers/detail/a_id/984
Trademarks
NETGEAR, the NETGEAR logo, and Connect with Innovation are trademarks and/or registered trademarks of
NETGEAR, Inc. and/or its subsidiaries in the United States and/or other countries. Information is subject to change
without notice. Other brand and product names are registered trademarks or trademarks of their respective
holders. © 2011 NETGEAR, Inc. All rights reserved.
Statement of Conditions
To improve internal design, operational function, and/or reliability, NETGEAR reserves the right to make changes
to the products described in this document without notice. NETGEAR does not assume any liability that may occur
due to the use, or application of, the product(s) or circuit layout(s) described herein.
Downloaded from www.vandenborre.be

3
Contents
Chapter 1 Getting Started
About the Access Point . . . . . . . . . . . . . . . . . . . . . . . . . . . . . . . . . . . . . . . . 6
Compatible NETGEAR Switches . . . . . . . . . . . . . . . . . . . . . . . . . . . . . . . . . 6
System Requirements . . . . . . . . . . . . . . . . . . . . . . . . . . . . . . . . . . . . . . . . . 7
What’s In the Box . . . . . . . . . . . . . . . . . . . . . . . . . . . . . . . . . . . . . . . . . . . . .7
Hardware Description . . . . . . . . . . . . . . . . . . . . . . . . . . . . . . . . . . . . . . . . . . 7
Front Panel . . . . . . . . . . . . . . . . . . . . . . . . . . . . . . . . . . . . . . . . . . . . . . . .8
Rear Panel . . . . . . . . . . . . . . . . . . . . . . . . . . . . . . . . . . . . . . . . . . . . . . . .9
Side Panel . . . . . . . . . . . . . . . . . . . . . . . . . . . . . . . . . . . . . . . . . . . . . . . 10
Product Label . . . . . . . . . . . . . . . . . . . . . . . . . . . . . . . . . . . . . . . . . . . . . 10
Chapter 2 Installation and Basic Configuration
Log In to the Access Point . . . . . . . . . . . . . . . . . . . . . . . . . . . . . . . . . . . . . 12
Install the Access Point . . . . . . . . . . . . . . . . . . . . . . . . . . . . . . . . . . . . . . .13
Configure the System Settings for Your Location. . . . . . . . . . . . . . . . . . . .13
Set the Time . . . . . . . . . . . . . . . . . . . . . . . . . . . . . . . . . . . . . . . . . . . . . . . . 15
Set Basic IP Options . . . . . . . . . . . . . . . . . . . . . . . . . . . . . . . . . . . . . . . . .15
Configure Wireless Access. . . . . . . . . . . . . . . . . . . . . . . . . . . . . . . . . . . . . 17
Deploy the Access Point. . . . . . . . . . . . . . . . . . . . . . . . . . . . . . . . . . . . . . . 17
Verify Wireless Connectivity. . . . . . . . . . . . . . . . . . . . . . . . . . . . . . . . . .18
Wireless Equipment Placement and Range Guidelines . . . . . . . . . . . . . 18
Wireless Settings . . . . . . . . . . . . . . . . . . . . . . . . . . . . . . . . . . . . . . . . . . . .19
Wireless Settings Screen Fields. . . . . . . . . . . . . . . . . . . . . . . . . . . . . . .19
Configure Basic QoS Settings . . . . . . . . . . . . . . . . . . . . . . . . . . . . . . . . . . 21
Set Up and Test Basic Wireless Connectivity . . . . . . . . . . . . . . . . . . . . . . 22
Chapter 3 Configure Security
Security Profiles . . . . . . . . . . . . . . . . . . . . . . . . . . . . . . . . . . . . . . . . . . . . .25
Edit Security Profile Screen Fields . . . . . . . . . . . . . . . . . . . . . . . . . . . . . 25
Wireless Security Options . . . . . . . . . . . . . . . . . . . . . . . . . . . . . . . . . . . . .27
Manually Configure Security. . . . . . . . . . . . . . . . . . . . . . . . . . . . . . . . . . . . 28
Configure WPA2, or WPA2 + WPA, or WPA . . . . . . . . . . . . . . . . . . . . . 28
Configure WEP. . . . . . . . . . . . . . . . . . . . . . . . . . . . . . . . . . . . . . . . . . . . 29
Wi-Fi Protected Setup (WPS). . . . . . . . . . . . . . . . . . . . . . . . . . . . . . . . . . . 30
Use WPS to Add a Client to the Wireless Network . . . . . . . . . . . . . . . . 31
Restrict Wireless Access by MAC Address . . . . . . . . . . . . . . . . . . . . . . . .32
Downloaded from www.vandenborre.be

4
Wireless N150 Access Point WN604
Chapter 4 Management
Upgrade the Wireless Access Point Firmware . . . . . . . . . . . . . . . . . . . . . . 35
Configuration File Management . . . . . . . . . . . . . . . . . . . . . . . . . . . . . . . . . 36
Change the Administrator Password . . . . . . . . . . . . . . . . . . . . . . . . . . . . . 38
Enable the SysLog Server . . . . . . . . . . . . . . . . . . . . . . . . . . . . . . . . . . . . . 39
Activity Log . . . . . . . . . . . . . . . . . . . . . . . . . . . . . . . . . . . . . . . . . . . . . . . . . 40
View Summary Information . . . . . . . . . . . . . . . . . . . . . . . . . . . . . . . . . . . . 41
System Screen Fields. . . . . . . . . . . . . . . . . . . . . . . . . . . . . . . . . . . . . . . 41
Network Traffic Statistics . . . . . . . . . . . . . . . . . . . . . . . . . . . . . . . . . . . . . . 42
Statistic Screen Fields . . . . . . . . . . . . . . . . . . . . . . . . . . . . . . . . . . . . . . 42
Available Wireless Station Statistics . . . . . . . . . . . . . . . . . . . . . . . . . . . . . 43
Chapter 5 Advanced Configuration
Schedule the Wireless Radio . . . . . . . . . . . . . . . . . . . . . . . . . . . . . . . . . . . 46
Advanced Wireless Settings. . . . . . . . . . . . . . . . . . . . . . . . . . . . . . . . . . . . 46
Advanced Wireless Settings Screen Fields . . . . . . . . . . . . . . . . . . . . . . 47
Advanced QoS Settings . . . . . . . . . . . . . . . . . . . . . . . . . . . . . . . . . . . . . . . 48
Enable Wireless Bridging . . . . . . . . . . . . . . . . . . . . . . . . . . . . . . . . . . . . . . 49
Configure a Point-to-Point Bridge. . . . . . . . . . . . . . . . . . . . . . . . . . . . . . 52
Configure a Point-to-Multi-Point Wireless Bridge . . . . . . . . . . . . . . . . . . 53
Chapter 6 Troubleshooting
Troubleshooting with the LEDs . . . . . . . . . . . . . . . . . . . . . . . . . . . . . . . . . 56
All LEDs Are Off . . . . . . . . . . . . . . . . . . . . . . . . . . . . . . . . . . . . . . . . . . . 56
WiFi LED Is Off. . . . . . . . . . . . . . . . . . . . . . . . . . . . . . . . . . . . . . . . . . . . 56
LAN LED Is Off. . . . . . . . . . . . . . . . . . . . . . . . . . . . . . . . . . . . . . . . . . . . 57
Cannot Access the Internet or the LAN Wirelessly . . . . . . . . . . . . . . . . . . 57
Cannot Connect to the Access Point to Configure It . . . . . . . . . . . . . . . . . 57
Time-Out Error . . . . . . . . . . . . . . . . . . . . . . . . . . . . . . . . . . . . . . . . . . . . . . 58
Appendix A Supplemental Information
Factory Default Settings . . . . . . . . . . . . . . . . . . . . . . . . . . . . . . . . . . . . . . . 60
Technical Specifications. . . . . . . . . . . . . . . . . . . . . . . . . . . . . . . . . . . . . . . 62
Appendix B Notification of Compliance
Index
Downloaded from www.vandenborre.be

5
1
1. Getting Started
This chapter covers the following topics:
• About the Access Point
• Compatible NETGEAR Switches
• System Requirements
• What’s In the Box
• Hardware Description
For more information about the topics covered in this manual, visit the support website at
http://support.netgear.com.
Downloaded from www.vandenborre.be

Getting Started
6
Wireless N150 Access Point WN604
About the Access Point
The Wireless N150 Access Point WN604 is the basic building block of a wireless LAN
infrastructure. It provides connectivity between Ethernet wired networks and radio-equipped
wireless notebook systems, desktop systems, print servers, and other devices.
The access point provides wireless connectivity to multiple wireless network devices within a
fixed range or area of coverage—interacting with a wireless network interface card (NIC)
through an antenna. Typically, an individual in-building access point provides a maximum
connectivity area with about a 500-foot radius. Consequently, the access point can support a
small group of users in a range of several hundred feet. Most access points can handle
between 10 and 30 users simultaneously per radio.
The access point acts as a bridge between the wired LAN and wireless clients. Connecting
multiple access points through a wired Ethernet backbone can extend the wireless network
coverage. As a mobile computing device moves out of the range of one access point, it
moves into the range of another. As a result, wireless clients can freely roam from one access
point to another and still maintain seamless connection to the network.
Compatible NETGEAR Switches
For a list of compatible products from other manufacturers, see the Wireless Ethernet
Compatibility Alliance website (WECA; see
www.wi-fi.net).
The following NETGEAR switches work with the WN604 Wireless Access Point:
• FS108P - ProSafe™ 8 Port 10/100 Switch with 4 Port PoE
• FS116P ProSafe 16 Port 10/100 Desktop Switch with 8 Port PoE
• FS726TP - ProSafe 24 Port 10/100 Smart Switch with 2 Gigabit Ports and 12 Port PoE
• FS728TP - ProSafe 24+4 10/100 Smart Switch with full PoE
• FS752TPS - ProSafe 48 Port 10/100 Stackable Smart Switch with 4 Gigabit Ports and 24
Port PoE
• FSM7328PS - ProSafe 24-port 10/100 L3 Managed Stackable Switch with 24 PoE Ports
• FSM7352PS-ProSafe 48 Port 10/100 L3 Managed Stackable Switch with 4 Gigabit Ports
and PoE
• GS724TP-ProSafe GS724TP 24-Port Gigabit Smart Switch and PoE
• GS748TP-ProSafe GS748TP 48-Port Gigabit Smart Switch and PoE
Downloaded from www.vandenborre.be

Getting Started
7
Wireless N150 Access Point WN604
System Requirements
Before installing the access point, make sure your system meets these requirements:
• A 10/100 Mbps LAN device such as a hub or switch
• The Category 5 UTP straight through Ethernet cable with RJ-45 connector included in the
package, or one like it
• A 100–240 V, 50–60 Hz AC power source
• A web browser for configuration such as Microsoft Internet Explorer 6.0 or later, or Mozilla
3.0 or later
• At least one computer with the TCP/IP protocol installed
• 802.11b/g/n-compliant devices
What’s In the Box
The package contains the following:
• Wireless N150 Access Point WN604
• Ethernet cable
• Power adapter
• Vertical stand feet (2)
• Installation Guide
• Resource CD
Contact your reseller or customer support in your area if there are any missing or damaged
parts. Keep the original packing materials, and use the packing materials to repack the
access point if you need to return it for repair. To qualify for product updates and product
warranty registrations, we encourage you to register on the NETGEAR website at:
www.NETGEAR.com.
Hardware Description
This section describes the front, rear, and side hardware functions of the access point.
Downloaded from www.vandenborre.be

Getting Started
8
Wireless N150 Access Point WN604
Front Panel
The access point front hardware functions are described below.
Power Wi-FiWPS LAN ports 1–4
Figure 1. WN604 front panel
The following table explains the LED indicators on the front panel.
Table 1. Front panel LEDs
LED Description
Power
• Solid green. Power is on and the access point is ready.
• Blinking green. A firmware update is in process.
• Solid amber. T
he access point is performing a power-on self-test.
• Off. No
power.
Wi-Fii Protected
Setup (WP
S)
• Blinking green. WPS activities are in process.
• Off. No
WPS activity, or there is a WPS error.
Wi-Fi
• Solid blue. The wireless radio is up and running without wireless data
transmission.
• Bl
inking blue. Wireless data is being sent or received.
• Off.
The wireless interface is turned off.
LAN ports 1–4
• Solid green. 100 Mbps link detected, no data transmission on the port.
• Blin
king green. 100 Mbps link detected, data transmission on the port.
• Solid amber.
10 Mbps link detected, no data transmission on the port.
• Blinkin
g amber. 10 Mbps link detected, data transmission on the port.
• Off. No link is detected
Downloaded from www.vandenborre.be

Getting Started
9
Wireless N150 Access Point WN604
Rear Panel
Power
Power
LAN ports 1–4 Reset Antenna
On/Off
Figure 2. WN604 rear panel
During set up, use an Ethernet RJ-45 port to connect a computer. After initial set up, use an
Ethernet port to connect to an Ethernet LAN through a device such as a hub, switch, router,
or PoE switch.
The Reset button has two functions:
• Reboot. W
hen pressed and released quickly, the access point restarts.
• Reset
to Factory Defaults. This button can also be used to clear all data and restore all
settings to the factory default values. See Factory Default Settings on p
age 60.
Downloaded from www.vandenborre.be

Getting Started
10
Wireless N150 Access Point WN604
Side Panel
Wireless On/Off
WPS
Figure 3. WN604 side panel
The side panel has a Wireless On/Off button and an WPS button.
• W
ireless On/Off button. You can use this button to turn the wireless radio off and on.
You can also schedule the wireless radio. See Schedule the Wireless Radio o
n page 46.
• WPS button. Y
ou can use WPS to add clients to the WN604 wireless network without
typing the WPA or WPA2 password. See Wireless Security Options on p
age 27.
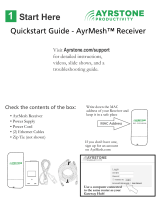
Product Label
The label on the bottom of the access point includes the MAC address, serial number,
security PIN, and the default IP address for logging in to the access point.
Figure 4. The label is located on the bottom of the access point
Downloaded from www.vandenborre.be

11
2
2. Installation and Basic Configuration
This chapter contains the following sections:
• Log In to the Access Point
• Install the Access Point
• Set the Time
• Set Basic IP Options
• Configure Wireless Access
• Deploy the Access Point
• Wireless Settings
• Wireless Settings
• Configure Basic QoS Settings
• Set Up and Test Basic Wireless Connectivity
Downloaded from www.vandenborre.be

Installation and Basic Configuration
12
Wireless N150 Access Point WN604
Log In to the Access Point
The access point is set, by default, with the IP address of 192.168.0.100 with DHCP disabled.
To log in to the access point:
1. Prep
are a computer with an Ethernet adapter.
a. If this comp
uter is part of your network, record its TCP/IP configuration settings.
b. Config
ure the computer with a static IP address of 192.168.0.210 and 255.255.255.0
for the subnet mask.
2. Connect an Ethern
et cable from the access point to the computer.
3. Power up the access point.
a. Connect the
power adapter and plug it into an electrical outlet.
b. Make su
re that the Power On/Off button on the rear panel is in the On position
(pressed in).
4. V
erify the following:
• Th
e Power LED is on.
• Th
e LAN LED is on for the LAN port that is connected to your powered-on computer.
• Th
e WiFi LED is blinking.
5. Lau
nch a web browser and enter http://192.168.0.230 in the address field. You are
prompted to log in:
6. Type admin in the User name field and password in the Password field, both in lower-case
letters, and click Login.
Downloaded from www.vandenborre.be

Installation and Basic Configuration
13
Wireless N150 Access Point WN604
Your web browser finds the access point and displays the General Settings screen.
Install the Access Point
Before installing the access point, make sure that your Ethernet network is up and working.
You will be connecting the access point to the Ethernet network so that computers with
802.11b/g/n wireless adapters will be able to communicate with computers on the Ethernet
network. In order for this to work correctly, verify that you have met all of the system
requirements, shown in System Requirements on p
age 7.
Tip: Befo
re mounting the access point in a high location, first set up and test
the access point to verify wireless network connectivity.
NETGEAR recommends that you configure the access point in this sequence:
1. S
pecify your country or region.
2. Set the
time.
3. Set the
basic IP options.
4. Conf
igure the wireless settings.
5. D
eploy the access point.
Configure the System Settings for Your Location
When you log in, the Configuration tab is selected and the General screen is displayed. This
is where you specify your location. The access point uses this setting to determine which
channels should be used for wireless communication.
Downloaded from www.vandenborre.be

Installation and Basic Configuration
14
Wireless N150 Access Point WN604
To set up the access point for your location:
1. Log in as described in the previous section. The Configuration tab is selected and the
General screen is displayed:
2. If you want to change the default access point name, in the Access Point Name field, type a
meaningful name.
This unique name is the access point NetBIOS name. The default access point name is
located
on the bottom label of your product. The default is netgearxxxxxx, where xxxxxx
represents the last 6 digits of the WN604 MAC address. You can modify the default name
with a unique name up to 15 characters long.
3. From t
he Country/Region drop-down list, select the region where the access point is located
(the default country/region is the United States).
Note: If your country or region is not listed, check with NETGEAR support.
Downloaded from www.vandenborre.be

Installation and Basic Configuration
15
Wireless N150 Access Point WN604
Set the Time
To configure your time settings:
1. Select Con
figuration > System > Basic > Time. The Time screen displays:
2. Configure the following information:
• T
ime Zone. From the drop-down list, select the local time zone for your access point
from a list of all available time zones. The default is USA-Pacific.
• NTP Cl
ient. Enable NTP client to synchronize the time of the access point with an
NTP server. The default is Enable.
Note: You need an Internet connection to get the current time.
• Use Custom NTP Server. Select this check box if you have a custom NTP server. By
default, this option is disabled.
• Hostname
/ IP Address. Enter the host name or the IP address of the custom NTP
server. The default is time-b.netgear.com.
3. Click App
ly.
Set Basic IP Options
The basic IP settings for your access point are entered on this screen. Most of the default
settings work in most cases. However, if your access point is part of a more complex LAN
network, then modify the settings to meet the requirements of your network based on the
explanation of the various fields.
Downloaded from www.vandenborre.be

Installation and Basic Configuration
16
Wireless N150 Access Point WN604
To configure the basic IP settings of your access point:
1. Select Configuration > IP > IP Settings. The IP Settings screen displays:
2. Enter the settings for the access point.
DHCP Client. By default,
the Dynamic Host Configuration Protocol (DHCP) client is
disabled. If you have a DHCP server on your LAN and you enable DHCP, the wireless
access point gets its IP address, subnet mask, and default gateway settings automatically
from the DHCP server on your network when you connect the access point to your LAN.
IP Address. Ent
er the IP address of your access point.The default IP address is
192.168.0.100. To change it, enter an unused IP address from the address range used on
your LAN; or enable DHCP.
IP Subnet Mask.
The access point automatically calculates the subnet mask based on
the IP address that you assign. Otherwise, you can use 255.255.255.0 (the default) as
the subnet mask.
Default Gateway. Enter th
e IP address of the gateway for your LAN. For more complex
networks, enter the address of the router for the network segment to which the access
point is connected.
Primary DNS Servers.
This is the address of the primary Domain Name Server used by
stations on your LAN.
Secondary DNS Servers.
This is the address of the secondary Domain Name Server
used by stations on your LAN.
Network Intgrity Check. Select th
is check box to enable the access point to validate that
the upstream link is active before allowing wireless associations. If you set this option,
you have to ensure that your default gateway is configured.
3. Click Apply
to save your basic IP settings.
Downloaded from www.vandenborre.be

Installation and Basic Configuration
17
Wireless N150 Access Point WN604
Configure Wireless Access
To configure your wireless settings for 11b/bg/ng:
1. Select Con
figuration > Wireless. The Wireless Settings screen displays:
2. Enter the wireless settings for your area. See Wireless Settings on page 19.
3. Click App
ly to save your settings.
When you have completed the setup steps, you can deploy the access point in your network.
I
f needed, you can now reconfigure the computer that you set to use the static IP back to its
original TCP/IP settings.
Deploy the Access Point
To deploy the access point:
1. Disco
nnect the access point and position it where it will be deployed. The best location
is elevated, such as wall mounted or on the top of a cubicle, at the center of your
wireless coverage area, and within line of sight of all the mobile devices.
2. Lif
t the antenna so that it is vertical.
Note: Refer to the antenna positioning and wireless mode configuration
information in the Advanced Configuration chapter.
3. Connect an Ethernet cable from your access point to a LAN port on your router, switch, or
hub.
Downloaded from www.vandenborre.be

Installation and Basic Configuration
18
Wireless N150 Access Point WN604
Note: By default, the access point is set with the DHCP client disabled. If
your network uses dynamic IP addresses, you have to change this
setting. To connect to the access point after the DHCP server on
your network assigns it a new IP address, enter the access point
name into your web browser. The default access point name is
netgearxxxxxx, where xxxxxx represents the last 6 bytes of the MAC
address. The default name is printed on the bottom label of the
access point.
4. Connect the power adapter to the wireless access point and plug the power adapter in to a
power outlet. The Power, LAN, and WiFi LEDs should light up.
Verify Wireless Connectivity
Using a computer with an 802.11b/bg/ng wireless adapter with the correct wireless settings
needed to connect to the access point (SSID, WEP/WPA, MAC ACL, etc.), verify connectivity
by using a browser such as Mozilla Firefox or Internet Explorer to browse the Internet, or
check for file and printer access on your network.
The default SSID for the 802.11b/bg/ng wireless mode is NETGEAR-11g. The SSID of any
wireless access adapters has to match the SSID configured in the access point. If they do not
match, no wireless connection is made.
Note: If you are unable to connect, see Chapter 6, Troubleshooting.
Wireless Equipment Placement and Range Guidelines
The operating distance or range of your wireless connection can vary significantly based on
the physical placement of the access point. The latency, data throughput performance, and
notebook power consumption of wireless adapters also vary depending on your configuration
choices.
Note: Failure to follow these guidelines can result in significant
performance degradation or inability to wirelessly connect to the
WN604. For complete performance specifications, see
Appendix A,
Supplemental Information.”
For best results, place your access point:
• Near the center of the area in which your PCs will operate.
Downloaded from www.vandenborre.be

Installation and Basic Configuration
19
Wireless N150 Access Point WN604
• In an elevated location such as a high shelf where the wirelessly connected PCs have
line-of-sight access (even if through walls).
• A
way from sources of interference, such as PCs, microwaves, and 2.4 GHz cordless
phones.
• A
way from large metal surfaces.
Putting the antenna in a vertical position provides best side-to-side coverage.
Putting the
antenna in a horizontal position provides best up-and-down coverage.
The time it takes to establish a wireless connection can vary depending on both your security
settings
and placement. Some types of security connections can take slightly longer to
establish and can consume more battery power on a notebook computer.
Wireless Settings
This section describes how to configure the available wireless settings.
To configure the wireless settings:
1. Select Con
figuration > Wireless. The Wireless Settings screen displays:
2. Configure the wireless settings.
The settings are described in the following section.
3. Click App
ly to save your 802.11b/bg/ng wireless settings.
Wireless Settings Screen Fields
Wireless Mode. Select the desired wireless operating mode. The default is 11ng. The
options are:
• 11
b. All 802.11b wireless stations can be used. (The 802.11g wireless stations can still be
used if they can operate in 802.11b mode.)
Downloaded from www.vandenborre.be

Installation and Basic Configuration
20
Wireless N150 Access Point WN604
• 11bg. Both 802.11b and 802.11g wireless stations are supported.
• 11ng. All 11b, 11g, and 11ng wireless stations can be used. This is the default. If you
select this option, then two additional options, Channel Width and Guard Interval, are
display.
Note: If you select an option, and some settings on this screen are not
available, then you have to select the Turn Radio On radio button to
make those settings available.
Turn Radio On. On by default, you can also turn off the radio to disable access through this
device. This can be helpful for configuration, network tuning, or troubleshooting activities.
Wireless Network Name (SSID). This is the name of your wireless network. It is set to the
default name of NETGEAR_11ng for 802.11b/bg/ng.
RF Switch Status. The WN604 also has an external hardware switch to enable or disable
the radio (RF). This field shows its current status. When the RF switch is off, you cannot
change wireless parameters.
Broadcast Wireless Network Name (SSID). If you disable broadcast of the SSID, only
devices that have the correct SSID can connect. This nullifies the wireless network
“discovery” feature of some products such as Windows XP, Vista, and Unix systems, but the
data is still fully exposed to a determined snoop using specialized test equipment like
wireless sniffers. The default is enabled.
Channel/Frequency. From the drop-down list, select the channel you wish to use on your
wireless LAN. The wireless channel in use is between 1 and 11 for United States and
Canada, 1 and 13 for Europe and Australia. The default is Auto.
It should not be necessary to change the wireless channel unless you experience
interference (shown by lost connections and slow data transfers). Should this happen, you
might need to experiment with different channels to see which is the best. Alternatively, you
can select the Auto channel option for the AP to intelligently pick the channel with least
interference. When selecting or changing channels, some points to bear in mind:
• Access points use a fixed channel. You can select the channel that provides the least
interference and best performance. In the USA and Canada, 11 channels are available.
• If you are using multiple access points, it is better if adjacent access points use different
channels to reduce interference. The recommended channel spacing between adjacent
access points is 5 channels (for example, use channels 1 and 6, or 6 and 11).
• Wireless stations normally scan all channels, looking for an access point. If more than
one access point can be used, the one with the strongest signal is used. This can only
happen only when the various access points are using the same SSID.
MCS Index/Data Rate. From the drop-down list, select the available transmit data rate of the
wireless network. Also, depending on the band selected, the set of rates varies. The possible
data rates supported are:
Downloaded from www.vandenborre.be
/