EPSON is a registered trademark and EPSON Exceed Your Vision is a
registered logomark of Seiko Epson Corporation.
BrightLink is a registered trademark of Epson America, Inc.
General Notice: Other product names used herein are for identification
purposes only and may be trademarks of their respective owners. Epson
disclaims any and all rights in those marks.
This information is subject to change without notice.
© 2012 Epson America, Inc. 10/12
Printed in XXX CPD-38221
Splitting the Screen
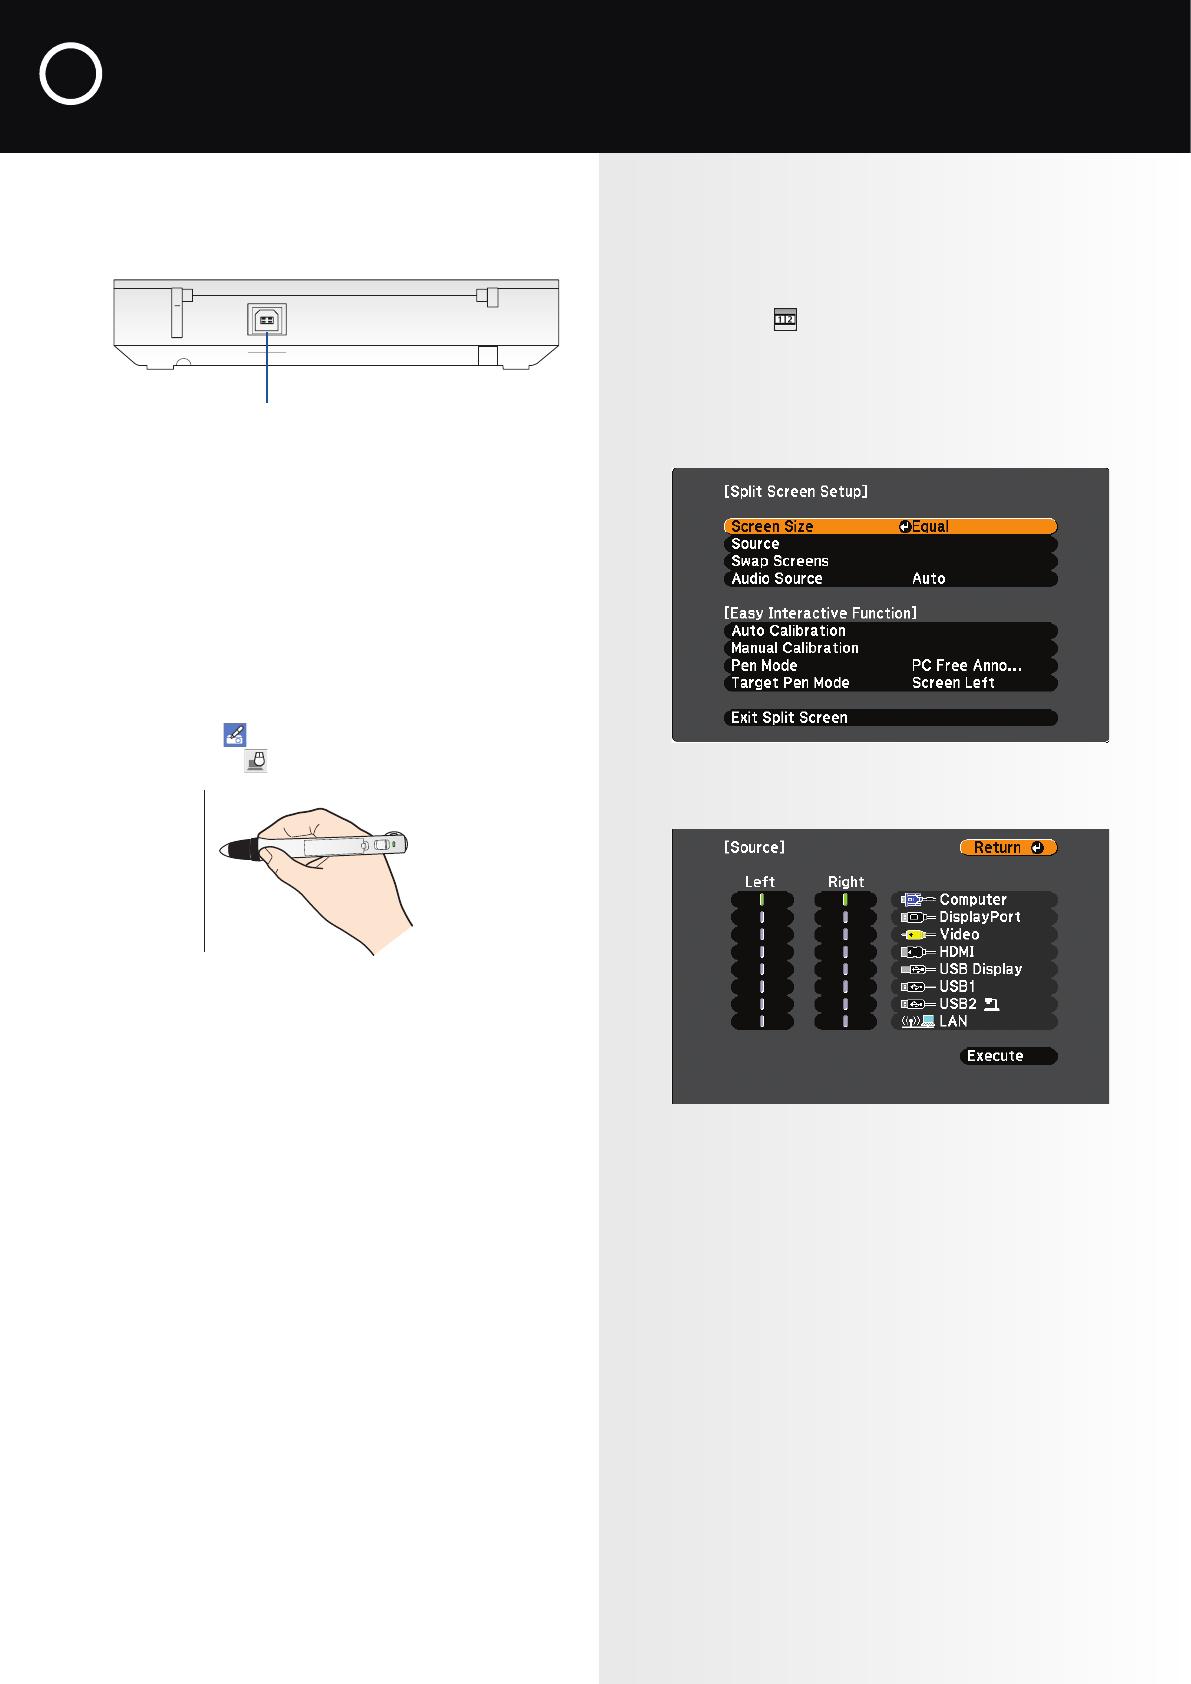
1
Press the Split button on the remote control or
select the Split icon on the screen. The current
projected image appears on the left.
2
Press the Menu button on the remote control. You
see the Split Screen Setup menu:
3
Select Source and press Enter.
4
Select the source you want to use for the right half
of the screen. If you want to write on a blank screen,
select any unused source.
5
Select Execute, then press Enter.
5 Using Interactive Computer Mode
1
Connect a USB cable from your computer to the
USB-B port on the bottom of the control pad.
Connect computer to
port on the bottom
If your computer is connected to the projector
wirelessly using EasyMP Network Projection
version 2.81 or later, you don’t need a USB cable.
If you are using Mac OS X, you need to install
Easy Interactive Driver from the CD that came with
the projector, labeled “EPSON Projector Software
for Easy Interactive Function.”
2
Press the Pen Mode button on the remote control
or select the Pen Mode icon on the screen,
then select the Mouse icon.
You can use the pen as a mouse to interact with the
projected image.
• To left-click, tap on the board.
• To double-click, tap twice.
• To right-click, press the board with the pen for about
3 seconds.
• To click and drag, tap and drag with the pen.
• To move the cursor, hover over the board without
touching it.
• When you are finished, slide the power switch to turn
off the pen.
For more information on any Brightlink Pro features,
see the online User’s Guide at
epson.com/brightlinkdownloads (U.S.) or
epson.ca/brightlinkdownloads (Canada).