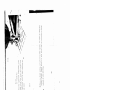
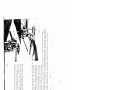
Pfaff 230-260 is an automatic sewing machine with unlimited possibilities. It features knee control, foot control, straight stitch sewing, zigzag sewing, automatic embroidery, adjustable stitch length, adjustable stitch width, and a variety of other features that make it perfect for a wide range of sewing projects. With its easy-to-use controls and automatic features, the Pfaff 230-260 is perfect for both beginners and experienced sewers alike. Whether you're looking to mend a simple tear or create a beautiful quilt, the Pfaff 230-260 is the perfect machine for the job.
I
N
ST
R
U
C
TION
BOOK

r
Contents
Foreword
Fssetial
Parts
of
Machine
Fundamentolsof
Machine
Operation
Important
Points
to
Remember
.
Starting
the
Machine
Knee
Control
Foot
Control
Straight
Stitch
Sewing
Zigzag
Sewing
Setting
Machine
for
Automatic
Embroidery
Winding
the
Bobbin
Removing
the
Bobbin
Case
.
.
Inserting
a
Full
Bobbin
into
Bobbin
Case
Inserting
the
Bobbin
Case
Recommended
Needle
and
Thread
Sizes
Important
Facts
about
Needles
.
Changing
the
Needle
Upper
Threading
Operating
the
Automatic
Needle
Threader
Drawing
Up
the
Bobbin
Thread
Correct
Tension
Regulation
Regulating
Thread
Tension
Stitch
Length
Regulation
Dropping
the
Machine
Feed
Changing
the
Sewing
Foot
The
Darning
Foot
Core
and
Maintenance
Sewlight
Facts
Trouble
Shooting
Zipper
Insertion
Edge
Stitching
Quitting
Flat
Felled
Seams
Rolled
Hems
Hemming
Overcasting
Edges
Butt
Sea
ining
Attaching
Lace
Inserting
Lace
Inserting
Patches
Single-Needle
Cording
Shirring
Applique
Work
Openwork
Embroidery
Scalloping
Scrollwork
Imitation
Henistitching
Blindstitctiing
Automatic
Blindstitching
Sewing
Buttonholes
Button
Sewing
Darning
Monogram
Embroidery
Sewing
Monograms
Cording
Two-Needle
Decorative
Sewing.
.
Three-Needle
Decorative
Sewing
.
Page
2
4
5
6
7
7
8
9
10
12
14
14
15
16
17
17
18
20
21
22
23
24
24
25
25
26
28
29
Page
32
32
32
33
34
34
35
35
36
36
37
38
38
•
39
40
41
41
42
•
43
43
•
44
46
47
49
49
50
52
53

-
—
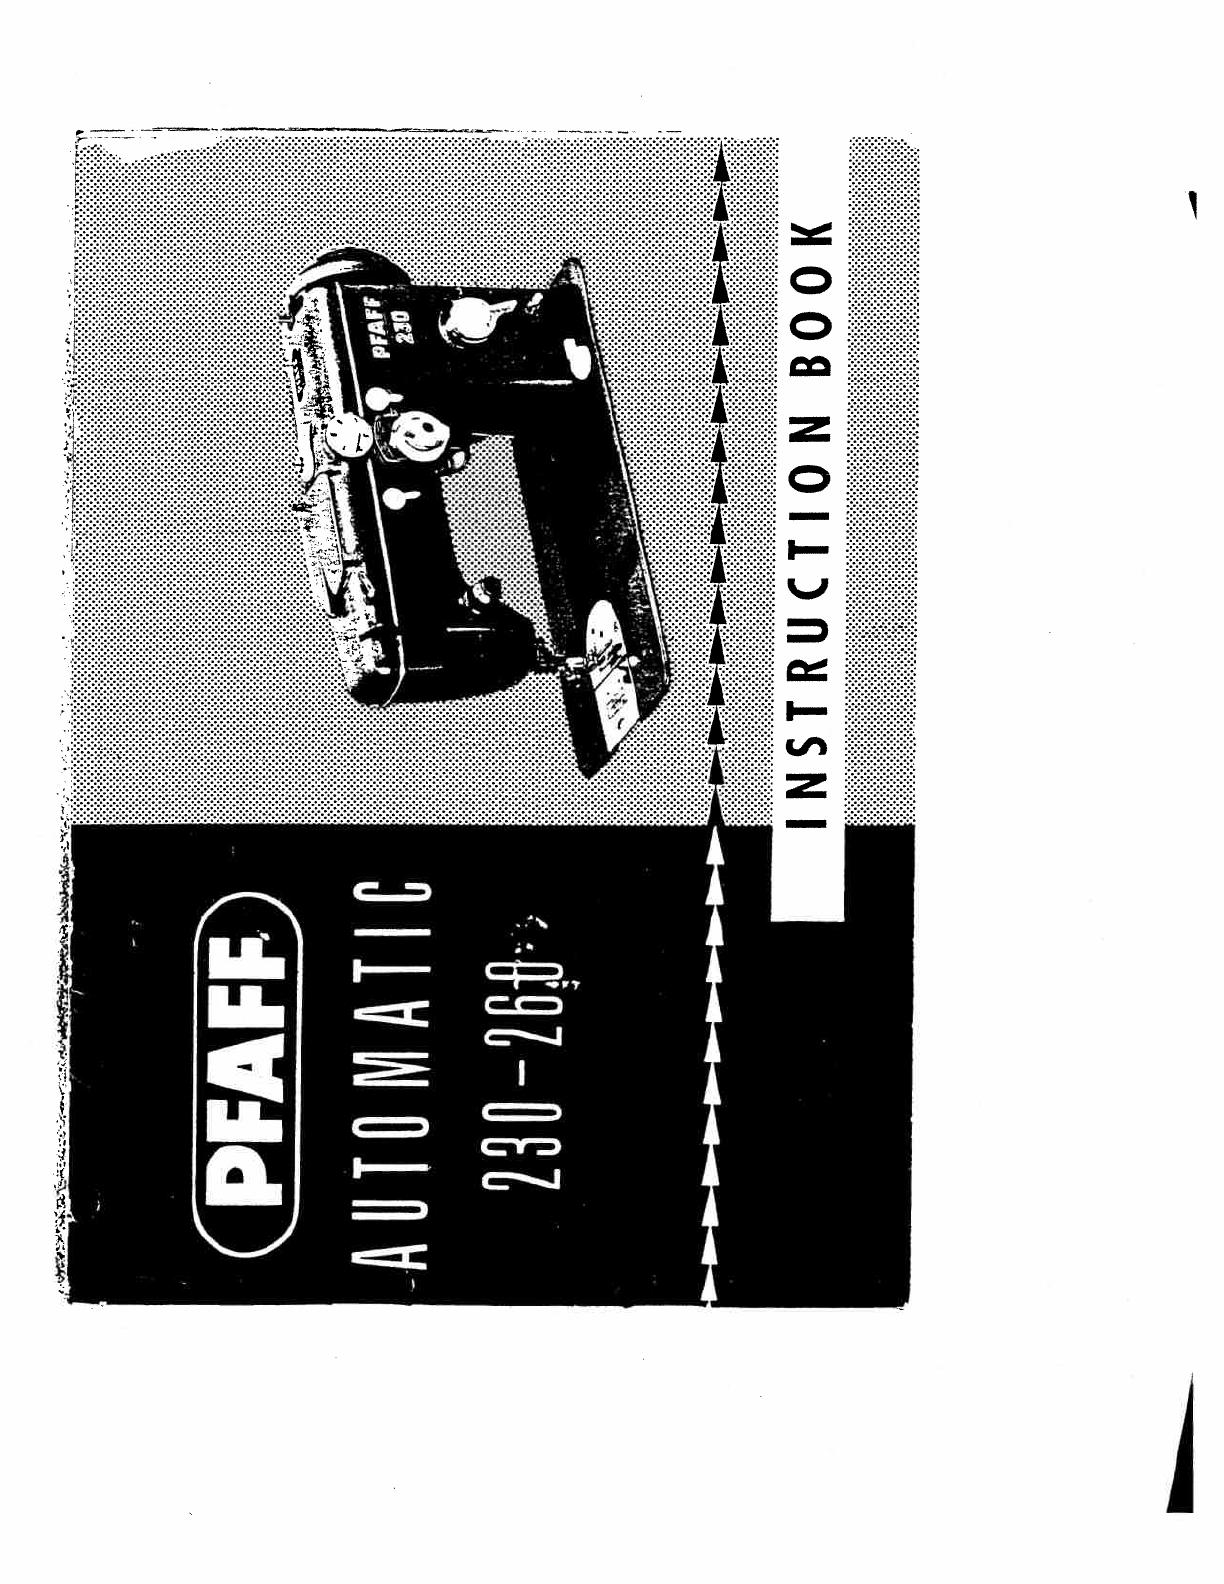
Automatic
23O26O
INSTRUCTIONS
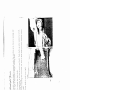
FOREWORD
Your
dream
has
come
true!
You
are
now
the
proud
owner
of
a
PFAFF
230-260
Automatic—
the
sewing
machine
with
unlimited
possibilities.
This
instruction
book
wilt
help
you
understand
the
machine
and
give
you
valuable
tips
to
make
sewing
more
tun
for
you.
Even
if
you
are
an
experienced
seamstress,
you
will
find
this
book
a
valuable
guide
to
easy
sewing
—
—
PFAFF
Automatic
Sewing.
Follow
these
simple
instructions
and
familiarize
yourself
with
the
exclusive
automatic
Features
of
your
machine.
You
will
find
sewing
exciting
on
your
easy-to-operate
PFAFF
Automatic.
If
you
have
any
sewing
problems,
please
contact
your
PfaIf
dealer.
He
will
be
glad
to
help
you
at
any
time.
Plait
International
Corporation
New
York,
N.Y.

-
-;.-
15
1
-10
8
7079
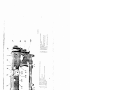
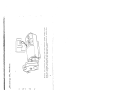
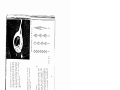
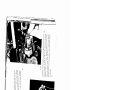
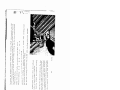
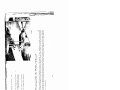
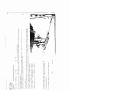
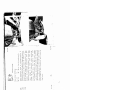
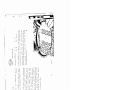
I
1
lucid
lake—up
levy,
2
1
o
control
cover
(A)
3
Einhi
oidery
pallet
n
length
lever
(El
4
Oct13
5
Buttonhole
slide
lever
6
Bobbin
winder
7
Sb
pm
olin,,
knob
8
SIb
I
length
slop
cant,
oh
9
Stitch
cog).
for
wo,
d
and
reverse
fever
10
kight
switch
1)
Drop
feed
control
12
Needle
plate
13
Tronsverse
rotary
sewing
hoot,
14
Bed
slide
15
Needle
2
16
Automatic
needle
threader
17
Upper
tension
18
Sewliglrl
19
Sewhmgf,h
swing-out
lever
20
Stifch
width
control
(Dl
21
Mofor
22
Needle
position
fever
(Cf
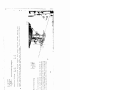
*
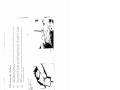
-
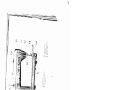
17
7
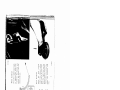
8

R
7O8
32
23
ColIop,,ie
spooi
pvs
24
Top
rovvr
25
Face
cove,
26
Needle
6,
Coder
eve,
27
Presser
how
ever
28
Sew,,,
0
foot
sd
sc
cv,
29
Sewvq
loot
30
Needle
set
Screw
31
Bed
plole
32
Motor
Pl”g
receptacle
33
Bc,lo,,c
Wleef
3

ii
Never
run
a
threaded
machine
unless
you
have
fabric
under
the
presser
foot.
R7098
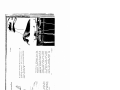
I
ô
/l’tadi,;c
Qpitioii
-
®
Make
sure
stop
motion
knob
b
is
tightened
be
fore
you
begin
sewing
(clockwise
as
indicated
by
white
arrow)
@)
Whenever
you
have
to
turn
the
balance
wheel
a,
turn
it
toward
you
(counter-clockwise
as
shown
by
black
arrow).
®
Raise
presser
bar
lever
c
and
place
bath
threads
under
and
behind
the
sewing
loot.
Slide
ma
terial
under
needle,
lower
sewing
loot
——
and
you’re
ready
to
sew.
R
7074
4

3
i%spntaiie
7tiiiLc
to
The
machine
will
feed
the
material
under
the
sewing
loot
automatically.
Alt
you
have
to
do
is
guide
the
work.
Never
try
to
hasten
feeding
by
pushing
or
pulling
the
fabric
while
stitching
because
the
needle
may
bend
or
break.
A
Woman
sewing
by
hand
will
nor-
inally
draw
one
stitch
light
before
making
another.
On
a
sewing
ma
chine,
this
is
done
automatically
by
fake-up
tever
d.
Therefore,
always
turn
the
balance
wheel
toward
you
until
the
take-up
lever
is
at
its
highest
position
before
you
begin
and
after
you
have
completed
a
seam.
Failure
to
observe
tlsis
rule
may
cause
the
thread
to
tangle
under
the
needle
plate
or
slip
out
of
Itse
needle
eye.
R
6808
/
/
5
R6809

/4ltuhmne
When
your
PFAFF
Automatic
is
delivered
to
your
home,
it
is
ready
for
sewing.
The
machine
is
driven
by
an
electric
motor
which
requires
no
attendance,
except
that
the
brushes
should
be
replaced
alter
about
400
hours
of
service.
When
you
replace
the
brushes,
also
check
whether
the
driving
belt
has
the
correct
tension.
If
not,
adEust
the
belt
idler.
The
sewing
speed
is
regulated
either
by
knee or
foot
control.
Before
you
connect
the
plug
with
the
electric
outlet,
make
sure
that
the
voltage
indicated
on
the
motor
name
plate
is
within
the
tension
range
marked
on
the
electric
meter.
6

R
7130
Connect
electric
cords
as
shown
in
illustration
Push
plug
1
into
three-pin
receptacle
2,
and
plug
3
at
other
end
of
cord
into
wall
outlet
4.
The
foot
control
cord
is
permanently
connect
ed
with
plug
I.
ft
mocisme
is
fitted
with
knee
control,
also
connect
plug
of
cord
5
wilts
outlet
at
opposite
end
of
motor.
Place
the
foot
control
under
the
cabinet
within
easy
reach
of
your
loot.
Rest
the
right
toot
on
tlse
speed
control
and
press.
The
harder
you
press,
the
faster
the
machine
will
run.
Knee
Control
Press
the
right
knee
light
ly
against
tile
knee
con-
trot
lever.
Tlse
harder
you
press,
tile
foster
the
ma
chine
will
run.
Foot
Control
7
R1132

Lever
f
regulates
the
stitch
length
and
controls
forward
and
reverse
sewing.
(Lever
should
be
in
vertical
position
be
fore
setting
stitch
length).
Control
e
stops
stitch
on
length
desired.
Forward
Sewing
Set
e
on
number
that
indicates
stitch
length
you
longer
the
stitch).
Turn
f
right
as
far
as
it
will
go.
5ta1fJht
$tUt/
$ivi,ij
4
Set:
Dial
B
—O
Leves
E
—0
Control
D
—
0
Lever
C
—
Centered
56629
slit
c
he
s,
want
(1
—S;
the
higher
the
number,
the
Reverse
Sewing
Turn
I
cIt
as
tar
as
it
will
go.
(The
reverse
stitches
will
be the
some length
as
lorward
8
R
7066

R
7071
i12aG
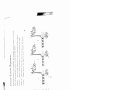
Qivus:7
Set:
Dial
B--U
Lever
E—O
Turn
control
D
left
to
desired
stitch
width
(indicated
by
numbers
1
to
6;
the
higher
the
number,
the
wider
the
stitch).
Do
not
move
C
or
D
while
needle
is
in
fabric.
V
2
I
A
Lever
I
lengthens
zigzag
stitches
or
packs
them
more
closely
together.
To
form
the
satin
stitch
gradually
de
crease
stitch
length
almost
to
0
until
you
get
tile
de
sired
effect.
Lever
C
changes
needle
position
from
left
to
right.
Thus
the
stitching
can
be
moved
irons
A
tile
center
to
the
left
or
right
oh
the
needle
plate
slot.
To
change
needle
position,
press
lever
C
down
and
move
into:
No
Ii
1
.-
The
needle
is
at
the
ectreine
left
of
the
needle
plate
slot
is
straight
sewing.
end
swings
to
the
right
in
zigzag
stitching.
NotCh
2
—
The
needle
is
centered
in
tie
needle
plate
slot
in
stroight
sewing,
and
swings
bolts
ways
in
zigzag
stitching.
Not
ci:
3
—
The
needle
is
at
the
eirtrenie
right
of
the
needle
plate
slot
in
straight
sewing,
ond
swings
to
tie
left
In
zigzag
stitching
Poio:nr
z
indicates
tie
position
of
the
needle
on
the
lop
scale.
9

R
6631
$
tftii:j
/4’lf4ChillQ
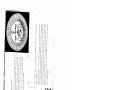
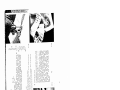
1
4iz
/ii(oiuaiic
I6I!t(
BS
C
D
It
embroidery
design dial
shows
no
symbol
for
lever
C
or
control
D,
disrcgcirct
them.
Set:
Lever
E—3
Swing
back
the
cover
on
control
A.
Your
embroidery
design
dial
shows
all the
pri
mary designs
you
can make
with
the
Automatic.
Pick
your
design
and
turn
the
dial
sa
it
points
to
that design.
The
numbers
in
the
slot
indicate
the
machine
dial
settings
which
will
give
you
the
design
you
have
chosen.
4
For
example:
Turn
A
(clockwise)
so
3
is
opposite
n.
Turn
E
(clockwise)
so
5
is
at
top.
Set
stikh
length
lever
f
(page
8)
so
stitches
are
closely
packed.
For
suc.Ii
clesig
us
C
u
nd
D
will
operate
u
utomatically.
Do
not
touch
them.
A
10
R7072
/
cIJC/2
DL
123
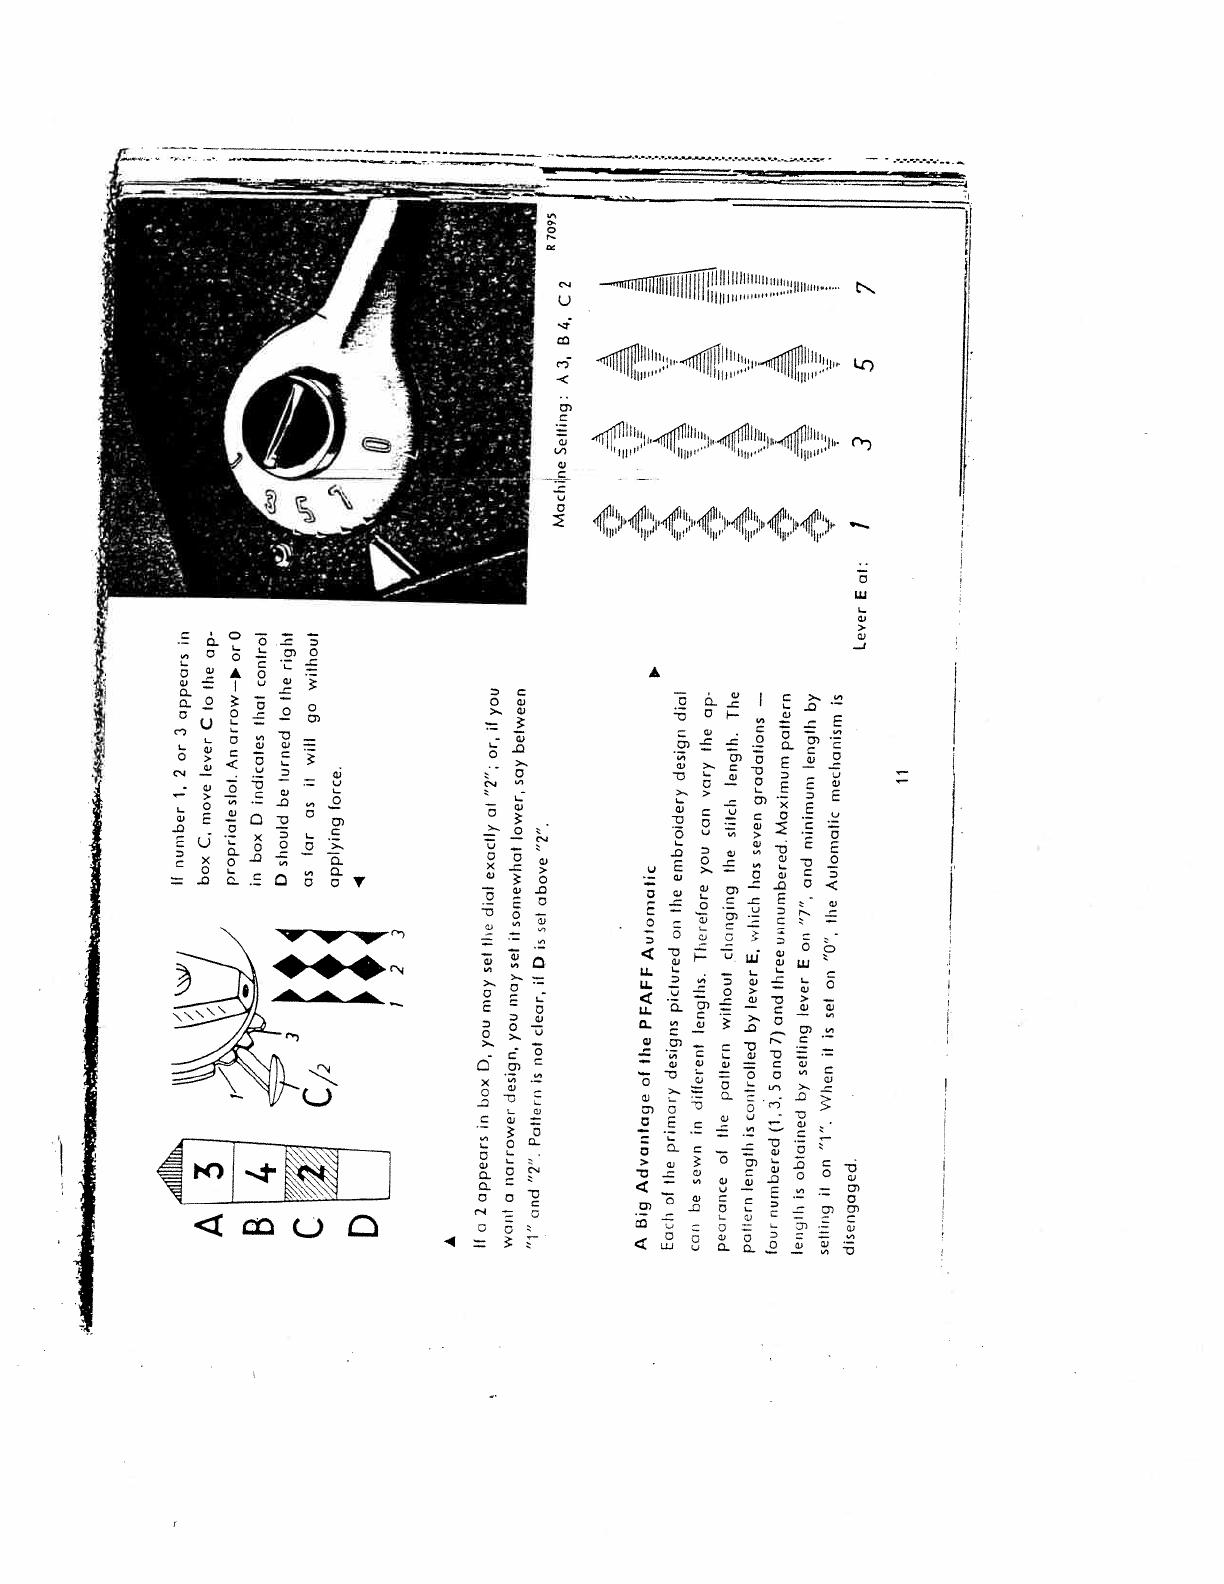
If
number
1,
2
or
3
appears
in
box
C,
move
lever
C
to
the
ap
propriate
slot
An
arrow—i
or
0
in
box
D
indicates
that
control
D
should
be
turned
to
the
right
as
far
as
ii
will
go
without
applying
force.
.4
A
Il
a
2
appears
in
box
D,
you
may
set
the
dial
exactly
at
“2”;
or,
it
you
want
a
narrower
design,
you
may
set
it
somewhat
lower,
soy
between
“1”
and
“2”.
Pattern
is
not
clear,
if
D
is
set
above
“2”.
A
Big
Advantage
of
the
PFAFF
Automatic
Each
of
the
primary
designs
pictured
on
the
embroidery
design
dial
can
be
sewn
in
diflerent
lengths.
Therefore
you
can
vary
the
ap
pea
rance
ol
the
pattern
without
cha
nging
the
stitch
length.
The
pattern
length
is
controlled
by
lever
E,
vhich
has
seven
gradations
—
tour
numbered
(1,3,
5
and
7)
and
three
unnumbered.
Maximum
pattern
length
is
obtained
by
setting
lever
E
on
“7”,
and
minimum
length
by
setting
it
on
“1”.
\Vhen
it
is
set
on
“0”,
the
Automatic
mechanism
is
disengaged.
C2
R
7095
Mach(ne
Setting:
A
3,
B
4,
A
A
A
A
A
LeverEat:
1
3
5
7
11

a
R7101
_..___.--,_
/Oiii?in
Hold
balance
wheel a
and
turn
stop
motion
knob
b
all
the
way
to
the
left
(counter-clockwise).
Place
spool
of
thread
on
right-hand
spool
pin.
The
bobbin
thread
should
always
be
the
same
size
as
that
used
on
the
spool,
or
a
little
Pull
thread
froni
spoof
and
lead
it
clockwise
around
thread
retainer
9,
crossing
lhe
thread.
Ii
n
e
r.
R
5704
2
3

r.
Pull
it
through
thread
guide
h.
0
Pass
end
ol
thread
through
slot
in
bobbin,
from
in
side.
Set
bobbin
on
bobbin
winder
spindle
so
that
key
at
base
of
spindle
enters
slot
in
bobbin.
Press
in
lever
Hold
end
of
thread
and
slowly
start
machine.
3
Having
wound
a
few
turns,
break
off
end
ol
thread
and
continue
winding
at
a
laster
pace.
Bobbin
winder
will
stop
automatically
when
bobbin
is
full.
If
you
don’t
want
a
lull
bobbin,
press
out
lever
i
when sullicient
amount
of
thread
has
been
wound.
You
may
continue
sewing
while
you
are
winding
bobbin
wIthout
disconnecting
balance
wheel.
6
7
R
7067
-
R7100
4
5
R
7102
8
I.
R
7097

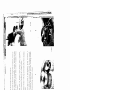
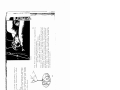
iiiuij
a
71
it
?
3
t5
661n
i,,t,
73,661,,
Ca.c
As
shown
in
illustration
1.
hold
bobbin
in
left
hand
so
that
the
thread
end
falls
from
the
top
down
toward
you,
and
insert
bobbin
into
bobbin
Hold
the
bobbin
firmly
in
the
bobbin
case
and
puff
the
thread
into
the
case
slot.
()
Pull
the
thread
under
the
tension
spring
until
it
emerges
from
the
open
ing
cit
the
end
of
the
spring.
Leave
about
three
inches
of
thread
hanging
from
the
bobbin
case.
(ID
Hold
the
case
by
its
open
latch,
so
that
the
bobbin
cannot
fall
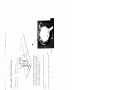
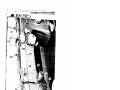
out.
V
R
5869
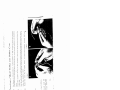
A
Raise
needle
to
its
highest
point
and
open
bed
slide
j,
so
you
can
see
sewing
hook.
Reach
under
the
machine
with
your
left
hand
and
lilt
latch
k
with
your
forefinger.
Pull
out
bobbin
case
with
bobbin
by
holding
the
latch.
When
you
release
latch
k,
the
empty
bobbin
drops
out.
case.
j
5
5867
\
Jj
1
ri
R
5882
.—,
I,.
2Z
t/?
t’O(’h(ii
-
-
rr
r
-—
-
---fl

Cii
It
is
best
to
tilt
machine
back
when
inserting
bobbin
case
the
first
time.
After
you
have
become
more
practiced,
you
will
manage
without
tilting
it.
Move
bed
slide
j
all
the
woy
to
the
left
so
you
con
see
the
hook.
Make
sure
the
needle
is
still
at
its
highest
point.
With
the
thumb
and
forefinger
ol
left
hand
lift
latch
k
and
turn
bobbin
case
until
slot
at
end
of
latch
points
up.
Then
place
it
on
center
stud
I
of
hook,
R
5870
R
5868
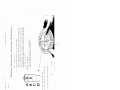
In
replacing
the
bobbin
case,
it
is
best
to
hold
the
loose
A
end
of
thread
so
that
it
wilt
not
get
jammed
between
bobbin
case
and
hook.
Release
latch
k
and
press
against
bobbin
case
until
you
hear
it
snap
into
place.
An
improperly
inserted
bobbin
case
wilt
cause
needle
breakage.
15

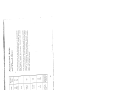
Mercerized
Needle
Types
of
Fabrics
-
Silk
CoHen
-Size
0
Fine
Fabrics
--
80
60
to
such
as
georgetle,
chi1loi,boliste,
to
000
or
voile,
own,
silk.
100
70
twist
Lightweight
Fabrics
70
such
as
dress
silks
md
cottons,
A
&
B
to
80
sheer,
woolens,
shirlmg,
dra-
twist
80
peries.
Medium
Fabrics
50
such
as
lightweight
woolens,
to
B
&
C
90
-
madras,
muslin,
biocades,
heavy
twist
70
silks
and
royon,
gabardine.
Heavy
Fabrics
40
such
os
coating,
denim,
corduroy,
to
C
&
0
100
slipcover
lobrics,
bed
tickings,
twist
50
lightweight
canvas.
Very
Heavy
Fabrics
24
90
such
as
heavy
Ockings.
canvas,
to
E
to
overcooting.
sailcloth,
up.
twist
40
110
holster
y
Synthetics,
Rayon,
Acetate
Deterinned
by
Deletmised
including
nylon.
orion.
dacron,
weiglil
ol
tobric
by
lhieod
size
plastics,
etc.
40
to
50
60
lo
80
16
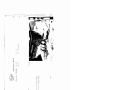
7Zec,%sIn?I:33
/‘i?t?
an
$iz.c
The
appearance
ot
the
finished
seam
is
dependent
on
the
correct
refalionship
belween
needle,
thread
and
fabric.
Select
the
proper
thread
sizes
and
needles
from
this
chart.
The
same
size
threads
should
be
used
in
the
needle
and
on
the
bobbin,
Some
experienced
seamstresses
prefer
a
somewhat
thinner
bobbin
thread.
How
ever,
the
bobbin
thread
never
should
be
thicker
than
the
needle
thread.

Bring
needle
bar
to
its
highest
point
and
lower
sewing
foot.
Loosen
needle
set
screw
o
half
a
turrs
‘E(
and
pull
old
needle
out
of
needle
clomp.
Insert
new
needle
into
opening
of
needle
clomp
and
push
it
up
as
tar
as
it
will
go.
Make
sure
that
the
flat
side
of
shank
faces
toward
the
back
and
long
groove
toward
you.
Tighten
needle
set
screw
o.
The
illustration
(left)
shows
you
how
the
needle
clamp
works.
The
needle
set
screw
presses
against
the
tapered
needle
positioning
roller
which
presses
against
the
flat
side
of
the
needle
shank
and
holds
the
needle
in
place.
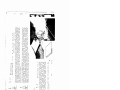
R
6798
r:.
I
.ii:i).ta,i(
ad.c
a
6
iuit
/\Qct.c
On
P
FAF
F
Automatic
sewing
machines,
System
130
R.
flat’shank
needles
are
used
for
all
ordinary
sewing
and
embroidery
work.
The
needle
system
is
stamped
on
the
bed
slide.
Genuine
Plaff
needtes,
System
130,
ore
available
from
every
PfaIf
dealer,
Bent
or
blunt
needles
should
not
be
used.
Chaitjiii
IL
iI
:
17
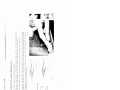
l

Place
thread
on
spool
pin
4
and
lead
thread
end
through
holes
in
thread
guides
2
cind
3
and
through
both
thread retainer
openings
ti
(see
itlustration
opposite).
Pull
thread
between
any twa
of
the
tension
discs
5,
(Fig.
I)
and
tead
it
clockwise
(Fig.
II)
until
it
snaps
into
the
square
notch
in
the
tension
cup
(Arrow,
Fig.
Ill).
The
thread
passes
underneath
the
thread
check
spring
which
holds
it
down
permanently.
Bring
take-up
lever
7
as
high as
it
will
go
and
pass
thread
from
right
to
left
throug
l
one
of
the holes
at
its
end.
Pull
thread
into
slots
at
left
of
thread
guides
8
and
9,
and
then
into
the
slot
at
left
of
needle
clamp
10.
Then
thread
needle,
front
to
back.
PFAF
F’s
Automatic
needle
threader
will
do
this
br
you
easily
and
quickly.
“
t
rn
h)iI:fJ
I
If
III
18
A
___,..____w,


 1
1
 2
2
 3
3
 4
4
 5
5
 6
6
 7
7
 8
8
 9
9
 10
10
 11
11
 12
12
 13
13
 14
14
 15
15
 16
16
 17
17
 18
18
 19
19
 20
20
 21
21
 22
22
 23
23
 24
24
 25
25
 26
26
 27
27
 28
28
 29
29
 30
30
 31
31
 32
32
 33
33
 34
34
 35
35
 36
36
 37
37
 38
38
 39
39
 40
40
 41
41
 42
42
 43
43
 44
44
 45
45
 46
46
 47
47
 48
48
 49
49
 50
50
 51
51
 52
52
 53
53
 54
54
 55
55
 56
56


Husqvarna Husky 165 Owner's manual
Simplicity SA2200 User manual
 Universal UN50 Instruction book
 Consew 347R-1A User manual
Sears 385.12514 User manual
SINGER 01663 User manual
 Riccar 9900 User manual
Baby Lock BLE-LF Operating instructions


