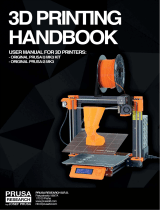

Pleasealwaysrefertothehttp://www.prusa3d.com/drivers/
forupdatedversionofthis3Dprintinghandbook(PDFdownload).
QUICK GUIDE TO THE FIRST PRINT
1.Placetheprinteronaflatandstablesurface(page10)
2.Readthesafetyinstructionscarefully(page5)
3.Downloadandinstallthedrivers(page22)
4.Preparetheglass(page10)andcalibratetheprinter(page12)
5.InsertSDintotheprinterandprintyourfirstmodel(page16)
Handbookversion1.01fromSeptember15
th
,2015.©PrusaResearchs.r.o.
2

Table of contents
1Productdetails
2Introduction
2.1Glossary
2.2Usedsymbols
2.3Safetyinstructions
2.4AssembledOriginalPrusai3Plusprinter
2.5OriginalPrusai3Plusprinterkit
2.6Licenses
3OriginalPrusai3Plusprinter
4OriginalPrusai3Plusprinterkit
5Firststeps
5.1Printerunpackingandproperhandling
5.2Printerassembly
5.3Setupbeforeprinting
5.3.1Glasspreparation
5.3.2ABSJuicepreparation
5.3.3PluggingtheACpower
5.3.4Calibration
5.3.5Loadingthefilamentintotheextruder
6Printing
6.1Printercontrols
6.1.1LCDscreen
6.1.2LCDlayout
6.1.3Printspeedversusprintquality
6.1.4USBcableandPronterface
7Printerdrivers
8Printingyourownmodels
8.1Whereyoucangetthe3Dmodels?
8.2Inwhatprogramyoucancreateyourownmodels?
8.3Slic3r
8.4Printingofnonstandardmodels
8.4.1Printingwithsupportmaterial
8.4.2Largeobjectprinting
9Materials
9.1ABS
9.2PLA
9.3PET
9.4HIPS
9.5PP
9.6Flex
10FAQPrintermaintenanceandprintissues
10.1Glasscleaning
10.2Clogged/jammedextruder
3

10.3Nozzlecleaning
10.4Axisfluency
10.5Calibrationissues
10.5.1Nozzletapstheglass
10.5.2DifferentspacingbetweennozzleandglassaftereveryZaxisreset
10.5.3Glassisunstableanddoesn’tholdfirmly
10.5.4DefaultXaxispositionisoutsidetheglass
10.5.5UnevenspacingofthenozzleontheXaxisoppositeends
10.6Printingproblems
10.6.1ABSmodelstearupfromtheglasswhenprinting
10.6.2LayersbreakandsplitwhenprintingfromABSmaterial
10.6.3Modelsmovetheglassduringtheprint
10.6.4Modelscontaineithertoomuchornotenoughofthefilament
10.7Problemswithfinishedmodels
10.7.1Modelbreaksand/oriseasilydestructed
11FAQcommonissueswhenassemblingtheprinterkit
11.1Nozzle/glassgapisgreaterinthemiddlethanatthecorners
11.2Printerstopsprintingsoonafterstart
11.3Printercan’treadSDcard
11.4LooseXand/orYaxisbelts
11.5Unattachedcablestotheheatbed
11.6Looseheatbedzipties
1 Product details
Title:OriginalPrusai3Plus/OriginalPrusai3Plus(kit)
Version:1.75mm
Manufacturer:PrusaResearchs.r.o.,PrvníhoPluku621/8a,Praha8,18600,Česká
republika
Contacts:phone+420222263718,email:[email protected]
EEEgroup:3(ITand/ortelecommunicationequipment)
Deviceuse:indooronly
Powersupply:90135VAC,2A/180264VAC,1A(5060Hz)
Workingtemperaturerange:18°C(PLA)38°C,indooruseonly
Workinghumidity:85%orless
Kitweight(brutto/netto):9.8kg/6.3kg
Assembledprinterweight(brutto/netto):12kg/6.3kg
Serialnumberislocatedontheprintercontrolunitandalsoonthepackaging.
4

2 Introduction
Thankyouforpurchasingouroriginal3DprinterPrusai3Plus1.75fromJosefPrusaeither
asaassembledprinteroraprinterkitasyourpurchasesupportsuswithitsfurther
development.Readthehandbookcarefully,please,allchapterscontainvaluableinfoforthe
correctserviceoftheprinter.
Pleasecheckthehttp://prusa3d.com/driverspageforupdatedversionofthis3D
printinghanbook(PDFdownload).
Incaseofanyprinterrelatedproblemdonothesitatetocontactusat[email protected]
.We
aregladtoreceiveallyourvaluablecommentsandtips.Westronglysuggestyoutovisitour
officialforumatforum.prusa3d.com,whereyoucanfindsolutionstocommonissues,tips,
adviceandhintsinadditiontoactualinformationabouttheOriginalPrusai3printer’s
development.
2.1 Glossary
Bed,Heatbed,PrintbedCommonlyusedtermforprintingpadaheatedareaof3D
printerwhere3Dobjectsareprinted.
ExtruderPrintingheadorextruderisapartofaprinterconsistingofanozzle,hobbed
pulley,idlerandanozzlefan.
FilamentTermforplasticprovidedonspooliscalled“filament”,it’susedthroughoutthis
handbookaswellasintheLCDmenuontheprinter.
Heater,Hotendothernameforaprintingnozzle.
1.753Dprintersusetwodifferentdiameters(thickness)ofafilament(thickness):2.85mm
(commonlycalledas3mm)and1.75mm.1.75mmversionismoreusedworldwidethough
thereisnodifferenceinprintingquality.
2.2 Used symbols
Importantnotice,tip,hintorinformationwhathelpsyouprintwithease.
Readcarefully!Thispartoftexthasuppermostimportanceeitherforusersafetyof
foraproperprinterservice.
Thissymbolindicatestextrelatedtoprinterkitonly.
2.3 Safety instructions
Pleasebeverycautiousduringanyinteractionwiththeprinter.Thisprinterisan
electricaldevicewithmovingpartsandhottemperatureareas.
1.Deviceisforindooruseonly.Donotexposetheprintertorainorsnow.Alwayskeepthe
printerinadryenvironmentataminimumdistanceof30cmfromotherobjects.
2.Alwaysplacetheprinteronastableplace,whereitcannotfallortipover.
5

3.Theprintersupplyishouseholdpoweroutlet230VAC,50Hzor110VAC/60Hz;Never
connecttheprintertoadifferentpowersupply,itmaycausemalfunctionordamagetothe
printer.
4.Placethepowercordsoyoucan’tstumbleonit,orsteponitorotherwiseexposetoany
damage.Makesurethatthepowercordisnotmechanicallyorotherwisedamaged.Stop
usingdamagedcableimmediatelyandreplaceit.
5.Whenyoudisconnectthepowercordfromthesocket,pulltheplugratherthanthecordto
reducetheriskofdamagetoplugorACoutlet.
6.Neverdisassembletheprinterpowersupply,itdoesnotcontainanypartsthatcouldbe
repairedbyunskilledworker.Allrepairsmustbeprovidedbyaqualifiedtechnician.
7.Donottouchthenozzleorheatbedwhentheprinterisprintingoriswarmingup.Note
thatthetemperatureofthenozzleis210260°C;heatbedtemperaturecanreachover100
°C.Temperaturesabove40°Ccancauseharmtohumanbody.
8.Preventchildrenfromunsupervisedaccesstotheprinterevenwhentheprinterisnot
printing.
2.4 Assembled Original Prusa i3 Plus printer
YoucanfindapictureofanassembledOriginalPrusai3Plusprinterwithdescriptioninpict.
1nextpageofthishandbook.Unliketheprinterkitit’scompletelyassembledandalmost
readytoprint.Afterplugginginandnecessarycalibrationyoucanprintthe3Dobjectinthe
matterofminutesafterunpackingtheprinter.Keepinmindyoucanuseoursupportemail
whenyoupurchasedtheassembledprinter.Donothesitatetowriteusifyouneedany
adviceorhelp.Wewillgladlyhelpwithanyspecificprints.
3Dprintersusetwodifferentdiametersofafilament(youfindmoreinchapter
Materials
):2.85mmand1.75mm.1.75mmversionismoreusedworldwidethough
thereisnodifferenceinprintingquality.Filamentisprovidedonaspoolwhereyou
canfindthebasicinformationfilamentmaker,material(ABS,PLA,etc.)and
filamentdiameter.2.85mmfilamentiscommonlycalledas3mm.
Thisprintersupportsonlya1.75mmfilament.Pleasecheckthefilamentdiametertobe
1.75mmbeforeinsertingintotheextruder.Donottrytoinsertwiderfilamentitcoulddamage
theextruder.
2.5 Original Prusa i3 Plus printer kit
OriginalPrusai3Pluskitispicturedinpict.2.Detailedinformationandassembly
descriptioncanbefoundinchapterPrinterassembly.Weofferthesupportforusers
whopurchasedtheprinterkitthroughourofficialforum.Ifyouneedhelpdonot
hesitatetovisitourforumatforum.prusa3d.com.Youcanfindtheanswersforyour
problemthere.Ifnot,pleasejustaskyourquestionhere.
2.6 Licenses
OriginalPrusai3PlusprinterisapartoftheRepRapproject,thefirstopensource3Dprinter
projectfreetouseunderaGNUGPLv3license(www.gnu.org/licenses/gpl3.0.en.html).If
youimproveoralteranypartofaprinterandyouarewillingtosell,thenyouhavetopublish
thesourcecodesunderasamelicense.All3Dprintedelementsoftheprinterthatcanbe
improveduponcanbefoundathttp://www.prusa3d.com/prusai3printableparts/.
6

3 Original Prusa i3 Plus printer
Pict.1OriginalPrusai3Plus
printer
described
7

4 Original Prusa i3 Plus printer kit
Thecompletecontentsoftheprinterkitboxcanbeseenonthepicturebelow.
Pict.2OriginalPrusai3Plus
printer
kitunboxed
8

5 First steps
5.1 Printer unpacking and proper handling
Taketheprinterfortheupperframepullitoutfromthebox.Becarefulwhenhandlingwith
theprinternottodamagetheelectronicsandthustheproperprinterfunctionality.Anytime
youmovetheprinteralwaysholditfortheupperframewithhotbeduprightpointingaway
fromyouaspicturedinpict.3.
Pict.3
Proper
handlingofa
printer
9

5.2 Printer assembly
WithOriginalPrusai3Plusprinterkitwesuggesttofollowtheguidelinesand
assemblethekitaccordingtothetheonlinemanualatmanual.prusa3d.com.(Online
manualisavailableinseverallanguagesonthewebsite).Theconstructionofthe
printershouldnottakemorethanoneworkingday.Afterasuccessfulcompilation
continuetothechapterSetupbeforeprinting.
5.3 Setup before printing
● Placetheprintertothehorizontallystableposition,bestplaceisaworkbenchwhere
thereisnoriskofdraft.
● Attachthefilamentholderstotheupperframe.
● AttachFilamenttotheholders.Makesurethefilamentspooldoesn’tjamandcan
movefreely.
Filamentisacommontermfortheplasticrodmaterialprovidedonspool,from
which3Dobjectsareprinted.
5.3.1 Glass preparation
Theprintedobjectwillnotattachtotheheatbedproperlyifyoudonotpreparethebed
correctly.Differentmaterialsrequiredifferentglasspreparationyoucanfindmoreinthe
chapterMaterials.Commonstepsare:
● Glassalwayshastobepreparedcold,notpreheated.
● PutasmoothevenlayerofKores(orregulargluestickyoucansourcelocally)glue
providedwiththeprinter.Onethinlayerisenough.
● LetthegluedryandthenapplyonelayerofABSJuiceprovidedwiththeprinterin
plasticsprayer.
● Whentheglassisdryattachitfirmlytothebedwiththebinderclips.
Theglassprovidedwiththeprinter(bothassembledandkit)isalreadypreparedwith
theKoresglueandABSJuicesoyoucanuseitfortheprintwithoutanyfurther
preparation.
10

5.3.2 ABS Juice preparation
Acetoneisextremelyflammable,rapidlyevaporatingliquid.Handleitina
wellventilatedareaonly,protectyoureyesandskinfromsplashes.Neveroperate
withacetonenearopenflamesorotherheatsource;especiallyinareaswherea
sparkcanoccuracetonevaporsareeasilyignited.
WhenyourunoutoftheABSJuicesuppliedwiththeprinter,youcaneasilymakeyourown
mix.YouwillneedacontainerinwhichyoucanretainpureacetoneandanABSfilament.
ABSJuiceismadebydissolvingABSinpureacetone34cmfilament(thickness1.75mm)to
30mlofacetone.OriginalABSjuicecontaineris100ml,soyouneedafilamentlengthof
approximately114cm.Cutthefilamentintoshorterpiecestofitcomfortablyintothe
containerandthencoveritwith100mlofacetone.Closethecontainersecurelyandshake
forseveralminutes.Beforefirstuse,letthemixturestandforseveralhourstoABSfilament
completelydissolvedinacetone.
Preparedjuicecanbealsopurchasedinoureshop.Unfortunately,UPSservice
doesnotallowtodeliveranyacetonebasedproductsduetoshippingconstraints.In
thatcaseyougetonlythebottleandABSfromoureshopandyouhavetosource
theacetonelocally.Youcanalsousethealternativesolution,e.g.hairsprayalways
choosenonperfumedsprayandlookoutforextrahold
withingredientsincludingAcetate,
CopolymerandVinyl.
11

5.3.3 Plugging the AC power
● Checktheglassplacementandattachmenttotheheatbed.
● PlugintheACpowercord.
5.3.4 Calibration
Youneedtocalibratetheprinterbeforethefirstprint.Ifyoutransporttheprinteror
manipulatewithitexcessivelyyoushouldcheckandeventuallycalibrateitagain.Forthe
successfulcalibrationyouneedtohavetheprinterheatedbothnozzleandheatbed.
TemperaturecanbesetthroughLCDpanel.
● PresstheLCDknobtoenterthemainmenuonLCD.Rotatethebuttontochoose
PreheatoptionandconfirmbypressingtheLCDknob.Nextyouchoosethematerial
youwillprintfrom.ChooseamaterialthenconfirmwithLCDknob.Nozzleand
heatbedwillheattotherequestedtemperature.
Pict.4LCDpanelcontrols
12

● Youneedacommonbusinesscardforthecalibration.ChooseSettingsinmain
menuthenAutohomeoption.Thisstepsetsallaxesto[0,0,0]positions.
● Trytoputandmovethecalibrationpaper(businesscard)betweenthebedand
nozzle.Youhavetofeelaslightfrictionbetweenthepaperandthenozzle.
NozzlebeddistanceissetwithZadjusters.Thisstepisrepeatedinallfourcorners
oftheprintbed.
Calibrationpaperisattachedtothepackagewithwiththeheatbeadandtheglass.If
youdon’thavethecalibrationpaperyoucanuseanycommonbusinesscardpaper
(250g/m
2
).
Pict.5
Printer
calibrationusingthecalibrationpaper,smallorangewheelbottomright
cornerisaZadjuster(oneoffour).
13

● Figures6ato6cshowthefirstprintedlayer.Pict.6ashowstheresultwhennozzle
istoofarfromthebed,6biscorrectlycalibratedprinterand6cshowstheprintwhen
thenozzleistooclosetotheheatbed.
Pict.6a
Nozzle
istoofarfromtheglass.Filamentcouldn’tattach
properly
andtearsout.
Pict.6b
Calibrated
printer
showscontinuous
filament
layers.
Pict.6c
Nozzle
tooclosetotheglass.Layersaretoocompressed.
14

5.3.5 Loading the filament into the extruder
Ifyoufollowthemanualyoushouldhavethenozzleandthebedpreheated.
● Youneedtopreheatthenozzlebeforeinsertingthefilament(andthebedtooifyou
liketoprintrightaway).Thetemperaturedependsonthematerialused.Detailed
informationaboutnozzleandbedtemperaturesaredescribedatchapterMaterials.
● PresstheLCDknobontheLCDpaneltoenterthemainmenu.Insertthefilamentto
theextruder,choosetheLoadfilamentoptioninthemenuandpressthebuttonto
confirm.Filamentisthenloadedtotheextruderbytheextruderstepper
automatically.Youshouldcutthetopofthefilamentasshowninthepicturebelow
(pict.7detail).
Pict.7
Loading
the
filament
totheextruder
● Checkifthefilamentflowsfromthenozzle.
● Ifyouchangethefilamentforanewonedonotforgettocompletelyreleasetheold
filamentbeforetheprinting.
15

6 Printing
● Makesurethatthenozzleandthebedareheatedtothedesiredtemperature.Ifyou
forgettopreheattheprintingnozzleandthebedbeforeprintingtheprinterwill
automaticallycheckthetemperaturesofthenozzleandthebed;printingwillstart
whendesiredtemperatureisreacheditcantakeseveralminutes.However,we
recommendpreheatingtheprinterbeforehandasdescribedinthechapter
Calibration.
Donotletthepreheatedprinteridle.Whenaprinterispreheatedandnonprinting
materialinanextruderdegradesovertimeitmaycausethenozzletojamup.
● Watchthefirstfewprintedlayerstobesurefilamenthasattachedtothebedproperly
(5to10minutes).
● PresstheLCDknobandchoosethePrintfromSDoptionfrommenu,pressto
confirmandpickthedesiredmodelmodel_name.gcode.Printerwillstartprintingthe
object.
Thefilename(.gcode)mustnotcontainanyspecialcharactersotherwisethe
printerisnotabletodisplaythefileontheLCD.IfyouremovetheSDwhileprinting,
printerwillpauseautomatically.WhenyoureinserttheSD,presstheLCDknoband
choose“Continue”option.Confirmandprintingwillresume.
● Printerfirmwareallowsthefilamentchangeduringtheprinting.Thisoptionis
usefulwhenthefilamentisrunningoutandyoucanchangethespoolandcontinue
withprint.ChoosetheTuneandthenChangefilamentoptionduringtheprint.
Printerwillpausetheprintingprocess,unloadthefilamentandsignalsyouwiththe
soundtoinsertthenewfilament.Whenyouconfirmthefilamentwasloaded
correctlyprintingprocesswillcontinue.
● Otheroptionstousethefilamentchangeisamulticoloredprint.Theprocedureis
thesameasabovechoosetheTuneandthenChangefilamentoptionduringthe
print.Printerwillpausetheprintingprocess,unloadthefilamentandsignalsyouto
insertthenewfilament.
● Whenyouchangethefilament,LCDdisplaysthemessage“Changedcorrectly?”
withthreeoptions:
1. “Yes”Everythingwentokandprintingcancontinue.Checkifthenewcoloris
clearwithoutanyremainsofthepreviousfilamentifyes,choosethisoption
tocontinueprintingwithanewcolor.
2. “Filamentnotloaded”Ifthenewfilamentwasnotloadedproperly,choose
thisoptionandtheprinterwillstarttheautomaticfilamentloadagain.When
thefilamentisloadedproperly,youcanchoosethe“Yes”optionandthe
printingwillcontinuewithanewcolor.
3. “Colornotclear”Filamentwasloadedbutthecolorisstillspottedbya
previousfilament.Pressthebuttonwiththisoptionandtheprinterwillextrude
morefilamentfromthenozzle.Whenthecolorispurewithoutanyremainsof
16

thepreviousfilamentyoucanchoosethe“Yes”optionandtheprintingwill
continuewithanewcolor.
● Youcanrepeatthisprocedureasmanytimesasyouwanttheresultforinstance
canbeafivecoloredobject.
● Whenprintingisfinishedletthenozzleandheatbedcooldownbeforeremovingthe
printedobject.Alwayshandletheprintedobjectswhentemperatureofthebedand
nozzledroptotheroomtemperature,whenthebedishotobjectsareveryhardto
remove.Pullthebedtowardsyouandremovetheobjectgently.Youcanalso
removethebindingclips,removetheglasswithobjectoutoftheprinterandthen
separatetheobjectfromtheglass.
● Ifyouexperienceanytroublesremovingtheobject(especiallythesmallones)you
canuseaflattoollikeaspatulaorStanleyblade.
Pict.8
Removing
the
model
fromtheglasswithspatula
● Inrarecasespartoftheglasscangougewiththeobject.Withnormalglassitcould
happenmoreoften,withtemperedglassweusewithOriginalPrusai3,it’sextremely
rarecase.Ifthisishappenedtoyoujustusetheothersideoftheglassoryoucan
getthesubstituteglassfromoureshop.
Substituteglassisalsohandywhenyou’dliketoprintanotherobjectimmediately
afterfinishingthepreviousone.Justremovetheglassfromthebedandletthe
objectcooldownoutoftheprinter.Usethegloveswhenmanipulatingwiththe
glassitstemperaturecanreach100°C.
17

6.1 Printer controls
Therearetwowayscontrollingtheprinter.YoucanusetheLCDpanelintegratedwiththe
printeroryoucanconnectyourcomputerwithUSBcable.WesuggesttheLCDpanel
becauseofitsspeedandreliability,andmoreoveryoudonotrelyonacomputer.
6.1.1 LCD screen
● Mainscreenisaninformationscreendisplayingthemostimportantdetails.These
arethetemperatureofthenozzleandtheheatbed(1,2),printingtime(3)andthe
actualZaxisposition(5).
Pict.9LCDlayout
1. Nozzletemperature(actual/desiredtemperature)
2. Heatbedtemperature(actual/desiredtemperature)
3. Progressofprintingin%shownonlyduringtheprinting
4. Statusbar(Prusai3ready/Heating/model_name.gcode,etc.)
5. Zaxisposition
6. Printingspeed
7. Elapsedprintingtimeshownonlywhenprinting
18

6.1.2 LCD layout
Itemsnotmentionedbelowarenotusedforthecommonprintsetupyoushouldnot
changeanyoftheunmentioneditemsunlessyouareabsolutelysurewhatyouare
doing.
❏ Infoscreen
❏ Tune(duringtheprintingprocessonly)
❏ Speed
❏ Nozzle
❏ Bed
❏ Fanspeed
❏ Flow
❏ Changefilament
❏ Pauseprint(duringtheprintingprocessonly)
❏ Stopprint(duringtheprintingprocessonly)
❏ Preheat
❏ ABS255/100
❏ PLA210/50
❏ PET240/90
❏ HIPS220/100
❏ PP254/100
❏ FLEX230/50
❏ Cooldown
❏ PrintfromSD
❏ Loadfilament
❏ Unloadfilament
❏ Support
❏ prusa3d.com
❏ forum.prusa3d.com
❏ howto.prusa3d.com
19

6.1.3 Print speed versus print quality
Printingasmallobjecttakesafewminutes,butprintinglargermodelsistimeconsuming
thereareprintstakingtensofhours.Theoverallprintingtimecanbechangedbydifferent
ways.FirstwaytoaltertheprintingspeedischanginglayerheightinSlic3rupperright
windowsshowsPrintsettingsoption.Defaultsettingis0.20mm(NORMAL),youcanspeed
uptheprinterbychoosingthe0.25mm(DRAFT)option.Raisingspeedwillresultthemodel
tobelessdetailedwithvisiblelayerborders.Ifyoupreferqualityoverspeed,choose0.10
mm(DETAIL)option.Printingtimewilldoublebutthemodelgetstheextradetail.Again,
higherprintingspeedresultsinlessdetailedmodel.
Speedcanbechangedalsowhileprinting.LCDshowstheFR100%itemit’sactualprint
speed(feedrate).ByturningtheLCDknobclockwiseyoucanincreasetheprintspeedupto
999%.However,wedonotadvisetoincreasethespeedover200%.Watchtheresultsof
increasedspeedontheprintedmodelandadjustthespeedeventually.
Whenincreasingthespeedalwayscheckthemodeliscooledproperlyespecially
whenprintingsmallobjectfromABSincreasedspeedcausesthedistortion
(sometimescalled“warping”)ofthemodel.Youcanpreventthisissuebyprinting
moresimilarobjectstogetherlayerprintingintervalislongenoughtopreventthis
issue.
Ifthemodelshowslowerqualitythandesiredyoucandecreasetheprintingspeedturnthe
LCDknobcounterclockwise.Maximumusableprintingspeedisaround20%ofnominal
speed.
6.1.4 USB cable and Pronterface
WestronglyrecommendtouseLCDpanelwhileprintingonPrusai31.75mm
Pronterfacedoesn’tsupportallfunctionsofanewfirmware(e.g.filamentchange
whileprinting).
KeepinmindthatwhenprintingfromthePronterfacethecomputermustbeconnectedto
theprinterduringthewholeprintingprocesscomputermustbepreventedfromsleep,
hibernationorshuttingdown.Disconnectingthecomputerduringtheprintendstheprinting
withouttheoptiontofinishtheobject.
● ConnecttheprintertothecomputerwiththeUSBcable.
20
Page is loading ...
Page is loading ...
Page is loading ...
Page is loading ...
Page is loading ...
Page is loading ...
Page is loading ...
Page is loading ...
Page is loading ...
Page is loading ...
Page is loading ...
Page is loading ...
Page is loading ...
Page is loading ...
Page is loading ...
Page is loading ...
Page is loading ...
Page is loading ...
Page is loading ...
/


