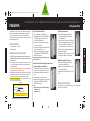
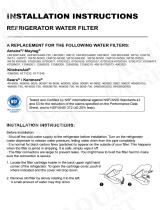
Insignia NS-A700PF6 User manual
- Category
- Water dispensers
- Type
- User manual
This manual is also suitable for

NS-A700PF6 or NS-A700PF6-2 (LG)
1 Press the push button on the lter housing.
2 Gently pull the cartridge down and then pull it out
of the lter housing. You may need to lower or
remove the shelf below the cover.
3 Ensure that o-rings are present on the cartridge
and are seated into grooves.
4 Insert the new cartridge, pushing it in until it stops.
Push up rmly and close the cover.
5 Reset the lter change indicator in your refrigera-
tor, if applicable. (See “RESETTING YOUR FILTER
INDICATOR” on back page.)
Note: Run approximately 1.5 gallons of water through
the new lter before use.
NS-A8001F6 or NS-A8001F6-2 (Maytag, PuriClean II, Amana,
Sears/Kenmore, Whirlpool and Kitchenaid)
1 Twist the old lter counterclockwise and pull it out
of the receiver. The water automatically shuts o.
2 Push the new lter into the lter receiver until it
stops.
3 Turn the new lter clockwise until it stops.
4 Reset the lter change indicator in your refrigerator,
if applicable. (See “RESETTING YOUR FILTER
INDICATOR” on back page.)
Notes:
• Run approximately 1.5 gallons of water through the
new lter before use.
• Do not remove O-ring.
NS-LT600B-2 (LG and Kenmore)
1 Remove the old lter by rotating a half turn
counterclockwise, then pull it out. The water
automatically turns o.
2 If you have a Kenmore refrigerator, check if there is
a plastic or metal cap that covers the top of the old
lter. If there is, pull o the cap and attach it to
your new lter. If there is not, continue to step 3.
3 Align the top of your new lter with the receiver,
then push it in until it stops.
4 Rotate the lter a half turn clockwise to secure the
lter, then twist a little more to prevent leaks.
NS-DA2920 or NS-DA2920-2 (Samsung)
1 Remove the old lter by rotating it a 1/4 turn
counterclockwise, then pull it out.
2 Align the top of your new lter with the receiver,
then push it up until it stops.
3 Rotate the lter a 1/4 turn clockwise to secure the
lter.
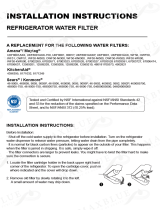
BEFORE USING YOUR FILTER
If your refrigerator has a change lter indicator, reset it. See “Resetting your
lter indicator” for instructions.
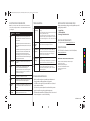
Quick Setup Guide
|
NS-A700PF6/NS-A700PF6-2/NS-A8001F6/NS-A8001F6-2/NS-LT600B-2/NS-DA2920/NS-DA2920-2
Refrigerator Filter
Before using your new product, please read these instructions to prevent any damage.
Congratulations on your purchase of one of the highest performing
water lters on the market today. Insignia lters use a high-grade
coconut carbon that has 50% more micro-pores than standard
carbon. They also use fewer high-compression binders, giving you the
best water ltration possible.
PACKAGE CONTENTS
• Refrigerator lter(s) (1 or 2 pack)
• Quick Setup Guide
GENERAL INSTALLATION GUIDELINES
1 YOU MUST SOAK your new lter in water for 15 minutes prior to
installing it in your refrigerator. This is needed to remove air from
the carbon block.
2 It is normal for black carbon nes (particles) to appear on the outside
of your lter. This happens when the lter is jarred in shipping, it is
safe, simply wipe it o.
3 Connections on our lters are larger in size to prevent leakage. This
might require more hand leverage to install.
4 After installing, run about two to three gallons of water through your
refrigerator’s water dispenser to remove air and loose carbon pieces.
The water may be cloudy and sputter until the air is removed.
5 We apply a safe, NSF approved, food grade silicone lubricant to our
lter connectors (jelly like substance).
Installation:
*PUSH AND TURN HARD
To remove turn counter-clockwise
To install turn clockwise
Do not remove the O-ring
Filter receivers are designed to be exible.
Don’t worry, they won’t break!
C
M
Y
CM
MY
CY
CMY
K
NS-A700PF6_A700PF6-2_A8001F6_A8001F6-2_LT600B-2_DA2920_DA2920-2_14-1039_QSG_V3_EN.ai 1 9/16/2014 4:29:05 PMNS-A700PF6_A700PF6-2_A8001F6_A8001F6-2_LT600B-2_DA2920_DA2920-2_14-1039_QSG_V3_EN.ai 1 9/16/2014 4:29:05 PM
V3
FINAL
FOR PRINT

RESETTING YOUR FILTER INDICATOR
Note: These are the most common lter reset instructions. If the instructions
don’t work for your refrigerator brand, see the documentation that came with
your refrigerator.
TROUBLESHOOTING
STORAGE AND MAINTENANCE
• Replace your lter every three to six months to prevent bacteria and
fungus growth in your lter, supply lines, and storage tank.
• Stored lters do not expire. Keep your unused lters in a cool, dark, and
dry place until you need them.
• If you do not use your water dispenser for more than four days, run two
gallons of water before using it to prevent bad tasting water.
• The lters are lubricated with a safe, USDA grade silicone. You do not need
to lubricate the gaskets or receiver before installing.
V3 ENGLISH 14-1039
RECYCLING YOUR USED INSIGNIA FILTER
Help the environment by recycling your used Insignia lter at your local
recycling facility or mail it to:
Insignia Filters
2678 Ram Bay Road
Manning, South Carolina 29102
ONEYEAR LIMITED WARRANTY
For complete warranty, visit www.insigniaproducts.com.
CONTACT INSIGNIA
1-877-467-4289 (U.S. and Canada) or 01-800-926-3000 (Mexico)
www.insigniaproducts.com
CERTIFICATIONS: <SGF-M9, SGF-LB60, SGF-DA20B, SGF-LA07>
INSIGNIA is a trademark of Best Buy and its aliated companies.
Registered in some countries.
Distributed by Best Buy Purchasing, LLC
7601 Penn Ave South, Richeld, MN 55423 U.S.A.
©2014 Best Buy. All rights reserved.
Made in China
REFRIGERATOR
BRAND
Amana®
GE or Hotpoint
Samsung
LG
Kenmore
Maytag® and
Jenn-Air®
Whirlpool® and
Kitchen Aid®
INSTRUCTIONS
Press and hold the dispenser lock and auto light buttons at the
same time. When the lter indicator ashes (about four seconds),
release both buttons.
OR
Press and hold the dispenser lock and water buttons at the same
time. When the lter indicator ashes (about four seconds), release
both buttons.
OR
Press and hold the dispenser lock and auto light buttons on the
dispenser (at the same time) for 4 seconds until the lter status
indicator begins to ash, and then release the buttons. On
some Amana fridges you need to press the dispenser lock and
water buttons for 4 seconds until the lter status indicator begins
to ash, and then release the buttons.
Press and hold the reset water lter button on the dispenser for
three seconds.
Press and hold the ice type and child lock buttons for three
seconds. The water lter indicator should turn green.
Note: Only hold these buttons for three seconds. Holding these
buttons for ve seconds cancels the reset. If you cancel the reset,
repeat the instructions above again.
Press and hold the reset button for three seconds.
The water lter reset for Kenmore refrigerators varies by model.
See the documentation that came with your refrigerator.
Press and hold the lock and light buttons (lock and water on newer
fridges) on the dispenser for about 4 seconds, until the indicator
light blinks.
Press the light switch 5 times within 10 seconds. If the fridge has a
lter button, press and hold it for 5-10 seconds
PROBLEM
My refrigerator is
not dispensing
water
My water
dispenser is
dripping
My water is cloudy
or contains black
carbon pieces
My new lter is
making noises or
sputtering
My water tastes
bad
SOLUTION
• Make sure that you soaked your lter in water for 15 minutes before
installing.
• Make sure that the lter is securely connected to the receiver. Do not
use tools to tighten the lter in place.
• Make sure that the water line to the refrigerator is turned on. The
valve must be completely open for the refrigerator to receive water.
• Make sure that the refrigerator door is closed or the dispenser will not
work.
• A few drops are normal. If the water is dripping constantly, have a
service technician check your refrigerator’s water valve.
• Cloudy water is caused by microscopic air bubbles. Run two to three
gallons of water from your dispenser to clear the air bubbles out.
• Black carbon pieces in the water are normal and appear with all
carbon lters. Run two to three gallons of water through your
dispenser to remove loose carbon pieces.
• Make sure that you soaked your lter in water for 15 minutes before
installing.
• Noises and sputtering are caused by trapped air pockets. Run two to
three gallons of water from your dispenser to push the air out.
• If you do not use your water dispenser for more than four days, run
two gallons of water through the dispenser before using it.
• Make sure that you replace your lter every three to six months to
prevent bacteria growth.
C
M
Y
CM
MY
CY
CMY
K
NS-A700PF6_A700PF6-2_A8001F6_A8001F6-2_LT600B-2_DA2920_DA2920-2_14-1039_QSG_V3_EN.ai 2 9/16/2014 4:29:12 PMNS-A700PF6_A700PF6-2_A8001F6_A8001F6-2_LT600B-2_DA2920_DA2920-2_14-1039_QSG_V3_EN.ai 2 9/16/2014 4:29:12 PM
-
 1
1
-
 2
2


Insignia NS-A700PF6 User manual
- Category
- Water dispensers
- Type
- User manual
- This manual is also suitable for
Ask a question and I''ll find the answer in the document
Finding information in a document is now easier with AI
Related papers
-
Insignia NS-LT600B-2 Quick setup guide
-
Insignia NS-HAF-CIN-2 Quick setup guide
-
-
-
Insignia NS-LT600P-2 User manual
-
-
Insignia NS-MWF-1 Refrigerator Filter Quick setup guide
-
-
-
Other documents
-
Samsung SL-NWA001N Installation guide
-
-
 Drinkpod USA BF-GE-MWF-5PACK Owner's manual
-
 PURELINE Frigidaire WFCB & WF1CB Water Filter Replacement. Compatible Frigidaire Models: WF1CB, NGRG 2000, WFCB, RG-100.- High End Generic Filter User manual
-
 AQUA CREST AQF-UKF8001-P User manual
-
 FilterLogic FL-RF07-S User manual
-
 Maxblue MB-UKF8001-P User manual
-
 PURELINE PL-500 User manual
-
Saba SGF-25 User manual
-
Waterdrop WDP-UKF8001 User manual


