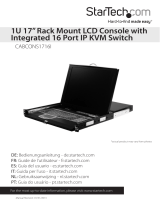
Tripp Lite 5UM7017 User manual

Type
User manual

This manual is also suitable for

www.minicom.com
International HQ
Jerusalem, Israel
Tel: + 972 2 535 9666
minicom@minicom.com
America
Linden, NJ, USA
Tel: + 1 908 486 2100
info.usa@minicom.com
Technical support - support@minicom.com
5UM70173 V1 6/09
AccessIT
User Guide
USER GUIDE
1
About this User Guide
This User Guide provides installation and operation instructions for the AccessIT
Manager system produced by Minicom Advanced Systems. It is intended for
system administrators and network managers, and assumes that readers have
general understanding of networks, LDAP, hardware and software.
All information in this User Guide is subject to change without prior notice.
User Guide Feedback
Your feedback is very important to help us improve our documentation. Please
email any comments to: ug.comments@minicom.com
Please include the following information: Guide name, part number and version
number (as appears on the front cover).
Copyright
Copyright © 2009 Minicom Advanced Systems Ltd.
All marks are trademarks or registered trademarks of their respective owners.
AccessIT
2
Table of Contents
1. Introduction.........................................................................................................7
1.1 Key features...............................................................................................................7
1.2 System components..................................................................................................8
1.3 Terminology...............................................................................................................8
1.4 System diagram.........................................................................................................9
2. Pre-installation guidelines...............................................................................10
2.1 Access services details...........................................................................................11
2.1.1 Adding user defined Access services.................................................................11
3. Understanding the system – an overview......................................................12
3.1 Creating users..........................................................................................................13
3.2 Forming users into Groups.....................................................................................13
3.3 Creating Targets......................................................................................................13
3.4 Forming Targets into sets.......................................................................................14
3.5 Associating a User Group with a Target Set.........................................................14
3.6 Access services.......................................................................................................15
4. Setting up the system.......................................................................................17
4.1 Connecting the AccessIT Manager........................................................................17
4.2 AccessIT Manager’s default IP address.................................................................18
4.2.1 Changing the AccessIT Manager network parameters.......................................18
5. Displaying the AccessIT web interface..........................................................19
5.1 Menu section............................................................................................................20
6. Creating users...................................................................................................21
6.1 General tab...............................................................................................................22
6.2 User Group tab.........................................................................................................22
6.2.1 Removing Users from a Group...........................................................................23
6.3 Access Permissions tab..........................................................................................23
6.4 Saving a user...........................................................................................................24
6.4.1 Deleting a user...................................................................................................25
6.5 Creating a User Group.............................................................................................25
6.5.1 Access Permissions tab......................................................................................26
6.5.2 Allowed Services tab..........................................................................................27
6.5.3 Saving the new Group........................................................................................27
6.5.4 Deleting a User Group........................................................................................28
7. Configuring Targets..........................................................................................29
7.1 Access Services tab................................................................................................30
7.1.1 Default access service........................................................................................31
USER GUIDE
3
7.1.2 Minicom KVM/IP.................................................................................................31
7.2 PDUs tab...................................................................................................................33
7.3 Target Sets tab.........................................................................................................34
7.4 Access Permissions tab..........................................................................................34
7.5 Saving the Target.....................................................................................................35
7.6 Deleting Targets.......................................................................................................35
7.7 Creating a Target Set...............................................................................................36
7.7.1 Access Permissions tab......................................................................................36
7.7.2 Saving the Target set.........................................................................................37
7.7.3 Deleting a Target Set..........................................................................................38
8. Configuring KVM/IP Devices...........................................................................39
8.1 Setting each IP device to be AccessIT enabled....................................................40
8.2 Configuring the IP devices......................................................................................40
8.2.1 The Advanced button.........................................................................................41
8.2.2 Performance.......................................................................................................41
8.2.3 Mouse.................................................................................................................42
8.3 KVM Ports tab..........................................................................................................42
8.3.1 DXU IP II units....................................................................................................43
8.4 Targets......................................................................................................................44
8.5 Network tab..............................................................................................................45
8.5.1 Serial tab............................................................................................................46
8.6 Saving the IP device configuration changes.........................................................46
8.7 Deleting IP devices..................................................................................................46
8.8 Device discovery......................................................................................................47
9. Configuring Other Devices..............................................................................48
9.1 Configuring PDUs....................................................................................................48
9.1.1 Outlets tab..........................................................................................................49
9.2 Configuring Console Servers.................................................................................50
9.2.1 Serial tab............................................................................................................52
10. Configuring Access Services........................................................................53
10.1 Access services.....................................................................................................53
10.2 Minicom KVM/IP.....................................................................................................54
10.3 Configuring other Access Services – introduction.............................................55
10.3.1 Access Services default values........................................................................55
10.3.2 General note about application paths...............................................................55
10.3.3 Minicom PX Serial............................................................................................55
10.3.4 Web..................................................................................................................56
10.3.5 ILO....................................................................................................................57
10.3.6 RDP..................................................................................................................59
10.3.7 SSH..................................................................................................................61
AccessIT
4
10.3.8 VNC..................................................................................................................62
10.3.9 Telnet................................................................................................................63
10.3.10 VMware Server...............................................................................................64
10.3.11 New Access Services.....................................................................................65
11. Configuring Access services for individual Targets...................................68
11.1 Default access service..........................................................................................68
11.2 Minicom PX Serial..................................................................................................68
11.2.1 Web..................................................................................................................69
11.2.2 ILO....................................................................................................................70
11.2.3 RDP..................................................................................................................71
11.2.4 SSH..................................................................................................................73
11.2.5 VNC..................................................................................................................74
11.2.6 Telnet................................................................................................................76
11.2.7 VMware Server.................................................................................................78
12. Account Policy................................................................................................80
12.1 Password policy.....................................................................................................80
12.1.1 Account blocking..............................................................................................81
12.2 External authentication (LDAP)............................................................................81
12.2.1 AccessIT in External authentication (LDAP) mode...........................................82
12.2.2 DNS setting in LDAP mode..............................................................................82
12.2.3 LDAP settings...................................................................................................83
12.2.4 Importing users.................................................................................................84
12.2.5 Synchronization................................................................................................85
12.2.6 Operating AccessIT in External Authentication mode.......................................86
13. Global Settings................................................................................................87
13.1 AccessIT / KVM/IP Session Idle timeout..............................................................87
14. Attached Devices............................................................................................89
14.1 Selecting PDUs......................................................................................................89
14.1.1 Uploading a new PDU model............................................................................89
14.2 KVM switches.........................................................................................................90
14.2.1 Uploading a new KVM Switch...........................................................................91
14.3 Configuring a Console server...............................................................................92
14.3.1 Uploading a new Console Server model...........................................................93
15. System Maintenance......................................................................................94
15.1 Backup & Restore..................................................................................................94
15.1.1 The backup elements.......................................................................................94
15.1.2 Restoring database backup..............................................................................95
15.2 Restore Settings....................................................................................................96
15.2.1 Restoring AccessIT to factory default settings..................................................96
USER GUIDE
5
15.2.2 Resetting AccessIT configuration.....................................................................96
15.3 Firmware upgrade..................................................................................................97
15.3.1 Upgrading the IP devices firmware...................................................................97
15.3.2 Upgrading the AccessIT Manager....................................................................97
15.4 Replication.............................................................................................................98
15.4.1 Connecting the secondary unit to the network..................................................98
15.4.2 Configuring the secondary unit.........................................................................98
15.4.3 Configuring the primary unit..............................................................................99
15.4.4 Promoting a secondary unit to a standalone unit............................................100
15.4.5 Reconfiguring the primary and secondary units..............................................100
15.4.6 Primary unit and secondary unit troubleshooting............................................101
15.4.7 Checking the secondary unit..........................................................................102
15.4.8 Redoing the secondary and primary unit configuration...................................102
15.5 Event log...............................................................................................................103
15.5.1 Drop-down search menus...............................................................................103
15.5.2 Access, System or Configuration tabs............................................................104
15.5.3 Advanced button.............................................................................................104
15.5.4 Syslog forwarding...........................................................................................104
15.6 SNMP....................................................................................................................105
16. Unit Maintenance..........................................................................................106
16.1 Date & Time tab....................................................................................................106
16.2 Network tab..........................................................................................................106
16.3 Power Control tab................................................................................................107
17. Accessing Targets - Administrator.............................................................108
17.1 Access page columns.........................................................................................108
17.1.1 Power management column...........................................................................108
17.1.2 Name column.................................................................................................109
17.1.3 Status column.................................................................................................109
17.1.4 More access services column.........................................................................109
17.2 Accessing a Target via KVM/IP remote session................................................110
17.3 Sharing a remote session...................................................................................110
17.3.1 Private remote session...................................................................................111
17.4 Displaying the Toolbar........................................................................................111
17.5 Virtual Media........................................................................................................111
17.5.1 Things to know during operation of the Virtual Media.....................................112
17.6 Session profile.....................................................................................................113
17.7 Full screen mode.................................................................................................114
17.8 Changing the performance settings...................................................................114
17.9 Adjusting the Video settings...............................................................................115
17.9.1 Refresh...........................................................................................................115
17.9.2 Video Adjust...................................................................................................115
AccessIT
6
17.9.3 Advanced........................................................................................................116
17.10 Power cycle........................................................................................................117
17.11 Keyboard key sequences..................................................................................117
17.12 Synchronizing mouse pointers.........................................................................119
17.12.1 Aligning the mice pointers.............................................................................119
17.12.2 Calibrating mice pointers..............................................................................119
17.13 Manual mouse synchronization........................................................................119
17.13.1 Relative/Absolute Mouse Position/Apple Macintosh.....................................120
17.13.2 PX USB KVM/IP...........................................................................................121
17.13.3 Switching to a different server......................................................................121
17.13.4 Disconnecting the remote session................................................................122
17.14 Accessing a Target through other Access Services......................................122
17.15 Exiting the AccessIT system............................................................................123
18. Accessing Targets as a User.......................................................................124
18.1 Power column......................................................................................................124
18.2 Status column......................................................................................................124
18.3 Connecting to a Target........................................................................................125
18.3.1 Connecting to a KVM/IP device Target...........................................................125
18.3.2 Connecting to a non-KVM/IP device Target....................................................125
18.3.3 Changing the password..................................................................................126
19. Accessing an IP device directly..................................................................127
20. About..............................................................................................................128
21. General troubleshooting..............................................................................129
22. Technical Specifications..............................................................................132
22.1 WEEE compliance................................................................................................133
23. Appendix A – PX details...............................................................................134
23.1 KVM/IP device details..........................................................................................135
USER GUIDE
7
1. Introduction
AccessIT is an appliance based application that provides IT staff with secure and
centralized management of all remote access services in the organization. It
operates in both Windows and Linux environments and is accessible from Internet
Explorer and Firefox.
AccessIT is a web-based management solution that consolidates in-band and out-
of-band remote access services onto one user-friendly web portal. It provides a
unified point and click view of all IT assets together with their assigned remote
access services. AccessIT is a single sign-in solution making it simple and easy for
IT staff to enter the system regardless of their location at any given moment.
AccessIT manages remote access to up to 250 mission-critical IT and network
devices of the business whether they are inside the server room or distributed
around the organization or branch offices. These can include: servers, virtual
servers, IP-enabled KVM switches, routers, firewalls, serial console servers,
network switches, printers, power distribution units (PDUs), environmental devices
(sensors), surveillance IP cameras and more.
AccessIT provides unique seamless (one-click) access to IT assets through a select,
predefined list of Access Servicesâ„¢ that include: RDP, VNC, VMware ESX
Server, VMware Server 1x and 2x, SSH, Telnet, HP iLO and KVM (Minicom or
3rd party). You can also customize any other remote access method in a few simple
steps.
1.1 Key features
IT Management - AccessIT centralizes the management of all devices,
authentication and global operation from a Web browser. The local administrator
can monitor, control and manage the various devices, user accounts and
authorization from one Web interface.
Automatic Discovery - Minicom IP devices are discovered automatically by the
AccessIT Manager.
Access Services - Connect to a variety of both hardware and software external
resources such as: ILO, RDP, SSH, VNC and web pages etc, from the AccessIT
interface.
Security - AccessIT provides a secure environment, adhering to the most stringent
industry standards.
Availability - Maximizes uptime by centralizing management and allowing
immediate and effective maintenance.
AccessIT
8
Virtual Media - Virtual Media is a very useful tool for those who need to manage
large numbers of computers such as commercial IT data center managers. A Target
computer can be made to boot to one of many virtual disks that can perform any
variety of tasks such as virus scans of the Target’s physical drive or patch
management or even complete installation of the operating system on a Target
computer.
1.2 System components
The AccessIT Manager system comes with the following:
· AccessIT Manager appliance
· Rack mounting kit
1.3 Terminology
Below are some terms and their meanings used in this guide.
Term Meaning
Targets Computers/servers and other services e.g. printers, firewalls, PDUs etc. that
are accessed remotely via the AccessIT.
Client computer
The PC running a remote AccessIT session
Remote session The process of accessing and controlling Targets connected to a KVM/IP
device from a Client computer
USER GUIDE
9
1.4 System diagram
The diagram below gives a brief outline of the AccessIT system setup. Section 3 on
page 12 explains the system setup in more detail.
LAN / WAN / VPN
Users login to AccessIT and choose
their preferred method of accessing
their server
PX
IPCONTROL
LAN
KVM In
Serial
3.3V/2A
Go LocalPower
IP Control
Smart 116 IP
Smart 216/32IP
SmartRack 116IP
DXUIP II
Minicom IP Solutions
Seamless Management & Access
Built-in Access Services
Seamless/Integrated Access
VNC
Remote Desktop
Telnet
VMware Server
SSH
HP ILO
Third Party IP devices
Client/Server Apps
Power Distr. Units
Terminal Access
Virtual Machines
POWER
100-250 VAC 50/60 Hz
1 2 3 4 5 6 7 8
10 11 12 13 14 15 169
COMPUTER
ww w .m i nic o m. co m
ETHERNET
ISDN
SERIAL 1 SERIAL 2
16IP/IPLink/MXIP
Custom Defined Access Services
Integrated or non-Integrated Access
AccessIT
Applications
Applications
Hardware
AccessIT Manager
PowerEdge
1950
KVM.net
Figure 1 System diagram
AccessIT
10
2. Pre-installation guidelines
Prepare a list of all AccessIT system components. You will need this information
to configure the system.
Appendix A on page 134 contains 2 lists of the details you need to prepare for
Minicom KVM/IP devices and PX units (not PX Serial). Photocopy or print out
Appendix A. For other access services see section 2.1 below.
The lists should include the IP device name and MAC address, KVM switch and
the Target details.
For each Target, list:
· A unique and clearly identifiable name
· The operating system
· Non-default mouse settings. Default mouse settings do not need to be
listed
Note! For Windows XP and later
(Relevant to all IP devices except PX USB)
For Windows XP and later deactivate Enhanced pointer precision. To do so:
From the Control Panel select Printers and Other Hardware. Click the Mouse
icon. The Mouse Properties box appears. See Figure 2. Select the Pointer Options
tab.
Figure 2 Pointer tab
The Motion section slider bar must be in the center, and the Enhanced pointer
precision checkbox must be unchecked. Click OK to save changes.
USER GUIDE
11
2.1 Access services details
Besides the Minicom KVM/IP devices mentioned above, you can connect to
Targets via the following Access services through AccessIT:
· Minicom’s PX Serial
· Web
· ILO
· RDP
· SSH
· VNC
· Telnet
· VMware Server
These services are elaborated on in the section 3.6.
All service applications must be installed on the local (client) computers.
See section 10.3 on page 55 which sets out the details required for each of the
above Access service.
2.1.1 Adding user defined Access services
You can also add your own access services, explained on page 65.
AccessIT
12
3. Understanding the system – an overview
The figure below shows a typical AccessIT application.
Figure 3 AccessIT typical application
The system works as follows:
Data centers in locations throughout the world are connected to Minicom IP
devices and to other 3
rd
party access services. The Minicom IP devices are
Centralized Management enabled allowing AccessIT to access/control the Targets
connected to all IP devices via IP.
Users access the AccessIT web interface and depending on their level of access
permissions can access and control the Targets.
USER GUIDE
13
3.1 Creating users
An Administrator can create users with 2 different possible permission types:
· Administrator
· User
These permission types are explained fully in section 6. In the example below 4
users are created with various permission types.
Phil Sid Dave Jon
User
User
Administrator
Administrator
Figure 4 Users with different permissions
Once an Administrator creates Targets or sets of Targets (explained below) in the
system, users can be assigned access to individual Targets or sets of Targets.
3.2 Forming users into Groups
You can form users into Groups. In the example below 3 users are formed into the
Finance group. Note! Groups can contain users with different levels of user
permissions.
Phil Sid Dave Jon
Finance Group
User Administrator
UserAdministrator
User Administrator
Sid
Dave Jon
Administrator
Figure 5 Forming users into groups
3.3 Creating Targets
An Administrator creates Targets corresponding to the physical servers connected
to the IP devices, explained in section 7, and also to Targets corresponding to e.g.
printers, firewalls, PDUs and IDSs etc accessed via Access Servicesâ„¢ - see page
15. In the example below, four Targets are created and given identifying names.
They can be named by location, server type or operating system or any other
unique feature associated with that particular server.
AccessIT
14
Dell
#1
Target servers
Dell
#2
Dell
#3
Dell
#4
Figure 6 Created Targets
3.4 Forming Targets into sets
Targets can be formed into sets. You can for example create a set of all financial
servers. In the example below 3 Targets are formed into Target Set - Finance.
Dell
#1
Target servers
Target Set - Finance
Dell
#2
Dell
#3
Dell
#4
Dell
#1
Dell
#2
Dell
#3
Figure 7 Forming Targets into sets
3.5 Associating a User Group with a Target Set
You can then associate the User Group with the Target Set, thus giving access
rights to all the Targets in the Set to all members of the Group.
Target Set - Finance
Dell
#1
Dell
#2
Dell
#3
Finance Group
Sid Dave Jon
UserAdministrator Administrator
Figure 8 User Group - Target Set association
In the example above the Finance Group is associated with the Target Set –
Finance.
USER GUIDE
15
This means that:
· The Finance Group has access rights to Target Set - Finance.
· Any user added to the Finance Group will automatically have access rights
to Target Set - Finance.
Note! Users can be members of many different groups. In the example below Sid
belongs to the Finance Group and also to the Marketing Group.
Marketing Group Finance Group
View Only
Sid Dave Jon
User
Administrator
Phil Sid
User Administrator
Administrator
Figure 9 Same user in different Groups
The Marketing Group could be associated with Targets or Target Sets that the
Finance Group is not. Sid being a member of both Groups has access to Targets
both Groups are associated with. Phil only has access to Targets associated with the
Marketing Group. Dave and Jon only have access to Targets associated with the
Finance Group.
3.6 Access services
The Access Servicesâ„¢ feature supports a wide range of remote access
technologies. This enables the assignment of multiple services to a single Target,
so you have the option of in-band or out-of-band access to the same device.
KVM/IP is a hardware method of accessing and controlling a Target. The other
Access Services encompass gaining remote access and control of a Target through
the internet or LAN network via Minicom’s PX Serial or 3
rd
party software. Both
hardware and software methods of access are managed by AccessIT.
AccessIT also enables you to effortlessly integrate any new remote access
technology into the remote access portal.
AccessIT
16
Besides the Minicom KVM/IP devices, you can connect to Targets via the
following Access services through AccessIT:
· Minicom’s PX Serial - PX Serial is a one-port RS232/422/485 to
Redundant Ethernet device server.
· Web – Browser based web service
· ILO - HP Integrated Lights-Out (iLO). HP ILO gives seamless access to
HP servers.
· RDP - Remote Desktop Protocol. RDP is a multi-channel protocol that
allows a user to connect to a computer running Microsoft Terminal Services.
· SSH - Secure Shell. SSH is a network protocol that allows data to be
exchanged using a secure channel between two computers. An SSH client
program is typically used for establishing connections to an SSH daemon.
· VNC - Virtual Network Computing. VNC is a graphical desktop sharing
system which uses the RFB protocol. VNC is platform-independent — a
VNC viewer on any operating system usually connects to a VNC server on
any other operating system. There are clients and servers for almost all GUI
operating systems.
· Telnet - TELecommunication NETwork. TELNET is a network
protocol used on the Internet or LAN connections.
· VMware Server - VMware Server is a free virtualization product for
Windows and Linux servers with enterprise-class support. It enables
companies to partition a physical server into multiple virtual machines and
to start experiencing the benefits of virtualization. VMware Server gives
seamless access to virtual machines.
USER GUIDE
17
4. Setting up the system
Set up the Minicom IP device systems according to their User Guide instructions.
In order to be managed by AccessIT, all Minicom IP devices must be configured to
be Centralized Management enabled. This is done from the Network Configuration
page of each IP device. For example, see the Centralized Management section in
Figure 10, Centralized Management is enabled by selecting the Enable
Centralized Management checkbox.
Figure 10 Network Configuration page sample
Also in the Centralized Management section in Figure 10, specify how the
AccessIT Manager detects the IP device. This can be done either by:
Manager Auto Discovery – when checked, AccessIT automatically detects the IP
device if it resides on the same network segment.
Manager IP – If the IP device resides on a different segment, type the static IP
address of the AccessIT Manager. (We advise typing the static IP address of the
AccessIT Manager even if the IP device resides on the same network segment as
the AccessIT Manager).
Install 3
rd
party access services in all client workstations according to their own
installation and configuration instructions. See section 10.3 on page 55 for details
required for the integration of the Access services into the AccessIT system.
4.1 Connecting the AccessIT Manager
1. Connect the AccessIT Manager to the network as follows: On the rear panel
connect an Ethernet cable to LAN 1. Connect the other end of the Ethernet
cable to the network switch.
2. Connect the AccessIT Manager to a power supply outlet.
AccessIT
18
4.2 AccessIT Manager’s default IP address
Each AccessIT Manager unit comes with the following default values:
IP address - 192.168.1.250.
Subnet mask - 255.255.255.0
Gateway - 192.168.1.1
If these values are not suitable for your network, follow the steps in the section
below to display the AccessIT interface. You can then change the IP address of the
AccessIT Manager in the Network tab under Settings/Unit Maintenance, see
section 16.2 on page 106.
4.2.1 Changing the AccessIT Manager network parameters
1. Open your Web browser (Internet Explorer version 6.0 - Firefox 3 or higher
versions).
2. Type in the IP address of the AccessIT Manager (default IP address
https://192.168.1.250) and press Enter. (Change your computer network
settings, if necessary). The Login page appears.
3. Type the login name admin and password access.
4. Navigate to the Network tab under Settings/Unit Maintenance and change the
network parameters to suit your network configuration.
5. Press Save and restart the AccessIT Manager.
6. Wait for the system to restart and login with the new IP address.
USER GUIDE
19
5. Displaying the AccessIT web interface
To display the Web interface:
1. Open your Web browser (Internet Explorer version 6.0 or Firefox 3 or higher)
versions.
2. Type in the IP address of the AccessIT Manager (default IP address
https://192.168.1.250) and press Enter.
Note! The IP address must begin with https:// and not http://. The Login page
appears. Bookmark it for easy reference.
3. Type the login name and password. Default username is admin and password is
access.
4. Press Enter. The Web interface appears, see Figure 11.
Menu section
IP device type
New devices identified
with their MAC address
Once devices are
identified by a
name they appear
here in the Devices
section
Click the arrows to show
or hide New Devices/
Devices section
Click a name to edit the
devices properties
To search for a device
type name here
To sort the devices in
alphabetical order A-Z or
Z-A, click the top of the
name column
Figure 11 Devices page
Note! On first connection the AccessIT GUI prompts you to install the AccessIT
client software, see Figure 12. Click Install.
Note! In Firefox, the client plugin is installed when you navigate to the Access
section.
  • Page 1 1
  • Page 2 2
  • Page 3 3
  • Page 4 4
  • Page 5 5
  • Page 6 6
  • Page 7 7
  • Page 8 8
  • Page 9 9
  • Page 10 10
  • Page 11 11
  • Page 12 12
  • Page 13 13
  • Page 14 14
  • Page 15 15
  • Page 16 16
  • Page 17 17
  • Page 18 18
  • Page 19 19
  • Page 20 20
  • Page 21 21
  • Page 22 22
  • Page 23 23
  • Page 24 24
  • Page 25 25
  • Page 26 26
  • Page 27 27
  • Page 28 28
  • Page 29 29
  • Page 30 30
  • Page 31 31
  • Page 32 32
  • Page 33 33
  • Page 34 34
  • Page 35 35
  • Page 36 36
  • Page 37 37
  • Page 38 38
  • Page 39 39
  • Page 40 40
  • Page 41 41
  • Page 42 42
  • Page 43 43
  • Page 44 44
  • Page 45 45
  • Page 46 46
  • Page 47 47
  • Page 48 48
  • Page 49 49
  • Page 50 50
  • Page 51 51
  • Page 52 52
  • Page 53 53
  • Page 54 54
  • Page 55 55
  • Page 56 56
  • Page 57 57
  • Page 58 58
  • Page 59 59
  • Page 60 60
  • Page 61 61
  • Page 62 62
  • Page 63 63
  • Page 64 64
  • Page 65 65
  • Page 66 66
  • Page 67 67
  • Page 68 68
  • Page 69 69
  • Page 70 70
  • Page 71 71
  • Page 72 72
  • Page 73 73
  • Page 74 74
  • Page 75 75
  • Page 76 76
  • Page 77 77
  • Page 78 78
  • Page 79 79
  • Page 80 80
  • Page 81 81
  • Page 82 82
  • Page 83 83
  • Page 84 84
  • Page 85 85
  • Page 86 86
  • Page 87 87
  • Page 88 88
  • Page 89 89
  • Page 90 90
  • Page 91 91
  • Page 92 92
  • Page 93 93
  • Page 94 94
  • Page 95 95
  • Page 96 96
  • Page 97 97
  • Page 98 98
  • Page 99 99
  • Page 100 100
  • Page 101 101
  • Page 102 102
  • Page 103 103
  • Page 104 104
  • Page 105 105
  • Page 106 106
  • Page 107 107
  • Page 108 108
  • Page 109 109
  • Page 110 110
  • Page 111 111
  • Page 112 112
  • Page 113 113
  • Page 114 114
  • Page 115 115
  • Page 116 116
  • Page 117 117
  • Page 118 118
  • Page 119 119
  • Page 120 120
  • Page 121 121
  • Page 122 122
  • Page 123 123
  • Page 124 124
  • Page 125 125
  • Page 126 126
  • Page 127 127
  • Page 128 128
  • Page 129 129
  • Page 130 130
  • Page 131 131
  • Page 132 132
  • Page 133 133
  • Page 134 134
  • Page 135 135
  • Page 136 136
  • Page 137 137

Tripp Lite 5UM7017 User manual

Type
User manual
This manual is also suitable for

Ask a question and I''ll find the answer in the document

Finding information in a document is now easier with AI