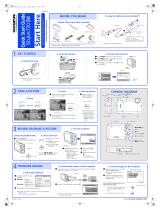
Olympus Stylus 730 Owner's manual

Type
Owner's manual

This manual is also suitable for

Advanced
Manual
Menu operations
Button operations
Printing pictures
Using OLYMPUS Master
Getting to know your
camera better
Appendix
Thank you for purchasing an Olympus digital camera. Before you start to use your new camera, please
read these instructions carefully to enjoy optimum performance and a longer service life. Keep this manual
in a safe place for future reference.
We recommend that you take test shots to get accustomed to your camera before taking important photographs.
In the interest of continually improving products, Olympus reserves the right to update or modify information
contained in this manual.
The screen and camera illustrations shown in this manual were produced during the development stages
and may differ from the actual product.
DIGITAL CAMERA
Quick Start Guide
This manual will help you
get started using your
camera right away.
/
2 EN
Contents
Test out the functions of the camera
buttons by following along with the
illustrations.
Learn how to print pictures you have
taken.
Learn how to transfer and save
pictures to a computer.
Find out more about camera
operations and how to take better
pictures.
Read about convenient functions and
safety precautions on how to use your
camera more effectively.
Learn about the menus that control
the functions and settings for basic
operation.
Menu operations can be performed
only in normal mode.
Button operations
Menu operations
Printing pictures
Getting to know your camera
better
Appendix
P. 11
P. 18
P. 38
P. 53
P. 63
Using OLYMPUS Master
P. 44
Quick Start Guide
P. 3
EN 3
Quick Start Guide
Gather these items (box contents)
Pull the strap tight so that it does not come loose.
Digital Camera Strap LI-42B
Lithium Ion Battery
LI-40C Battery Charger USB Cable AV Cable OLYMPUS Master
Software CD-ROM
Items not shown: Advanced Manual (this manual), Basic Manual, and warranty card.
Contents may vary depending on purchase location.
Attach the strap
The strap can also be fed through strap
eyelet on the lower side.
4 EN
Quick Start Guide
Prepare the battery
a. Charge the battery
Battery comes partially charged.
b. Insert the battery in the camera
Charging Indicator
Light On (Red): Charging
Light Off: Charging complete
(Charging time: Approx. 5 hours)
AC Wall Outlet
2
1
Power Cable
Battery Charger
Lithium Ion Battery
3
1
2
3
To remove the battery,
slide the battery lock
knob in the direction of
the arrow.
3
Insert the battery with
the side down.
Battery lock knob
EN 5
Prepare the battery
Quick Start Guide
For details on inserting an optional xD-Picture Card™. (hereinafter
referred to as “the card”), please refer to “Inserting and removing the
card” (P. 64).
a. Press the o button
To turn off the camera, press the o button once again.
When the date and time have
not yet been set, this screen
will appear.
4
Turn the camera on
o Button
MENU
CANCEL
X
Y/M/D
Y / M / D
Y
Y
M D
D
TIME
T I M E
----.--.-- --:--
----.--.-- --:--
1
2
34
Hint
The directions of the arrow pad (1243) is indicated
with 1243 in the supplied instruction manual.
6 EN
Quick Start Guide
Set date and time
a. Press the 1F button and the 2Y button to select [Y].
The first two digits of the year are fixed.
b. Press the 3# button.
c. Press the 1F button and the 2Y but-
ton to select [M].
d. Press the 3# button.
About the date and time setting screen
MENU
CANCEL
X
Y/M/D
Y / M / D
Y
Y
M D
D
TIME
T I M E
----.--.-- --:--
----.--.-- --:--
Y-M-D (Year-Month-Day)
Exits a setting.
Minute
Date formats (Y-M-D, M-D-Y, D-M-Y)
Hour
2Y Button
1F Button
CANCEL
MENU
2006
2006
.--.-- --:--
.--.-- --:--
X
Y
Y
M D
D
TIME
T I M E
Y/M/D
Y / M / D
3# Button
2006
2006
.
11
11
.-- --:--
.-- --:--
CANCEL
MENU
X
Y
Y
M D
D
TIME
T I M E
Y/M/D
Y / M / D
EN 7
Set date and time
Quick Start Guide
e. Press the 1F button and the 2Y
button to select [D].
f. Press the 3# button.
g. Press the 1F button and the 2Y but-
ton to select “hour”, “minute”.
The time is displayed in the 24-hour format.
h. Press the 3# button.
i. Press the 1F button and the 2Y but-
ton to select [Y/M/D].
j. After all items have been set, press the
button.
For precise time setting, press the
button as the time signal strikes 00 seconds.
2006
2006
.
11
11
.
26
26
--:--
--:--
CANCEL
MENU
X
Y
Y
M D
D
TIME
T I M E
Y/M/D
Y / M / D
CANCEL
MENU
OK
SET
2006
2006
.
11
11
.
26
26
12
12
:
30
30
X
Y
Y
M D
D
TIME
T I M E
Y/M/D
Y / M / D
CANCEL
MENU
OK
SET
2006
2006
.
11
11
.
26
26
12
12
:
30
30
X
Y/M/D
Y / M / D
Y
Y
M D
D
TIME
T I M E
Button
P
HQ
HQ
3072
3072
×
2304
2304
[
IN
IN
]
44
[ ]
8 EN
Quick Start Guide
Take a picture
a. Hold the camera
c. Shoot
Horizontal grip Vertical grip
b. Focus
The K button blinks.
(Pressed
halfway)
Shutter
Button
[
[
]
P
HQ
HQ
3072
3072
×
2304
2304
[
IN
IN
]
44
The green lamp indicates the focus and
exposure are locked.
The number of remaining
still pictures is displayed.
Place this mark over your
subject.
(Pressed
completely)
Shutter
Button
EN 9
Quick Start Guide
Review your pictures
a. Press the q button.
a. As described in a. above, display the picture you want to erase.
b. Press the S button.
c. Press the 1F button to select [YES] and press the button
to erase the image.
12:30
12:30
'06.11.26
'0 6.11.26
100-0001
1 00-00 0 1
1
HQ
HQ
[
IN
IN
]
q Button
Arrow Pad
Next Picture
Prev. Picture
Erase pictures
S Button
OK
SET
MENU
BACK
YES
NO
ERASE [IN]
1F Button
OK
SET
MENU
BACK
YES
NO
ERASE
10 EN
Quick Start Guide
Simple mode and normal mode
The simple mode allows you to take pictures using only basic operations.
It is ideal for beginners, or anyone who is not yet accustomed to using digital cameras.
Features of simple mode:
Shooting still pictures g“Shutter button” (P. 11)
Setting to shooting mode gK button (SHOOT)” (P. 12)
Confirming your selection g button (OK/FUNC)” (P. 13)
Setting the time
g
m
button (MENU)” (P. 13)/“
X
Setting the date and time” (P. 35)
Using the flash g3# button” (P. 14)
Shooting pictures close to the subject g4& button” (P. 15)
Shooting with the Self-Timer g2Y button” (P. 15)
Changing picture brightness g1F button” (P. 16)
Editing images gh//P button” (P. 16)
Restoring default settings g“RESET button” (P. 17)
Erasing pictures gS button” (P. 17)
The normal mode allows you to take pictures with various settings.
It is useful for those who have used digital cameras and want to take advanced pictures.
You can also edit the pictures you have taken in a variety of ways.
a. Press the MODE button
The mode is switched each time when you push the button, and the current mode is indicated
on the screen.
About simple mode
About normal mode
Switch between simple mode and normal mode
SWITCHED TO SIMPLE MODE SWITCHED TO NORMAL MODE
MODE
Button
EN 11
Button operations
Button operations
Shooting still pictures
Normal mode
Press
K
to select [
K
STILL PICTURE], [
SCENE MODE] or [
GUIDE].
Simple mode
Press
K
to switch to still picture shooting mode.
Press the shutter button lightly (halfway).
The green lamp lights when the focus and exposure are locked (focus lock). Press the shutter
button all the way (completely) to take the picture.
Focus Lock - Locking the focus before composing your shot
Compose your picture with the focus locked, and then completely
press the shutter button to shoot a picture.
When the green lamp blinks, the focus is not adjusted properly. Try
locking the focus again.
1 POWER button Turning the camera on and off
Power on: The camera starts up in shooting mode.
Monitor turns on
Lens barrier opens.
2 Shutter button Shooting pictures
3
0
7
9
4
6
f
a
b
12
8
c
e
d
P
[
IN
IN
]
44
[ ]
HQ
HQ
3072
3072
×
2304
2304
[
IN
IN
]
Shooting mode
Flash mode
Macro mode/
Super macro mode
Place this mark
over your subject.
Self-timer
Flash mode
Self-timer
Macro
Normal mode Simple mode
5
P
HQ
HQ
3072
3072
×
2304
2304
[
IN
IN
]
44
[ ]
Green lamp
12 EN
Button operations
Recording movies
Normal mode
Press
K
, and select [
n
MOVIE], and lightly press the shutter button to lock the focus, and then press
the shutter button completely to start recording. Press the shutter button again to stop recording.
Simple mode
Movies cannot be recorded.
Switches to shooting mode, and the button lights up.
Normal mode
Press
K
to display the screen, and select a shooting mode. Press
for setting.
The camera determines the optimum settings for the shooting conditions automatically.
Records movies. Audio is recorded with the movie. Lightly press the shutter button to lock the
focus, and then press it fully to start recording. Press the shutter button again to stop recording.
Set [DIGITAL ZOOM] to [ON] to enable the zoom function for shooting.
g “DIGITAL ZOOM Zooming in on your subject”(P. 23)
This function allows you to shoot pictures by selecting a scene according to the shooting condition.
Change a scene mode to another one
Press
m
to select
s
from the top menu to switch to another scene mode.
By switching to the other scene, most settings will be changed to the default settings of each scene.
g s (Scene) Selecting a scene mode according to the shooting situation”(P. 22)
This function allows you to set the target items by following the
shooting guide displayed on the screen.
Press m to display the shooting guide again.
To change the setting without using the shooting guide, press
K to switch to another shooting mode.
Shooting guide settings can be reverted to their defaults by
pressing m, switching shooting mode, or pressing the
RESET.
Simple mode
Switches to shooting mode.
[
n
MOVIE], [
SCENE MODE], and [
GUIDE] cannot be selected in simple mode. It is fixed
at [
K
STILL PICTURE].
Switches to playback mode, and the button lights up. The last picture taken will be displayed.
3 K button (SHOOT)
Setting to shooting mode/Switching between shooting modes
K STILL PICTURES ........................................................... Shooting still pictures
n MOVIE .................................................................................... Recording movies
SCENE MODE .....
Shooting pictures by selecting a scene mode according to the situation
GUIDE ............................ Follow the shooting guide to take better pictures
4 q button(VIEW) Viewing still pictures/Selecting playback mode
This icon lights red during movie recording.
A
00:36
00:36
00:36
The remaining recording time is displayed.
When the remaining recording time reaches 0, recording will
stop automatically.
OK
SET
4
Set particular lighting.
5
Shooting into backlight.
Brightening subject.
Blurring background.
Adjusting area in focus.
3
2
1
SHOOTING GUIDE 1/ 3
EN 13
Button operations
Press the arrow pad to view other pictures.
Use the zoom lever to toggle between close-up playback, index display and calendar display.
g Movie playback “MOVIE PLAY Playing back movies” (P. 26)
Press
q
in shooting mode to switch to playback mode.
Use the arrow pad to select scenes, playback picture, and the items on the menus.
Normal mode
Displays the Function Menu which contains the functions and settings used during shooting. This
button is also used to confirm your selection.
Functions you can set with the Function Menu
When taking still pictures, switch between P (Program auto) mode and AUTO (Full auto).
Simple mode
This is used to confirm the settings of menu items.
Displays the Top Menu/Set the time
Normal mode
Displays the top menu.
Simple mode
Displays [
X
].
g X Setting the date and time” (P. 35)
Checking the time
While the camera is off, press
m
to display the current time and the set alarm time (when
[ALARM CLOCK] is set) for 3 seconds.
Shooting mode: Zooming in and out on your subject
5 Arrow pad (1243)
6 button (OK/FUNC)
P/AUTO................................................ Shooting pictures with automatic settings
P (Program auto) The camera automatically sets the optimum aperture value and shutter
speed for the brightness of the subject.
AUTO (Full auto) The camera automatically sets white balance and ISO sensitivity in
addition to the aperture and shutter speed.
7 m button (MENU)
Displaying the menu guide/setting and checking the time
8 Zoom lever Zooming while shooting/close-up playback
P
P
P
P
WB
AUTO
ISO
AUTO
o
h
P/AUTO
P/AUTO
ESP
43: Select a setting, and press .
12: Select the function to be set.
Function Menu
Other functions you can set with the Function Menu
g “WB Adjusting the color of a picture” (P. 22)
“ISO Changing the ISO sensitivity” (P. 23)
“DRIVE Using sequential (continuous) shooting” (P. 23)
“ESP/n Changing the area for measuring the
brightness of a subject” (P. 23)
14 EN
Button operations
Optical zoom: 3×
Playback mode: Changing the picture display
Normal mode
Press
3#
in shooting mode to select the flash setting.
Press
to confirm your selection.
9 3# button Using the flash
AUTO Auto-flash The flash fires automatically in low light or backlight conditions.
!
Red-eye reduction flash This emits pre-flashes to reduce the occurrence of red-eye in
your pictures.
P
P
[
IN
IN
]
44
[ ]
HQ
HQ
3072
3072
×
2304
2304
P
P
[
IN
IN
]
44
[ ]
HQ
HQ
3072
3072
×
2304
2304
Zoom out:
Press the zoom lever
to the W side.
Zoom in:
Pull the zoom lever to
the T side.
1
1
2
4
3
[
IN
IN
]
12:30
'06.11.26
100-0004
4
HQ
[
IN
]
1
1
2 3
4 5 6
7 8 9
[
IN
IN
]
[
[
IN
IN
]
[
[
IN
IN
]
Close-up playback
Pull to the T side to incrementally
enlarge the picture up to 10 times
the original size.
Push to the W side to reduce the
size.
Use the arrow pad during close-
up playback to scroll around the
picture.
Press to return to the
singleframe playback.
Index display
Use the arrow pad to select a
picture for playback, and press
to play back the single-
frame of the picture selected.
Calendar display
Use the arrow pad to select the
date, and pull or the zoom lever
to the T side to display the picture
on the date selected.
Single-frame playback
Use the arrow pad to browse pictures.
W
TW
W
T
W
W
T
W
T
T
EN 15
Button operations
Simple mode
Press
3#
in shooting mode to select on and off of the flash.
Press
for setting, and to turn off the display.
Normal mode
Press
4&
in shooting mode to select the macro mode.
Press
to confirm your selection.
Zoom and flash cannot be used in [
%
].
Simple mode
Press
4&
in shooting mode to select on and off of the macro mode.
Press
to turn off the display.
Normal mode
Press
2Y
in shooting mode to select on and off of the self-timer.
Press
to confirm your selection.
Simple mode
Press
2Y
in shooting mode to select on and off of the self-timer.
Press
for setting, and turn off the display.
After pressing the shutter button completely, the self-timer lamp lights up for approximately 10
seconds, blinks for approximately 2 seconds, and then the picture is taken.
To cancel the self-timer, press
2Y
.
Self-timer shooting is automatically cancelled after one shot.
#
Fill-in flash The flash fires regardless of the available light.
$
Flash off The flash will not fire.
AUTO The flash fires automatically in low light or backlight conditions.
$
FLASH OFF The flash will not fire.
0 4& button Shooting pictures close to the subject
OFF Macro mode off Macro mode is deactivated.
&
Macro mode This mode lets you shoot as close as 20cm/7.8 in. (wide) and
30cm/11.8 in. (tele) from your subject.
%
Super macro mode This mode lets you shoot as close as 7cm/2.7in. from your
subject.
&
MACRO ON This mode lets you shoot from as close as 20cm/7.8 in. (when
the zoom is set for the zoom-out angle) and as close as 30cm/
11.8 in. (when the zoom is set for the zoom-in angle) to your
subject.
MACRO OFF Macro mode is deactivated.
a 2Y button Shooting with the Self-Timer
Y
ON Set the self-timer.
Y
OFF Cancel the self-timer.
Y
SELFTIMER ON Set the self-timer.
SELFTIMER OFF Cancels the self-timer.
16 EN
Button operations
Normal mode
Press
1F
in shooting mode to adjust the exposure.
Adjustable from - 2.0EV to +2.0 EV
Simple mode
Press
1F
in shooting mode to select on and off of the exposure compensation.
Press
to set, and the indicator disappears.
Press the MODE button to switch between simple mode and normal mode.
g Simple mode and normal mode” (P. 10)
Press
h
/
/
<
in shooting mode to select on and off of the image stabilizer. Press
for setting.
Normal mode
(Still picture shooting mode…shooting using digital image stabilization
This function reduces the blur caused by a moving subject or camera movement.
When shooting in a dark environment, ISO is automatically increased, which may increase electrical
noise, causing a rough image.
(Movie recording mode
Shooting in digital image stabilization movie mode
Shooting using digital stabilizer.
When set to [
h
ON], images will appear slightly magnified.
Images may not be correctable if the camera is severely shaken or the subject's motion is excessive.
Select [
h
OFF] when recording movie with the camera physically stabilized. If not, the movie you
are capturing may shake along with the subject.
Simple mode
Digital image stabilization is not available in the movie mode.
b 1F button Changing picture brightness
BACKLIGHT ADJ. ON The exposure is adjusted to + 1.0EV to brighten.
BACKLIGHT ADJ. OFF The exposure is not adjusted.
c MODE button Switching between simple mode and normal mode
d h//< button Shooting pictures using image stabilizer /
Editing images / Printing pictures
h Shooting pictures with digital image stabilization
h
OFF Image stabilizer is deactivated.
h
ON Image stabilizer is activated.
h
OFF Image stabilizer is deactivated.
h
ON Image stabilizer is activated.
+
+
2.0
2.0
OK
SET
P
+
2.0
3: Brighten
4: Darken
Activate the
setting contents.
EN 17
Button operations
The recorded image is corrected and saved as a new one.
Movies, pictures shot by other cameras, and previously fixed or edited pictures cannot be corrected.
Editing an image may cause it to suffer a minor loss in quality.
Normal mode
Press
h
/
/
<
in playback mode. Select an editing feature using
12
button, and press
.
Simple mode
[
h
DIS EDIT], [
LIGHTING FIX] and [
!
REDEYE FIX] are done at once, and saved as a
new image.
Press
h
/
/
<
in playback mode, and press
.
When the printer is connected to the camera, display a picture to be printed out in playback mode,
and press
h
/
/
<
.
g EASY PRINT” (P. 38)
Press RESET to display the reset confirmation screen. Select [YES] and press
.
Functions for returning the settings to the original when the reset function is executed
Pressing RESET while in playback mode switches to still picture shooting mode.
In playback mode, select the picture you want to erase, and press
S
. Select [YES] and press
.
Once erased, pictures cannot be restored. Check each picture before erasing to avoid accidentally
erasing pictures you want to keep.
g 0 Protecting pictures” (P. 29)
Editing images
< Printing pictures
e RESET button Restoring default settings
NO Reset is not executed.
YES Reset is executed.
Function
Factory
default
setting
Ref.
Page
Function
Factory
default
setting
Ref.
Page
SHOOTING MODE
K STILL
PICTURE
P. 12 P/AUTO P P. 13
Flash AUTO P. 14 WB AUTO P. 22
&
OFF P. 15 ISO AUTO P. 23
YY
OFF P. 15 DRIVE
o
P. 2 3
F
0.0 P. 16 ESP/
n
ESP P. 23
h
OFF P. 16 FINE ZOOM OFF P. 23
IMAGE QUALITY HQ P. 20 DIGITAL ZOOM OFF P. 23
PANORAMA OFF P. 21 AF MODE iESP P. 24
MULTI-SHOT OFF P. 25
R
OFF P. 24
COMPARE & SHOOT OFF P. 20 LABEL SHOT OFF P. 24
f S button Erasing pictures
OK
SET
MENU
BACK
PERFECT FIX
ALL
h DIS EDIT
LIGHTING FIX
! REDEYE FIX
[
IN
]
ALL
Image stabilization, brightness fix and redeye fix
are done all at once.
h
DIS EDIT
Retouches unanticipated blurred images.
LIGHTING FIX
Only the dark area of an image is corrected. The
underexposed area of an image is brightened.
!
REDEYE FIX
Only redeye fix is activated.
18 EN
Menu operations
Menu operations
Menu operations can be performed only in normal mode.
Press
m
to display the Top Menu on the monitor.
The items displayed on the Top Menu differ according to the mode.
When [CAMERA MENU], [PLAYBACK MENU], [EDIT], [ERASE], or [SETUP] is selected, the menu
corresponding to the respective function is displayed.
When your camera is set according to the shooting guide with the shooting mode set to
, press
m
to display the shooting guide screen.
During menu operations, the buttons and their respective functions are displayed at the bottom of
the monitor. Follow these guides to navigate the menus.
This explains how to use the menus with the [AF MODE] setting as an example.
1
Set to still picture shooting mode.
About the menus
Operation guide
Using the menus
m
button
button
Arrow Pad
(1243)
OK
MENU
SET
EXIT
SETUP
SETUP
SCN
SCN
COMPARE
COMPARE
& SHOOT
& SHOOT
IMAGE
IMAGE
QUALITY
QUALITY
PANORAMA
PANORAMA
SCN
SCN
CAMERA
CAMERA
MENU
MENU
SILENT
SILENT
MODE
MODE
MULTI-
MULTI-
SHOT
SHOT
OK
SET
MENU
BACK
1
2
CAMER A MENU
WB
AUTO
ISO AUTO
FINE ZOOM
DRIVE
o
ESP
OFF
Top menu (in still picture shooting mode)
OK
MENU
SET
EXIT
SETUP
SETUP
SCN
SCN
COMPARE
COMPARE
& SHOOT
& SHOOT
IMAGE
IMAGE
QUALITY
QUALITY
PANORAMA
PANORAMA
SCN
SCN
CAMERA
CAMERA
MENU
MENU
SILENT
SILENT
MODE
MODE
MULTI-
MULTI-
SHOT
SHOT
Operation
guide
m
button
1243 on
the arrow pad
BACK y m :Returns to the previous menu.
EXIT y m :Exits the menu.
:
Press
1243
to select a
setting.
SET y :Sets the selected item.
EN 19
Menu operations
2
Press MENU to display the Top Menu. Select
[CAMERA MENU] and press
to confirm
your selection.
[AF MODE] is one of the selections on the [CAMERA
MENU]. Press
to confirm your selection.
3
Use the arrow pad
12
to select [AF
MODE], and press
.
Some settings may not be available, depending on the
shooting/scene mode.
When pressing
4
on this screen, the cursor moves to the
page display. Press
12
to change the page. To select an
item or function, press
3
or
.
4
Use the arrow pad
12
to select [iESP] or
[SPOT], and press
to confirm your
selection.
The menu item is set and the previous menu is displayed.
Press
m
repeatedly to exit the menu.
To cancel changes and continue menu operation, press
m
before pressing
.
Some functions are not available according to the selected mode.
g Functions available in shooting modes and scene modes” (P. 61)
g SETUP menus” (P. 32)
The factory default settings are displayed in ( ).
Shooting mode menu
K
OK
MENU
SET
EXIT
SETUP
SETUP
SCN
SCN
COMPARE
COMPARE
& SHOOT
& SHOOT
IMAGE
IMAGE
QUALITY
QUALITY
PANORAMA
PANORAMA
SCN
SCN
CAMERA
CAMERA
MENU
MENU
SILENT
SILENT
MODE
MODE
MULTI-
MULTI-
SHOT
SHOT
OK
SET
MENU
BACK
1
2
CA ME RA MENU
WB
AUTO
ISO AUTO
FINE ZOOM
DRIVE
o
ESP
OFF
OK
SET
MENU
BACK
2
1
CA ME RA MENU
DIGITAL ZOOM OFF
AF MODE iESP
OFF
R
LABEL SHOT
FRAME
The selected item is displayed
in a different color.
Page display:
The page display mark is displayed when
there are additional menu items on the next
page.
OK
SET
MENU
BACK
2
1
CA ME RA MENU
AF MODE
R
DIGITAL ZOOM
LABEL SHOT
FRAME
SPOT
iESP
OK
MENU
SET
EXIT
SETUP
SETUP
SCN
SCN
COMPARE
COMPARE
& SHOOT
& SHOOT
IMAGE
IMAGE
QUALITY
QUALITY
PANORAMA
PANORAMA
SCN
SCN
CAMERA
CAMERA
MENU
MENU
SILENT
SILENT
MODE
MODE
MULTI-
MULTI-
SHOT
SHOT
3
6CAMERA MENU
WB
ISO
DRIVE
ESP/n
FINE ZOOM
DIGITAL ZOOM
AF MODE
R
LABEL SHOT
FRAME
*
1 An Olympus xD-Picture Card is required.
6
4
1
5
2 7
*1
20 EN
Menu operations
Still picture image quality and their applications
Movie image quality
The last four pictures taken are displayed on the left side. You can shoot while comparing the
previous pictures taken.
When you take a new picture, the picture just taken moves to the upper left, while the four frames
of pictures move downward one-by-one and the picture at the bottom disappears.
The pictures displayed on the left side can be selected. When a picture is selected once in playback
mode and the camera is then switched to shooting mode, the picture on the upper left will be the one
selected in playback mode.In this case, the next picture taken will appear on the upper left, and the
four pictures shown on the left will not be changed.
1 IMAGE QUALITY Changing the image quality
Image quality/Image size
Compression
Application
SHQ 3072 × 2304
Low
compression
This is useful for printing large images on A3-size
paper.
This is useful for performing computer image
processing, such as contrast adjustment and
red-eye correction.
HQ 3072 × 2304
Standard
compression
SQ1 2560 × 1920
Standard
compression
This is useful for A3/A4-size prints.
This is useful for computer editing such as
rotating or adding text to a picture.
2304 × 1728
2048 × 1536
SQ2 1600 × 1200
Standard
compression
This is useful for postcard-sized prints.
This is useful for viewing pictures on a computer.
1280 × 960
1024 × 768
This is useful for sending as e-mail attachments.
640 × 480
Low
compression
16:9 1920 × 1080
Standard
compression
This is useful for expressing the broadness of a
subject such as landscapes and for viewing
pictures on a wide-screen television.
Image quality/Image size
SHQ 640 × 480
HQ 320 × 240
SQ 160 × 120
2 COMPARE & SHOOT Shooting while viewing the previous pictures
OFF /ON
P
P
[
IN
IN
]
4
[ ]
HQ
HQ
3072
3072
×
2304
2304
Pictures disappear from the one at the bottom.
Pictures in shooting
Picture taken immediately before
  • Page 1 1
  • Page 2 2
  • Page 3 3
  • Page 4 4
  • Page 5 5
  • Page 6 6
  • Page 7 7
  • Page 8 8
  • Page 9 9
  • Page 10 10
  • Page 11 11
  • Page 12 12
  • Page 13 13
  • Page 14 14
  • Page 15 15
  • Page 16 16
  • Page 17 17
  • Page 18 18
  • Page 19 19
  • Page 20 20
  • Page 21 21
  • Page 22 22
  • Page 23 23
  • Page 24 24
  • Page 25 25
  • Page 26 26
  • Page 27 27
  • Page 28 28
  • Page 29 29
  • Page 30 30
  • Page 31 31
  • Page 32 32
  • Page 33 33
  • Page 34 34
  • Page 35 35
  • Page 36 36
  • Page 37 37
  • Page 38 38
  • Page 39 39
  • Page 40 40
  • Page 41 41
  • Page 42 42
  • Page 43 43
  • Page 44 44
  • Page 45 45
  • Page 46 46
  • Page 47 47
  • Page 48 48
  • Page 49 49
  • Page 50 50
  • Page 51 51
  • Page 52 52
  • Page 53 53
  • Page 54 54
  • Page 55 55
  • Page 56 56
  • Page 57 57
  • Page 58 58
  • Page 59 59
  • Page 60 60
  • Page 61 61
  • Page 62 62
  • Page 63 63
  • Page 64 64
  • Page 65 65
  • Page 66 66
  • Page 67 67
  • Page 68 68
  • Page 69 69
  • Page 70 70
  • Page 71 71
  • Page 72 72
  • Page 73 73
  • Page 74 74
  • Page 75 75
  • Page 76 76
  • Page 77 77
  • Page 78 78
  • Page 79 79
  • Page 80 80

Olympus Stylus 730 Owner's manual

Type
Owner's manual
This manual is also suitable for

Ask a question and I''ll find the answer in the document

Finding information in a document is now easier with AI