Page is loading ...

1
store your future
EAGLEROC E9
User Manual

Page | 2
ROCSTOR
|
EAGLEROC E9
user manual
TABLE OF CONTENTS
IMPORTANT NOTICES 4
• Safety Notices ________________________________________________________ 4
• General Notices
• Capacity Disclaimer____________________________________________________ 4
• Care and Handling 4
GENERAL 6
• Introduction ___ ________________________________________________ 6
• Box Contents 6
• Minimum System Requirements _____________________________________ 7
• Connectors and Eagleroc rear view 7
QUICK INSTALLATION 8
• How to Connect the Interface Cables - Connecting the Drive ___________________ 8
• Cable Types: FireWire 800, FireWire 400, USB and SATA 10
INSTALLING YOUR DRIVE 11
• Eagleroc as a bootable device ____________________________________________ 11
• Disconnecting Your Drive 11
o PC _______________________________________________________________ 11
o Mac 12
• Reformatting Your Drive ________________________________________________ 12
o Reformatting via PC (Window based computers) 12
o Reformatting via Mac _______________________________________________ 12
• Important Note 12
• How to Daisy-Chain through FireWire ports to your Eagleroc Drive at one time ____ 13
PARTITIONING AND FORMATTING THE EAGLEROC DRIVE ON A MAC OS 14
• Warning _____________________________________________________________ 14
• Important Notes 14
• Instructions for Partitioning and Formatting from FAT 32 to HFS+ _______________ 14
PARTITIONING-FORMATTING the EAGLEROC Drive on WINDOWS 2000, XP and VISTA 22
• Warning _____________________________________________________________ 22
• Important Notes 22
• Different ways to get to the Control Panel __________________________________ 23
• Instructions upon reaching the Control Panel 25
• Instructions for Partitioning and Formatting from FAT 32 to NTFS _______________ 26

Page | 3
ROCSTOR
|
EAGLEROC E9
user manual
TROUBLESHOOTING 33
• Troubleshooting for Macintosh computers _________________________________ 33
• Troubleshooting for PC Windows based computers 35
KNOWLEDGE BASE 37
• Eagleroc E9 Unique Features ________________________________________ 37
• Specifications 38
• Introduction to Interfaces (ports) and Cables ________________________________ 39
o FireWire (IEEE 1394) 39
o USB (Universal Serial Bus) ____________________________________________ 40
o SATA (Serial Advanced Technology Attachment) 42
o Comparison Chart __________________________________________________ 43
• Introduction to Formatting 44
o File Allocation Table (FAT) and FAT 32 __________________________________ 44
o HFS Plus or HFS+ 45
LIMITED WARRANTY 46
TECHNICAL SUPPORT 49
ACKNOWLEDGEMENTS 51
• Trademarks __________________________________________________________ 51
• Copyrights 51
CONTACT INFORMATION 52
• Corporate Headquarters ________________________________________________ 52
• Technical Support / Return Authorization “RMA” 52
• Sales Info ____________________________________________________________ 52

Page | 4
ROCSTOR
|
EAGLEROC E9
user manual
IMPORTANT NOTICES
Safety Notices
• The warranty is void if an unauthorized person attempts and/or repairs the hard disk drive.
• Read all Manuals and instructions carefully before using the device.
• Do not spill any liquid or insert any object into the device.
• Use the device within the specifications indicated, including but not limited to: power
requirements, temperature, humidity, sunlight and magnetism from other devices such as
computers and televisions.
• Please visit the Rocstor website, www.rocstor.com for further information concerning
specifications and use of the device.
General Notices
• Consistently make multiple backup copies of your data for your protection. Hard disk drives
are subject to failure at any time.
• Rocstorage, Inc. shall not be held liable for loss of data or the restoration or recovery of
data on the device. Please view complete Limited Warranty Information in this manual or
on the Rocstor website (www.rocstor.com) for further details.
Capacity Disclaimer
Actual accessible hard drive capacity will indicate up to 10% lower than stated under different
Operating Systems and formatting.
The storage volume is measured in total bytes before formatting. References to round
numbers of gigabytes or terabytes are an approximation only. For example, a disk drive labeled
as having 500GB (gigabytes) has space for approximately 500,000,000 bytes before formatting.
After formatting, the drive capacity is reduced by about 5% to 10% depending on the operating
system and formatting used.
Care and Handling
The following instructions concern the proper care and handling of Eagleroc E9 Drives. Please
take a moment to review these instructions.
• As with any storage solution, it is recommended that all data be backed up regularly.
• Ensure that you follow the proper removal procedure to disconnect the Eagleroc drive.
• Do not move or disconnect this device from your computer while it is reading or writing
data. This may cause damage to the Eagleroc drive.
• Do not place this device near a heat source or expose it to direct flame.
• Do not place the device near any equipment generating strong electromagnetic fields.
Exposure to strong electromagnetic fields may cause the device to malfunction or data to
be corrupted.
• Do not drop or cause shock to your Eagleroc drive.

Page | 5
ROCSTOR
|
EAGLEROC E9
user manual
• Do not spill any liquid or insert any object into the device.
• Do not attempt to disassemble and service the Eagleroc drive during the warranty
period.
• Please read the Safety Notices and Limited Warranty information in this Manual and on
the Rocstor website (www.rocstor.com) for further details.

Page | 6
ROCSTOR
|
EAGLEROC E9
user manual
GENERAL
Introduction
EAGLEROC E9 – FireWire 800(400) and USB (1.1/2.0)
The Eagleroc E9 external SATA Hard Drives delivers extraordinary
performance and reliability for both Mac and PC users. Eagleroc E9
contains a fast SATA high capacity 3.5” drive in a stylish and unique
case that can be placed horizontally or mounted vertically on its
stand. With its fan-less and quiet operation, the Eagleroc can be
easily moved from one desktop environment to another.
Choose Rocstor drives and “store your future.”
Box Contents
• External hard disk drive
• Stand for vertical mounting
• USB cable
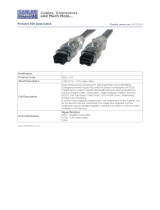
• 9-pin to 6-pin FW 800 to FW400 cable
• 9-pin to 9-pin FireWire 800 (1394b) cable
• AC adaptor 220/110V
• Installation user Guide

Page | 7
ROCSTOR
|
EAGLEROC E9
user manual
Minimum System Requirements
Mac Users: Window Users:
* Many computers do not come with factory installed FireWire 800 or eSATA ports. Therefore,
you may need to purchase a PCI, PCI-X or PCI-Express card to use these ports. Rocstor offers a
variety of accessories to work with PC Windows or Mac based Computers. Please visit us at
www.ROCSTOR.com
Connectors
• FireWire 800 (IEEE 1394b) port x2
• Standard AC adaptor connection
• USB 2.0 port x1
Hardware: FireWire* 400 or 800 or USB
(1.1 or 2.0) port(s.)
Operating Systems: Microsoft Windows
2000, Me, XP, Vista, Windows 7
Recommended memory: 512 MB RAM
Hardware: FireWire* 400 or 800 or USB
(1.1 or 2.0) port(s.)
Mac: PowerPC or Intel processor running
Mac OS 9, X, Leopard, Snow Leopard
Recommended memory: 512 MB RAM

Page | 8
ROCSTOR
|
EAGLEROC E9
user manual
QUICK INSTALLATION
1. Turn ON your computer and wait until it fully boots up to load all programs.
2. Connect one end of the Adaptor cord directly to the Eagleroc and the other end to an AC
outlet, surge protector or battery Backup (UPS).
3. Using only one interface cable at a time, select the interface port you wish to use on your
computer. When using FireWire, connect one end of the FireWire cable to the appropriate
FireWire port (FW800 or FW400) of your computer and then the other end to the FireWire
port in the Eagleroc E9. When using USB, connect one end of the USB cable to the USB port
of your computer (or via Power Hub that is connected to your computer) and then the
other end to the USB port in the Eagleroc E9.
4.
NOTE: Although, the AC adaptor MUST BE connected first to both the hard drive and to
electricity; however, the drive will not come “ON” until an interface (USB or FireWire) cable is
fully connected.

Page | 9
ROCSTOR
|
EAGLEROC E9
user manual
5. The Hard drive is preformatted for Plug-and-Play operation. After a few seconds a Rocstor
HD icon will show on “My Computer” folder under the Windows OS. Under the Mac OS,
the Rocport HD will appear on the “Desktop.”
6. Click (double click) on the Rocstor HD icon to access the drive.

ROCSTOR
|
EAGLEROC E9
user manual
Cable Types
FireWire 400 (IEEE 1394a) 6-
Pin FireWire
• Fire
Wire 400 can transfer data between devices at 400
FireWire 800 (IEEE 1394b) 9-
Pin FireWire
• Fire
Wire 400 can transfer data between devices at
USB supports three data transfer rates:
• USB 2.0: A Hi-Speed
(USB 2.0) rate of 480
• USB 1.1: A Full Speed
rate of
• USB 1.0: A Low Speed
rate of 1.5
user manual
Pin FireWire
400 connector
Wire 400 can transfer data between devices at 400
Mbits/sec
Pin FireWire
800 connector
Wire 400 can transfer data between devices at
800 Mbits/sec
USB supports three data transfer rates:
(USB 2.0) rate of 480
Mbits/s (60 MB/sec)
rate of
12 Mbits/s (1.5 MB/sec)
rate of 1.5
Mbits/s (187 KB/sec)
Page | 10

Page | 11
ROCSTOR
|
EAGLEROC E9
user manual
INSTALLING YOUR DRIVE
All Rocstor hard drives are formatted as blank FAT32 (32-bit file allocation table) volumes
{unless otherwise stated on the box} that are compatible with most modern Windows and
Macintosh operating systems. To begin using your Rocstor drive, simply connect a data cable
and power cord. There’s no need to shut down your computer because your Rocstor drive is
hot-pluggable. Just plug it in and it’s ready to use.
The first choice you have to make is which of the provided data cables to use. The drive can
connect directly to any available FireWire or USB port on your computer, or it can be Daisy-
Chained to your computer through another compatible device with an available FireWire port.
The ability to Daisy-Chain allows you to have multiple drives connected simultaneously, greatly
increasing your available storage capacity. Daisy-Chain is only available through FireWire ports.
If you intend to use the drive for additional storage only—not as a startup device (bootable) use
the cable that provides the maximum throughput rate for the buses available on your
computer: Up to 800 Mbits/sec via FireWire 800, 480 Mbits/sec via USB 2.0, 400 Mbits/sec via
FireWire 400, or 12 Mbits/sec via USB 1.1. To avoid damaging your hardware and losing data,
never simultaneously connect the drive to the computer using more than one data cable.
Eagleroc as a bootable device
If you intend to use the drive as a startup device, check the documentation that came with your
computer to confirm compatibility with the various interfaces. PowerPC-based Macs require
FireWire connections for startup disks, whereas Intel-based Macs can use either FireWire or
USB connections.
Furthermore, using the drive as a startup device requires installing an authorized copy of the
Windows or Mac operating system (available separately from Microsoft and Apple,
respectively). To install the Mac OS 9 or OS X, you must reformat the drive as a Mac OS
Extended volume with Disk Utility. An Intel-based Mac cannot start from a device formatted on
a PowerPC-based Mac or vice versa.
Disconnecting Your Drive
Never disconnect or turn off an external drive when its activity light is ON. External drives must
be properly unmounted (or disconnected) to avoid data loss and possible damage to the hard
disk drive or computer.
PC
The easiest ways to safely unmount an external hard drive on your PC is to right-click the device
removal icon next to the clock in the system tray. Then choose Safely Remove Hardware.
Choose the external device you want to remove, and then click Stop. An alert will notify you if
the drive is in use by an application. If in use close any open documents or applications on the
drive and try again. Windows will display an alert when you can safely disconnect or turn off the drive.

Page | 12
ROCSTOR
|
EAGLEROC E9
user manual
Mac
The easiest way to safely unmount an external hard drive is to drag its Finder icon to the Trash.
An alert will notify you if the drive is in use by an application. Close any open documents or
applications on the drive and try again. When the drive’s icon no longer appears on the Finder’s
Desktop and the drive’s activity light is green, you can safely disconnect or turn off the drive.
Reformatting Your Drive
As mentioned previously, all Rocstor hard drives are formatted as blank FAT32 volumes
(otherwise noted on the retail packaging) that are compatible with most modern Windows and
Macintosh operating systems. However, you can use your normal disk management tools to
erase or reformat the drive if needed. For example, Windows users may want to reformat the
drive as an NTFS (new technology file system) volume, or Mac OS X users may wish to reformat
the drive as a Mac OS Extended (Journal) or UFS (Unix file system) volume.
Please note that all of your data will be lost if the volume (Hard Drive) is formatted or reformatted.
Reformatting via PC (Window based computers)
Right-click the Eagleroc drive in the “My Computer” folder, then choose Format. In the dialog
window that appears, choose the desired capacity, file system and allocation unit size and then
click Start.
Reformatting via Mac
Open Disk Utility (/Applications/Utilities). Select the drive in the list at the left, and then click
the Erase tab. Choose the desired volume format, specify a name, and then click Erase.
Important Note
Any cable (eSATA, FireWire800, or USB 2.0) inserted before the drive is powered on has priority
over the other cables and will be the primary connection method, e.g. if the drive is connected
via FireWire 800 before powering on the drive, data will be transferred via FireWire 800.
The drive should only be connected to a computer via one interface at a time. Connection of the
drive to a computer via two or more interfaces is not recommended and may potentially
damage your Eagleroc drive and data.

Page | 13
ROCSTOR
|
EAGLEROC E9
user manual
How to Daisy-Chain through FireWire ports to your Eagleroc Drive at one time
Daisy-Chain (Connecting Multiple Devices) means that device A is connected to device B and device
B is connected to device C and so forth. All connections are made only through FireWire ports.
• Do not mix interfaces. Select FireWire ports only. For example, do not use USB and
FireWire to Daisy-Chain.
• Mixing FireWire 400 and 800 connectors to Daisy- Chain will reduce the transfer speed to
FireWire 400.
• Daisy-Chain allows you to connect multiple devices, such as cameras, external read/write
drives and other external devices such as hard disk drive to your computer via FireWire
ports.

Page | 14
ROCSTOR
|
EAGLEROC E9
user manual
PARTITIONING AND FORMATTING THE EAGLEROC DRIVE ON A MAC OS
All Rocstor drives are factory formatted with FAT32, unless otherwise stated on the box.
WARNING: Formatting and Partitioning the Eagleroc Drive will destroy all of its data. To
protect your data, back it up before formatting or partitioning this device.
IMPORTANT NOTES:
1. All programs should be closed before beginning.
2. Connect the Rocstor hard disk drive adaptor to the drive and the other end plug into
electricity.
3. Connect the Rocstor hard disk drive to your computer using the appropriate cables.
4. “Click” means left click. “Right Click” will be so labeled.
5. Some computers are set so a single “click” will perform the task, such as opening a
window. Depending on your mouse setting, you may have to double click to get to the
next window. If a single click does not open the next window, please double click.

ROCSTOR
|
EAGLEROC E9
user manual
INSTRUCTIONS FOR PARTITIONING AND FORMATING FROM FAT32 to
1.
Connect the Rocstor drive to the computer via a port.
2.
The drive will appear as an icon on the Desktop on the middle right side. The icon will
represent the method of connection (USB, FireWire and SATA).
Note: If the Hard Drive is connected via USB port, the desktop
“Macintosh HD” icon. The
same
user manual
INSTRUCTIONS FOR PARTITIONING AND FORMATING FROM FAT32 to
HFS+:
Connect the Rocstor drive to the computer via a port.
The drive will appear as an icon on the Desktop on the middle right side. The icon will
represent the method of connection (USB, FireWire and SATA).
Note: If the Hard Drive is connected via USB port, the desktop
would indicate
the USB
same
procedures would also apply
to the following steps
Page | 15
The drive will appear as an icon on the Desktop on the middle right side. The icon will
the USB
on the
to the following steps
.

ROCSTOR
|
EAGLEROC E9
user manual
3.
Once the icon appears on the
4.
In the “Macintosh HD” menu, click on the “Applications” icon.
user manual
Once the icon appears on the
“Desktop”
click on the “Macintosh HD” icon.
In the “Macintosh HD” menu, click on the “Applications” icon.
Page | 16
click on the “Macintosh HD” icon.

ROCSTOR
|
EAGLEROC E9
user manual
5.
In the “Applications” menu, click on the “Utilities” icon.
6.
In the “Utilities” menu, click on the “Disk Utility” icon.
user manual
In the “Applications” menu, click on the “Utilities” icon.
In the “Utilities” menu, click on the “Disk Utility” icon.
Page | 17

ROCSTOR
|
EAGLEROC E9
user manual
7. On the
left side of the “Disk Utility” menu is a list of available drives. One will be the
Rocstor drive. Click on the icon showing the disk capacity.
8.
You are now in the Rocport menu. Click on the “Partition” tab
“Current” tab under “Vol
ume Scheme.” A drop down “Partition” menu will appear.
9.
In the “Partition” menu, you may select any number of partitions available under
“Volume Scheme.”
10.
If you are using Panther proceed to #13 below.
user manual
left side of the “Disk Utility” menu is a list of available drives. One will be the
Rocstor drive. Click on the icon showing the disk capacity.
You are now in the Rocport menu. Click on the “Partition” tab
and then click the
ume Scheme.” A drop down “Partition” menu will appear.
In the “Partition” menu, you may select any number of partitions available under
If you are using Panther proceed to #13 below.
Page | 18
left side of the “Disk Utility” menu is a list of available drives. One will be the
and then click the
ume Scheme.” A drop down “Partition” menu will appear.
In the “Partition” menu, you may select any number of partitions available under

ROCSTOR
|
EAGLEROC E9
user manual
11.
If you are using Tiger, click on Option
Partition Scheme for your Rocstor drive. Suggest you select “Apple Partition Map” then
click OK.
12.
Volume Information: select a name for your drive.
user manual
If you are using Tiger, click on Option
s on the lower center of the window. Select the
Partition Scheme for your Rocstor drive. Suggest you select “Apple Partition Map” then
Volume Information: select a name for your drive.
Page | 19
s on the lower center of the window. Select the
Partition Scheme for your Rocstor drive. Suggest you select “Apple Partition Map” then

ROCSTOR
|
EAGLEROC E9
user manual
13.
Format: Click on either the “Format” area or the Blue up/down arrows. Select Mac OS
extended (journal).
14.
After selecting the type of format, click the “Partition” tab in the lower right of the
screen. On the next screen, Partition Disk, click “Partitio
user manual
Format: Click on either the “Format” area or the Blue up/down arrows. Select Mac OS
After selecting the type of format, click the “Partition” tab in the lower right of the
screen. On the next screen, Partition Disk, click “Partitio
n” again.
Page | 20
Format: Click on either the “Format” area or the Blue up/down arrows. Select Mac OS
After selecting the type of format, click the “Partition” tab in the lower right of the
/