16
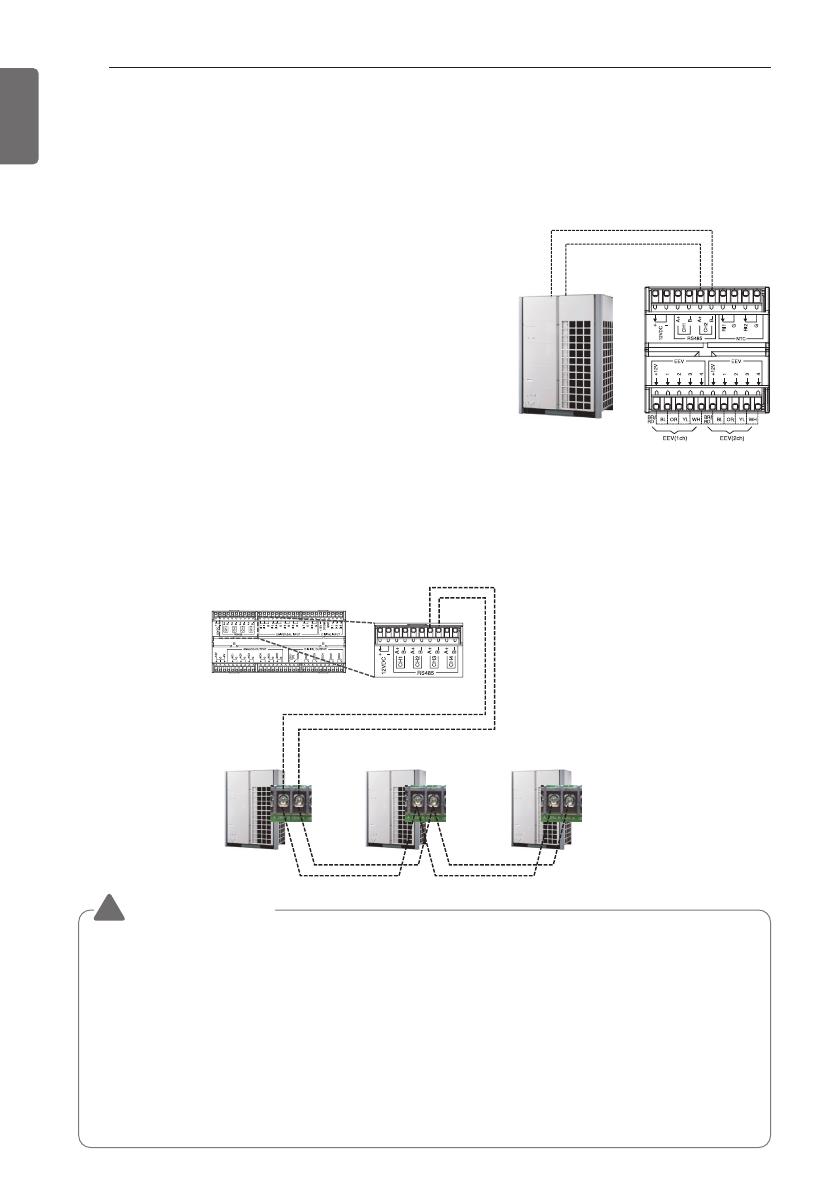
OUTDOOR UNIT COMMUNICATION LINE CONNECTION
ENGLISH
Connect
CEN B, CEN A
Connect
CEN B, CEN A
Connect
CEN B, CEN A
Outdoor
Unit #1
<Main module>
Outdoor
Unit #2
CH3 A+
CH3 B-
Outdoor
Unit #3
CAUTION
!
• The AHU Control Kit can control the temperature of the supply air by connecting to up to three
outdoor units. When connecting outdoor units, the communication addresses should be set
from 1 to 3, sequentially.
Otherwise, the supply air temperature control function may not work properly.
• Make sure the polarity of the power supply connector is correct when connecting the
communication cable between the Control Kit and outdoor unit.
• DIP SW 3 of the outdoor unit must be turned off in order to ensure communication between the
control kit and the outdoor unit.
• When connecting to Multi V Super 5, Function FN39 must be set to Option1. (Dip switch No.5
ON → FUNC → FN39 → OP1) Please refer to the Multi V manual for details on Multi V Function
settings. (Applicable to both ventilation temperature control and supply air temperature control)
Capacity Control Communication Cable Connection
-
In order to control the SA temperature in the control kit, the central control communication line
must be additionally connected. Please refer to the wiring diagram and the figure below for details.
- For models without a central control communication modem, a central control communication
modem must be installed separately to control the supplied air's temperature.
OUTDOOR UNIT COMMUNICATION LINE
CONNECTION
Cautions on connecting the EEV module (communication
module) with outdoor unit
- The Control Kit comes mounted with three EEV modules,
and each EEV module can be connected to one Expansion
Kit.
If additional EEV modules are required depending on the
number of outdoor units, they must be purchased
separately and installed.
- Make sure the communication cables of each outdoor unit
and pipe thermistor wires of Expansion Kit are not mixed
when connecting the outdoor units.
CH2 A+
IDU B
IDU A
CH2 B-


