Page is loading ...

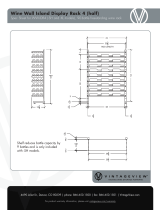
Evolution Island Display Rack
Installation Instructions for all Evolution IDR installations
IDR BASE
(two required for standard install)
• (2) IDR Uprights, L or T shaped
• (varies) Self-drilling Screws
• (4) Footer Pads
• (2) WW Brackets (per rack)
• (varies) Wine Rods
Required Tools
• Drill (with torque setting)
• Phillips head drill bit
• Phillips head screwdrive
• Pencil or Marker
• M6 Driver (optional for Extensions)
• A handy friend
Parts List:
(QTY or parts increases with multi-col-
umn installations)
• (2 per Rod) Wine Rod Screws
• (1) 5mm Allen Key
IDR Extension
• (1) IDR Upright, L or T shaped
• (varies) Self-drilling Screws
• (1) wwl Bracket (per rack)
• (varies) Evolution Wine Rods
• (2 per Rod) Evolution Screw
These installation instructions will assist you with
installing the VintageView Evolution Island Display Rack
(base only or with extensions).
1. THREAD FOOTER PADS
Thread footer pads into the bottom of the uprights.
If using optional casters, please refer to those
instructions for additional installation steps.
2. MARK ASSEMBLY HOLES
Starting at the top end of each Upright, lay all Evolution
Wine Wall Mounting Brackets in desired locations. En-
sure each Bracket is ush with the Upright post.
Mark all mounting hole locations (Figure A) on the front
side (or both the front and the back side if installing a
double-sided Evolution IDR System).
If assembling a Presentation Row model, ensure the
Wine Wall Presentation Row Bracket is placed at the top
of the Upright (Figure B).
3. PRE-DRILL
MOUNTING HOLES
Using the provided Drill Bit, pre-drill all marked
mounting hole locations.
Please note: Uprights may have predrilled mounting
holes for use with other products. Do not use those for
this application.
Figure A
Figure B

1
FIGURE Ch
Instructions: Evolution Island Display Rack
4. INSTALL MOUNTING BRACKETS
Using self-drilling screws (provided), attach the rst
Wine Wall Bracket to the rst Upright, starting from the
top set of Mounting Holes on the Upright. Repeat this
step with each additional Mounting Bracket.
Repeat the entire step with second Upright.
5. ATTACH RACKING
Insert one Evolution Screw through one assembly hole
on a Wine Wall Brackets from the rst Upright. Thread
one Evolution Rod onto the Evolution Screw and fully
tighten with provided 5mm allen key. Repeat with all
mounting hole locations on the rst Upright (Figure C).
Pro tip: Use a hex key drill bit and a drill on a low-
torque setting to speed this step up.
6: CONNECT WINE RODS
Single Column Installations
Insert one Evolution Screw through one assembly hole
on a Wine Wall Brackets from the opposite Upright.
Thread one Evolution Rod onto the Evolution Screw and
fully tighten with provided 5mm allen key (Figure D).
Repeat for all Wine Rods.
If project includes only one column of wine racking,
you’ve completed the assembly. Skip to step 9.
Multi Column Installations
Fasten one Wine Rod to the Wine Wall Mounting
Brackets using an Evolution Stud. Half of the Stud will
protrude out to start your next column (Figure E). Repeat
with all other Wine Rods until rst IDR column is fully
assembled.
Pro tip: Use an M6 Driver and drill on a low-torque
setting to speed this step up.
Proceed to next step.
Figure C
1
FIGURE Dh
Figure D
Figure E

Instructions: Evolution Island Display Rack
**OPTIONAL STEPS FOR
MULTI COLUMN DISPLAYS**
**7. BUILD THE NEXT POST**
Repeat steps 1-4 to build and place next post.
**8. CONNECT WINE RODS**
If nal column
Insert one Evolution Screw through one assembly hole
location on the Wine Wall Mounting Bracket. Thread
one Evolution Rod onto the Evolution Screw and fully
tighten with provided 5mm allen key.
If adding more columns
Fasten one Wine Rod to the Wine Wall Mounting Brack-
ets using Evolution Studs. Half of the Stud will protrude
out to start your next column. Repeat with all other Wine
Rods until rst Wine Wall Post column is fully assem-
bled.
Repeat steps 7-8 for as many columns of racking de-
sired.
9. ADD WINE
Preferably the good stuff.
PRODUCT CARE
Care must be taken when cleaning your racks.
Please use:
• A dry dusting cloth
• Compressed air cans
• Rubbing alcohol and a clean cloth to remove
grease, oil, or other substances
Avoid:
• Dish soap
• Household cleaners
• Abrasive materials
• Any chemicals
Our racks are covered by a limited lifetime manu-
facturer’s warranty. Learn more at vintageview.com/
warranty
/
