Page is loading ...

RELEASED
7-13-16
REFERENCE NUMBER
INS-1496
40429 Brickyard Drive • Madera, CA 93636 • USA
559.438.5800 • FAX 559.438.5900
www.bklighting.com • [email protected]
B-K LIGHTING
THIS DOCUMENT CONTAINS PROPRIETARY INFORMATION OF B-K LIGHTING, INC. AND ITS RECEIPT OR POSSESSION DOES NOT CONVEY ANY RIGHTS TO REPRODUCE, DISCLOSE ITS CONTENTS, OR TO MANUFACTURE, USE OR SELL ANYTHING IT MAY
DESCRIBE. REPRODUCTION, DISCLOSURE OR USE WITHOUT SPECIFIC WRITTEN AUTHORIZATION OF B-K LIGHTING, INC. IS STRICTLY FORBIDDEN.
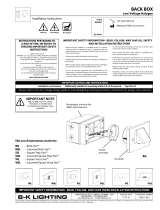
SS™ / SSL™/ VS™/ VSL™
Round Back Box Installation Instructions
IMPORTANT SAFETY INFORMATION - READ, FOLLOW, AND SAVE THESE INSTALLATION INSTRUCTIONS
SS
TOOLS
NEEDED:
By Others
1/8” Allen Wrench
Phillips Screwdriver
Waterproof Wire Connectors
Junction Box
Universal Mounting Ring
• Product must be installed by a qualified person in a manner
consistent with its intended use and in compliance with the
National Electrical Code, Canadian Electrical Code, and all Local
and Provincial Codes.
• Followproductlabelinformationandinstructions.
• QualifiedPersonnel mustperform allservicing orrelamping of
this product.
• Beforewiringtopowersupplyandduringservicingorrelamping,
turnoffpoweratfuseorcircuitbreakerbeforeservice.
• The use of accessory equipment not recommended by the
manufacturerorinstalledcontrarytoinstructionsmaycausean
unsafecondition.Theuseofdamagedcomponentsmaycause
anunsafeconditionandvoidproductwarranty.
IMPORTANT SAFETY INFORMATION - READ, FOLLOW, AND SAVE ALL SAFETY
AND INSTALLATION INSTRUCTIONS
• Donotblocklightemanatingfromproductinwholeorpart,
asthismaycauseanunsafecondition.
• Never operate the fixture with missing or damaged lens.
Lensmustbecleanedonregularbasis.
• Entire fixture may become extremely hot. Do not touch hot
lensorfixturebody.Donottouchthelampatanytime.Use
aclean,dry,softclothtohandlethelamp.Oilfromskinmay
damagethelampandcauseittorupture.
• Replace lamp only with correct wattage and type of lamp
markedonfixturelabel.
• All gaskets, o-rings and sealing surfaces must be kept clean
duringinstallationandservice;failuretodothismaycausean
unsafeconditionandvoidproductwarranty.
INSTRUCTIONS PERTAINING TO
A RISK OF FIRE, OR INJURY TO
PERSONS IMPORTANT SAFETY
INSTRUCTIONS
LightedlampisHOT!
WARNING-ToreducetheriskofFIREORINJURYTOPERSONS:
Turnoff/unplugandallowtocoolbeforereplacinglamp.
LampgetsHOTquickly!Contactonlyswitch/plugwhen
turning on.
Donottouchhotlens,guard,orenclosure(seediagram/
picture).
Keeplampawayfrommaterialsthatmayburn.
Donotouchthelampatanytime.Useasoftcloth.Oil
fromskinmaydamagelamp.
Donotoperatetheluminairefittingwithamissingor
damagedshield.
SAVE THESE INSTRUCTIONS
·Suitableforwetlocation·Additionallysuitableformountingwithin4ft.oftheground•TypeNon-IC
IMPORTANT LISTINGS AND CERTIFICATIONS
Hot Surface
Warning Low Voltage
Pleaserefertothelowvoltagedesignguideatwww.bklighting.com/lvguidebeforeinstallationforproperwireselection.
LampBracket
Faceplate
BACK BOX
Low Voltage Halogen
Installation Instructions
This set of instructions works for:
SS - Step Star™ (A or B)
VS - Versa Star™
VS
SS

40429 Brickyard Drive • Madera, CA 93636 • USA
559.438.5800 • FAX 559.438.5900
www.bklighting.com • [email protected]
B-K LIGHTING
3. Mount faceplate using two (2) #10-24 screws
with 1/8” Allen wrench. Tighten to compress
gasket.Donotovertighten.
Phase 2 - Finish Installation of Fixture with Remote Transformer
1. Remove #10-24 Phillips screws from mounted
backbox.Installuniversalmountingring(supplied
withfaceplate)using#10-24screwsontobackbox.
Alignfaceplatemountingholestofinalmounting
position.
2. Make watertight connections from remote
transformerto fixture leads using waterproof
wire connectors (By Others). See wiring
diagram.
Phase 1 - Rough In
InstallationofBackbox
1. Install Conduit (By Others) to be used with
this product.
2. Installjunctionboxsothatfrontfaceisflush
with finished wall or ceiling.
3. Connect box to conduit and pull wires for
connections(SeeWiringdiagram).
Additional Info
• PleasefollowNationalandLocalelectricalcodesforyourarea.
• 4”roundcastbox
• Suitableforthroughwire.
• Suitableforinstallationintocombustiblematerials.
• Ratedfor90°C.
IMPORTANT SAFETY INFORMATION LISTED ON REVERSE
READ, FOLLOW, AND SAVE ALL SAFETY AND INSTALLATION INSTRUCTIONS
RELEASED
7-13-16
REFERENCE NUMBER
INS-1496
LINE 12V
Fixture
COM
Remote
Transformer
COM
WIRING DIAGRAM
BACK BOX
Low Voltage Halogen
Installation Instructions

RELEASED
7-13-16
REFERENCE NUMBER
INS-1496-AJ
40429 Brickyard Drive • Madera, CA 93636 • USA
559.438.5800 • FAX 559.438.5900
www.bklighting.com • [email protected]
B-K LIGHTING
THIS DOCUMENT CONTAINS PROPRIETARY INFORMATION OF B-K LIGHTING, INC. AND ITS RECEIPT OR POSSESSION DOES NOT CONVEY ANY RIGHTS TO REPRODUCE, DISCLOSE ITS CONTENTS, OR TO MANUFACTURE, USE OR SELL ANYTHING IT MAY
DESCRIBE. REPRODUCTION, DISCLOSURE OR USE WITHOUT SPECIFIC WRITTEN AUTHORIZATION OF B-K LIGHTING, INC. IS STRICTLY FORBIDDEN.
IMPORTANT SAFETY INFORMATION - READ, FOLLOW, AND SAVE THESE INSTALLATION INSTRUCTIONS
This set of instructions works for:
SS - Step Star™ (A or B)
SSL - Step Star Louver™
VS - Versa Star™
VSL - Versa Star Louver™
SSL
SSL VS VSL
TOOLS
NEEDED:
By Others
1/8” Allen Wrench
Phillips Screwdriver
Waterproof Wire Connectors
Junction Box
Universal Mounting Ring
• Product must be installed by a qualified person in a manner
consistent with its intended use and in compliance with the
National Electrical Code, Canadian Electrical Code, and all Local
and Provincial Codes.
• Followproductlabelinformationandinstructions.
• QualifiedPersonnel mustperform allservicing orrelamping of
this product.
• Beforewiringtopowersupplyandduringservicingorrelamping,
turnoffpoweratfuseorcircuitbreakerbeforeservice.
• The use of accessory equipment not recommended by the
manufacturerorinstalledcontrarytoinstructionsmaycausean
unsafecondition.Theuseofdamagedcomponentsmaycause
anunsafeconditionandvoidproductwarranty.
IMPORTANT SAFETY INFORMATION - READ, FOLLOW, AND SAVE ALL SAFETY
AND INSTALLATION INSTRUCTIONS
• Donotblocklightemanatingfromproductinwholeorpart,
asthismaycauseanunsafecondition.
• Never operate the fixture with missing or damaged lens.
Lensmustbecleanedonregularbasis.
• Entire fixture may become extremely hot. Do not touch hot
lensorfixturebody.Donottouchthelampatanytime.Use
aclean,dry,softclothtohandlethelamp.Oilfromskinmay
damagethelampandcauseittorupture.
• Replace lamp only with correct wattage and type of lamp
markedonfixturelabel.
• All gaskets, o-rings and sealing surfaces must be kept clean
duringinstallationandservice;failuretodothismaycausean
unsafeconditionandvoidproductwarranty.
INSTRUCTIONS PERTAINING TO
A RISK OF FIRE, OR INJURY TO
PERSONS IMPORTANT SAFETY
INSTRUCTIONS
LightedlampisHOT!
WARNING-ToreducetheriskofFIREORINJURYTOPERSONS:
Turnoff/unplugandallowtocoolbeforereplacinglamp.
LampgetsHOTquickly!Contactonlyswitch/plugwhen
turning on.
Donottouchhotlens,guard,orenclosure(seediagram/
picture).
Keeplampawayfrommaterialsthatmayburn.
Donotouchthelampatanytime.Useasoftcloth.Oil
fromskinmaydamagelamp.
Donotoperatetheluminairefittingwithamissingor
damagedshield.
SAVE THESE INSTRUCTIONS
·Suitableforwetlocation·Additionallysuitableformountingwithin4ft.oftheground•TypeNon-IC
IMPORTANT LISTINGS AND CERTIFICATIONS
Hot Surface
Warning Low Voltage
Pleaserefertothelowvoltagedesignguideatwww.bklighting.com/lvguidebeforeinstallationforproperwireselection.
AdjustableLampBracket
Faceplate
SS
BACK BOX
Low Voltage Halogen - Adjustable Bracket
Installation Instructions

40429 Brickyard Drive • Madera, CA 93636 • USA
559.438.5800 • FAX 559.438.5900
www.bklighting.com • [email protected]
B-K LIGHTING
5. Mount faceplate using two (2) #10-24 screws
with 1/8” Allen wrench. Tighten to compress
gasket.Donotovertighten.
Phase 2 - Finish Installation of Fixture with Remote Transformer
1. Remove #10-24 Phillips screws from mounted
backbox.Installuniversalmountingring(supplied
withfaceplate)using#10-24screwsontobackbox.
Alignfaceplatemountingholestofinalmounting
position.
Phase 1 - Rough In
InstallationofBackbox
1. Install Conduit (By Others) to be used with
this product.
2. Installjunctionboxsothatfrontfaceisflush
with finished wall or ceiling.
3. Connect box to conduit and pull wires for
connections(SeeWiringdiagram).
Additional Info
• PleasefollowNationalandLocalelectricalcodesforyourarea.
• 4”roundcastbox
• Suitableforthroughwire.
• Suitableforinstallationintocombustiblematerials.
• Ratedfor90°C.
IMPORTANT SAFETY INFORMATION LISTED ON REVERSE
READ, FOLLOW, AND SAVE ALL SAFETY AND INSTALLATION INSTRUCTIONS
RELEASED
7-13-16
REFERENCE NUMBER
INS-1496-AJ
BACK BOX
Low Voltage Halogen - Adjustable Bracket
Installation Instructions
LINE 12V
Fixture
COM
Remote
Transformer
COM
WIRING DIAGRAM
Low Voltage - For use with 12VAC remote
transformer.
2. To install lamp (if needed), remove socket
assembly from faceplate housing by loosening
thumbscrew.Donotexceedwattageonlabel.
4. Insert tab from socket into notch on adjustable
lampbracket,thentightenthumbscrew.
3. Make watertight connections from remote
transformertolampleadsusingwaterproofwire
connectors.(ByOthers)See wiring diagram.

RELEASED
7-13-16
REFERENCE NUMBER
INS-1496-TP
40429 Brickyard Drive • Madera, CA 93636 • USA
559.438.5800 • FAX 559.438.5900
www.bklighting.com • [email protected]
B-K LIGHTING
THIS DOCUMENT CONTAINS PROPRIETARY INFORMATION OF B-K LIGHTING, INC. AND ITS RECEIPT OR POSSESSION DOES NOT CONVEY ANY RIGHTS TO REPRODUCE, DISCLOSE ITS CONTENTS, OR TO MANUFACTURE, USE OR SELL ANYTHING IT MAY
DESCRIBE. REPRODUCTION, DISCLOSURE OR USE WITHOUT SPECIFIC WRITTEN AUTHORIZATION OF B-K LIGHTING, INC. IS STRICTLY FORBIDDEN.
IMPORTANT SAFETY INFORMATION - READ, FOLLOW, AND SAVE THESE INSTALLATION INSTRUCTIONS
This set of instructions works for:
SS - Step Star™ (A or B)
VS - Versa Star™
SS
VS
TOOLS
NEEDED:
By Others
1/8” Allen Wrench
Phillips Screwdriver
Waterproof Wire Connectors
Junction Box
Universal Mounting Ring
• Product must be installed by a qualified person in a manner
consistent with its intended use and in compliance with the
National Electrical Code, Canadian Electrical Code, and all Local
and Provincial Codes.
• Followproductlabelinformationandinstructions.
• QualifiedPersonnel mustperform allservicing orrelamping of
this product.
• Beforewiringtopowersupplyandduringservicingorrelamping,
turnoffpoweratfuseorcircuitbreakerbeforeservice.
• The use of accessory equipment not recommended by the
manufacturerorinstalledcontrarytoinstructionsmaycausean
unsafecondition.Theuseofdamagedcomponentsmaycause
anunsafeconditionandvoidproductwarranty.
IMPORTANT SAFETY INFORMATION - READ, FOLLOW, AND SAVE ALL SAFETY
AND INSTALLATION INSTRUCTIONS
• Donotblocklightemanatingfromproductinwholeorpart,
asthismaycauseanunsafecondition.
• Never operate the fixture with missing or damaged lens.
Lensmustbecleanedonregularbasis.
• Entire fixture may become extremely hot. Do not touch hot
lensorfixturebody.Donottouchthelampatanytime.Use
aclean,dry,softclothtohandlethelamp.Oilfromskinmay
damagethelampandcauseittorupture.
• Replace lamp only with correct wattage and type of lamp
markedonfixturelabel.
• All gaskets, o-rings and sealing surfaces must be kept clean
duringinstallationandservice;failuretodothismaycausean
unsafeconditionandvoidproductwarranty.
INSTRUCTIONS PERTAINING TO
A RISK OF FIRE, OR INJURY TO
PERSONS IMPORTANT SAFETY
INSTRUCTIONS
LightedlampisHOT!
WARNING-ToreducetheriskofFIREORINJURYTOPERSONS:
Turnoff/unplugandallowtocoolbeforereplacinglamp.
LampgetsHOTquickly!Contactonlyswitch/plugwhen
turning on.
Donottouchhotlens,guard,orenclosure(seediagram/
picture).
Keeplampawayfrommaterialsthatmayburn.
Donotouchthelampatanytime.Useasoftcloth.Oil
fromskinmaydamagelamp.
Donotoperatetheluminairefittingwithamissingor
damagedshield.
SAVE THESE INSTRUCTIONS
·Suitableforwetlocation·Additionallysuitableformountingwithin4ft.oftheground•TypeNon-IC
IMPORTANT LISTINGS AND CERTIFICATIONS
Hot Surface
Warning Low Voltage
Pleaserefertothelowvoltagedesignguideatwww.bklighting.com/lvguidebeforeinstallationforproperwireselection.
LampBracket
Faceplate
SS
BACK BOX
Low Voltage Halogen - Thermal Protector
Installation Instructions
ThermalProtector

40429 Brickyard Drive • Madera, CA 93636 • USA
559.438.5800 • FAX 559.438.5900
www.bklighting.com • [email protected]
B-K LIGHTING
5. Mount faceplate using two (2) #10-24 screws with
1/8”Allenwrench.Tightentocompressgasket.Do
not over tighten.
Phase 2 - Finish Installation of Fixture with Remote Transformer
1. Remove#10-24Phillipsscrewsfrommountedback
box.Installuniversalmountingring(suppliedwith
faceplate) using #10-24 screws onto back box.
Alignfaceplatemountingholestofinalmounting
position.
Phase 1 - Rough In
InstallationofBackbox
1. Install Conduit (By Others) to be used with
this product.
2. Installjunctionboxsothatfrontfaceisflush
with finished wall or ceiling.
3. Connect box to conduit and pull wires for
connections(SeeWiringdiagram).
Additional Info
• PleasefollowNationalandLocalelectricalcodesforyourarea.
• 4”roundcastbox
• Suitableforthroughwire.
• Suitableforinstallationintocombustiblematerials.
• Ratedfor90°C.
IMPORTANT SAFETY INFORMATION LISTED ON REVERSE
READ, FOLLOW, AND SAVE ALL SAFETY AND INSTALLATION INSTRUCTIONS
RELEASED
7-13-16
REFERENCE NUMBER
INS-1496-TP
BACK BOX
Low Voltage Halogen - Thermal Protector
Installation Instructions
Red
LAMP
QUICK
DISCONNECT
REMOTE
TRANSFORMER
THERMAL
PROTECTOR
LINE
COMMON
Red
White
White
Yellow
White
White
White
Black
2. Make watertight connections from remote
transformer to thermal protector using
waterproof wire connectors. (By Others) See
wiring diagram.
WIRING DIAGRAM
Low Voltage - For use with 12VAC remote
transformer.
3. Connectquickdisconnectfromthermalprotector
tolampleads.
4. Re-insertsocketassemblyintofaceplate.

RELEASED
7-13-16
REFERENCE NUMBER
INS-1496-AJ-TP
40429 Brickyard Drive • Madera, CA 93636 • USA
559.438.5800 • FAX 559.438.5900
www.bklighting.com • [email protected]
B-K LIGHTING
THIS DOCUMENT CONTAINS PROPRIETARY INFORMATION OF B-K LIGHTING, INC. AND ITS RECEIPT OR POSSESSION DOES NOT CONVEY ANY RIGHTS TO REPRODUCE, DISCLOSE ITS CONTENTS, OR TO MANUFACTURE, USE OR SELL ANYTHING IT MAY
DESCRIBE. REPRODUCTION, DISCLOSURE OR USE WITHOUT SPECIFIC WRITTEN AUTHORIZATION OF B-K LIGHTING, INC. IS STRICTLY FORBIDDEN.
IMPORTANT SAFETY INFORMATION - READ, FOLLOW, AND SAVE THESE INSTALLATION INSTRUCTIONS
This set of instructions works for:
SS - Step Star™ (A or B)
SSL - Step Star Louver™
VS - Versa Star™
VSL - Versa Star Louver™
SS
SSL VS VSL
TOOLS
NEEDED:
By Others
1/8” Allen Wrench
Phillips Screwdriver
Waterproof Wire Connectors
Junction Box
Universal Mounting Ring
• Product must be installed by a qualified person in a manner
consistent with its intended use and in compliance with the
National Electrical Code, Canadian Electrical Code, and all Local
and Provincial Codes.
• Followproductlabelinformationandinstructions.
• QualifiedPersonnel mustperform allservicing orrelamping of
this product.
• Beforewiringtopowersupplyandduringservicingorrelamping,
turnoffpoweratfuseorcircuitbreakerbeforeservice.
• The use of accessory equipment not recommended by the
manufacturerorinstalledcontrarytoinstructionsmaycausean
unsafecondition.Theuseofdamagedcomponentsmaycause
anunsafeconditionandvoidproductwarranty.
IMPORTANT SAFETY INFORMATION - READ, FOLLOW, AND SAVE ALL SAFETY
AND INSTALLATION INSTRUCTIONS
• Donotblocklightemanatingfromproductinwholeorpart,
asthismaycauseanunsafecondition.
• Never operate the fixture with missing or damaged lens.
Lensmustbecleanedonregularbasis.
• Entire fixture may become extremely hot. Do not touch hot
lensorfixturebody.Donottouchthelampatanytime.Use
aclean,dry,softclothtohandlethelamp.Oilfromskinmay
damagethelampandcauseittorupture.
• Replace lamp only with correct wattage and type of lamp
markedonfixturelabel.
• All gaskets, o-rings and sealing surfaces must be kept clean
duringinstallationandservice;failuretodothismaycausean
unsafeconditionandvoidproductwarranty.
INSTRUCTIONS PERTAINING TO
A RISK OF FIRE, OR INJURY TO
PERSONS IMPORTANT SAFETY
INSTRUCTIONS
LightedlampisHOT!
WARNING-ToreducetheriskofFIREORINJURYTOPERSONS:
Turnoff/unplugandallowtocoolbeforereplacinglamp.
LampgetsHOTquickly!Contactonlyswitch/plugwhen
turning on.
Donottouchhotlens,guard,orenclosure(seediagram/
picture).
Keeplampawayfrommaterialsthatmayburn.
Donotouchthelampatanytime.Useasoftcloth.Oil
fromskinmaydamagelamp.
Donotoperatetheluminairefittingwithamissingor
damagedshield.
SAVE THESE INSTRUCTIONS
·Suitableforwetlocation·Additionallysuitableformountingwithin4ft.oftheground•TypeNon-IC
IMPORTANT LISTINGS AND CERTIFICATIONS
Hot Surface
Warning Low Voltage
Pleaserefertothelowvoltagedesignguideatwww.bklighting.com/lvguidebeforeinstallationforproperwireselection.
AdjustableLampBracket
Faceplate
SS
BACK BOX
Low Voltage Halogen - Thermal Protector & Adjustable Bracket
Installation Instructions
ThermalProtector

40429 Brickyard Drive • Madera, CA 93636 • USA
559.438.5800 • FAX 559.438.5900
www.bklighting.com • [email protected]
B-K LIGHTING
7. Mount faceplate using two (2) #10-24 screws
with 1/8” Allen wrench. Tighten to compress
gasket.Donotovertighten.
Phase 2 - Finish Installation of Fixture with Remote Transformer
1. Remove#10-24Phillipsscrewsfrommountedback
box.Installuniversalmountingring(suppliedwith
faceplate) using #10-24 screws onto back box.
Alignfaceplatemountingholestofinalmounting
position.
Phase 1 - Rough In
InstallationofBackbox
1. Install Conduit (By Others) to be used with
this product.
2. Installjunctionboxsothatfrontfaceisflush
with finished wall or ceiling.
3. Connect box to conduit and pull wires for
connections(SeeWiringdiagram).
Additional Info
• PleasefollowNationalandLocalelectricalcodesforyourarea.
• 4”roundcastbox
• Suitableforthroughwire.
• Suitableforinstallationintocombustiblematerials.
• Ratedfor90°C.
IMPORTANT SAFETY INFORMATION LISTED ON REVERSE
READ, FOLLOW, AND SAVE ALL SAFETY AND INSTALLATION INSTRUCTIONS
RELEASED
7-13-16
REFERENCE NUMBER
INS-1496-AJ-TP
BACK BOX
Low Voltage Halogen - Thermal Protector & Adjustable Bracket
Installation Instructions
Red
LAMP
QUICK
DISCONNECT
REMOTE
TRANSFORMER
THERMAL
PROTECTOR
LINE
COMMON
Red
White
White
Yellow
White
White
White
Black
2. Make watertight connections from remote
transformer to thermal protector using
waterproof wire connectors. (By Others) See
wiring diagram.
WIRING DIAGRAM
Low Voltage - For use with 12VAC remote
transformer.
3. Connectquickdisconnectfromthermalprotector
tolampleads.
4. Re-insertsocketassemblyintofaceplate.
5 Toinstalllamp(ifneeded),removesocketassembly
from faceplate housing by loosening thumbscrew.
Donotexceedwattageonlabel.
6. Inserttabfromsocketintonotchonadjustable
lampbracket,thentightenthumbscrew.

40429 Brickyard Drive • Madera, CA 93636 • USA
559.438.5800 • FAX 559.438.5900
www.bklighting.com • [email protected]
B-K LIGHTING
IMPORTANT SAFETY INFORMATION LISTED ON REVERSE
READ, FOLLOW, AND SAVE ALL SAFETY AND INSTALLATION INSTRUCTIONS
RELEASED
7-13-16
REFERENCE NUMBER
INS-1496
3. Mount faceplate using two (2) #10-24 screws with
1/8” Allen wrench. Tighten to compress gasket.
Do not over tighten.
BACK BOX
Low Voltage Halogen
Installation Instructions
2. Remove socket assembly from faceplate
housing. Replace lamp, then reinstall socket
assembly into faceplate. Do not exceed
maximumwattageonlabel.
REPLACING LAMP
1. Use 1/8” Allen wrench to loosen #10-24 stainless
faceplatescrewstoremovefaceplate.
/