Page is loading ...

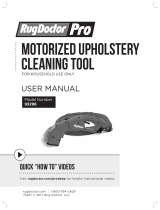
deep
carpet cleaner
USER MANUAL
Model Number: 93140 series
Motorized brush for use on:

Founded by a professional carpet cleaner in 1972,
the first machines were designed and built for
professional use. A brand was born and soon after, Rug
Doctor launched the first rental program that made
professional-grade carpet cleaning machines available
to the public. More than 40 years later, Rug Doctor has
grown to become a household name and continues as
the leader in carpet care rental systems with powerful
machines and innovative products.
2 rugdoctor.com 1-800-784-3628
3 Safety Instructions
4 Quick Start
5 Parts, Components
6 How To Clean / Features
11 Troubleshooting &
Replacement Parts
13 Warranty Information
Rug Doctor, LLC
4701 Old Shepard Place
Plano, Texas 75093
consumer. support@rugdoctor. com
www.rugdoctor. com
Retain for your records: To save
time if calling Customer Service for
information about your Rug Doctor®
machine, it is recommended that you
record your machine information
below.
Serial #: _______________________
Model #: _______________________
Date of Purchase:________________

Grounding Instructions
This appliance must be grounded. If
it should malfunction or breakdown,
grounding provides a path of least
resistance for electric current to reduce
the risk of
electric shock.
This appliance is
equipped with
a cord having
an equipment
grounding
conductor and
grounding plug. The plug must be inserted
into an appropriate outlet that is properly
installed and grounded in accordance with
all local codes and ordinances.
SAVE THESE INSTRUCTIONS
Grounded Outlet Box
Grounded Outlet
Grounding Pin
IMPORTANT SAFETY INSTRUCTIONS
Please read all instructions before using.
When using an electrical appliance,
basic precautions should always be
followed, including the following:
∆ To avoid scalding or burns, use caution when handling hot tap water to fill tanks. Do not
boil or microwave water to be used in machine.
∆ Do not leave appliance unattended when plugged in or while it is on. Unplug from outlet
when not in use and before servicing.
∆ To reduce the risk of fire and electric shock due to internal component
damage, use only Rug Doctor
®
cleaning products intended for use with this appliance.
See the Cleaning Product section of this manual.
∆ Do not allow to be used as a toy. Not intended for use by children age 12 and under.
Close attention and adult supervision is necessary when used near children. Do not allow
children to place their body parts in or near openings and moving parts.
∆ Use only as described in this manual. Use only manufacturer’s
recommended products.
∆ Do not use with damaged cord or plug. If appliance is not working as it should, has
been dropped, damaged, left outdoors, or dropped into water, stop using and
return it to a service center.
∆ Do not pull or carry by cord, use cord as a handle, close a door on cord, or pull cord
around sharp edges or corners. Do not run appliance over cord. Keep cord away from
heated surfaces.
∆ Do not unplug by pulling on cord. To unplug, grasp the plug, not the cord.
∆ Do not handle plug or appliance with wet hands.
∆ Do not put any object into openings. Do not use if any opening is blocked;
keep free of dust, lint, hair, and anything that may reduce air flow.
∆ Keep hair, loose clothing, fingers, and all parts of body away from openings and
moving parts.
∆ Turn o all controls before unplugging.
∆ Product contains chemicals known to the State of California to cause cancer and
birth defects.
∆ Use extra care when cleaning on stairs.
∆ Do not use to pick up flammable or combustible liquids or materials such as gasoline,
certain paints or use in areas where they may be present.
∆ Do not use to pick up anything that is burning or smoking, such as cigarettes,
matches, or hot ashes.
∆ Do not place in or pick up caustic or toxic materials (Such as, bleach, ammonia, toilet
bowl cleaner and drain cleaners) with machine.
∆ Connect to a properly grounded outlet only. See “Grounding Instructions.”
∆ Use only on surfaces moistened by cleaning process or small spills. Do not place or
submerge machine in standing water or try to clear flooded areas.
∆ Do not clean over floor electrical outlets.
∆ The use of an extension cord is not recommended. Failure to follow the foregoing
instructions may expose the user to the possibility of electric shock, personal injury
and/or death.
∆ When clean water tank runs out stop using and follow instructions to refill.
∆ Do not operate without tanks or in any manner inconsistent with above warnings or
the operating instructions set fourth in this manual.
WARNING
TO REDUCE THE RISK OF FIRE, ELECTRIC
SHOCK, INJURY OR PROPERTY DAMAGE:
WARNING
Improper connection of equipment-grounding
conductor can result in a risk of electric shock.
Check with a qualified electrician or service
person if you are in doubt as to whether the
outlet is properly grounded. Do not modify
the plug provided with the appliance—If it will
not fit the outlet, have a proper outlet installed
by a qualified electrician. This appliance is
for use on a nominal 120-volt circuit and
has a grounded plug that looks like the plug
illustrated in Figure A. Make sure that the
appliance is connected to an outlet having the
same configuration as the plug. No adapter
should be used with this appliance.
rugdoctor.com 1-800-784-3628 3

CLEANING TIPS
4 rugdoctor.com 1-800-784-3628
1. Before you begin, review the safety warnings found in the front of
this manual.
2. Always test color fastness before using on carpets and upholstery.
a. Wet an inconspicuous area with a small amount of cleaner
b. After 1-2 minutes, blot with a paper towel and check for
color transfer.
3. Using a normal dry vacuum cleaner, vacuum the area you want to
deep clean to remove loose dirt before using the Rug Doctor Deep
Carpet Cleaner machine.
4. Pre-treat any special problem areas with appropriate Rug Doctor
cleaning solutions (reference cleaning products on manual Page 5
and www.rugdoctor.com).
(Fig. 1)
(Fig. 2)
(Fig. 3)
(Fig. 4)
(Fig. 5)
QUICK START
1. Raise the HANDLE by pulling the handle upward. Lift the handle into
the upright position. (Fig. 1)
2. Remove the CLEAN WATER TANK by grasping the TANK HANDLE
and lifting straight up. (Fig. 2). Loosen the TANK LID by turning
counter clockwise and remove from the machine, set
aside. Fill the tank with hot tap water to the “CLEAN
WATER FILL LINE”. DO NOT USE BOILED OR MICROWAVED
WATER IN TANK.
3. The TANK LID is also the “Soap” measure. (Fig. 3) Fill the lid
with Rug Doctor cleaning solution to the desired level (measured
in ounces). Follow instructions on the cleaning solution bottle for
best results. Pour the cleaning solution into the CLEAN WATER TANK
and replace the lid. Turn clockwise to tighten. Place the CLEAN
WATER TANK back in the machine, making sure it is secure.
4. Check the POWER SWITCH to make sure it is in the “o” position.
5. Unwrap the POWER CORD and plug in to an outlet. Note: Rotate the
top CORD WRAP HOOK to release the cord for easy unwrapping.
6. To clean RUG/CARPET position the machine and turn the POWER
SWITCH toward the “RUG” setting.
7. Depress the “SOAP & SCRUB” button on the top of the handle while
pulling the machine slowly and steadily backward in a straight line.
(Fig. 4)
8. Use the SUPER BOOST SPRAY knob to select your desired level of
deep cleaning. (Fig. 5). For moderately/heavy soiled or high-trac
carpets set the SUPER BOOST SPRAY to “ON”. (See SUPER BOOST
CLEANING instructions found on Page 7 for more information).
9. Release the “SOAP & SCRUB” button 6 to 12 inches before ending
each pass to stop cleaning solution. Tilt the machine back and push it
forward to start a new backward cleaning pass.
10. When the “CLEAN WATER TANK” is empty, re-fill using the TANK
REFILLING instructions found on Page 8.
11. To clean upholstery, stairs, spots and stains see the UPHOLSTERY
TOOL instructions found on Page 9.
12. Wrap the UPHOLSTERY TOOL around the TOOL CADDY. The TOOL
CADDY is removable and can be stored on-board or hung on a hook.
See Page 5 for UPHOLSTERY TOOL CADDY wrapping instructions.

PRODUCT PARTS, COMPONENTS
CLEANING SOLUTION
-RUG DOCTOR PROFESSIONAL OXY-STEAM 64 or 40oz products will thoroughly
deep clean and brighten carpets while eectively removing dirt, soils and stains
through oxygen-activated cleaning boosters.
-RUG DOCTOR PROFESSIONAL PET 64 or 40oz products will permanently remove
pet stains and odors while deterring pets from remarking areas through its powerful,
pro-enzymatic carpet cleaning formula.
rugdoctor.com 1-800-784-3628 5
Upholstery
Brush Tool for
stains, stairs
and versatile
cleaning
“Rotating” Cord Wrap
for fast unwrapping
Comfort
Grip
Handle
Carry Handle
Flexible hose
with compact
storage
“Simple Lift”
CLEAN Water
Tank Handle
Upholstery
Tool Waste
Port
Large, carpet friendly
wheels for extra
maneuverability
Removable
clear
water tank
Rotation
Grooming
Brush
STEP 1 Insert large connector with hose up, secure in place.
STEP 2 Wrap the tool hose clockwise around the caddy 3 times.
STEP 3 Insert the Upholstery Hand Tool into place with the brush
facing out. Secure the tool with the clips locking it in place.
STEP 4 Insert the small connector into the opening directly above
the Upholstery Hand Tool final placement.
TOOL CADDY WRAP SYSTEM
Complete Tool Caddy
Wrap System
Vibrating Deep
Cleaning Brush

1. Raise the COLLAPSIBLE HANDLE into the upright position:
a. Raise the handle by pulling upward into the upright position. (Fig. 6)
b. For best results, lower the HANDLE to it’s lowest position by pulling
the HANDLE RELEASE lever upward. This will help keep the front
nozzle in contact with the carpet at all times when pulling backwards.
2. Fill the CLEAN WATER TANK:
a. Remove the CLEAN WATER TANK by grasping the tank HANDLE
and lifting straight up. (Fig. 7)
b. Loosen the TANK LID by turning counter clockwise and remove from
the machine, set aside.
c. Fill the tank with hot tap water to the “CLEAN WATER FILL LINE”.
DO NOT USE BOILED OR MICROWAVED WATER IN TANK.
d. The TANK LID is also the “Soap” measure. Fill the lid with Rug
Doctor cleaning solution to the desired level (measured in ounces).
Follow instructions on the cleaning solution bottle for best results.
(Fig. 8)
e. Pour the cleaning solution into the CLEAN WATER TANK and replace
the lid. Turn clockwise to tighten.
f. Place the CLEAN WATER TANK back in the machine, making sure
it is secure.
g. Check the POWER SWITCH to make sure it is in the “o” position.
h. The POWER CORD will come wrapped and tied. Release the POWER
CORD and plug in to a grounded outlet.
i. NOTE: The machine was designed with convenient Rotating CORD
WRAP HOOKS to store and CORD on-bard. The CORD WRAP
HOOKS on the handle rotate to easily release the power cord.
(Fig. 6)
(Fig. 7)
(Fig. 8)
SETTING UP/ GET READY TO CLEAN
Your RUG DOCTOR DEEP CARPET CLEANER is ready to start cleaning right out of the
box. No assembly required! Follow these simple instructions to start cleaning.
6 rugdoctor.com 1-800-784-3628
DO NOT USE BOILED OR MICROWAVED WATER IN TANK. Doing
so could result in scalding or burns. Not recommended for use on
wool, jute, sisal carpets and rugs. Doing so could damage material
and void warranty on machine. Do not walk on wet carpet.
DUAL CROSS ACTION BRUSHES
Your Rug Doctor Deep Carpet Cleaner uses DUAL CROSS ACTION
BRUSHES. Two brushes under the machine deep clean all sides of the
carpet fibers. This innovative technology deep cleans each carpet fiber,
then grooms and polishes the carpet – all in one cleaning pass.
1. With the machine POWER CORD plugged in to a grounded outlet turn
the machine on by pressing the POWER SWITCH down toward the
“RUG” setting.
HOW TO CLEAN / FEATURES
You’re now ready to deep clean your carpets and rugs. Your RUG DOCTOR
DEEP CARPET CLEANER has innovative features: DUAL CROSS ACTION
BRUSHES to clean deep down in carpet and SUPER BOOST SPRAY empowers
you to customize your clean for high-trac and heavily soiled areas.

(Fig. 10)
DUAL CROSS ACTION BRUSHES (CONT
2. The DUAL CROSS ACTION BRUSHES are activated by the “SOAP &
SCRUB” button on the top of the handle. (Fig. 9)
a. The Vibrating-Oscillating Brush scrubs all sides of the carpet, deep
cleaning each fiber from the base of the carpet.
b. The Roller Brush grooms and polishes the carpet, leaving it looking
clean and finished. Note: Your Rug Doctor Deep Carpet Cleaner also
features Side Brushes for edge cleaning along carpets.
SUPER BOOST CLEANING
Not every carpet needs the same level of deep clean, some need a
SUPER BOOST. Use the “SUPER BOOST SPRAY” setting on the machine
for an extra “boost” in cleaning heavily soiled and high-trac areas.
1. Use the SUPER BOOST SPRAY knob to select your desired level of deep
cleaning. (Fig. 10)
a. SUPER BOOST “OFF”: For lightly soiled carpets set the SUPER
BOOST SPRAY on the machine to “OFF”. The machine will spray
cleaning solution onto the carpet under the machine. As you pull
the machine backward, you’ll see the solution dirt from the carpet
being suctioned into the machine.
b. SUPER BOOST “ON”: For moderately/heavy soiled or high-trac
carpets set the SUPER BOOST SPRAY on the machine to “ON”. The
machine will spray additional cleaning solution from the “SUPER
BOOST SPRAY” nozzle.
2. Position the machine on carpet and push the POWER SWITCH down
toward the “RUG” setting.
3. Press the “SOAP & SCRUB” button on the top of the handle while
pulling the machine slowly and steadily backward in a straight line.
(Fig. 9)
4. Release the “SOAP & SCRUB” button 6 to 12 inches before ending
each pass to stop cleaning solution. Tilt the machine back and push it
forward to start a new backward cleaning pass.
EMPTYING THE WASTE WATER TANK
1. Empty the WASTE WATER TANK before the dirty water reaches the
“Full Line” (Fig. 11).
2. Turn o the machine using the POWER SWITCH.
3. Remove the WASTE WATER TANK from the machine by grasping the
tank HANDLE and lifting straight up. (Fig. 12)
4. Unscrew the WIDE OPENING LID and pour out the dirty water. (Fig. 13).
Dirty water should be poured into a toilet or outside, do not pour into
sink or tub.
5. Rinse the inside of the WASTE WATER TANK and replace the WIDE
OPENING LID, firmly tighten the lid.
6. Place the tank back on the machine by setting is straight down on the
base until it is secure. (Fig. 14)
REFILLING THE CLEAN WATER TANK
1. When the unit no longer sprays water, check the CLEAN WATER TANK
to see if it’s empty.
2. If the CLEAN WATER TANK is empty, turn o the machine using the
POWER SWITCH.
HOW TO CLEAN / FEATURES (CONT)
rugdoctor.com 1-800-784-3628 7
(Fig. 9)
(Fig. 11 )
(Fig. 12)
(Fig. 13)
(Fig. 14)

(Fig. 15)
REFILLING THE CLEAN WATER TANK (CONT)
3. Remove the CLEAN WATER TANK by grasping the TANK HANDLE and
lifting straight up. (Fig. 15)
4. Loosen the TANK LID by turning counter clockwise and remove from the
machine, set aside. Fill the tank with hot tap water to the “CLEAN
WATER FILL LINE”. (Fig. 16). DO NOT BOIL OR MICROWAVE WATER.
5. The TANK LID is also the “Soap” measure. (Fig. 17). Fill the lid with Rug
Doctor cleaning solution to the desired level (measured in ounces).
Follow instructions on the cleaning solution bottle for best results.
6. Pour the cleaning solution into the CLEAN WATER TANK and replace
the lid. Turn clockwise to tighten.
7. Place the CLEAN WATER TANK back in the machine, making sure it
is secure.
CLEANING UP/STORAGE AFTER USE
After you’ve used your RUG DOCTOR DEEP CARPET CLEANER follow these
easy steps for quick clean-up and storage for your machine.
1. Turn the machine o by pressing the POWER SWITCH down toward the
“OFF” setting.
2. Unplug the POWER CORD from the outlet and wrap it around the
ROTATING CORD HOOKS.
3. Empty the CLEAN WATER TANK (if necessary), rinse and replace on
the machine.
4. Empty the WASTE WATER TANK then rinse, clean and dry before
placing back on the machine base.
a. WIDE OPENING LID opening is designed to fit your hand inside to
thoroughly clean, rinse and dry to store a fresh and clean tank. (Fig. 7)
5. Move the machine to a closet or storage place. Use the HANDLE
RELEASE lever to collapse the HANDLE for convenient and compact
storage. (Fig. 18). Tip: Let the machine brushes dry before putting the
machine away.
(Fig. 16)
(Fig. 17)
HOW TO CLEAN / FEATURES (CONT)
8 rugdoctor.com 1-800-784-3628
(Fig. 17)
(Fig. 18)
CLEANING UPHOLSTERY, STAIRS AND
STAINS, USING THE UPHOLSTERY TOOL
SETTING UP/GETTING READY TO CLEAN
Your RUG DOCTOR DEEP CARPET CLEANER is ready to start cleaning right
out of the box. No assembly required! Follow these simple instructions to
start cleaning.
1. Wrap the UPHOLSTERY TOOL around the TOOL CADDY. The TOOL
CADDY is removable and can be stored on-board or hung on a hook
a. UPHOLSTERY TOOL CADDY wrapping instructions. (Fig. 19).
See Page 5 for UPHOLSTERY TOOL CADDY wrapping instructions.
2. Raise the COLLAPSIBLE HANDLE into the upright position
3. Fill the CLEAN WATER TANK:
a. Remove the CLEAN WATER TANK by grasping the tank HANDLE
and lifting straight up. (Fig. 15)
b. Loosen the TANK LID by turning counter clockwise and remove from
the machine, set aside.
(Fig. 19)

CLEANING UPHOLSTERY, STAIRS AND
STAINS, USING THE UPHOLSTERY TOOL
SETTING UP/GETTING READY TO CLEAN (CONT)
Your RUG DOCTOR DEEP CARPET CLEANER is ready to start cleaning right
out of the box. No assembly required! Follow these simple instructions to
start cleaning.
3. Fill the CLEAN WATER TANK:
c. Fill the tank with hot tap water to the “CLEAN WATER FILL LINE”.
DO NOT USE BOILED OR MICROWAVED WATER IN TANK.
d. The TANK LID is also the “Soap” measure. Fill the lid with Rug
Doctor cleaning solution to the desired level (measured in ounces).
Follow instructions on the cleaning solution bottle for best results.
(Fig. 20)
e. Pour the cleaning solution into the CLEAN WATER TANK and replace
the lid. Turn clockwise to tighten.
f. Place the CLEAN WATER TANK back in the machine, making sure
it is secure.
4. Rotate the CORD WRAP HOOK on the handle to release the power cord.
Unwrap the POWER CORD and plug in to a grounded outlet. Making sure
the POWER SWITCH is in the “OFF” (middle) position. (Fig. 21)
(Fig. 20)
(Fig. 21)
DO NOT USE BOILED OR MICROWAVED WATER IN TANK. Doing
so could result in scalding or burns. Not recommended for use on
wool, jute, sisal carpets and rugs. Doing so could damage material
and void warranty on machine. Do not walk on wet carpet.
CLEANING WITH THE UPHOLSTERY TOOL
You’re now ready to deep clean your upholstery, stairs and carpet spots and
stains. Your RUG DOCTOR DEEP CARPET CLEANER has an UPHOLSTERY
TOOL and innovative TOOL CADDY. Designed to easily snap on and o back of
the machine handle, the UPHOLSTERY TOOL CADDY hangs on a hook or peg
when not in use. Simply snap the TOOL CADDY on-board to store the whole
machine in one convenient and compact package.
1. Unwrap the UPHOLSTERY TOOL from the CADDY. (Fig. 22)
2. Open the WASTE WATER PORT by pulling on the black
rubber plug out. (Fig. 23)
3. Insert the UPHOLSTERY TOOL connection into the WASTE WATER PORT
on the front of the WASTE WATER TANK by lining up the “O” icons on the
tank and the TOOL. (Fig. 24)
4. Lock the TOOL into place by rotating to the right, the icon will be
straight up. (Fig. 25)
5. Connect the SOLUTION HOSE to the “TOOL CLEAN PORT” located on the
top of the machine. (Fig. 26)
HOW TO CLEAN / FEATURES
(Fig. 22)
(Fig. 23)
(Fig. 24)
(Fig. 25)
(Fig. 26)
rugdoctor.com 1-800-784-3628 9

CLEANING WITH THE UPHOLSTERY TOOL (CONT)
6. Turn the machine on by pressing the POWER SWITCH down toward the
“TOOL” setting. (Fig. 27)
7. Position the UPHOLSTERY TOOL in front of the area or stain you want to
deep clean.
8. Squeeze the “SOAP” trigger on the handle to begin cleaning. (Fig. 28)
9. While squeezing the trigger, move the tool back and forth over the area
you want to clean, making sure to press the suction nozzle down into
the surface. (Fig. 29)
10. Release the “SOAP” trigger when complete, excess water can be removed
by making additional passes with the tool without squeezing the “SOAP”
trigger. This may permit faster drying.
11. Leave the machine on for 15 seconds after cleaning to allow for all of the
dirty solution to be collected into the WASTE WATER TANK.
EMPTYING THE WASTE WATER TANK
See instruction on Page 7
REFILLING THE CLEAN WATER TANK
See instruction on Page 6
STORING THE UPHOLSTERY TOOL ON THE TOOL CADDY
1. The Tool Caddy is labeled so you can wrap the upholstery tool hose securely
for storage. Also see instruction on Page 5. (Fig. 30)
2. The TOOL CADDY can be easily removed and replaced on the unit. Simply
lift up to remove. To replace back on the unit, align the connection hooks on
the back with the connection inlets on the back of the HANDLE. (Fig. 31)
CLEANING UP/STORAGE AFTER USE
After you’ve used your RUG DOCTOR DEEP CARPET CLEANER Upholstery
Tool follow these easy steps for quick clean-up and storage for your machine.
1. Turn the machine o by pressing the POWER SWITCH down toward the
“OFF” setting.
2. Unplug the POWER CORD from the outlet and wrap it around the
ROTATING CORD HOOKS.
3. Empty the CLEAN WATER TANK (if necessary), rinse and replace on
the machine.
4. Empty the WASTE WATER TANK then rinse, clean and dry before placing
back on the machine base.
a. WIDE OPENING LID opening is designed to fit your hand inside to
thoroughly clean, rinse and dry to store a fresh and clean tank. (Fig. 32)
5. Move the machine to a closet or storage place. Use the HANDLE
RELEASE lever to collapse the HANDLE for convenient and compact
storage. (Fig. 33)
HOW TO CLEAN / FEATURES (CONT)
(Fig. 27)
(Fig. 28)
(Fig. 29)
(Fig. 30)
(Fig. 31)
(Fig. 32)
(Fig. 33)
10 rugdoctor.com 1-800-784-3628

TROUBLE SHOOTING
Please do not return this product to the store.
CALL 1-800-RUGDOCT (1-800-784-3628) if problem is not resolved
rugdoctor.com 1-800-784-3628 11
Problem Possible Reason How to Fix
No Power Power cord not plugged in
Power button not pressed
Plug power cord into wall
outlet
Press unit power
button on
No / Low Spray Not pressing spray trigger
Clean Water / solution
tank is empty or low
Clean Water tank is
not seated or installed
correctly
Spray is clogged
Press spray trigger
Fill Clean Water tank with
water and solutions
Lift Up Clean Water
tank, and place back into
position
Clean spray tip
No / Low Suction Dirty Water / collection
tank Is full
Dirty Water / collection
tank is not seated /
installed correctly
Empty Dirty Water /
collection tank
Lift Up Dirty Water /
collection tank and place
back into position
Rotating Brush Doesn’t
Rotate
Not Pressing Soap and
Scrub Button
If something gets lodged
in the brush roll, Brush will
stop rotating
Press Soap and Scrub
Button on Handle
Turn Unit o and back on
to reset the brush roll
Vibrating Oscillating Brush
doesn’t vibrate or oscillate
Not Pressing Soap and
Scrub Button
If something gets lodged
in the brush roll, Brush will
stop rotating
Press Soap and Scrub
Button on Handle
Turn Unit o and back on
to reset the brush roll
No/Low Spray from the
Upholstery Tool
Not Pressing Spray Trigger
Upholstery Solution Plug
not installed correctly on
Tool Clean Port
Clean Water/Solution Tank
Empty/Low
Clean Water Tank Is Not
Seated/Installed Correctly
Press Spray Trigger
Make sure symbols are
aligned when installing
Fill Clean Water Tank with
Water and Solution
Lift Up Clean Water
tank and place back into
position
No/Low Suction from the
Upholstery Tool
Dirty Water/Collection
Tank Is Full
Dirty Water/Collection
Tank is Not Seated/
Installed Correctly
Upholstery Vacuum Plug in
not installed correctly on
the Tool Waste Port
Empty Dirty Water/
Collection Tank
Lift Up Dirty Water/
Collection tank and place
back into position
Make sure symbols are
aligned when installing

Replacement Parts Image Part #
Waste Water Tank Assembly 93276
Clean Water Tank Assembly 93277
Upholstery Tool 93270
Basic Tool Caddy 93271
REPLACEMENT PARTS
Accessories and replacement parts are available for your RUG DOCTOR DEEP CARPET
CLEANER by calling “Rug Doctor Customer Service 1-800-RUGDOCT (1-800-784-3628) or
visiting www.rugdoctor.com.
12 rugdoctor.com 1-800-784-3628

Two (2) Year Limited Consumer Warranty
Rug Doctor gives the original purchaser, who retains proof of purchase, from Rug Doctor or an
authorized Rug Doctor dealer, this limited warranty (“warranty”) for your Deep Carpet Cleaner
machine acquired for normal household use (commercial or rental use is excluded). You are
responsible to notify Rug Doctor within thirty (30) days of original purchase if any parts or
components are missing on your Deep Cleaning machine.
What Does This Warranty Cover / How Long Does The Warranty Last
Rug Doctor will, for the original purchaser, repair or replace including labor, any part that is defective
in material or workmanship within two (2) years of purchase. This warranty applies to machines used
for normal household purposes only.
What The Warranty DOES NOT Cover
The following exclusions apply to machine and part(s) failures due to: 1) normal wear and tear; 2)
machine alterations and 3) abuse or misuse of the machine, including use not in accordance with
this “Instruction Guide.” This warranty does not provide for a refund of the purchase price. For best
operating eciency and cleaning, use of Rug Doctor products is recommended. Use of the machine
for rental voids the warranty and is not permitted under Federal Law (see “UNAUTHORIZED USE”
statement below). Commercial use is excluded under this warranty except as set forth in the
“ONE YEAR LIMITED COMMERCIAL WARRANTY” below. RUG DOCTOR IS NOT LIABLE FOR ANY
CONSEQUENTIAL OR INCIDENTAL DAMAGES OF ANY NATURE INVOLVING THE PURCHASE/USE
OF YOUR CARPET CLEANING MACHINE. IN NO EVENT SHALL RUG DOCTOR’S LIABILITY EXCEED
THE PURCHASE PRICE OF THE MACHINE. SOME STATES DO NOT ALLOW THE EXCLUSION OR
LIMITATION OF INCIDENTAL OR CONSEQUENTIAL DAMAGES, SO THE ABOVE LIMITATIONS OR
EXCLUSIONS MAY NOT APPLY TO YOU. THIS IS RUG DOCTOR’S EXCLUSIVE WARRANTY FOR THIS
PRODUCT. ALL OTHER WARRANTIES, WHETHER ORAL OR WRITTEN ARE EXPRESSLY DISCLAIMED.
THE IMPLIED WARRANTIES OF A MERCHANTS’ ABILITY AND FITNESS FOR A PARTICULAR
PURPOSE, WHICH MAY ARISE BY OPERATION OF LAW, ARE LIMITED TO 2 YEARS FROM THE DATE
OF PURCHASE UNLESS APPLICABLE STATE LAW PROVIDES OTHERWISE.
Expenses
If a machine is returned to a warranty center for repair within thirty (30) days of original purchase,
Rug Doctor will pay the freight charges both to a warranty center and back to you. Thereafter, you
may be directed to take the machine to a local repair center or required to ship the machine to a Rug
Doctor warranty center should additional repairs be required during the warranty period. You will be
responsible to pay any freight charges for shipment to the warranty center for repairs occurring after
the initial thirty (30) days. Rug Doctor will pay the freight charges back to you.
How State Laws Apply
This warranty gives you specific legal rights. You may also have other rights which vary
from state to state.
How Do I Get Service Under This Warranty?
TO OBTAIN WARRANTY ASSISTANCE, please call 1-800 RUG DOCTOR (1-800-784-3628)
(8 am to 5 pm Mon - Fri CST) or e-mail consumer. support@rugdoctor.com. Rug Doctor will need
the following information in order to assist you: your name, address and telephone number, product
model and serial number, proof of purchase showing date and place of purchase. Please explain
the nature of the problem. Rug Doctor will review all the facts involved and advise you as to
recommended procedure. We recommend you keep the original carton and packing materials.
Rug Doctor, LLC
4701 Old Shepard Place
Plano, Texas 75093
E-mail: consumer. support@rugdoctor. com
Web Site: www.rugdoctor. com
Unauthorized Use
Use of this carpet cleaning machine with Rug Doctor trademarks for rental purposes is
UNAUTHORIZED and is in violation of U.S.C. Section 1114(I) and 15 U.S.C. Section 1125(a).
WARRANTY INFORMATION
rugdoctor.com 1-800-784-3628 13

deep
carpet cleaner
71491 © 2014 Rug Doctor, LLC – All rights reserved.
/