Page is loading ...

USER
MANUAL
Model Number
FCM-1 / FCM-2
Quick “How To” Videos
Visit rugdoctor.com/flexclean
for helpful instructional videos
rugdoctor.com | 1-800-784-3628
76825 © 2017 (Rev. A 11/17) Rug Doctor, LLC
®

FLEXCLEAN
®
ALL-IN-ONE FLOOR CLEANER | User Manual
2
WHAT’S IN THE BOX
The Rug Doctor FlexClean
®
All-In-One Floor Cleaner makes deep cleaning carpet AND
hard floors as easy as vacuuming. Its added versatility allows you to go “beyond carpet,
beyond clean.”
We are excited to share our latest innovation with you and want to make sure you have
all of the important information you need to operate your machine. To help you achieve
the best cleaning results, please use this easy-to-navigate user manual.
Happy Cleaning!
Screw
Main Handle
(not assembled)
THANK YOU FOR BUYING THE FLEXCLEAN
®
BY RUG DOCTOR
Machine
Soft Surface
Nozzle
Hard Surface
Nozzle
For household use only

rugdoctor.com | 1-800-784-3628
3
4 Important Safety Instructions
6 Product Overview
8 Assembly Instructions
9 How To Use Your Flow Control Dial
10 Operations
14 Maintenance and Care
16 Indicator Lights
17 Cleaning and Storing
19 Troubleshooting
20 Warranty
21 Servicing Your Machine
22 Registration & Key Tips
Manual Content

FLEXCLEAN
®
ALL-IN-ONE FLOOR CLEANER | User Manual
4
IMPORTANT SAFETY INSTRUCTIONS
USER MUST READ AND UNDERSTAND ALL INSTRUCTIONS BEFORE USING THIS TOOL AND
MACHINE. WHEN USING TOOL AND MACHINE, BASIC PRECAUTIONS SHOULD ALWAYS BE
FOLLOWED, INCLUDING THE FOLLOWING:
› Use the machine only as described in this manual. Use manufacturers recommended attachments.
› For indoor use only.
› Do not leave machine unattended when plugged in or while it is powered on. Unplug the machine when
not in use and before cleaning or servicing. Do not unplug by pulling on the cord. Unplug by pulling on
the plug.
› Use only Rug Doctor cleaning products in this machine. Refer to cleaning product section of this
manual.
› Do not allow this machine to be used as a toy. Close attention and adult supervision is necessary when
used by or near children. This machine is not intended to be used by children age 12 and under. Do not
allow children to place their body parts in or near openings or moving parts.
› Do not immerse. Use only on sealed hard floor surfaces (stone, tile, laminate, vinyl), and only on
surfaces moistened by the cleaning process. Do not use on unsealed hardwood floors.
› Do not use machine as a vacuum.
› Use caution when using hot tap water. Do not boil or microwave water to be used in this machine.
› Do not allow this machine to run dry. When the solution tank runs out, stop using and follow directions
to refill.
› Do not use with damaged cord or plug. If this machine is not working as it should, has been damaged
by dropping or has been left outdoors; stop using and take it to a service center.
› Do not pull by the cord, carry by the cord, use the cord as a handle, close a door on the cord, nor pull
the cord around sharp edges or corners.
› Do not run machine over cord. Keep cord away from heated surfaces.
› Do not handle the plug or use this machine with wet or sweaty hands.
› Do not put any objects into the opening. Do not use the machine if any opening is blocked. Keep
openings free of dust, lint, hair and anything that could reduce air flow.
› Keep hair, loose clothing, fingers and all parts of the body away from openings and moving parts.
› Turn off all controls before unplugging.
› Use extra care when cleaning on stairs.
› Do not use to pick up flammable or combustible liquids or liquids or materials such as gasoline, or
certain paints. Do not use in areas where they may be present.
› Do not use to pick up anything that is burning or smoking, such as cigarettes, matches or hot ashes.
› Do not place in or pick up anything with this machine that is caustic or toxic material, such as bleach,
ammonia, toilet bowl cleaners or drain cleaners.
› Do not clean over floor electrical outlet.
WARNING
TO REDUCE RISK OF FIRE, ELECTRIC SHOCK OR INJURY
TO PERSONS OR PROPERTY DAMAGE:
SAVE THESE INSTRUCTIONS FOR FUTURE USE

rugdoctor.com | 1-800-784-3628
5
USER MUST READ AND UNDERSTAND ALL INSTRUCTIONS BEFORE USING THIS TOOL AND
MACHINE. WHEN USING TOOL AND MACHINE, BASIC PRECAUTIONS SHOULD ALWAYS BE
FOLLOWED, INCLUDING THE FOLLOWING:
› The use of an extension cord is not recommended. Failure to follow this instruction may expose the
user to the possibility of electric shock, personal loss or injury and/or death.
› Do not operate without tanks or in any manner inconsistent with the above warnings or the operating
instructions included in this manual.
› The attachment hose is to be used only for indoor household cleaning applications using only Rug
Doctor recommended cleaning solutions.
› Always ensure float is properly installed before any wet pick-up operation.
› Product contains chemicals known to the state of California to cause cancer, birth defects and other
reproductive harm.
› Connect to a properly grounded outlet only. See “Grounding Instructions”
WARNING
Improper connection of equipment-grounding conductor can result in the
risk of electric shock. Check with a qualified electrician if you are in doubt as
to whether the outlet is properly grounded. Do not modify the plug provided
with the machine. If the plug will not fit the outlet, have a proper outlet installed
by a qualified electrician. This machine is for use on a nominal 120 volt circuit
and has a plug that looks like the plug in Figure A. Make sure the machine is
connected to an outlet having the same configuration as the plug. No adapter
should be used with this machine.
GROUNDING INSTRUCTIONS
This machine must be grounded. If the machine should malfunction or
break down, grounding provides a path of least resistance for electric
current, to reduce the risk of electric shock. This machine is equipped
with a cord having an equipment grounding conductor and grounding
plug. The plug must be inserted into an appropriate outlet that is
properly installed and grounded in accordance with the local codes and
ordinances.
SAVE THESE INSTRUCTIONS FOR FUTURE USE
Grounded
Outlet
Figure A
Grounding Pin

FLEXCLEAN
®
ALL-IN-ONE FLOOR CLEANER | User Manual
6
1. Main Handle
2. Soap & Scrub Trigger
3. Handle Base
4. Clean Water Tank Release
5. Clean Water Tank
6. Tank Handle
7. Dirty Water Tank
8. Nozzle Release
9. Nozzle
10. Handle Screw
11. Handle Connector
12. Power Cord Wrap
13. Dirty Water Cap
14. Easy Lift Handle
15. Flow Control Dial
16. Power Switch
17. Handle Release
18. Brushroll Jam Indicator
19. Low Solution Indicator
20. Brushroll
21. Brushroll Cover
22. Brushroll Lock
1
3
4
10
11
15
8
2
5
12
19
21
22
18
20
13
16
14
6
7
9
17
®

rugdoctor.com | 1-800-784-3628
7
CLEANING FORMULAS
Rug Doctor® FlexClean
®
All-In-One Floor Cleaner is engineered to easily
deep clean carpet and sealed hard floors such as stone, tile, laminate and
hardwood.
Two innovative floor cleaning solutions have been scientifically formulated to
give you the best results when using the Rug Doctor® FlexClean
®
machine.
Always use RUG DOCTOR® cleaning solutions with your FlexClean
®
All-In-One Floor Cleaner.
Other cleaning solutions may harm the machine and void the machine warranty.
Rug Doctor® All-In-One Concentrated Floor Cleaning Solution
New Rug Doctor® All-In-One floor cleaning solution is a revolutionary formula that deeply
cleans and deodorizes carpets, area rugs and sealed hardwood, tile, vinyl, laminate and
stone. This Dual Action formula is tough on ground-in dirt, grime, grease, stains and odors,
but gentle on ALL floors. Residue-free, safe for all floors and for use around kids and pets.
Rug Doctor® Pet All-In-One Concentrated Floor Cleaning Solution
When pet accidents happen, time is of the essence. Rug Doctor® Pet All-In-One floor
cleaning solution permanently removes pet stains and odors at the source on both
soft surfaces and hard floors. Pro-Enzymatic Technology eliminates urine, vomit, feces,
blood, food, perspiration and more. Residue-free, safe for all floors, and for use around
kids and pets.

FLEXCLEAN
®
ALL-IN-ONE FLOOR CLEANER | User Manual
8
5
1 3
6
Assembly
• Main Handle
• FlexClean
®
All-In-One Floor Cleaner
• Soft Surface Nozzle (carpet/rug)
• Hard Surface Nozzle (hard oor)
Your Rug Doctor® FlexClean® All-In-One Floor Cleaner comes in 4 easy-to-assemble components:
*A #2 Phillips screwdriver is required for Steps 1 and 4.
Attach the Nozzle Secure The Cord
WARNING!
DO NOT plug in your FlexClean
®
All-In-One Floor Cleaner until you are
familiar with all instructions and operating procedures.
4
Carpet Nozzle Hard Floor Nozzle
Remove Screw Line up the Hole
Use #2 Phillips
screwdriver to remove
screw in Handle
Connector.
Align the hole in the Main
Handle with the hole on the
Handle Base. Insert the Screw
and use a
#2 Phillips
screwdriver
to tighten
the Screw
by turning
clockwise.
Insert
the
Handle.
2
Insert the
Main Handle
into the
Handle
Connector.
Choose One
Attach Carpet Nozzle or
Hard Floor Nozzle as per
desired area to clean.
1. Align the nozzle tabs with
the slots in the base
(in front of the brushroll).
2. Rotate toward machine.
3. Latch the nozzle by pressing
down on the top of the nozzle
until you hear a “click.”
Wrap the cord around
the Power Cord Wrap.
Now you are ready to
clean.
1
2
3

rugdoctor.com | 1-800-784-3628
9
FLOW CONTROL DIAL
The FlexClean® All-In-One Floor Cleaner is equipped with a Flow Control System
designed to address all of your cleaning needs with one machine.
The three different FLOW CONTROL DIAL settings and usage information are
listed as follows:
QUICK DRY
USE ONLY FOR SOFT SURFACE CLEANING (carpet/area rugs).
Quick Dry mode provides a lighter clean by applying less water and cleaning solution and
reduces the drying time after cleaning (when compared to DEEP CLEAN mode).
Great for use on carpet, area rugs, upholstery, and spot cleaning.
CARPET DEEP CLEAN
USE ONLY FOR SOFT SURFACE CLEANING (carpet/area rugs).
Deep Clean mode delivers a traditional deep clean to your soft surfaces and is recommended
to achieve the best deep cleaning results.
IMPORTANT!
The Deep Clean Mode dispenses three times the solution of the Hard Floor Clean Mode.
HARD FLOOR
USE ONLY FOR SEALED HARD FLOOR CLEANING.
Delivers the perfect amount of solution and water on sealed hard floors such as stone, tile,
laminate, vinyl, and sealed hardwood.
ATTENTION! DO NOT use DEEP CLEAN mode on hard floors as it will over-wet hard floors

FLEXCLEAN
®
ALL-IN-ONE FLOOR CLEANER | User Manual
10
FILLING THE CLEAN WATER TANK
Operations:
Locate the
Clean Water Tank
Remove the
Clean Water Tank
Fill the Clean
Water Tank
Add Cleaning Solution Place the Clean
Water Tank
Now
You Are
Ready
To Clean
1 2
5 6
3
4
The CLEAN WATER TANK
is the top tank located on
the front of the machine.
Clean
Water
Tank
Dirty
Water
Tank
Push the CLEAN WATER TANK
RELEASE BUTTON and lift the
CLEAN WATER TANK in an
outward motion.
Turn the CLEAN WATER
TANK upside down.
Unscrew the CLEAN
WATER CAP by turning
counter clockwise.
Remove CLEAN WATER
CAP from the tank and
set aside.
REMEMBER
Always use Rug Doctor cleaning solutions.
Other cleaning solutions may harm the
machine and void the machine warranty.
Fill with hot tap water.
DO NOT USE BOILING WATER! DO NOT
HEAT WATER OR TANK IN MICROWAVE!
Fill the tank with HOT tap water
until it reaches the “Fill” line. Add
Rug Doctor All-In-One Cleaning
Solution as directed.
(CLEAN WATER TANK holds
approximately 1 gallon of water.)
Screw the cap back onto the CLEAN WATER
TANK by turning clockwise until completely
tightened.
Turn CLEAN
WATER TANK
right side
up. Securely
place onto the
machine. You
will hear a “click”
sound when the
tank is locked
into place.

rugdoctor.com | 1-800-784-3628
11
cleaning your carpet
Operations:
Plug In The Machine
Unwrap the POWER CORD
and insert plug into a properly
grounded outlet.
Position The Machine
Position the MACHINE onto the
desired area to clean.
Leave The Machine On
For 15 Seconds
Leave the machine on for 15 seconds
after cleaning to allow for all of the
dirty solution to be collected into
the DIRTY WATER TANK.
Select
Cleaning
Mode
Turn the FLOW
CONTROL DIAL to
the DEEP CLEAN or
QUICK DRY setting
based on desired
cleaning. Refer to
“Flow Control Dial”
instructions on PG 9.
CAUTION
Before plugging in machine, check the POWER SWITCH to make sure it is in
the “off” position.
IMPORTANT CLEANING TIP: Vacuum area with dry vacuum cleaner thoroughly before deep cleaning.
Attach Carpet Nozzle
If the CARPET NOZZLE is not attached:
1. Align the nozzle tabs with the slots in the base of
the machine.
2. Rotate NOZZLE
toward machine
3. Latch the
NOZZLE by
pressing down
on the top of the
nozzle until you
hear a “click.”
1
3 4
2
1
2
3
Release The Handle
Step on the HANDLE RELEASE
PEDAL to pull back/release the
MAIN HANDLE.
6
Handle
Release
Pedal
Turn Machine On
Push the POWER SWITCH to
“FLOOR CLEANING” position.
5
7 8
Press
Soap &
Spray
Trigger
Cleaning Your Carpets
Press the SOAP & SCRUB TRIGGER
to apply solution.
Make 2 wet passes. (1 forward,
1 back) over each area.
* For heavily soiled areas, make
up to 4 wet passes
Release SOAP & SCRUB TRIGGER approximately 6
inches from stop point to ensure solution is removed.

FLEXCLEAN
®
ALL-IN-ONE FLOOR CLEANER | User Manual
12
Press
Soap &
Spray
Trigger
Cleaning Your Hard Floors
Press the SOAP & SCRUB TRIGGER
to apply solution.
Make 2 slow wet passes
(1 forward, 1 back) over each area.
Release SOAP & SCRUB TRIGGER
approximately 6 inches from stop
point to ensure solution is removed.
cleaning your HARD FLOORS
Operations:
Plug In The Machine
Unwrap the POWER CORD
and insert plug into a properly
grounded outlet.
Position The Machine
Position the machine onto the
desired area to clean.
Leave The Machine On
For 15 Seconds
Leave the machine on for 15 seconds
after cleaning to allow for all of the
dirty solution to be collected into
the DIRTY WATER TANK.
Select
Cleaning
Mode
Turn the FLOW
CONTROL DIAL to
the HARD FLOOR
setting.
CAUTION
Before plugging in machine, check the POWER SWITCH to make sure it is in
the “off” position.
IMPORTANT CLEANING TIP: Sweep area thoroughly before deep cleaning.
To Attach HARD FLOOR NOZZLE
1. Align the nozzle tabs with the slots in the base of
the machine.
2. Rotate NOZZLE
toward machine.
3. Latch the
NOZZLE by
pressing down
on the top of
the NOZZLE
until you hear a
“click.”
1
3 4
2
1
2
3
Release The Handle
Step on the HANDLE RELEASE
PEDAL to pull back/release the
MAIN HANDLE.
6
Handle
Release
Pedal
Turn Machine On
Push the POWER SWITCH to
“FLOOR CLEANING” position.
5
7 8

rugdoctor.com | 1-800-784-3628
13
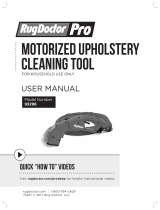
THE UPHOLSTERY TOOL
Operations:
Great to use on Upholstery, Stairs, Mattresses and Spot Cleaning.
CAUTION
Before plugging in machine, check the POWER SWITCH to make sure it is in
the “off” position.
Selecting Cleaning Mode
Turn the FLOW
CONTROL DIAL to
the DEEP CLEAN or
QUICK-DRY setting
based on desired
cleaning.
(Refer to “FLOW
CONTROL DIAL” instructions for
additional details if needed, Page 9).
Plug In The
Machine
Unwrap the
POWER CORD
and insert plug
into a properly
grounded
outlet.
Turn The
Machine On
Push the POWER
SWITCH to the
UPHOLSTERY
CLEAN
position.
Attach The
Upholstery
Tool
Insert the
UPHOLSTERY
TOOL CONNECTOR in the
UPHOLSTERY TOOL PORT,
located behind the NOZZLE.
Remove The Nozzle
If attached, remove the Nozzle from the machine:
1. Press the NOZZLE
RELEASE BUTTON
to unlock the NOZZLE.
2. Rotate the NOZZLE
away from the base of
the machine to remove.
1
3 4 5
2
Nozzle
Release
Upholstery
Ports
Position The
Upholstery Tool
Position the
UPHOLSTERY TOOL
in front of the area or
stain you want to deep
clean.
Step 1 - How To Clean
Squeeze the SPRAY TRIGGER on
the UPHOLSTERY TOOL to begin
cleaning.
Move the tool back and forth over the area you want
to deep clean. Make sure to press the top (suction)
nozzle down into the surface.
6 7
Step 2 - How To Clean
Release the SPRAY TRIGGER
Move the tool back and forth over
the same area to suck up dirty water.
When You Are Done Cleaning
Leave the machine on for 15 seconds
after cleaning to allow for all of the
dirty solution to be collected into the
DIRTY WATER TANK.
8 9

FLEXCLEAN
®
ALL-IN-ONE FLOOR CLEANER | User Manual
14
REMOVING UPHOLSTERY TOOL
Maintenance and Care:
1
4
2
Turn The
Machine Off
Turn the machine off by
pressing the POWER
SWITCH down to the
center “OFF” position.
Unplug
The Machine
Unplug the
POWER CORD
from the outlet
and wrap it
around the
POWER CORD
WRAP.
3
5 6
Remove The
Upholstery
Tool
Remove the
UPHOLSTERY TOOL
by squeezing on the
sides of the
connector and
pulling from the
UPHOLSTERY TOOL
PORT.
Attach Nozzle
Attach SOFT SURFACE OR HARD
SURFACE NOZZLE by:
1. Align the nozzle tabs
with the slots in the
base, just in front of the
BRUSH ROLL.
2. Rotate NOZZLE toward
machine.
3. Latch the NOZZLE by
pressing down on the top of the
nozzle until you hear a “click.”
Empty The
Water Tanks
Empty the CLEAN WATER
TANK and DIRTY WATER
TANK as necessary. Rinse,
dry and replace on the
machine as directed in
STORAGE INSTRUCTIONS.
You Are Ready To
Deep Clean Or Store
The Machine.
1
2
3

rugdoctor.com | 1-800-784-3628
15
EMPTYING THE DIRTY WATER TANK
Maintenance and Care:
4
1 2
Turn The
Machine Off
Press the POWER
SWITCH to the “OFF”
position.
Unplug The
Power Cord
Unplug the POWER
CORD from the outlet
and wrap it around the
POWER CORD WRAP.
3
Remove The
Dirty Water Tank
Remove the DIRTY
WATER TANK by
grasping the TANK
HANDLE and lifting
straight up.
Empty The Dirty Water
Unscrew the DIRTY WATER CAP
counter-clockwise and set aside.
Pour out the dirty water.
Rinse out the DIRTY WATER TANK
thoroughly with warm water.
Replace DIRTY WATER CAP.
NOTE: DO NOT pour into sink or
tub. Dirty water should be poured
into toilet or outside.
5
Secure The Dirty
Water Tank
Place the DIRTY
WATER TANK back
onto the machine by
setting it straight
down on the base.
IMPORTANT: Empty the DIRTY WATER TANK before the dirty water reaches the “FULL LINE.”
6
For A Deeper Clean
To clean the DIRTY WATER TANK more thoroughly:
1. Turn the DIRTY WATER TANK upside down to
locate the FLOAT CAP.
2. Unscrew the FLOAT CAP turning
counterclockwise.
3. Remove the FLOAT ASSEMBLY. Clean inside the
tank with a towel or a cleaning brush.
4. Replace the FLOAT ASSEMBLY. Firmly tighten the
DIRTY WATER CAP by turning clockwise until
tightened.

FLEXCLEAN
®
ALL-IN-ONE FLOOR CLEANER | User Manual
16
INDICATOR LIGHTS
The FlexClean®All-In-One Floor Cleaner is equipped with a helpful
indicator light system designed to quickly alert you of issues while
cleaning. The FlexClean
®
All-In-One Floor Cleaner is equipped with two
different indicator lights: BRUSH JAM and LOW SOLUTION. The two
different indicator lights are located behind the DIRTY WATER TANK.
The BRUSH JAM INDICATOR LIGHT is triggered
when everyday items (such as socks, small toys etc.)
become lodged into the BRUSH ROLL, jamming and
preventing the BRUSH ROLL from spinning. When the
machine detects a jam, the brush motor will shut off
and the BRUSH JAM INDICATOR LIGHT will illuminate.
The BRUSH JAM INDICATOR LIGHT system protects the
machine and prevents belt burn-out.
The LOW SOLUTION INDICATOR LIGHT will
illuminate if the machine detects the CLEAN WATER
TANK is depleted or empty. The LOW SOLUTION
INDICATOR LIGHT system protects the machine and
prevents pump burn-out that could occur if the
machine runs dry/without solution.
Removing Brush Roll Jam
1
2
3
Illuminated
Indicator Light
The BRUSH JAM
INDICATOR LIGHT
will illuminate if the
machine detects
a BRUSH ROLL jam.
Access the Brush Roll
Turn off the machine and unplug the machine from the
power outlet.
Remove water tanks.
Gently position the
machine on its side
to access the
BRUSH ROLL.
Remove the Jam
Gently remove jammed item
from the BRUSH ROLL.
Once jammed item is
removed, place the machine
upright. Replace both tanks,
plug in machine and press
POWER BUTTON to desired
cleaning mode.
3
Now You Are
Ready To Clean
Low Solution Indicator Light
1
Illuminated Low
Solution Light
The LOW SOLUTION
INDICATOR LIGHT
will illuminate if the
machine detects
the CLEAN WATER
TANK is empty.
2
Add Cleaning Solution
Refer to “Fill the Clean
Water Tank” Instructions
on Page 10.
Low
Solution
Indicator
Light
Brush
Roll Jam
Indicator
Light
TOP VIEW

rugdoctor.com | 1-800-784-3628
17
CLEANING AND STORING
Turn The Machine Off
Push the POWER SWITCH to the “OFF”
position.
1 2
Unplug The Power Cord
Unplug the POWER CORD from the outlet and wrap it
around the POWER CORD WRAP.
Rinse The Clean Water Tank
Press the CLEAN WATER
TANK RELEASE button and
remove the CLEAN WATER
TANK from the machine.
Rinse thoroughly with warm
water.
Allow tank to dry thoroughly
to prevent odor when
stored. Replace on the
machine when ready.
43
Empty The Dirty Water
Remove the DIRTY WATER TANK
using the TANK HANDLE.
Rinse the inside of the DIRTY
WATER TANK thoroughly with
warm water.
Allow tank to dry thoroughly to
prevent odor when stored.
Replace on the machine when
ready.
Refer to “Emptying the DIRTY
WATER TANK” instructions on Page 15
for additional deep cleaning details.
5
Store The Machine
Move the machine to a closet
or storage place.
DO NOT place or store the
machine on floors that may be
damaged by water.

FLEXCLEAN
®
ALL-IN-ONE FLOOR CLEANER | User Manual
18
HOW TO CHANGE THE BRUSH ROLL
CLEANING THE BRUSH ROLL
1
1
4
2
2
5
TURN THE
MACHINE
OFF
Push the
POWER SWITCH to
the “OFF” position
and unplug the
machine from the
grounded outlet.
TURN THE
MACHINE OFF
Push the POWER
SWITCH to the
“OFF” position
and unplug the
machine from the
grounded outlet.
GENTLY LAY THE MACHINE
DOWN ON ITS SIDE
Remove CLEAN WATER TANK and
DIRTY WATER TANK. Gently position
the machine on its side to access the
BRUSH ROLL.
REMOVE ANY DEBRIS FROM
BRUSH ROLL
REMOVE THE TANKS
Remove
the CLEAN
WATER
TANK and
DIRTY
WATER
TANK and
set aside.
UNLOCK THE BRUSH
ROLL LOCK
Turn the BRUSH ROLL LOCK to
the UNLOCK positon using coin or
screwdriver.
REMOVE BRUSH ROLL
LOCK COVER
Gently lay the machine
down on its side.
LAY THE MACHINE ON ITS SIDE
3
3
Brush Roll
Lock
6
Old Brush Roll New Brush Roll
REPLACE THE BRUSH ROLL
Remove old BRUSH ROLL and
replace with NEW BRUSH ROLL.
7
8
REPLACE BRUSH ROLL
LOCK COVER
Turn the BRUSH ROLL LOCK to
the LOCK position using a coin
or screwdriver.
MOVE MACHINE
INTO UPRIGHT
POSITION
Replace DIRTY
WATER TANK and
CLEAN WATER
TANK.
Brush Roll
Lock
9
Now You Are
Ready To Clean

rugdoctor.com | 1-800-784-3628
19
TROUBLESHOOTING
The following Troubleshooting Guide is provided to help you resolve issues that
may arise with common usage of the machine.
PROBLEM POSSIBLE REASON HOW TO FIX
NO POWER
› Power Cord not plugged in
› Power Button not turned on
› Plug Power Cord into wall outlet.
› Press Power Button to “Floor Clean or
Upholstery” position.
NO / LOW SPRAY,
MACHINE
› Not pressing Cleaning Solution
Trigger
› Clean Water Tank is empty or low
› Clean Water Tank is not locked or
installed correctly
› Valve of Clean Water Tank is clogged
› Press and hold Cleaning Solution Trigger.
› Fill Clean Water Tank with water and solution.
› Lift up Clean Water Tank, and place back into
position. Tank should click into place when
positioned properly.
› Remove valve from bottom of Clean Water Tank.
Clean with warm soapy water.
NO / LOW SPRAY,
UPHOLSTERY
TOOL
› Upholstery Tool Connection is not
installed properly
› Disconnect plastic Upholstery Tool Connector
at end of the Upholstery Hose by pinching the
sides and pulling away from the base. Reconnect
Upholstery Tool Connector. You will feel the tool
lock into place.
NO / LOW
SUCTION,
MACHINE
› Dirty Water Tank Is full
› Dirty Water Tank is not installed
correctly
› Nozzle is not properly installed
› Empty Dirty Water Tank and replace empty tank
when finished.
› Lift up Dirty Water Tank and place back into
position.
› Disconnect Nozzle. Reconnect Nozzle ensuring
the tabs are latched at the bottom and the latch
is fully engaged.
NO / LOW
SUCTION,
UPHOLSTERY
TOOL
› Upholstery Tool Connection is not
installed properly
› Kink or obstruction in Vacuum Hose
› Make sure the Upholstery Tool Connection
is fully inserted into the Upholstery Tool port.
› Unkink or remove obstruction in Vacuum Hose.
ROTATING BRUSH
DOESN’T ROTATE
› If something is lodged in the Brush
Roll, brush will stop rotating
› Turn machine off and unplug Power Cord from
outlet. Check that there is nothing stopping the
Brush Roll from rotating. The Brush Roll can be
removed by unlocking the cover with a coin or
screwdriver on the bottom of the machine.
Clean and check the Brush Roll spins freely.
Replace the Brush Roll and secure by locking
the Brush Roll cover. Then plug in the Machine
and turn the Machine on to continue cleaning.
If you are not able to resolve or have other questions call the customer service
hotline at 1-800-784-3628.

FLEXCLEAN
®
ALL-IN-ONE FLOOR CLEANER | User Manual
20
Warranty Information
Two (2) Year Limited Consumer Warranty
Rug Doctor gives the original purchaser, who retains proof of purchase, from Rug Doctor or an authorized Rug
Doctor dealer, this limited warranty (“Warranty”) for your Rug Doctor Flex Clean
®
acquired for normal household
use (commercial or rental use is excluded). You are responsible to notify Rug Doctor within thirty (30) days of
original purchase if any parts or components are missing, or if you experience any issue with your Rug Doctor
Flex Clean
®
machine.
What Does This Warranty Cover / How Long Does The Warranty Last
Rug Doctor will repair or place including labor, for the original purchaser, with proof of purchase, any part that is
defective in material or workmanship within two (2) years of original purchase; two (2) years on outer housing
parts. This warranty applies to machines used for normal household purposes only.
What The Warranty Does Not Cover
The following exclusions apply to machine and part(s) failures due to: 1) normal wear and tear; 2) machine
alterations and 3) abuse or misuse of the machine, including use not in accordance with this “User Manual.”
This warranty does not provide for a refund of the purchase price. For best operating efficiency and cleaning,
use of only Rug Doctor products is recommended. Use of the machine for rental voids the warranty and is not
permitted under Federal Law (see “Unauthorized Use” statement below). Commercial use is excluded under this
warranty except as set forth in the “ONE YEAR LIMITED COMMERCIAL WARRANTY” on the following page. Rug
Doctor is not liable for any consequential or incidental damages of any nature involving the purchase/use of your
carpet cleaning machine. In no event shall Rug Doctor’s liability exceed the purchase price of the machine. Some
states do not allow the exclusion or limitation of incidental or consequential damages, so the above limitations
or exclusions may not apply to you.
Expenses
If a machine is returned to a repair center for repair within thirty (30) days of original purchase, Rug Doctor
will pay the freight charges both to a repair center and back to you. Thereafter, you will be required to ship
the machine to a Rug Doctor repair center should additional repairs be required after the initial thirty (30) day
warranty period. You will be responsible to pay any freight charges for shipment to the repair center for repairs
occurring after the initial thirty (30) days. Rug Doctor will pay the freight charges back to you.
How State Laws Apply
This warranty gives you specific legal rights. You may also have other rights which vary from state to state.
How Do I Get Service Under This Warranty?
TO OBTAIN WARRANTY ASSISTANCE, please call 1-800 RUG DOCTOR (1-800-784-3628) (8 am to 5 pm
Mon - Fri CST) or e-mail consumer.support@rugdoctor.com. Rug Doctor will need the following information
in order to assist you: your name, address and telephone number, product model and serial number, proof
of purchase showing date and place of purchase. Please explain the nature of the problem. Rug Doctor will
review all the facts involved and advise you as to recommended procedure. We recommend you keep the
original carton and packing materials. Rug Doctor does not supply these materials if shipping the machine
is necessary.
/