12
TO ENSURE SAFETY
For installation to the bicycle, and maintenance:
• Use a brake hose/outer casing which still has some length to spare even when the
handlebars are turned all the way to either side. Furthermore, check that the shifting
lever does not touch the bicycle frame when the handlebars are turned all the way.
• Use an OT-SP sealed cable and cable guide for smooth operation.
• Grease the inner cable and the sliding portions of the outer casing before use to ensure
that they slide properly. Do not let dust adhere to the inner cable. If the grease on the
inner cable is wiped off, the application of SIS SP41 grease (Y04180000) is recommended.
• A special grease is used for the gear shifting cable. Do not use Premium Grease or other
types of grease, otherwise, they may cause deterioration in gear shifting performance.
• If gear shifting adjustments cannot be carried out, check that the rear fork ends are
aligned. Check if the cable is clean and lubricated, and if the outer casing is not too long
or short.
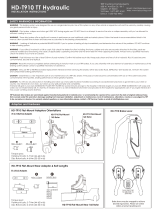
• Do not remove the lever unit.
• If the brake caliper mounting boss and the fork end are not of standard dimensions, the
disc brake rotor and caliper may touch.
• When the bicycle wheel has been removed, it is recommended that pad spacers are
installed. The pad spacers will prevent the piston from coming out if the brake lever is
depressed while the wheel is removed.
• If the brake lever is depressed without the pad spacers installed, the pistons will protrude
further than normal. Use a flat-shaped tool to push back the brake pad, while being
careful not to damage the surface of the brake pads. (If the brake pads are not installed,
use a flat-shaped tool to push the pistons straight back in, while being careful not to
damage them.) If it is difficult to push the brake pads or pistons back, remove the bleed
screws and then try again. (Note that some oil may overflow from the reservoir tank at
this time.)
• Use isopropyl alcohol, soapy water or a dry cloth when cleaning and carrying out
maintenance of the brake system. Do not use commercially available brake cleaners or
silencing agents. Such substances can cause damage to parts such as seals.
• Do not remove the pistons when disassembling and cleaning the calipers.
• If the disc brake rotor is worn, cracked or warped, it should be replaced.
• The clamp band, clamp bolt, and clamp nut are not compatible with other products. Do
not use with components that are used in other products.
The actual product may differ from the illustration because this manual is
intended mainly to explain the procedures for using the product.