Page is loading ...

Noble house Home Furnishings LLC 1
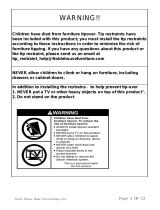
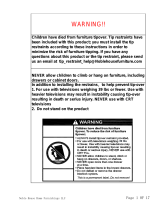
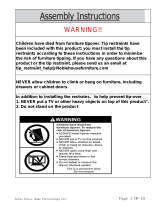
WARNING!!
Children have died from furniture tipover. Tip restraints have been
included with this product; you must install the tip restraints according to
these instructions in order to minimize the risk of furniture tipping. If you
have any questions about this product or the tip restraint, please send us
an email at [email protected]
NEVER allow children to climb or hang on furniture, including drawers or
cabinet doors.
In addition to installing the restrainsto help prevent tip-over
1. NEVER put a TV or other heavy objects on top of this product".
2. Do not stand on the product

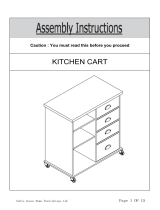
Caution : You must read this before you proceed
kitchen cart
Label
A
B
Picture Description
1
1
QTY
Top Panel
Shelf Panel
Noble house Home Furnishings LLC 2
A
B

C
D
E
F
G
H
I
J
K
1
1
1
1
1
1
1
1
1
Bottom Panel
Supprt Panel
Supprt Panel
Supprt Panel
Left Side Panel
Right Side Panel
Back Panel
Door Panel
Back Panel
Noble house Home Furnishings LLC 3
C
D
E
F
G
H
I
J
K

Drawer Front Panel
Left Panel of drawer
Drawer Bottom Panel
Drawer back Panel
Round rod
Wood Panel
Right Panel of drawer
L
M
N
O
P
Q Q
R R
1
1
1
1
1
2
1
Noble house Home Furnishings LLC 4
L
M
N
O
P

Label Picture Description QTY
11
11
10
5
2
3
6
15
Cam Bolt(M6X35mm)
Cam Nut(M15X9mm)
Screw (M5x55mm)
Dowel (M6X30mm)
Screw (M4x30mm)
Screw (M3x14mm)
Guide Rail
Back plate buckle
1
2
3
4
5
6
7
8
Noble house Home Furnishings LLC 5

Screw (M4x16mm)
Hinge
Screw (M3.5X12mm)
Knob(M6)
2
23
2
3
2
1
4
2
9
10
11
12
13
14
15
16
17
18
Noble house Home Furnishings LLC 6
1
11
wheel
wheel
Wrench
Shelf Holder
Magnet
stickers

Before
Beginning
Assembly:
Overview
This Kitchen Cart has multiple parts and may require up to 30 minutes to assemble.
To give you an overview of the Kitchen Cart parts, the above picture is to help you put
the various parts into perspective. Please read through the instructions below to
familiarise yourself with the parts and steps before assembly.
Noble house Home Furnishings LLC 7
Top Panel(A)
Door Panel(K)
Drawer Front Panel(L)
Wood Panel(Q)
wheel
Left Side Panel(H)

Step 1
Step 2
1.1
2.1 2.2
1.2
Noble house Home Furnishings LLC 8
1
2
2
!
11
11
1
A
1
1
L
A
1
1
7
17
10
17
9
9
H
K
10
10
10 10
10 55
55
M
M
N
O
O
P
2.1A ttach Magnet 17 to the Left Side Panel (H) with Screws .
Attach Magnet 17 to Door Panel ( ) with Screws .
Attach Hinge to Door Panel ( ) with Screws .
2.2)Attach Drawer Left PanelM) and Drawer Right Panel N) to the
Panel (O) with Screws .
Insert Drawer Bottom Panel (P) into Drawer Left
PanelM) .
1.2) eparate Left Guide Rails to Rails and slides.
1.2) Insert Cam Bolt into the mounting positions on T op Panel (A), Drawer Front
Panel (L) .

Step 3
3.1 3.2 3.3
Step 4
4.1 4.2
Noble house Home Furnishings LLC 9
2
2
2
2
L12
11
6
6
3
33
3
3
3
3
3
3
I
I4
4
4
F
DG
E
Attach Magnet 17 to Door Panel(k)with Screws
3.1)Insert Cam Nuts into the mounting positions on the Drawer Left Panel (M)
and Drawer Right Panel ( N ).
3.2)Attach Guide Rails t o sides of Drawer left panel (M) and Drawer Right
Panel ( N ) with Screws .
Attach handle 11 to Drawer Front Panel (L) with Screws 12.
3.3) Place Wood Panel (Q) onto Round Rods (R).
Q
Q
R
R
4.1)Attach Round Rod (R) to Right Side Panel (I) with Screws .
4.2)Attach Back Panel (F) to Right Side Panel (I) with Screws .
Attach Supprt Panel (D) to Right Side Panel (I) with Screws and Dowels .
Attach Supprt Panel (G) to Right Side Panel (I) with Screws
a nd Dowels .
Attach Supprt Panel (E) to Right Side Panel (I) with Screws and Dowels .
10
10
10 6

Step 5
5.1 5.2
Step 6
6.1 6.2
Step 7
7.1 7.2
Noble house Home Furnishings LLC 10
J
C
33
3
3
3
4
4
4
H
13
15
14
13
13
14 4
4
2
2
A
22
2
6
610 !JJJ
11
12
10
K
10
10
10
5.1)Insert Back Panel (J) into the mounting positions on Back Panel(F) and Supp rt
Board G .
Insert Bottom Panel (C) into the mounting positions on Supp rt Panel G) and Supp rt
Panel(E).
.2)Attach Left Side Panel (H) to with Screw and Dowels .
6.1)Attach wheel 13 to Side Panel ( ) with Wrench15.
Attach wheel 14 to Left Side Panel ( ) with Wrench 15.

Step 8
8.1 8.2
Noble house Home Furnishings LLC 11
Step 9
9.1 9.2
16
16
16
16
B
L
8
88
88
8
18
18
8.1) Shelf Holders 16 to the Left Side Panel (H)
Place Shelf Panel (B) on the Shelf Holders 16 .
8.2) Slide in the drawer as shown in Figure 8.2
7.1)Attach Guide Rail to Right Side Panel I with Screws
Attach Guide Rail to Left Side Panel (H) with Screws
7.2)Attach Hinges to Right Side Panel I) with Screws
Attach Knob 1 1 to Door Panel (K) with Screws 12 .
9.1Insert Back buckle 8 into the mounting positions on Back Panel (J)
9.2)Attach stickers 18 to the side of four legs of the Kitchen cart to cover the holes.
Your Kitchen cart is ready for use.
This Kitchen cart can only be used on a flat, level surface.

Noble house Home Furnishings LLC 12
/
