Page is loading ...

INTERGAS
GATEWAY
1. Remove the gateway from the packaging
Contents
5. Connect the power adapter to the gateway 6. Plug the power adapter into the wall socket
2. Remove the Ethernet cable from the packaging 3. Connect the Ethernet cable
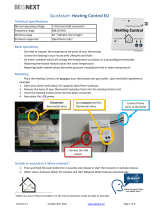
Installation manual
12. Your boiler is now linked
Login to your Intergas account from the app to pair
your gateway and the boiler. Follow the instructions
in the app.
11. Link to your boiler
If the link is successful, the first 4 indicators on the gateway
will light up. You can now operate your boiler remotely.
Note: The gateway is equipped with an auto restart function.
If the connection is interrupted for more than an hour,
the gateway will restart itself automatically.
The Intergas Gateway is simple and effective and uses its own RF wireless network to
connect to a boiler. This installation manual provides step-by-step instructions for
installing the Intergas Gateway, including verifying the RF link to the boiler ICX 120
controller and the Internet. The Intergas Gateway is compatible with the Intergas
Superflow series boilers.
Comfort Touch thermostat
Our Comfort Touch is an incredibly
easy-to-use thermostat with a sleek,
compact design.
Gateway
The gateway makes the connection
between the boiler, thermostat and
Comfort Touch app.
Comfort Touch app
The Comfort Touch app makes it
extremely easy to operate the thermostat
using a smartphone and offers various
additional functionalities and options.
9. Download the Comfort Touch app
Download the Comfort Touch app from
Google Play or App Store.
4. Remove the power adapter from the packaging
7. Five indicators will light up briefly
1 PWR: Gateway powered ON
2 WAN: Connection between gateway and Intergas server established
3 LAN: Connection between gateway and home network established
4 RF: Connection between gateway and boiler established
5: Control
12345
Make sure your smartphone and the Intergas Gateway
are using the same local network. To make the link,
3 indicators must light up.
8. Local Wi-Fi (home) network
1234 5
12345
10. Create an account
Create an Intergas
account. Follow the
instructions in the app.
Gateway
2 screws 2 wall plugsEthernet cable
Power adapter
INTERGAS
GATEWAY

FCC Part 15
This device and the ICX 120 controller device that it connects
to complies with FCC Rules Part 15 operation and is subject
to the following two conditions:
1. The device may not cause harmful interference.
2. The device must accept any interference, including
interference that may cause undesired operation of the
device.
Changes or modifications to the device, not expressly
approved by IBC, could void the user’s authority to operate
the equipment.
1.
2.
The device may not cause interference; and
The device must accept any interference, including
interference that may cause undesired operation of the
device.
Le présent appareil et le contrôleur de chaudière ICX 120
qu'il relie pour se conforme aux CNR d’Industrie Canada
applicables aux appareils radio exempts de licence.
L’exploitation est autorisée aux deux conditions suivantes:
1. l’appareil ne doit pas produire de brouillage;
2. l’utilisateur de l’appareil doit accepter tout brouillage
radioélectrique subi, même si le broillage est susceptible
d’en compromettre le fonctionnement.
Connection problems
The gateway has five illuminated indicators. These indicators display the gateway’s status.
If the link to the boiler is successful and the gateway is functioning properly,
the indicators 1 to 4 will light up. Certain indicators will be on or off in the event of a
connection problem. Below you’ll find an explanation and solution for various faults.
12345
Only the first indicator is lit
The gateway is powered ON, but there’s no connection
to the internet or boiler.
Possible causes/solutions:
- Check whether you have a working internet connection.
- Check whether your internet router (connected to the
gateway) is ON.
- Check whether the Ethernet cable is working properly.
- Check whether the Ethernet cable is inserted into the
router properly.
Indicator 1 is blinking and indicator 4 is lit
Indicators 1, 2 and 3 are lit Indicators 1, 3 and 4 are lit
Indicators 1 and 3 are lit
1234512345
Possible causes/solutions:
- Ethernet cable is not connected.
- Router/switch is switched off.
- The cable connector is not functioning properly.
A DHCP server cannot be found on your network.
Possible solutions:
- Turn on DHCP on the router.
- Configure static network settings for the gateway
(see below for instructions).
1234 5
No RF connection with the boiler.
Possible causes/solutions:
- Your boiler is not connected. Repeat the connection process.
- Try moving the gateway away from any large, metal objects.
- The RF signal is too weak. Move the gateway closer to the boiler.
- Move the gateway away from large metal objects.
- Another device is causing interference. }
Move the gateway further away from the router.
12345
There is no response from the Intergas server.
Possible causes:
- No internet connection.
- Maintenance/malfunction in the Intergas server.
The gateway has been installed with an internal web server for static IP configuration.
Ask your system administrator for the correct settings. There are two options:
1. With a DHCP network: check the administration page of your router for the device’s IP address,
which shows the MAC address for the gateway.
2. With a network without a DHCP server, the IP address is: 192.168.1.101.
Configure the LAN network interface of your computer to enable a connection to the IP address for the gateway:
- Open a browser window and go to http://<IP address> (where <IP address> is the IP address shown above).
- The welcome page for the gateway internal web server will now open.
- Select ‘Network Configuration’.
- Enter the username: admin
- Enter the password as shown on the sticker on the back of the gateway.
- Enter the required settings and click ‘Save config’.
- The gateway will now reboot with the new settings.
Static IP configuration Changing the gateway password
Use the ‘Change password’ button to change the gateway password. The existing password
(as shown on the back of the gateway), the new password (of your choice) and the confirmation of
the new password are used to make the old password invalid and the new password valid. The new
password may consist of no more than 16 characters. After clicking on ‘Save config’ and if all details
are correct, you can log in again. After logging in again correctly, a confirmation page will be shown.
Factory settings
12345
Note: any manually set network connections or personal passwords for
the gateway will be cancelled.
1. Remove the adapter from the power supply and wait 10 seconds
before plugging it back in.
2. After the indicators 1 to 5 light up, repeat step 1.
The factory settings will be restored once indicator 1 turns OFF briefly
and the remaining four indicators remain ON.
3. Repeat steps 1 and 2, if required.
842074-00
For additional information:
CANADA – HEAD OFFICE
IBC Technologies Inc.
8015 North Fraser Way, Burnaby,
BC V5J 5M8
comforttouch@ibcboiler.com
Tel. 604.877.0277
USA – HEAD OFFICE
IBC Technologies USA Inc.
1702 Taylor’s Lane, Cinnaminson,
NJ 08077
comforttouch@ibcboiler.com
Tel. 856.887.0544
INTERGAS
GATEWAY
Industry Canada Notifications
This device and the ICX 120 controller device that it
connects to complies with Industry Canada's license-
exempt RSSs. Operation and is subject to the following two
conditions:
/