B07PLBD17J

10L0L B07PLBD17J User manual

  • Hello! I've reviewed the provided installation instructions for the 10L0L DS Heavy Duty Leaf Spring. This document details the steps for installing the U-bolts and nuts on a Club Car DS golf cart, including tool requirements and parts list. I'm ready to assist with any questions you have regarding the installation process.
  • What tools are needed for installation?
    How many U-bolts are included?
    How many nuts are included?
Installation Tools Qty
9/16-inch (14mm) spanner....................1
3/4-inch (19mm) socket........................1
Jack......................................................1
Club Car DS Heavy Duty Leaf Spring
U Bolt+ Nuts Installation Instruction
International Smart Production, Global Direct Supply
Heavy Duty Leaf Spring U Bolt..............2
Nut.........................................................4
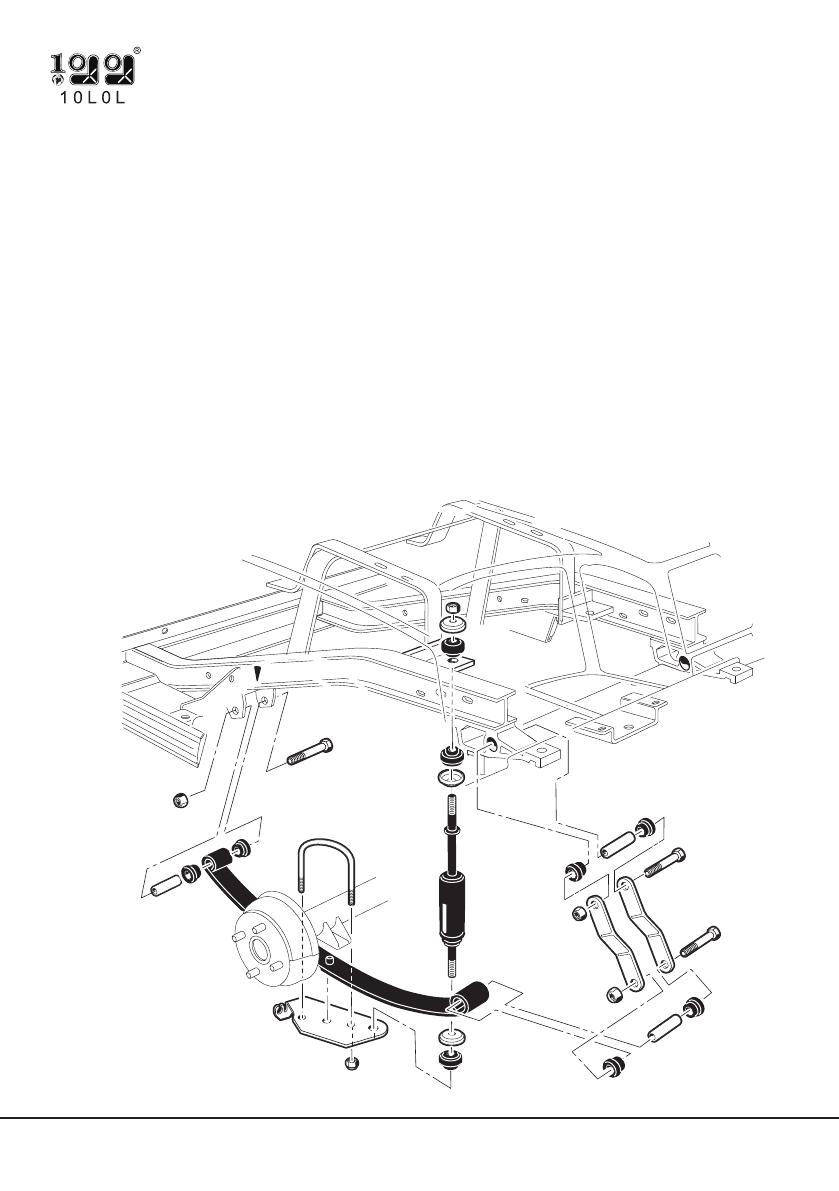
See figure 1
Contents Qty
Assembly Diagram
We are striving to build an reliable brand of golf carts parts and accessories.
Hope this manual can assist you to easier install.
For more technical support, please reach us via
Website : www.10l0l.com
Facebook : zhong zaiyang
Youtube : 10L0L
Installation Tools
1. Park the vehicle on level ground.
2. Turn the key to “OFF” position and
remove it from the switch.
3. Make sure the parking brake is set.
4. Loosen the screws of the rear tire with
the 3/4-inch (19mm) socket.
See figure 2
5. Raise the frame of the rear suspension
with the jack to hang the rear tire in the air.
See figure 3
International Smart Production, Global Direct Supply
1
2
3
Installation Steps
6. Remove the screws of the rear tire with
the 3/4-inch (19mm) socket, and remove
the rear tire; then put the tire under the
chassis (in case the jack accidently leans
or slips down)
See figure 4
7. Remove the screw of shock absorber
lower terminal with the 9/16-inch (14mm)
spanner.
See figure 5
8. Remove the shock absorber lower
terminal cushions.
See figure 6
9. Loosen the U bolt nuts with the 9/16-inch
(14mm) spanner, then remove the U bolt.
See figure 7
International Smart Production, Global Direct Supply
4
5
6
7
10. Install a new U bolt.
See figure 8
11. Install the spring pad.
See figure 9
12. Install the screws on the lower terminal
of the rear shock ahsorber with the
9/16-inch (14mm) spanner.
See figure 10
13. Install the rear wheel.
See figure 11
This all completes your installation.
International Smart Production, Global Direct Supply
9
10
11
8
/