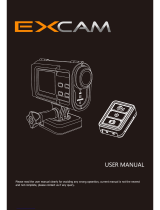
Activeon CX Gold User manual

Category
Action sports cameras
Type
User manual

Activeon CX Gold is a compact and versatile action camera that allows you to capture stunning videos and photos in various situations. With its 4K video recording capability at 30FPS, you can create ultra-high-quality videos with sharp details. The camera also offers multiple photo modes, including burst shooting and time-lapse, providing you with creative options for capturing special moments. Additionally, Activeon CX Gold features various program modes tailored to specific environments, such as water sports, diving, and winter sports, making it an ideal choice for outdoor enthusiasts.

Activeon CX Gold is a compact and versatile action camera that allows you to capture stunning videos and photos in various situations. With its 4K video recording capability at 30FPS, you can create ultra-high-quality videos with sharp details. The camera also offers multiple photo modes, including burst shooting and time-lapse, providing you with creative options for capturing special moments. Additionally, Activeon CX Gold features various program modes tailored to specific environments, such as water sports, diving, and winter sports, making it an ideal choice for outdoor enthusiasts.

USER MANUAL
www.activeon.com
1
2
4
5
6
7
8
10
12
14
17
17
18
18
20
21
22
23
25
25
26
28
CAUTION
FCC RADIO FREQUENCY INTERFERENCE STATEMENT
RF Exposure Information (SAR)
Warranty
Table Of Contents
1. Name of each part
2. How to use
3. Start the camera
4. LCD screen shot
5. Graphical icon description
6. Mode menu
7. Video mode
8. Photo mode
9. Playback mode
10. Setup mode
11. Quick menu
12. Recharging Battery
13. Smart phone control
14. Connect ACTIVEON CX GOLD to smartphone(using ACTIVEON App)
15. Transferring data to computer
16. Firmware update
17. Features and specication
18. Inside the Package
1. Name of each part
1
ENGLISH
www.activeon.com
* Please read this manual carefully before the use!
Mode / Navigation Internal MIC
Power / Shutter LED Indicator
(Top, Bottom, Front, Back)
LCD Screen
Li-ion battery slot
HD OUT
* Please use “Micro HDMI" cable on HD OUT port.
* Cable not included.
Mini USB port
microSD Card Slot
Tripod hole (Bottom)
Speaker
2
2. How to use
ACTIVEON CX GOLD IS OPERATED BY TWO BUTTONS. ( button , button )
( )BUTTON FEATURES “ Power, Shutter and Enter”.
( )BUTTON FEATURES ”Mode change, Program change and Navigator”.
The feature of buttons are dened as below table.
Button operation
Press ( ) button to start video recording or photo shoot
(Video / Photo / Burst / Timelapse)
Power On / O
REC Start / Stop
Conrm
setting menu
Function Button Description
Within user setup mode, press ( ) button to enter setting
menu in each category
Press ( ) button and hold for 2 seconds
* If Auto Power o is set, the camera will automatically shut down in 3 minutes
when there is no operation.
Mode change
Navigator
Program mode
Press the ( ) button to switch modes
(Video> Photo>Playback>Setup)
Press the ( ) button and hold for 2 seconds to enter Program mode
Press the ( ) button to move select bar on OSD menu or change setting
3
If you want to use the CX Gold display
responds to touch-based gestures like
tapping and swiping.
Touch operation
Tap Tap & Hold
Double-Tap Swipe up, down,
left, right
Double-Tap
You can easily access the menu
Swipe Up
Swipe left
Swipe Right
<Program menu>
<Quick menu>
<Mode menu>
<Zoom>
4
How to unlock the Touch operation
CX Gold includes special power saving features.
1. Auto Backlight Dimming : When you set [Auto LCD O ] , auto backlight dimming will start at mid-
point of your setting time.
2. Quick LCD OFF : Tap and hold the screen for 2-3 seconds. LCD will go o automatically.
* For turning on the LCD again, please press the ( ) button once.
* If lock image appears, please refer to How-to-Unlock-the-Touch-Operation guide.
Power saving features
If you want to use touch operation, tap
the screen rst.
And then it will show " Lock image".
Tap and hold the "Lock image" until the
live screen is ready.
3. Start the camera
1. Open the battery cover and insert ACTIVEON CX GOLD Li-ion battery.
2. Insert microSD Card on the microSD Card slot. (The camera will not record when microSD Card is not inserted.)
3. Press the () button and hold for two seconds. ( The camera will turn on and LCD screen will display live screen .)
Recording mode / Program status
Recording time information
WiFi status
Battery status
Program/ Mode/ Quick Mode
Resolution/FPS/FOV/Interval info
Quick REC/ Eect Setup /AE
Double-tap the screen to activate zoom
function
Recording mode
Recording time
WiFi
Battery
Swipe icon
Recording Info
Function Zone
Zoom
FunctionNo. Description
5
4. LCD screen shot
⑥ ⑦
③ ④
⑤ ⑤
③ ④
⑤ ⑤
Photo screen
Video screen
5. Graphical icon description
6
Video mode Photo mode Playback Setup
Video Program
Time lapse
Manual
Winter Sports
Indoor
Water sports
Riding
Night
Diving Manual Outdoor WiFi Quick REC Beep Upside Down Speaker MIC Brightness
Indoor
Portrait Landscape NightOutdoor
Burst Video Setup Photo Setup Effect Setup General Setup ConnectionSelf-timer Time lapse
Photo Program
Quick menu
1x 2x 3x 4x
1x 2x 3x 4x
Looping
Zoom
7
6. Mode menu
For Touch screen
1. Swipe left. Then Mode menu screen will appear.
2. Tap the mode which you wish to enter among Video, Photo, Playback or Setup.
Mode menu is available with both button and touch screen.
For Button : There are 4 modes in “Mode menu” - Video, Photo, Playback and Setup.
1. Press () button once. Then Video mode icon will appear
2. Press () button once again to shift mode you want among Video, Photo,
Playback and Setup.
3. Wait for a one second, the selected menu will show up automatically.
4. For Playback and Setup mode, Press () button to see more options.
8
1. After the camera is turned on, Press() button to start video recording.
2. When the camera starts to record, LED light blinks* and shows recording
time on the screen.
3. Press() button to stop recording.
4. You can adjust video settings in Video Setup”.
* If LED OFF option is selected in General setup, LED light will not blink.
Screen shot of using button
Screen shot of using touch screen
7. Video mode
Time Lapse-video
Captures images in set intervals and creates a Time lapse video le.
(0.5 SEC/1 SEC/3 SEC/5 SEC/10 SEC/30 SEC/60 SEC)
Looping
Continuously records a video until you stop.
** Maximum video le capacity is 4GB. If the le size is over the looping space, the camera will
overwrite current recording le.
Zoom
Double-tap shortly on live screen, zoom function will appear.
After 3sec the zoom menu automatically disappear and save value
during recording. (x1/x2/x3/x4) Double-Tap
9
Program menu
Program menu provides fast and simple camera eect settings based on your
environment. Program menu is available with both button and touch screen.
For button
1. At the Video mode, press and hold () button for two seconds.
Then Program menu icon will appear.
2. Press () button once again to shift the mode you want.
3. Wait for a one second, the selected menu will show up automatically.
For touch screen
1. At the Video mode, swipe right. Then Program menu screen will appear.
2. Tap the mode you want.
Manual
Rollback to previous setting before
the Program mode
Water sports
For Recording on the water or beach
Diving
For Recording under the Water
Winter sports
For recording on the Snow
Riding
For Recording Speedy Activity
Outdoor
For Recording Outdoor with strong
shine
Indoor
For Recording Indoor place
Night
For Recording Night time
10
You can also change mode by using touch screen more easily.
1.Swipe left to change mode.
2. Tap Photo icon.
3. Press () button to start photo shooting.
Time Lapse-photo
Captures images in set intervals and creates a
Time lapse photo le.
(0.5 SEC/1 SEC/3 SEC/5 SEC/10 SEC/30 SEC/60 SEC)
Zoom(x1/x2/x3/x4)
Double-tap shortly on live screen, zoom function
will appear. After 3sec the zoom menu automatically
disappear and save zoom setting during recording.
Burst
Photo burst shooting.
(6/1sec)
Self-timer
Captures an image after a
set time.
(5 SEC/10 SEC/15 SEC)
8. Photo mode
Please change your mode into Photo mode.
Press () button to change into Photo mode.
1. Press () button. The mode menu will appear on your LCD screen.
2. Press () button once again, the camera will change into Photo mode.
3. After 1 sec, the mode menu will disappear from LCD screen automatically.
Then you can start photo shooting.
4. You can adjust detailed photo settings in Setup menu.
Screen shot of using button
Screen shot of using touch screen
11
Program menu
Program menu provides fast and simple camera eect settings based on your
environment. Program menu is available with both button and touch screen.
For button
1. At the Video mode, press and hold () button for two seconds.
Then Program menu icon will appear.
2. Press () button once again to shift the mode you want.
3. Wait for a one second, the selected menu will show up automatically.
For touch screen
1. At the Video mode, swipe right. Then Program menu screen will appear.
2. Tap the mode you want.
Manual
Rollback to previous setting before
the Program mode
Landscape
For Shooting Outdoor with strong
shine
Outdoor
For Shooting Outdoor with strong
shine
Indoor
For Shooting Indoor place
Portrait
For Shooting Portrait
Night
For Recording Night time
1/34
00:16
1
Sorting function provides 3 options :
All (both video & photo), Video and Photo
Select to delete a le. Multiple les can be deleted at once.
File IDX number or Selected le quantity / Total le quantity
Back button
Thumbnail image
File type
Recording Time(For video le) or Picture quantity(For photo le)
Swipe left or right to go into next page.
9. Playback mode
Please change the mode into Playback mode.
User can view recorded video or photo on the screen.
Press () button to select control panel on top menu.
While the le is playing, you can call the play control panel by pressing () button.
Icon Description
12
13
PLAYBACK (Photo)
PLAYBACK (Video)
File type
Playback Time / Total time
Battery remaining
Scroll bar
Delete / Back
Prev. le / Pause / Next le
IconNo. Description
With one tap, you can hide the control bar.
When you tap the screen once again,
the control bar will appear.
You can see all photo les with slide
show function.
*Time lapse & burst photo will only show
the rst picture.
File type
Playback Time / Total time
Battery remaining
Delete / Back
Prev. le / Pause / Next le
IconNo. Description
14
Please change the mode into Setup mode.
Able to choose more options with Setup mode.
Video Setup : Provides detailed video recording
options
Photo Setup : Provides photo shooting options.
Eect Setup : Provides eect setup options for
shooting.
General Setup : Provides general camera setup
options.
Connection : Provides WiFi function.
10. Setup mode
Screen shots of using button & Touch screen
Video Setup Mode/Resolution/FPS/FOV/Video Quality/Interval
Mega Pixel/FOV/Picture Quality/Interval
WiFi/WiFi Info
Control/Beep/LED indicator/Quick REC
/Auto LCD OFF/Auto Power OFF
/Screen Lock/ TV Out/Time Setup
/Memory Format/Default/Software Info
Filter/AE Meter/Zoom/EV/White Balance
/ISO/Upside Down/ Time Stamp
Photo Setup
Eect Setup
General Setup
Connection
Setup Option
15
10-1. Setup options
Manual/ Looping/ Time Lapse
1080P/ 720P/ 480P
240/120/60/30
0.5/ 1 / 3 / 5 / 10 /30 / 60 (sec)
Super wide/ Wide/ Medium/ Narrow
MODE
RESOLUTION
FPS
T/LAPSE INTERVAL
FOV
S-Fine/ Fine/ NormalVIDEO QUALITY
Function Description
Manual/Time Lapse/Burst/Self Timer
16MP / 12MP / 8.5MP/ 7MP
Super wide/ Wide/ Medium/ Narrow
5/ 10 / 15 (sec)
S-Fine/Fine/Normal
MODE
MEGA PIXEL
FOV
Self Timer INTERVAL
Picture Quality
0.5/ 1 / 3 / 5 / 10 /30 / 60 (sec)T/LAPSE INTERVAL
Function Description
16
Mic/Speaker/ LCD Brightness
ON/OFF
OFF/TWO/FOUR
OFF/ 0sec/ 3sec/ 5sec
OFF/30sec/ 1min/ 5min
OFF/ 5min/ 10min/ 30min
DATE - TIME
YES/NO
NTSC/PAL
OFF/ 5sec/ 10sec/ 30sec
YES/NO
CONTROL
BEEP
LED INDICATOR
AUTO LCD OFF
DEFAULT
SOFTWARE INFO
MEMORY FORMAT
TIME SETUP
TV OUT
Screen lock
AUTO POWER OFF
QUICK REC
Function Description
CENTER/AVERAGE/SPOT
x1/ x2/x3/x4
-2.0/-1.0/0/+1.0/+2.0
AUTO/3000K/5500K/6500K
AUTO/100/200/400/1600/3200
ON/OFF
ON/OFF
O/Black&White/Warm/Negative/Sepia/Red/Green/BlueFilter
AE Meter
Zoom
White Balance
Time Stamp
Upside Down
ISO
EV
Function Description
17
11. Quick Menu
Quick menu provides easy access to your
most often used menu.
Quick menu is only available with touch
screen.
1. Swipe up. Then Quick menu screen will
appear.
2. Tap the menu you wish to enter.
12. Recharging battery
LCD will show the low battery icon( ) when the battery is too low and close to the cut o level.
The camera will save the le automatically until it is turned o. You must recharge your battery to restart.
It will take about 3.5 hours for a full charge by USB port.
You can use a Battery Charger (optional accessory) for fast charging.
ON/OFF
SSID-PW
WiFi
WiFi INFO
Function Description
ON/OFF
ON/OFF
ON/OFF(last setting value)
ON/OFF
ON/OFF(last setting value)
CONTROL BAR
WIFI
UPSIDE DOWN
QUICK REC
SPEAKER
Brightness
MIC
BEEP
Function Description
1. Turn o the camera.
2. Connect the camera to your computer via USB cable.
3. LED will turn on indicating battery is being charged.
4. LED will be turned o when it is fully charged.
Utilizing WiFi APP function of ACTIVEON, user can control the camera through smartphone.
Compatible with iOS and Android OS.
Before connecting the camera, download ACTIVEON’ application from smartphone app store.
Search for ‘ACTIVEON’ in Apple App Store or Google Play Store.
Turn on WiFi APP’ function in ACTIVEON CX Gold.
The camera screen will display Waiting for connection
* While smartphone is connected to the camera, camera button operation will be disabled.
* You can take a video and photo, and adjust camera setting on ‘ACTIVEON’.
* ACTIVEON’ features will be upgraded through application updates on your smartphone.
14. Connect ACTIVEON CX GOLD to smartphone(using ACTIVEON App)
On your camera
13. Smartphone control
Waiting for connection
18
  • Page 1 1
  • Page 2 2
  • Page 3 3
  • Page 4 4
  • Page 5 5
  • Page 6 6
  • Page 7 7
  • Page 8 8
  • Page 9 9
  • Page 10 10
  • Page 11 11
  • Page 12 12
  • Page 13 13
  • Page 14 14
  • Page 15 15
  • Page 16 16
  • Page 17 17
  • Page 18 18
  • Page 19 19
  • Page 20 20
  • Page 21 21
  • Page 22 22
  • Page 23 23
  • Page 24 24
  • Page 25 25
  • Page 26 26
  • Page 27 27
  • Page 28 28
  • Page 29 29
  • Page 30 30
  • Page 31 31
  • Page 32 32
  • Page 33 33

Activeon CX Gold User manual

Category
Action sports cameras
Type
User manual

Activeon CX Gold is a compact and versatile action camera that allows you to capture stunning videos and photos in various situations. With its 4K video recording capability at 30FPS, you can create ultra-high-quality videos with sharp details. The camera also offers multiple photo modes, including burst shooting and time-lapse, providing you with creative options for capturing special moments. Additionally, Activeon CX Gold features various program modes tailored to specific environments, such as water sports, diving, and winter sports, making it an ideal choice for outdoor enthusiasts.

Ask a question and I''ll find the answer in the document

Finding information in a document is now easier with AI