Page is loading ...

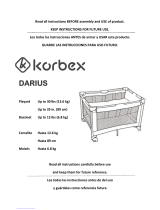
Pack 'n Play
®
Care Suite
™
Playard
Corralito Pack 'n Play
®
Care Suite™
©2020 Graco NWL0000790966K 4/20
Read all instructions BEFORE assembly and USE of product.
KEEP INSTRUCTIONS FOR FUTURE USE.
Lea todas las instrucciones ANTES de armar y USAR este
producto. GUARDE LAS INSTRUCCIONES PARA USO FUTURO.
See back page for set up quick guide.
Vea la página posterior para encontrar la guía de
instalación rápida.

2
2-A Parts List • Lista de piezas
1 WARNING • ADVERTENCIA Pages • Páginas 3-6
2 Features • Características Page • Página 7
3-A Playard Set Up • Armado del corralito
3-B To Fold • Para plegar
3-C To Cover • Para cubrirlo
3 Playard • Corralito Pages • Páginas 8-11
5-A Care and Maintenance • Cuidado y mantenimiento
5-B Replacement Parts • Warranty Information
Piezas de repuesto • Información sobre la garantía
5-C Product Registration • Registro del producto
5 Care • Cuidado Pages • Páginas 28-30
4-A Playard Bassinet • Moisés del corralito
4-B Changing Area • Los Cambiadores
4-C Newborn Seat • Asiento para recién nacidos
4-D Mesh Storage Bag • Bolsa de almacenamiento de malla
4 Accessories • Accessorios Pages • Páginas 12-27

3
Failure to follow these warnings and the
instructions could result in serious injury or death.
Setting Up the Playard
• THIS PRODUCT REQUIRES
ADULT ASSEMBLY.
• Keep fingers clear of top
corners during setup. Be sure
playard is completely set up
before use. Check that the four
top rails are completely latched,
the center of the floor is pushed
down, the mattress pad is flat,
and the straps are securely
fastened to the bottom of the
unit. Always follow the
instructions in the owner’s
manual to set up the playard.
• Never use this product if there
are any loose or missing
fasteners, loose joints, broken
parts or torn mesh. Check
before assembly and periodically
during use. Contact Graco at
1-800-345-4109 for
replacement parts and
instructions if needed. Never
substitute parts.
Using the playard
• The playard is for playing or
sleeping. When used for playing,
never leave child unattended and
always keep child in view. When
used for sleeping, you must still
provide the supervision
necessary for the continued
safety of your child.
• Always keep the playard away
from hazards in the area that
may injure your child.
• When child is able to pull to
standing position, remove large
toys and other objects that could
serve as steps for climbing out.
• Stop using this product when
your child reaches 35 in. (89
cm) in height, weighs more than
30 lb (14 kg), or is able to climb
out.
• Do not modify playard or add
any attachments that are not
listed in the owner’s manual,
including an add-on bassinet.
• Child can become entrapped
and die when improvised netting
or covers are placed on top of a
playard. Never add such items
to confine child in playard.
• NEVER leave child in product
with side lowered. Be sure side
is in raised and locked position
whenever child is in product.

4
Avoiding Suffocation
Hazards
• Unlike cribs that have rigid
sides, the playard has flexible
sides. As a result, the playard
mattress pad is specially
designed to prevent suffocation.
The playard mattress pad has a
solid base, a certain length and
width, and is less than one inch
thick in order to meet safety
standards. Using a thicker or a
different sized mattress pad may
allow a child’s head to get
between mattress pad and the
side of the playard causing
suffocation.
Infants can suffocate
• In gaps between a mattress
pad too small or too thick
and products sides
• On soft bedding.
NEVER add a mattress pad,
pillow, comforter or padding.
Use ONLY mattress pad provided
by Graco. Mattress pad
dimension: 27”x 39” (68.5 cm x
99 cm).
• To reduce the risk of SIDS,
pediatricians recommend healthy
infants be placed on their backs
to sleep, unless otherwise
advised by your physician.
• Never use plastic shipping bags
or other plastic film as mattress
pad covers not sold and
intended for that purpose. They
can cause suffocation.
• If a sheet is used with the
mattress pad, use only the one
provided by Graco that is
specifically designed to fit the
dimensions of the mattress pad.
• NEVER use a water mattress
pad with the playard.
Avoiding Strangulation
Hazards
• Strings and cords can cause
strangulation. Keep strings and
cords away from child.
• NEVER place the playard near
a window where cords from
blinds or drapes can strangle
a child.
• NEVER hang strings on or
over the playard.
• NEVER place items with a
string around a child’s neck,
such as hood strings, pacifier
cords, etc.
• NEVER attach strings to toys.
This product is not intended
for commercial use.

5
Si no se obedecen estas advertencias y las instrucciones,
podría resultar en lesiones graves o la muerte.
Armar el corralito
• ESTE PRODUCTO REQUIERE
QUE LO ARME UN ADULTO.
• Mantenga los dedos lejos de las
esquinas superiores mientras
dure la instalación. Asegúrese
que el corralito esté
completamente instalado antes
de usarlo. Verifique que las
cuatro barandas superiores
estén completamente trabadas,
el centro del suelo esté abajo, la
almohadilla del colchón esté
plana y las correas estén
sujetadas apretadamente al
fondo de la unidad. Siempre siga
las instrucciones del manual del
propietario para armar el
corralito.
• Nunca use este producto si hay
sujetadores sueltos o que faltan,
uniones flojas, piezas o rejillas
rotas. Verifique antes del armado
y periódicamente durante el uso.
De ser necesario, comuníquese
con Graco al 1-800-345-4109
para obtener piezas de repuesto
e instrucciones. Nunca sustituya
las piezas.
Usar el corralito
• El corralito es para jugar o
dormir. Cuando se lo usa para
jugar, nunca deje al niño sin
atención y mantenga siempre a
su niño a la vista. Cuando se lo
usa para dormir, debe
proporcionar la supervisión
necesaria para mantener la
continua seguridad de su niño.
• Siempre mantenga el corralito
lejos de peligros que pudieran
dañar a su niño.
• Cuando el niño pueda ponerse
de pie, quite los juguetes
grandes y otros objetos que
pueden servir de escalones para
salir.
• Deje de usar el producto
cuando su niño alcance las
35 pulgadas (89 cm) de altura,
pesa más de 30 libras (14 kg),
o en cualquier momento que le
sea posible salirse.
• No modifique el corralito ni
agregue otra pieza que no se
mencione en el manual del
propietario, incluyendo un
moisés adicional.
• El niño puede quedar atrapado y
morir cuando se ponen fundas o
redes improvisadas arriba del
corralito. Nunca agregue dichos
artículos para encerrar al niño
en el corralito.
• NUNCA deje al niño en el
producto cuando el lado esté
bajado. Asegúrese que el lado
esté cerrado y subido cuando el
niño esté en el producto.
ADVERTENCIA

6
Para evitar el riesgo de
asfixia
• Al contrario de las cunas que
poseen costados rígidos, el
corralito posee costados
flexibles. Como resultado, la
almohadilla del colchón del
corralito fue especialmente
diseñada para prevenir la asfixia.
La almohadilla del colchón del
corralito tiene una base sólida,
cierta longitud y ancho y tiene
menos de una pulgada de
espesor para cumplir con las
normas de seguridad. Usar una
almohadilla del colchón más
espesa o de tamaño diferente
podría permitir que la cabeza del
niño quede entre la almohadilla
del colchón y el costado del
corralito causando la asfixia.
Los bebés pueden asfixiarse
• En los huecos entre una
almohadilla del colchón
demasiado pequeña o
demasiado gruesa y los
costados del producto
• En ropa de cama blanda.
NUNCA agregue una almohadilla
del colchón, almohada, edredón o
acolchado. Use SOLAMENTE la
almohadilla del colchón
proporcionada por Graco.
Dimensiones del colchón:
27” x 39” (68.5 cm x 99 cm)
• Para reducir el riesgo del SIDS,
los pediatras recomiendan que
los bebés con buena salud sean
puestos a dormir sobre la
espalda, a menos que su
médico le indique lo contrario.
• Nunca use las bolsas de envío
de plástico ni otras películas de
plástico como fundas de la
almohadilla del colchón que no
se venden ni fueron fabricadas
para dicho propósito. Pueden
provocar la asfixia.
• Si se usa una sábana con la
almohadilla, use solamente la
provista por Graco o una que
esté específicamente diseñada
para las dimensiones de la
almohadilla del colchón.
• NUNCA use una almohadilla
para colchón de agua en el
corralito.
Para evitar el riesgo de
estrangulación
• Cuerdas y cordones pueden
provocar estrangulación.
Mantenga cuerdas y cordones
lejos de su hijo.
• NUNCA ubique el corralito
cerca de ventanas donde
cordones o cortinas puedan
estrangular a su bebé.
• NUNCA cuelgue cuerdas
sobre el corralito.
• NUNCA ponga objetos con
cuerda alrededor del cuello de
su hijo, como gorros con
cordón, sujeta chupetes,etc.
• NUNCA amarre cuerdas a los
juguetes.
Este producto no está diseñado
para uso comercial.
ADVERTENCIA

7
This model may not include some
features shown below. Check
that you have all the parts for this
model BEFORE assembling your
product. If any parts are missing,
call Customer Service
1-800-345-4109.
No tools required.
Este modelo podría no incluir algunas de
las características que se indican a
continuación. Verifique que tenga todas
las piezas de este modelo ANTES de
armar su producto. Si falta alguna pieza,
llame a Servicio al Cliente al
1-800-345-4109.
No requiere herramientas.
ALL MODELS • TODOS LOS MODELOS
2-A Parts list • Lista de piezas
2X
A B C
D
E
F
G
J
Toy styles vary
Los estilos de los juguetes
pueden variar
K
2X
L
H
I
A. Playard • Corralito
B. Mattress Pad • Colchón
C. Carry Bag • Bolsa de transporte
D. Bassinet • Moisés
E. Newborn Seat • Asiento para
recién nacidos
F. Newborn Seat Frame • Armazón
del asiento para recién nacidos
G. Changing Area • Cambiador
H. Changer Rails with Kickstands
• Barandas del cambiador con
soporte
I. Changer Rails with Plastic
Corner • Barandas del
cambiador con esquina de
plástico
J. Changer Attachment Tubes
• Tubos de sujeción del
cambiador
K. Storage Bag • Bolsa de
almacenamiento
L. Toys (styles vary) • Juguetes
(Les modèles varient)

8
3-A Playard Setup • Armado del corralito
SNAP!
¡CRAC!
SNAP!
¡CRAC!
2. Tire hacia arriba las barandas
laterales del medio arriba del
botón hasta que los cuatro
costados estén trabados. NO
empuje el centro hacia abajo
todavía.
2. Pull up on side rails in middle
above push-button until all four
sides are locked. DO NOT push
center down yet.
3. Cuando instale, trabe las
barandas ANTES de bajar el
centro. Asegúrese que las
barandas superiores hayan
quedado rígidos. Si no es así,
tírelas hacia arriba nuevamente
hasta que estén bien rígidos. Si
las barandas superiores no han
enganchado, levante el centro del
corralito aún más arriba.
3. When setting up, lock rails
before lowering center.
Be sure top rails have become
rigid. If not, pull up again until
they are rigid. If top rails do not
latch, lift the center of the floor
higher.
1. Desconecte las correas que
sujetan el colchón alrededor del
corralito. Saque el colchón del
corralito.
1. Disconnect straps holding
mattress around playard. Remove
mattress from around playard.
A. Playard
• Corralito
B. Mattress Pad
• Colchón

9
4. Agarre un costado de la unidad y
empuje el centro del piso hacia
abajo hasta que quede trabado en
su lugar con seguridad.
4. Hold one end of the unit up and
push the center of the floor down
until locked securely into place.
5. Use siempre la almohadilla del
colchón con el lado blando hacia
arriba.
5. Always use mattress pad soft
side up.
6. Pase las cuatro correas con
broches de las esquinas de la
almohadilla del colchón del
corralito por el fondo del
corralito. Envuélvalas alrededor
del tubo y sujete el broche al
tubo. Repita el proceso en todas
las esquinas.
6. Pull the four snap straps on
corners of playard mattress pad
through bottom of playard. Wrap
around the tube and fasten snap
onto the tube. Repeat on all
corners.
SNAP!
¡CRAC!

10
2. DO NOT unlock top rails yet. Pull
the center of the playard floor up with
the tab in the middle of the playard.
Center of floor must be halfway up
before top rails will unlock.
2. NO destrabe las barandas
superiores todavía. Tire el centro del
piso del corralito hacia arriba usando
la lengüeta que está en el medio del
corralito. El centro del piso debe estar
a mitad camino antes de que las
barandas superiores se destraben.
3-B To Fold • Para plegar
1. Libere las correas en el fondo del
corralito. Saque completamente la
almohadilla del colchón del corralito.
1. Release straps on bottom of playard.
Pull mattress pad fully out of
playard.
3. Center of floor must be up.
a. Lift up slightly on the top rail.
b. Push in on the button
located on the side of the top rail
to release the two tubes.
c. Push down.
d. Repeat on all four rails until
all tubes are released.
• If top rails do not unlatch, DO NOT
FORCE. Lift the center of the floor
higher.
• Both tubes must be released for
the top rail to fold.
3. El centro del piso debe estar
arriba.
a. Levante suavemente la baranda
superior.
b. Empuje el botón en el lado de
la baranda superior para soltar
los dos tubos.
c. Empuje hacia abajo.
d. Repita el proceso en las cuatro
barandas hasta que haya
liberado todos los tubos.
• Si las barandas superiores no se
destraban, NO LAS FUERCE.
Levante el centro del piso hacia
arriba aún más.
• Ambos tubos deben ser soltados
para que la baranda superior pueda
plegarse.

11
4. Do not force. If unit will not fold,
look for a partially latched top rail.
Squeeze the push-button to release
the rail.
4. No lo fuerce. Si el corralito no
se pliega totalmente, fíjese si una
baranda superior esté
parcialmente enganchada.
Apriete el botón a presión para
soltar la baranda.
3-C To Cover • Para cubrir
1. Cubra la unidad con la manija
hacia fuera.
1. Cover unit with handle out.
2. Ciérrela con el cierre.
2. Zip together.
C. Carry Bag
• Bolsa de
transporte
5. Envuelva el colchón alrededor
corralito y sujete las correas.
5. Wrap mattress around playard
and fasten straps.

12
4 Accessories
•Accessorios
4
4
A
A
c
c
c
c
e
e
s
s
s
s
o
o
r
r
i
i
e
e
s
s
•
•
A
A
c
c
c
c
e
e
s
s
s
s
o
o
r
r
i
i
o
o
s
s
4-A Bassinet Set Up • Armado del moisés
WARNING
SUFFOCATION HAZARD Infants have suffocated:
• In gaps between extra padding and side of the bassinet,
and
• On soft bedding.
Use ONLY mattress pad provided by Graco. NEVER add a pillow,
comforter or another mattress pad for padding.
• FALL HAZARD: To help prevent falls, do not use this product when
the infant begins to push up on hands and knees or weighs over
15 lb (6.8 kg), whichever comes first.
• Use bassinet with only one child at a time.
• Never place a child under the bassinet.
• The bassinet must be fully assembled and installed, including four
metal tubes, eight clips and mattress pad, before using. Do not
modify bassinet or add any attachments that are not listed in the
owner’s manual.
• DO NOT store the bassinet in the product when using in playard
mode.
• To help prevent heat build-up inside the playard and to avoid
overheating your child, when using the bassinet DO NOT
use an outdoor canopy.
• To reduce the risk of SIDS, pediatricians recommend healthy
infants be placed on their backs to sleep, unless otherwise advised
by your physician.
• If a sheet is used with the mattress pad, use only the one provided
by Graco that is specifically designed to fit the dimensions of the
mattress pad.
• Never place child in bassinet while seat or changer is attached.
ADVERTENCIA
PELIGRO DE ASFIXIA Bebés se han asfixiado:
• En los huecos entre el acolchado adicional y el costado del
moisés, y
• En ropa de cama blanda.
Use SOLAMENTE la almohadilla del colchón provista por Graco.
NUNCA agregue un almohadón, edredón u otra almohadilla del
colchón para agregar acolchado.

13
1. You will need to remove the
mattress pad from the bottom
of the playard to use inside your
bassinet.
1. Necesitará sacar la almohadilla del
colchón del fondo del
corralito para usarla en el interior
de su moisés.
• PELIGRO DE CAÍDAS: Pare ayudar a prevenir caídas, no use este
producto cuando el niño comienza a levantarse en sus manos y
rodillas o pese más de 15 libras (6.8 kg), el que ocurra primero.
• Use el moisés con un niño solamente a la vez.
• Nunca coloque a un niño debajo del moisés.
• El moisés debe estar completamente montado e instalado, incluidos
los cuatro tubos metálicos, los ocho ganchos y la almohadilla del
colchón, antes de usarlo. No modifique el moisés ni añada ningún
accesorio que no se indique en el manual del propietario.
• NO guarde el moisés en el producto mientras esté en uso en el
modo corralito.
• Para ayudar a prevenir la acumulación de calor en el interior del
corralito y para prevenir que el niño se acalore, cuando se usa el
moisés NO use una capota para exteriores.
• Para reducir el riesgo del SIDS, los pediatras recomiendan que los
bebés con buena salud sean puestos a dormir sobre la espalda, a
menos que su médico le indique lo contrario.
• Si se usa una sábana con la almohadilla, use solamente la provista
por Graco o una que esté específicamente diseñada para las
dimensiones de la almohadilla del colchón.
• Nunca coloque al niño en el moisés si el asiento o el cambiador
está instalado.
D. Bassinet
• Moisés

14
4 Accessories
•Accessorios
4
4
A
A
c
c
c
c
e
e
s
s
s
s
o
o
r
r
i
i
e
e
s
s
•
•
A
A
c
c
c
c
e
e
s
s
s
s
o
o
r
r
i
i
o
o
s
s
2. Attach 8 bassinet clips to
playard.
2. Sujete las 8 presillas del moisés al
corralito.
3. Insert tapered end of bar into end
of other bar with hole in it. Repeat
with other set of bars.CHECK:
Tubes MUST be
assembled before placing
mattress pad in bassinet.
3. Inserte el extremo cónico de la
barra en el extremo de la otra barra
que tiene un agujero. Repita el
procedimiento con el otro juego de
barras.
VERIFIQUE: Los tubos DEBEN
montarse antes de colocar la
almohadilla del colchón en el
moisés.
4. Once both tubes are securely
fastened, insert the mattress pad
soft side up into the bassinet.
4. Una vez que ambos tubos estén
apretadamente abrochados, inserte
el lado blando del colchón
almohadilla hacia arriba en el
moisés.

15
4-B Changing Area • Los Cambiadores
WARNING
FALL HAZARD: Children have suffered serious injuries after falling
from changing area. Falls can happen quickly.
• STAY within arms reach.
• Use changing area only on this playard model.
• ALWAYS secure this unit to the support frame by attaching to identified
location. Before each use, check the attachment by grasping the sides/
ends of the changing area, and pulling upward. See instructions.
• Do not use on the floor, bed, counter or other surfaces.
Suffocation Hazard: Babies have suffocated while sleeping on
changing area: changing area is not safe for sleep.
• NEVER allow baby to sleep on changing area.
• Weight limit for the changing area is 25 lb (11 kg). Do not use the
changing area as extra storage.
• Use only the pad provided by Graco.
• Do not use changing area if it is damaged or broken.
Strangulation Hazard: Child can lift changing area and get neck
trapped between changing area and playard frame. Always remove the
changing area when your child is in the playard.
• ONLY use with playard bassinet attached.
• Never place child in playard bassinet if changer is attached.
ADVERTENCIA
PELIGRO DE CAÍDA: Hay niños que han sufrido lesiones serias
después de caerse del cambiador del bebé. Las caídas pueden
producirse rápidamente.
• MANTÉNGASE al alcance de la mano.
• Use el cambiador del bebé solo en este modelo de corralito.
• SIEMPRE asegure esta unidad al armazón de apoyo sujetándola a la
ubicación indicada. Antes de cada uso, compruebe la sujeción
agarrando los lados/extremos del cambiador del bebé y tirando hacia
arriba. Consulte las instrucciones.
• No usarlo en el piso, la cama, el tablero o otro superficie.
Peligro de asfixia: Hay bebés que se han asfixiado mientras dormían en
los cambiadores del bebé: Los cambiadores no son seguros para dormir.
• NUNCA deje que el bebé duerma en el cambiador del bebé.
• El límite de peso para el cambiador es de 25 lb (11 kg). No use el
cambiador como zona de almacenamiento adicional.
• Use solamente el colchón proporcionado por Graco.
• No use el mudador si está dañado o roto.
Peligro de estrangulamiento: El bebé se puede levantar del cambiador
del bebé y quedar atrapado entre el cambiador y el armazón del corralito.
Retire siempre el cambiador del bebé cuando su hijo esté en el corralito.
• Úselo SOLAMENTE con el moisés del corralito instalado.
• NUNCA ponga al niño en el moisés del corralito si el cambiador está
instalado.

16
4 Accessories
•Accessorios
4
4
A
A
c
c
c
c
e
e
s
s
s
s
o
o
r
r
i
i
e
e
s
s
•
•
A
A
c
c
c
c
e
e
s
s
s
s
o
o
r
r
i
i
o
o
s
s
2X
G. Changing Area
• Cambiador
J. Changer Attachment
Tubes • Tubos de sujeción
del cambiador
H. Changer Rails with
Kickstands • Barandas
del cambiador con
soporte
I. Changer Rails with
Plastic Corner
• Barandas del
cambiador con
esquina de plástico
Plastic corners
Esquinas de
plástico
SNAP!
¡CRAC!
Kickstands
Soportes
2. Flip changer over so the changer is
facing down. Slide assembled
changer rails with kickstands into
the fabric as shown.
2. Dele la vuelta al cambiador de
modo que quede mirando hacia
abajo. Deslice las barandas del
cambiador montadas con soportes
en la tela como se muestra.
1. Snap changer rails with kickstands
together as shown.
1. Encaje las barandas del cambiador
con soportes como se muestra.

17
SNAP!
¡CRAC!
Plastic corners
Esquinas de
plástico
Kickstands
Soportes
Plastic corners
Esquinas de
plástico
5. Rails should appear exactly as
shown. Plastic corners should be
in the corner openings and
kickstands should be in side
openings. CHECK rails are
completely in channels on both
sides of the changer.
5. Las barandas deben estar
colocadas exactamente como se
muestra. Las esquinas de plástico
deben estar en las aberturas para
las esquinas y los soportes en las
aberturas laterales. VERIFIQUE que
las barandas estén completamente
insertadas en los canales en
ambos costados del cambiador.
3. Snap changer rails with plastic
corners together as shown.
3. Encaje las barandas del cambiador
con las esquinas de plástico como
se muestra.
4. While changer is still facing down,
slide assembled changer rails with
plastic corners into other channel
as shown.
4. Con el cambiador todavía mirando
hacia abajo, deslice las barandas
del cambiador montado con las
esquinas de plástico en el otro
canal como se muestra.

18
4 Accessories
•Accessorios
4
4
A
A
c
c
c
c
e
e
s
s
s
s
o
o
r
r
i
i
e
e
s
s
•
•
A
A
c
c
c
c
e
e
s
s
s
s
o
o
r
r
i
i
o
o
s
s
SNAP!
¡CRAC!
SNAP!
¡CRAC!
2X
SNAP!
¡CRAC!
6. Snap changer rails together as
shown.
6. Encaje las barandas del cambiador
entre sí como se muestra.
7. Snap two short changer
attachment tubes into the
openings in the plastic corners as
shown.
7. Encaje los dos tubos de sujeción
cortos del cambiador en las
aberturas de las esquinas de
plástico como se muestra.

19
SNAP!
¡CRAC!
8. Insert changer attachment tubes
into openings in corners of
playard. Make sure the changer is
secured by pulling up on the sides
of the changer.
8. Inserte los tubos de sujeción del
cambiador en las aberturas de las
esquinas del corralito. Asegúrese
de que el cambiador esté seguro
tirando hacia arriba de los
costados del cambiador.
10. To remove, push in buttons on
changer attachment tubes while
pulling up on corners of changer.
10. Para retirar, presione los botones
en los tubos de sujeción del
cambiador mientras tira hacia
arriba de las esquinas del
cambiador.
9. CHECK that corners of changer
fabric are pulled over the changer
frame.
9. VERIFIQUE que las esquinas de la
tela del cambiador cubran el
armazón del cambiador.

20
4 Accessories
•Accessorios
4
4
A
A
c
c
c
c
e
e
s
s
s
s
o
o
r
r
i
i
e
e
s
s
•
•
A
A
c
c
c
c
e
e
s
s
s
s
o
o
r
r
i
i
o
o
s
s
4-C Newborn Seat • Asiento para recién
nacidos
WARNING
Prevent serious injury or death: follow these warnings and the
instructions.
• This product is not safe for sleep.
• You are responsible to provide adult supervision when using
your seat.
• Seat must be properly attached to bassinet before use.
FALL HAZARD:
To prevent falls, stop using the product when infant:
• Begins to wiggle out of position or turn over in the product or
• Head touches the upper edge of the product or
• Weighs more than 15 lb (6.8 kg) (approximately 3 months
of age).
SUFFOCATION HAZARD: Infants have suffocated
• On added pillows, blankets and extra padding.
- ONLY use the pad provided by the manufacturer.
- NEVER place extra padding under or beside infant.
• When trapped between product and adjacent surfaces.
- Always attach the product at the indentified locations on playard.
Always use the bassinet when using the product.
- NEVER use seat in different product.
• ALWAYS place child on back.
• Never assemble seat on the same side as the changer.
• Never place any objects in seat while child is in it.
• Use seat with only one child at a time.
• Never place child in bassinet while seat is attached.
/