Page is loading ...

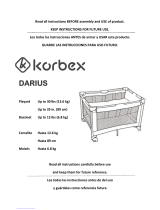
Read all instructions BEFORE assembly and USE of product.
KEEP INSTRUCTIONS FOR FUTURE USE.
Lire les instructions d’assemblage soigneusement.
GARDEZ CES INSTRUCTIONS POUR USAGE FUTUR.
Lea todas las instrucciones ANTES de armar y USAR este producto.
GUARDE LAS INSTRUCCIONES PARA USO FUTURO.
©2011 Graco ISPP124AB 1/11
www.gracobaby.com
••
Owners Manual • Mode d'em Owners Manual • Mode d'em
pp
loloii
••
Manual del Manual del
pp
roro
pp
ietarioietario

2
Failure to follow these warnings and the
instructions could result in serious injury or death.
Setting Up the Playard
• THIS PRODUCT REQUIRES ADULT ASSEMBLY.
• Keep fingers clear of top corners during setup. Be sure playard
is completely set up before use. Check that the four top rails are
completely latched, the center of the floor is pushed down, and the
mattress/pad is flat and secured by the hook and loop straps. Always
follow the instructions in the owner’s manual to set up the playard.
• Never use this product if there are any loose or missing fasteners,
loose joints, broken parts or torn mesh. Check before assembly and
periodically during use. Contact Graco at 1-800-345-4109
(Canada 1-800-667-8184) for replacement parts and instructions if
needed. Never substitute parts.
Using the Playard
• The playard is for playing or sleeping. When used for playing, never
leave child unattended and always keep child in view. When used for
sleeping, you must still provide the supervision necessary for the
continued safety of your child.
• Always keep the playard away from hazards in the area that may
injure your child.
• When child is able to pull to standing position, remove large toys
and other objects that could serve as steps for climbing out.
• Stop using this product when your child reaches 35 inches (89 cm) in
height or is able to climb out.
• Do not modify playard or add any attachments that are not
listed in the owner’s manual, including an add-on bassinet.
• Child can become entrapped and die when improvised netting or
covers are placed on top of a playard. Never add such items to
confine child in playard.
• NEVER leave child in product with side lowered. Be sure side is in
raised and locked position whenever child is in product.
• If refinishing, use a nontoxic finish specified for children’s products.

3
Avoiding Suffocation Hazards
• Unlike cribs that have rigid sides, the playard has flexible sides.
As a result, the playard mattress/pad is specially designed to prevent
suffocation. The playard mattress/pad has a solid base, a certain
length and width, and is less than one inch thick in order to meet
safety standards. Using a thicker or a different sized mattress/pad may
allow a child’s head to get between mattress/pad and the side of the
playard causing suffocation.
• Infants can suffocate
• In gaps between a mattress too small or too thick and
products sides
• On soft bedding.
NEVER add a mattress, pillow, comforter or padding. Use ONLY
mattress pad provided by Graco.
• To reduce the risk of SIDS, pediatricians recommend healthy
infants be placed on their backs to sleep, unless otherwise advised
by your physician.
• Never use plastic shipping bags or other plastic film as mattress covers
not sold and intended for that purpose. They can cause suffocation.
• NEVER use a water mattress with the playard.
Avoiding Strangulation Hazards
• Strings and cords can cause strangulation. Keep strings and cords
away from child.
• NEVER place the playard near a window where cords from
blinds or drapes can strangle a child.
• NEVER hang strings on or over the playard.
• NEVER place items with a string around a child’s neck, such as hood
strings, pacifier cords, etc.
• NEVER attach strings to toys.
This product is not intended for commercial use.

9
Setup • Assembler • Installar
F
E
G
DO NOT push center
down yet.
NE PAS abaisser le
centre maintenant.
NO empuje todavía el
centro hacia abajo
todavía.
SNAP!
ENCLENCHEZ!
¡RUIDO!

12
L
M
To Fold • Pour plier • Para plegar
DO NOT unlock top
rails yet.
NE PAS déverrouillez
les tiges supérieures
maintenant.
NO destrabe todavía
los rieles superiores.
Release two hook and
loop straps.
Libere las cintas
de ganchos/nudo.
Libérer les deux
courroies de crochet-
boucle.

13
EN
Center of floor
must be up.
1. Lift up slightly on
the top rail.
2. Push in on the
button located on
the side of the top
rail to release the
two tubes.
3. Push down.
• If top rails do not
unlatch, DO NOT
FORCE. Lift the
center of the floor
higher.
• Both tubes must be
released for the top
rail to fold.
Le moyeu du centre
doit être élever.
1. Soulevez
légèrement la
tige supérieure.
2. Enfoncez le bouton
localisé sur le côté
de la traverse
supérieure pour
dégager les deux
tubes.
3. Poussez vers le bas.
• Si les tiges
supérieures ne se
déclenchent pas,
NE PAS FORCER.
Soulevez le moyeu
du centre plus haut.
• Les deux tubes
doivent être
déclenchés pour
pouvoir replier la
tige supérieure.
El centro del fondo
debe estar arriba.
1. Levante suavemente
el lateral.
2. Empuje el botón
en el lado de la
baranda superior
para soltar los dos
tubos.
3. Empuje hacia abajo.
• Si los laterales no se
pliegan,
NO LA FUERCE.
Levante el centro de
el piso hacia arriba.
• Ambos tubos deben
ser soltados para que
el lateral pueda
plegarse.

16
Accessories (On certain models)
• Des accessories (Sur certains modèles)
• Accesorios (En ciertos modelos)
Bassinet • Couchette • Moisés
WARNING
• SUFFOCATION HAZARD: Infants can suffocate
• In gaps between an extra pad and side of bassinet
• On soft bedding.
NEVER add a mattress, pillow, comforter or padding. Use ONLY
mattress/pad provided by Graco.
• FALL HAZARD: To help prevent falls, do not use this product when
the infant begins to push up on hands and knees or weighs over
15 lbs (6.8 kg), whichever comes first.
• Use bassinet with only one child at a time.
• Never place a child under the bassinet.
• The bassinet must be fully assembled and installed, including two
metal tubes, clips, and mattress/pad, before using.
Do not modify bassinet or add any attachments that are not listed
in the owner’s manual.
• DO NOT store the bassinet in the playard while in use.
• To help prevent heat build-up inside the playard and to avoid
overheating your child, when using the bassinet DO NOT use an
outdoor canopy.
• Included canopy for indoor use only.
• To reduce the risk of SIDS, pediatricians recommend healthy
infants be placed on their backs to sleep, unless otherwise advised
by your physician.
• If a sheet is used with the pad use only the one provided by Graco
or one specifically designed to fit the dimensions of the bassinet.

19
EL
You will need to remove the
mattress/pad from the bottom
of the playard to use inside
your bassinet.
Vous devrez enlever le matelas/
coussin du fond
du parc portatif pour l'utiliser
dans votre berceau.
Necesitará sacar el colchón /
almohadilla del fondo del
corralito para usarlo adentro
del moisés.
EJ
Attach 8 hooks on the bassinet to the
ends of the playard as shown.
Attacher 8 crochets à la couchette, aux
extrémités du parc, tel qu’illustré.
Conecte 8 ganchos en la cuna a los
extremos del corralito como se indica.
EK
CHECK to make sure bassinet corner
channel openings are opposite the
tires as shown.
S’ASSURER que les ouvertures des
sillons de coin de la couchette sont à
l’opposé des pneus, tel qu’illustré.
ASEGÚRESE de que el cordón
eléctrico de la vibración esté
conectado al módulo integrado de la
vibración como se indica.

21
Open the battery compartment lid by
inserting a screwdriver into the slot. Insert
one D (LR20) cell battery (not included).
Replace lid.
Ouvrir le compartiment de la pile de
l’appareil en insérant un tournevis dans la
fente. Insérer une pile D «LR20 » (non
comprise).
Remettre le couvercle en place.
Abra la tapa del compartimiento de las pilas
insertando un destornillador en la ranura.
Coloque una pila D (LR20) (no se incluye).
Vuelva a poner la tapa.
Cord in bottom of bassinet.
Cordon dans le fond de la
couchette.
El cable está en el fondo del
moisés.
FF
FG
FH

23
FK
FL
Use siempre el lado más
suave del colchón hacia
arriba.
Utilisez toujours le
matelas avec le côté
doux vers le haut.
Always use mattress/pad
soft side up.
Para usar el módulo
integrado de la
vibración, deslice el
botón hacia la izquierda
o derecha para alcanzar
una alta o baja
velocidad.
Pour utiliser le module
de vibration intégré,
faire glisser le bouton
vers la gauche ou la
droite, pour une vitesse
rapide ou lente.
To use integrated
vibration module, slide
button to left or right
for hi or lo speed.

25
Keep the batteries out of children’s reach.
Any battery may leak battery acid if mixed with a different battery
type, if inserted incorrectly (put in backwards) or if all batteries are
not replaced or recharged at the same time. Do not mix old and new
batteries. Do not mix alkaline, standard (carbon-zinc) or rechargeable
(nickel-cadmium) batteries.
Any battery may leak battery acid or explode if disposed of in fire
or an attempt is made to charge a battery not intended to be
recharged. Never recharge a cell of one type in a recharger made for
a cell of another type.
Discard leaky batteries immediately. Leaky batteries can cause
skin burns or other personal injury. When discarding batteries, be sure
to dispose of them in the proper manner, according to your state and
local regulations.
Always remove batteries if the product is not going to be used
for a month or more. Batteries left in the unit may leak and cause
damage.
Recommended type batteries—alkaline disposables. NEVER mix
battery types. Change batteries when product ceases to operate
satisfactorily.
TROUBLESHOOTING: If your device is not functioning
properly, check for the following problems:
1. No batteries in electronics module.
2. Batteries dead.
3. Batteries in backwards—check “+” and “-”.
4. Corrosion on battery terminals. Rotate batteries in place
against terminals, or clean with sandpaper or steel wool if
corrosion is severe.
5. Batteries too weak.
If you still have problems, call our toll-free number,
USA 1-800-345-4109 (Canada 1-800-667-8184).
This device complies with part 15 of the FCC Rules. Operation is
subject to the following two conditions: (1) This device may not
cause harmful interference, and (2) this device must accept any
interference received, including interference that may cause
undesired operation.
For Safe Battery Use
• Pour un usage sécuritaire des piles
• Para el uso seguro de las pilas

28
The vibration unit
may ONLY be used
with the bassinet.
WARNING
You must remove the
module from the unit
when your child can
pull up to a standing
position.
L'unité de vibration
peut être utilisé
SEULEMENT avec
la couchette.
MISE EN GARDE
Vous devez enlever le
module électronique
de l'unité quand
votre enfant peut
se mettre debout.
La unidad
de vibración
SOLAMENTE puede
usarse con el moisés.
ADVERTENCIA
Debe quitar el
módulo electrónico
cuando su niño
pueda ponerse
de pie.
Using Electronics Module
• Usage du module électronique
• Cómo usar el módulo electrónico
Remove 2 screws from back of
electronics module.
Enlever les deux vis à l'endos
du module électronique.
Saque los 2 tornillos de la parte
de atrás del módulo electrónico.
GE

29
Remove battery door and insert
3 AA (LR06) batteries (not
included). Replace door and
screws.
Enlever la porte de la pile et
insérer 3 piles AA (LR06) (non
comprises). Replacer la porte et
les vis.
Saque la puerta para las pilas e
inserte 3 pilas tamaño AA (LR06)
(no se incluyen). Vuelva a poner
la puerta y los tornillos.
GF
TO TURN OFF ANY FUNCTION— Press and hold the button for
2 seconds.
POUR PLACER LES FONCTIONS HORS TENSION— presser le
bouton pendant 2 secondes.
PARA APAGAR CUALQUIER FUNCIÓN— Oprima y mantenga
apretado el botón durante 2 segundos.
GG

30
LIGHTS— Press once to turn top light (A) on,
press twice to turn both lights on, press three
times to turn bottom light (B) on, and four
times to turn lights off.
LUCES— Oprima una vez para encender la luz
de arriba (A), dos veces para encender ambas
luces, tres veces para encender la luz de abajo
(B), y cuatro veces para apagarlas.
LUMIÈRES— Presser une fois pour allumer la
lumière supérieure (A), presser deux fois pour
allumer les deux lumières, presser trois fois
pour allumer la lumière inférieure (B) et quatre
fois pour les éteindre.
(A)
(B)
MÚSICA— Cada vez que oprime el botón activará
la próxima secuencia de la función música, después
de seleccionar el quinto canción, la
próxima vez que oprima el botón seleccionará
la primera canción de la secuencia.
MUSIC— Each press will start the next music
function in sequence, after the 5th song is
selected, the next press will turn music off.
MUSIQUE— Chaque pression du bouton
démarrera la prochaine fonction musicale en
séquence. Après que le cinquième chanson est été
sélectionnée, la prochaine pression du bouton
choisira la première chanson en séquence.

32
MISE EN GARDE
RISQUE DE CHUTE - Afin de prévenir les blessures sérieuses ou mortelles,
• Toujours rester à proximité de votre enfant lorsque vous utilisez
la table à langer. Ne jamais laisser votre enfant sans surveillance.
• La table à langer est conçue pour usage avec ce parc seulement.
Ne pas utiliser par terre, sur un lit, un comptoir, ou autres surfaces.
Avant chaque usage, assurez-vous que la table à langer est fixée de
façon solide au parc en abaissant fermement dans le milieu de la
table à langer.
• Ne pas utiliser la table à langer pour dormir ou pour jouer.
• La limite de poids pour la table à langer est de 11,3 kg (25 livres).
Ne pas utiliser la table à langer comme espace de rangement
supplémentaire. Toujours enlever la table à langer lorsque votre
enfant est dans le parc.
• Ne pas utiliser cette table à langer si elle est endommagée ou brisée.
• Risque de strangulation : L'enfant peut soulever la table à langer et
son cou risque de se coincer entre la table à langer et le cadre du
parc. Toujours enlever la table à langer lorsque votre enfant est
dans le parc.
Changing Table • Table à langer
• Mudador
WARNING
FALL HAZARD- To prevent death or serious injury,
• Always stay within arm’s reach of your child when using the
changing table. Never leave child unattended.
• The changing table is designed for use only with this Graco
playard. Do not use on the floor, bed, counter or other
surfaces. Before each use make sure the changing table is properly
secured to the playard by pushing down firmly in the middle
of the changing table.
• Do not use changing table as a sleeping or play area.
• Weight limit for the changing table is 25 lbs (11.3 kg). Do not use
the changing table as extra storage. Always remove the changing
table when your child is in the playard.
• Do not use changing table if it is damaged or broken.
• Strangulation Hazard: Child can lift changing table and get neck
trapped between changing table and playard frame. Always remove
the changing table when your child is in the playard.

34
GL
Coloque el tubo centro en los
montantes de plásticos como se
indica. Asegúrese que los
botones de metal estén trabados
en su lugar.
Insérer le tube centre en les
supports en plastique tel qu’illustré.
S’assurer que les boutons de
métal sont bien enclenchés en
place.
Insert the center tube into the
plastic mounts as shown. Make
sure metal buttons are snapped in
place.
SNAP!
ENCLENCHEZ!
¡RUIDO!
GK
SNAP!
ENCLENCHEZ!
¡RUIDO!
Coloque el tubo otro en los
montantes de plásticos como se
indica. Asegúrese que los
botones de metal estén trabados
en su lugar.
Insérer le tube autre en les
supports en plastique tel qu’illustré.
S’assurer que les boutons de
métal sont bien enclenchés en
place.
Insert the other tube into the
plastic mounts as shown. Make
sure metal buttons are snapped
in place.

37
HI
El módulo electrónico debe
estar en el lado opuesto de
la mesa para cambiar al
bebé.
Le module électronique
doit se trouver du côté
opposé de la table à langer.
Electronic module must be
on opposite end from
changing table.
Para sacarla, oprima el botón
debajo de la tela mientras tira
hacia arriba de la esquina de la
mesa para cambiar al bebé.
Repita el proceso en el otro
costado.
Pour retirer, pousser sur le
bouton sous le tissu, tout en
tirant le coin de la table à
langer vers le haut. Répéter
l’opération de l’autre côté.
To remove, push in button
underneath fabric while pulling
up on corner of changing
table. Repeat for other side.
HH

38
INSPECTEZ RÉGULIÈREMENT VOTRE PARC pour vérifier toutes
déchirures, pièces endommagées ou raccords mal ajustés. Remplacez
ou réparez les pièces au besoin. Utilisez seulement les pièces de
remplacement Graco
®
.
SI VOUS UTILISEZ LE PARC À LA PLAGE, vous DEVEZ enlevez le
sable de votre parc ainsi que les pieds avant de le ranger dans sa
housse. Le sable qui se trouve dans les loquets des tiges du haut peut
l’endommager.
POUR NETTOYER VOTRE PARC, utilisez du savon de ménage ou un
détergent doux et de l’eau tiède.
POUR LAVER LE SAC DE VOYAGE, lavez à machine à l’eau froide au
cycle doux et suspendre pour sécher. PAS D’EAU DE JAVEL.
NETTOYAGE DE LA COUCHETTE: Enlever le module électronique
ainsi que l'unité de vibration. Ne JAMAIS enlever le cordon de la
couchette. Lavez à la main en eau tiède et un savon de ménage.
Suspendre pour sécher.
Care and Maintenance
FROM TIME TO TIME CHECK YOUR PLAYARD for worn parts, torn
material or stitching. Replace or repair the parts as needed. Use only
Graco
®
replacement parts.
IF PLAYARD IS USED AT THE BEACH, you MUST clean sand off your
playard, including the feet, before packing it into cover. Sand in top rail
lock may damage it.
TO CLEAN PLAYARD, use only household soap or detergent and
warm water.
TO WASH CARRY BAG, machine wash in cold water on delicate cycle
and drip-dry. NO BLEACH.
TO WASH BASSINET: Remove electronics module and vibration unit.
NEVER remove cord from bassinet. Hand wash with warm water and
household soap. Drip dry.
Soins et entretien

40
0
Replacement Parts • Warranty Information (USA)
Pièces de rechange
• Renseignements sur la garantie (au Canada)
Piezas de repuesto • Servicio de la garantía (EE.UU.)
www.gracobaby.com
or/o
1-800-345-4109
To purchase parts or accessories or for warranty
information in Canada, contact Elfe at /
Pour commander des pièces ou pour service sous
garantie au Canada,
communiquez avec Elfe au:
1-800-667-8184
(Montréal : 514-344-3533 / Fax: 514-344-9296).
or/ou
www.elfe.net
To register your Graco product from within the U.S.A. visit us
online at www.gracobaby.com/productregistration or return registration
card provided with your product. We currently do not accept product
registrations from those living outside the United States of America.
Para registrar su producto Graco desde dentro de los EE.UU., visítenos
en línea en www.gracobaby.com/productregistration o envíe la tarjeta
de registro provista con su producto. Actualmente no aceptamos
registros de los productos de quienes viven fuera de los Estados
Unidos de América.
Pour inscrire votre produit Graco aux États-Unis, visitez notre site
Internet www.gracobaby.com/productregistration ou retrouner la
carte d’enregistrement fournie avec le produit. Pour le moment nous
n’acceptons pas d’inscriptions de produits des résidents hors des
États-Unis.
Product Registration (USA)
Inscription de votre produit (au Canada)
Registro del producto (EE.UU.)
To purchase parts or
accessories or for warranty
information in the United
States, please contact us at
the following:
Para comprar repuestos o
accesorios o para el servicio
de la garantía en los Estados
Unidos, por favor comuníquese
con nosotros en:
/