E 2099 E 2099 E 2099
Tools needed / Herramientas necesarias / Outils requis Tools needed / Herramientas necesarias / Outils requis Tools needed / Herramientas necesarias / Outils requis
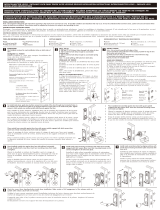
Installation hints: To position strike; slide door to within a
few inches of jamb with latch in locked position. Mark jamb
adjacent to top of latch hook, as shown in View "A". Attach
strike to jamb to allow for maximum possible engagement.
Consejos para la instalacion: Para posicionar el rasero-jale
la puerta hasta llegar a unos cetímetros del quicial con el
cerrojo en la posiciôn cerrada. Marque el quicial junto a la
parte superior del gancho del cerrojo, tal como se indica en
la ilustración "A". Junte el rasero al quicial para permitir el
máximo contacto.
Conseils d’installation: Afin de posi-
tionner correctement la gâche, faites
glisser la porte jusqu’à quelques
pouces du jambage - loquet en posi-
tion verrouillée. Marquez le jambage
ad ja cent à la partie supérieure du
crochet de loquet, tel qu’illustré ("A").
Fixez la gâche au jambage afin qu’elle
s’y en gage au maximum.
1/2"
13 mm
1/2"
13 mm
1/2"
13 mm
Latch point
Punta del
pestillo
Pointe du
loquet
Latch point
Punta del
pestillo
Pointe du
loquet
Latch point
Punta del
pestillo
Pointe du
loquet
Latch point projection
Saldelzo de punto del
pestillo
Saillie de la pointe du
loquet
Latch point projection
Saldelzo de punto del
pestillo
Saillie de la pointe du
loquet
Latch point projection
Saldelzo de punto del
pestillo
Saillie de la pointe du
loquet
Mounting holes
Agujeros de montaje
Trous de montage
Mounting holes
Agujeros de montaje
Trous de montage
Mounting holes
Agujeros de montaje
Trous de montage
1-1/8"
2.9 cm
1-1/8"
2.9 cm
1-1/8"
2.9 cm
Jamb
Jamba
Jambage
Jamb
Jamba
Jambage
Jamb
Jamba
Jambage
Jamb
Jamba
Jambage
Jamb
Jamba
Jambage
Jamb
Jamba
Jambage
Striker
Placa de tope
Gâche
Striker
Placa de tope
Gâche
Striker
Placa de tope
Gâche
Stile
Montante
Montant
Stile
Montante
Montant
Stile
Montante
Montant
Latch
Pestillo
Loquet
Latch
Pestillo
Loquet
Latch
Pestillo
Loquet
Latch
Pestillo
Loquet
Latch
Pestillo
Loquet
Latch
Pestillo
Loquet
Side View "A"
Vista Lateral "A"
Vue latérale "A"
Side View "A"
Vista Lateral "A"
Vue latérale "A"
Side View "A"
Vista Lateral "A"
Vue latérale "A"
Top View "B"
Vista de Arriba "B"
Vue supérieure "B"
Top View "B"
Vista de Arriba "B"
Vue supérieure "B"
Top View "B"
Vista de Arriba "B"
Vue supérieure "B"
3/4"
19 mm
3/4"
19 mm
3/4"
19 mm
3/4"
19 mm
3/4"
19 mm
3/4"
19 mm
2-3/4"
7 cm
2-3/4"
7 cm
2-3/4"
7 cm
1-11/16"
4.3 cm
1-11/16"
4.3 cm
1-11/16"
4.3 cm
/


