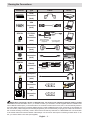
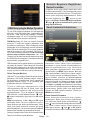
VESTEL 42PF6022 Operating Instructions Manual
- Category
- LCD TVs
- Type
- Operating Instructions Manual

50227945
22
KULLANIM KILAVUZU
OPERATING INSTRUCTIONS
DANIŞMA MERKEZi:
444 4 123
www.vestel.com.tr
42PF6022 42” LED TV
Vestel Dayanıklı Tüketim Malları Pazarlama A.Ş.
Zorlu Plaza Avcılar 34310 İstanbul-TÜRKİYE
Tel: (0212) 456 22 00 Faks: (0212) 422 02 03
Cihazınızın Gümrük ve Ticaret Bakanlığı veya Bakanlıkça tespit ve ilan edilen
kullanım ömrü (cihazın fonksiyonlarını yerine getirebilmesi için
gerekli yedek parça bulundurma süresi) 10 yıldır.

English - 1 -
Safety Precautions
Please read these instructions fully
before installing or operating.
Preparation
Place the device on a solid even surface. For
ventilation, leave a free space of at least 10 cm
all around the set. To prevent any fault and unsafe
situations, do not place any objects on top of
the set. Use this device in moderate climates.
Operation temperature and operation humidity:
5ºC up to 45ºC, 85% rel. humidity max. (not blocking
ventilation openings).
Intended Use
This device is used to receive and display TV
programmmes.The different connection options
make an additional expansion of the reception and
display sources possible (various external devices).
This device is only suitable for the operation in dry
interiors. This appliance is intended solely for private
domestic use and may not be used for industrial and
commercial purposes. We exclude liability in principle,
if the device is not used as intended, or unauthorized
modications have been made. To operate your LCD
TV in extreme ambient conditions may cause the
damage of the device.
WARNING: Never let people (including
children) with physical, sensory or mental
abilities or lack of experience and / or knowledge
unsupervised use electrical device!
Children may not recognize dangers right!
The swallowing of batteries can be fatal. Keep
batteries always out of reach of small children.
If a battery is swallowed, immediately seek
medical attention. Keep the packaging lms out
of reach of children. Risk of suffocation.
Power source
• The TV should be operated only from a 220-240 V
AC, 50 Hz outlet.
• Warning: Do not leave your TV in standby or
operating mode when you leave your house.
Positioning the TV
• For ventilation, please leave a clear space of at least
10cm all around the TV.
• Do not block the ventilation openings.
• Do not place the TV on sloping or unstable surfaces,
the TV may tip over.
• To prevent damage to the TV, do not place any
objects on top of the TV.
• Only use the TV in moderate climates.
Contents
Safety Precautions ................................................. 1
Environmental Information ..................................... 2
Accessories included .............................................. 3
TV - Features ......................................................... 3
Viewing the TV ....................................................... 3
TV Control buttons & Operation ............................. 3
Installing the Batteries to the Remote..................... 4
Connect Power & Antenna/Cable/Satellite ............. 4
Viewing remote control .......................................... 5
Switching On/Off ..................................................... 7
First Time Installation.............................................. 7
Media Playback via USB Input ............................... 9
Changing Image Size: Picture Formats .................. 9
Using the Channel List ........................................... 9
Menu Features and Functions .............................. 10
Menu Features and Functions ...............................11
Menu Features and Functions .............................. 12
Electronic Programme Guide (EPG) .................... 13
Recording a Programme ...................................... 13
Timeshift Recording ............................................. 14
Instant Recording ................................................. 14
Watching Recorded Programmes ....................... 14
Recording Conguration ....................................... 14
Teletext ................................................................. 15
Software Upgrade................................................. 15
Troubleshooting & Tips ......................................... 15
PC Typical Display Modes ................................... 16
Specications ..............................................................17
Supported File Formats for USB Mode ................ 17

English - 2 -
Power cord and plug
• The power cord plug should be easily accessible.
In case of storms and lightning, when going on
holiday, or when the TV is not used for a long period
of time disconnect the power cord from the mains
power socket.
• The mains plug is used to disconnect TV set from the
mains and therefore it must remain readily operable.
• Do not place the TV, furniture, etc. on the power
cord or pinch the cord.
• Handle the power cord by the plug, do not unplug
the TV by pulling the power cord.
• Never touch the power cord/plug with wet hands
as this could cause a short circuit or electric shock.
• Never make a knot in the power cord or tie it with
other cords.
• Power cords should be placed in such a way that
they are not likely to be stepped on or driven over.
• A damaged power cord/plug can cause re or give
you an electric shock. When damaged it must be
replaced, this should only be done by qualied
personnel.
Moisture and Water
• Do not use this TV in a humid or damp place (avoid
bathrooms, the sink in the kitchen, and near the
washing machine).
• Do not expose this TV to rain or water, as this may
be dangerous.
• Do not place objects lled with liquids, such as
ower vases, on top of the TV. Avoid from dripping
or splashing.
• If any solid object or liquid falls into the cabinet,
unplug the TV and have it checked by qualied
personnel before operating it any further.
Ventilation
• The slots and openings on the TV set are intended
for ventilation and to ensure reliable operation.
• To prevent overheating, these openings must not be
blocked or covered in anyway.
Heat sources and Flames
• Do not expose the TV to direct
sunlight or other heat sources.
• The TV should not be placed near to
open ames and sources of intense
heat such as an electric heater.
• Ensure that no open ame sources,
such as lighted candles, are placed
on top of the TV.
Headphone Volume
• Excessive sound pressure from
earphones and headphones can cause
hearing loss, please take care.
Wall Mounting (optional)
• To prevent injury, this TV must be securely attached
to the wall in accordance with the installation
instructions (if the option is available).
LCD Screen
• Occasionally, a few non-active pixels may appear
on the screen as a xed blue, green or red point.
Please note that this does not affect the performance
of your product.
• Take care not to scratch the screen with ngernails
or other hard objects.
Cleaning
• Before cleaning, unplug the TV from the wall socket.
• Do not use liquid or aerosol cleaners. Only use a
soft, dry cloth.
Environmental Information
This television is designed to consume less energy
to save environment. You not only help to save the
environment but also you can save money by reducing
electricity bills thanks to the energy efciency feauture
of this TV. To reduce energy consumption, you should
take the following steps:
You can use Power Save Mode setting, located in the
Picture menu. If you set Power Save Mode as On, the
TV will switch to energy-saving mode and luminance
level of TV set will be decreased to optimum level.
Note that some picture settings will be unavailable
to be changed when the TV is in Power Save Mode.
When the TV is not in use, please switch off or
disconnect the TV from the mains plug. This will also
reduce energy consumption.
Disconnect power when going away for longer time.
It is highly recommended to activate Power Save Mode
setting to reduce your annual power consumption. And
also it is recommended to disconnect the TV from the
mains plug to save energy more when you do not use.
Please helps us to save environment by following
these steps.
Repair Information
Please refer all servicing to qualied personnel. Only
qualied personnel must repair the TV. Please contact
your local dealer, where you have purchased this TV
for further information.

English - 3 -
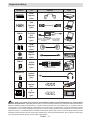
Accessories included
• Remote Control
• Batteries: 2 x AAA
• Instruction Book
• Side AV Connection Cable
TV - Features
• Fully integrated digital/cable/ TV (DVB-T/C).
• HDMI connectors for digital video and audio.
• USB input.
• 10000 programmes.
• OSD menu system.
• Scart socket for external devices.
• Stereo sound system.
• Teletext, fastext, TOP text.
• Headphone connection.
• Automatic programming system.
• Forward or backward manual tuning.
• Automatic power down after up to six hours.
• Sleep timer.
• Child lock.
• Automatic sound mute when no transmission.
• NTSC playback.
• AVL (Automatic Volume Limiting).
• PLL (Frequency Search).
• PC input.
• Plug&Play for Windows 98, ME, 2000, XP, Vista,
Windows 7.
• Game Mode (optional).
• Picture off function.
• Pixellence.
Viewing the TV
TV Control buttons & Operation
1. Up direction
2. Down direction
3. Programme/Volume / AV / Standby-On selection
switch
You can move the switch, upward or downward to
change the volume. If you want to change channels,
press the middle of the switch once (Position 3) and
then move upward or downward. If you press the
middle of the switch once more,source OSD will be
displayed. To select desired source, move the switch
upward or downward and release. If you press the
middle of the switch and hold about a few seconds,
the TV will switch to standby mode. Main menu OSD
cannot be displayed via the control button.

English - 4 -
Operation with the Remote Control
Press MENU button on your remote control to display
main menu screen. Use Left or Right button to select
a menu tab and press OK to enter. Use Left / Right
/ Up / Down to select or set an item. Press RETURN
or MENU button to quit a menu screen.
Input Selection
Once you have connected external systems to your
TV, you can switch to different input sources. Press
button on your remote control consecutively
to select the different sources.
Changing Channels and Volume
You can change the channel and adjust the volume by
using the V ^ / v and CH ^ / v buttons on the remote.
Installing the Batteries to the
Remote
1. Lift the cover on the back of the remote upward
gently.
2. Install two AAA batteries. Make sure to match
the + and - ends of the batteries in the battery
compartment (observe the correct polarity.
3. Replace the cover.
Connect Power & Antenna/Cable/
Satellite
IMPORTANT: The TV set is designed to operate on
220-240V AC, 50 Hz socket. After unpacking, allow
the TV set to reach the ambient room temperature
before you connect the set to the mains. Plug the
power cable to the mains socket outlet.
SPDIF
VGA

English - 5 -
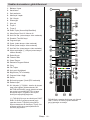
1. Standby / On
2. Channel list
3. Volume up-down
4. Menu on/off
5. OK / Conrm
6. Return / Back
7. No function
8. My button 1
9. My button 2
10. Coloured buttons (Red, Green, Yellow, Blue)
11. Mono-Stereo Dual I-II / Current language
12. Fast rewind (in media browser mode)
13. Pause /Timeshift Recording
14. Programme Recording
15. Play (in media browser mode)
16. Stop (in media browser mode)
17. Fast forward (in media browser mode)
18. Subtitle on-off / Subtitle (in media browser
mode)
19. Image size
20. Teletext - Mix
21. Media Browser
22. Electronic programme guide
23. Exit
24. Navigation buttons
25. Quick menu On-Off
26. Info / Reveal (in TXT mode)
27. Programme up/down
28. Mute
29. Previous programme / Now (in EPG mode)
30. Numeric buttons
31. AV / Source
(**) MY BUTTON 1: When on a desired source,
channel or link, press MY BUTTON 1 for ve
seconds, until the “MY BUTTON IS SET”
message is displayed on the screen. This
conrms that the selected MY BUTTON is now
associated with the selected function.
(***) MY BUTTON 2: This button’s main function
is to switch between DVB-T, DVB-C and DVB-S
broadcasts. However, if you press MY BUTTON
2 for ve seconds, you can set a function to it as
described in
TV
My Button 1.
Note that if you perform rst time installation,
MY BUTTON 2 will return to its default function,
switching between DVB-T, DVB-C and DVB-S
broadcasts.
Viewing remote control

English - 6 -
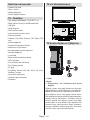
Viewing the Connections
NOTE: When connecting a device via Side AV input, you must use the supplied connection cables to enable
connection. See the illustrations above. | To enable PC audio, you will need to use the supplied SIDE AV CONNECTION
cable’s WHITE & RED inputs. | If an external device is connected via the SCART socket, the TV will automatically switch to
AV mode.| When receiving DTV channels (Mpeg4 H.264) or while in Media Browser mode, output will not be available via
the scart socket. | When using the wall mounting kit (optional), we recommend that you plug all your cables into the back of
the TV before mounting on the wall. | Insert or remove the CI module only when the TV is SWITCHED OFF. You should refer
to the module instruction manual for details of the settings. You can use the VGA input for connecting a YPbPr device. To do
this, you need a YPbPr to PC cable (Not supplied).
Connector Type Cables Device
Scart
Connection
(back)
VGA
Connection
(back)
SIDE AV
PC/YPbPr
Audio
Connection
(side)
Side Audio/Video
Connection Cable
(Supplied)
PC Audio Cable
(Not supplied)
HDMI
Connection
(back)
SPDIFF
Connection
(back)
SIDE AV
Side AV
Connection
(side)
AV Connection Cable
(supplied)
HEADPHONE
Headphone
Connection
(side)
USB
Connection
(side)
CI
Connection
(side)
CAM
module

English - 7 -
Switching On/Off
To Switch the TV On
Connect the power cord to the 220-240V AC, 50 Hz.
Press “ ” button. Then the standby LED lights up.
To switch on the TV from standby mode either:
Press the “ ” button, P+ / P- or a numeric button on
the remote control.
To Switch the TV Off
Press the “ ” button on the remote control or press
the “ ” button or hold the control switch on the Tv
until shut down, so the TV will switch to standby mode.
(Depends model)
To power down the TV completely, unplug the power
cord from the mains socket.
Note: When the TV is switched to standby mode, standby LED
can blink to indicate that features such as Standby Search, Over
Air Download or Timer is active. The LED can also blink when
you switch on the TV from standby mode.
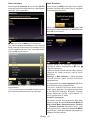
First Time Installation
When turned on for the rst time, the “language
selection” menu appears. The message “Welcome
please select your language!” is displayed in all
language options listed alphabetically.
Press the “ ” or “ ” button to highlight the required
language, press OK button to select. “First Time
Installation” appears. Use “ ” or “ ” button to set
the required country, and press “ ” button to select
Search Type.
Use “ ” or “ ” to set the desired search type. Available
search types are Digital and analog, digital only and
analog only.
When set, press “ ” to select Teletext Language. Use
“ ” or “ ” to select the desired Teletext Language.
Next, select Scan Encrypted and set as Yes if you
want to scan coded stations.
Press OK button on the remote control to continue and
the following message will be displayed on the screen.
You can activate Store mode option by using “ ” or “
” button. If Store Mode is selected, Store mode option
will be available in other settings menu and your TV’s
features will be illustrated on the top of the screen. A
conrmation screen will be displayed after selecting
the Store Mode. Select YES to proceed.
If Home Mode is selected, Store mode will not be
available after the First Time Installation. Press OK
button on the remote control to continue and the
following message will be displayed on the screen...
You must select a search type to search and store
broadcasts from the desired source.

English - 8 -
Aerial Installation
If you select AERIAL option from the Search Type
screen, the television will search for digital terrestrial
TV broadcasts.
NOTE: You can press MENU button to cancel.
After all the available stations are stored, Channel
List will be displayed on the screen. If you like the
sort channels, according to the LCN (*), please select
“Yes” and than press OK.
Press OK button to quit channel list and watch TV.
(*) LCN is the Logical Channel Number system that
organizes available broadcasts in accordance with a
recognizable channel sequence.
Cable Installation
If you select CABLE option and press OK button on
the remote control to continue, the following message
will be displayed on the screen:
To continue please select YES and press OK. To
cancel operation, select NO and press OK.
You can select frequency ranges from this screen.
For highlighting lines you see, use “ ” or “ ” button.
You can enter the frequency range manually by using
the numeric buttons on the remote control.
Set Start and Stop Frequency as desired by using
numeric buttons on the remote control.
After this operation, you can set Search Step as 8000
KHz or 1000 KHz.
If you select 1000 KHz, the TV will perform search
process in a detailed way. Searching duration will
thus increase accordingly. When nished, press OK
button to start automatic search. The TV will search
and store available broadcasts.
Quick Menu (optional)
Quick Settings menu allows you to access some
options quickly. This menu includes Power Save
Mode, Picture Mode, Equalizer Settings, Favourites
and Sleep Timer options. Press Q.MENU button on
the remote control to view quick menu. See the
following chapters for the details of the listed features.

English - 9 -
Media Playback via USB Input
You can connect a USB hard disk drive or USB
memory stick to your TV by using the USB inputs of
the TV. This feature allows you to play les stored in
a USB drive. 2.5” and 3.5” inch (hdd with external
power supply) external hard disk drives are supported.
IMPORTANT! You should back up your les before
making any connections to the TV set in order to
avoid any possible data loss. Manufacturer will not
be responsible for any le damage or data loss. It is
possible that certain types of USB devices (e.g. MP3
Players) or USB hard disk drives/memory sticks may
not be compatible with this TV. The TV supports FAT32
and NTFS disk formatting but recording will not be
available with NTFS formatted disks. Note: While
formatting a USB hard disk that has 1TB (Tera Byte)
or more le capacity, you can experience problems
with the formatting process.
Quickly plugging and unplugging USB devices, is a
very hazardous operation. Do not repeatedly quickly
plug and unplug the drive. This may cause physical
damage to the USB player and USB device itself. Do
not pull out USB module while playing a le.
Media Browser Menu
You can play photo, music, and movie les stored
on a USB disk by connecting it to your TV and using
the Media Browser screen. To do this, perform the
following: Connect a USB disk to one of the USB
inputs located on the side of the TV.
You can connect two USB devices to your TV. If both
USB devices include music, picture or video les, USB
selection OSD will be displayed on the screen. The
rst USB device connected to the TV will be named
as USB Drive1. Select a device by using “ ” or “ ”
button and press OK.
Press MENU button and select Media Browser tab by
using Left/Right and OK buttons. Main media browser
screen will be displayed. You can display the related
content by selecting the Video, Music or Picture tab.
Follow the button indications under each on screen
menu for media playback features.
You can set your Media Browser preferences by using
the Settings dialog.
Changing Image Size: Picture
Formats
Programmes can be watched in different picture
formats, depending on the transmission received. You
can change the aspect ratio (image size) of the TV for
viewing the picture in different zoom modes. Press “
” button repeatedly to change the image size. You
can shift the screen up or down by using “ ” or “
” buttons while in 14:9 Zoom, Cinema or Subtitle.
Using the Channel List
The TV sorts all stored stations in the Channel List.
You can edit this channel list, set favourites or set
active stations to be listed by using the Channel List
options. Press MENU button to view main menu.
Select Channel List item by using Left or Right button.
Press OK to view menu contents. Select Edit Channel
List to manage all stored channels. Use Up or Down
and OK buttons to select Edit Channel List. Press
Up or Down button to select the channel that will be
processed. Press Left or Right button to select a
function on Channel List menu. Use P+/P- buttons to
move page up or down. Press MENU button to exit.
Sorting Channel List
You can select broadcasts to be listed in the channel
list. To display specic types of broadcast, you should
use Active channel list setting. Select Active channel
list from the Channel list menu by using “ ” or “ ”
button. Press OK button to continue. You can select
a network type option from the list by using “ ” or “
” and OK buttons.

English - 10 -
Menu Features and Functions
Picture Menu Contents
Mode
For your viewing requirements, you can set the related mode option. Picture mode can
be set to one of these options: Cinema,Game,Dynamic and Natural.
Contrast Sets the lightness and darkness values of the screen.
Brightness Sets the brightness value for the screen.
Sharpness Sets the sharpness value for the objects displayed on the screen.
Colour Sets the colour value, adjusting the colors.
Power Save
Mode
To set Power Save Mode as Eco, Picture Off and Disabled. See the section,
“Environmental Information” in this manual for further information on Power Save Mode.
Backlight
(optional)
This setting controls the backlight level and it can be set to Auto, Maximum, Minimum
and Eco Mode. Backlight function will be inactive if Power Save Mode is set to On.
Backlight cannot be activated in VGA, Media Browser mode or while the picture mode
is set to Game.
Noise
Reduction
If the broadcast signal is weak and the picture is noisy, use Noise Reduction setting
to reduce the noise amount. Noise Reduction can be set to one of these options: Low,
Medium, High or Off.
Pixellence
Demo Mode :
While Mode option is highlighted in picture menu, Pixellence demo mode will be
displayed bottom of the menu screen.
Pixellence Demo Mode function optimizes the TV’s video settings and helps to
acquire a better image quality. Pixellence Demo Mode thus includes contrast,
sharpness, colour enhancement and skin tone correction along with the skin tone
detection.
Press OK to start Pixellence Demo Mode for experiencing Pixellence quality.
Throughout the demo mode, the screen is splitted into two sections, one displaying
the Pixellence II active area; the other displaying the normal broadcast. Press OK
button to quit the demo mode.
Advanced Settings
Dynamic
Contrast
You can change contrast rate by using dynamic contrast function. Dynamic contrast can
be set to one of these options: Low, Medium, High or Off.
Colour Temp Sets the desired colour tone.
Picture Zoom Sets the picture size to Auto,16:9, Subtitle,14:9, 14:9 Zoom, 4:3 or Cinema.
HDMI True
Black
While watching from HDMI source, this feature will be visible in the Picture Settings
menu. You can use this feature to enhance blackness in the picture.
Film Mode
Films are recorded at a different number of frames per second to normal television
programmes. Turn this feature on when you are watching lms to see the fast motion
scenes clearly.
Skin Tone Adjust the desired skin tone.
Colour Shift Adjust the desired colour tone.
RGB Gain
Press OK button to edit RGB gain. You can congure the colour temperature values
using the RGB Gain feature.
Reset Resets the picture settings to factory default settings.
Autoposition
(in PC mode)
Automatically optimizes the display. Press OK to optimize.
H Position (in
PC mode)
This item shifts the image horizontally to right hand side or left hand side of the screen.
V Position (in
PC mode)
This item shifts the image vertically towards the top or bottom of the screen.

English - 11 -
Menu Features and Functions
Advanced Settings
Dot Clock (in PC
mode)
Dot Clock adjustments correct the interference that appear as vertical banding in
dot intensive presentations like spreadsheets or paragraphs or text in smaller fonts.
Phase (in PC mode)
Depending on the resolution and scan frequency that you input to the TV set, you
may see a hazy or noisy picture on the screen. In such a case you can use this
item to get a clear picture by trial and error method.
While in VGA (PC) mode, some items in Picture menu will be unavailable. Instead, VGA mode settings will be added to the
Picture Settings while in PC mode.
Sound Menu Contents
Volume Adjusts volume level.
Equalizer:
In equalizer menu, the preset can be changed to Music, Movie, Speech, Flat,
Classic and User. Press the MENU button to return to the previous menu.
Equalizer menu settings can be changed manually only when the Equalizer
Mode is in User.
Balance This setting is used for emphasizing left or right speaker balance.
Headphone Sets headphone volume.
Sound Mode
You can select Mono, Stereo, Dual I or Dual II mode, only if the selected channel
supports that mode.
AVL
Automatic Volume Limiting (AVL) function sets the sound to obtain xed output
level between programmes (For instance, volume level of advertisements tend
to be louder than programmes).
Dynamic Bass
(optional)
Enables or disables the Dynamic Bass.
Digital Out Sets digital out audio type.
Install and Retune Menu Contents
Automatic Channel
Scan (Retune)
Displays automatic tuning options.
Digital Aerial: Searches and stores aerial DVB stations.
Digital Cable: Searches and stores cable DVB stations.
Analogue: Searches and stores analogue stations.
Digital Aerial & Analogue: Searches and stores aerial DVB and analogue stations.
Digital Cable & Analogue: Searches and stores cable DVB and analogue stations.
Manual Channel
Scan
This feature can be used for direct broadcast entry.
Network Channel
Scan
Searches for the linked channels in the broadcast system.
Analogue Fine Tune
You can use this setting for ne tuning analogue channels. This feature is not
available if no analogue channels are stored.
First Time
Installation
Deletes all stored channels and settings, resets TV to factory settings and starts
rst time installation. You can follow the instructions in the Initial Installation
section for more information on this process.

English - 12 -
Settings Menu Contents
Conditional Access Controls conditional access modules when available.
Language Congures language settings.
Parental Congures parental settings.
Timers Sets timers for selected programmes.
Recording
Conguration
Displays recording conguration menu.
Date/Time Sets date and time.
Sources Enables or disables selected source options.
Other Settings: Displays other setting options of the TV set:
Menu Timeout Changes timeout duration for menu screens.
Scan Encrypted
When this setting is on, search process will locate the encrypted channels as well.
If it is set as Off, encrypted channels will not be located in automatic search or
manual search.
Blue Background Activates or deactivates blue background system when the signal is weak or absent.
Software Upgrade
To ensure that your TV always has the most update information, you can use
this setting. In order for the proper operation, please ensure that the TV is set to
standby mode.
Application Version Displays application version.
Hard of Hearing
If the broadcaster enables any special signal concerning the audio, you can set
this setting as On to receive such signals.
Audio Description
Audio description refers to an additional narration track for blind and visually
impaired viewers of visual media, including television and movies. You can use this
feature, only if the broadcaster supports that additional narration track.
Auto TV Off
You can set the timeout value of auto off feature.After the timeout value is reached
and the Tv is not operated for selected time , the TV will go off.
Store Mode
If you are displaying the TV in a store, you can activate this mode. While Store Mode is
enabled, some items in the TV menu may not be available to be set. Your TV’s features
will be illustrated on the top of the screen.
Standby Search
(optional)
If you change Standby Search to Off, this function will be unavailable. To use
Standby search please make sure that you select Standby Search as On. If the
Standby Search is set to On, when the TV is in standby mode, available broadcasts
will be searched. If the TV locates any new or missing broadcasts, a menu screen
will be displayed, asking you whether or not to execute these changes. Channel list
will be updated and changed after this process. Please activate Standby Search
setting in order to enable your TV for automatically updating the broadcast frequency
of the broadcaster, broadcast denition and similar changes.
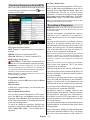
Menu Features and Functions

English - 13 -
Electronic Programme Guide (EPG)
Some, but not all channels send information about the
current and next programmes. Press the “ ”button
to view the EPG menu.
Up/Down/Left/Right: Navigate EPG.
OK: Displays programme options.
INFO: Displays, in detail information on programme
selected.
GREEN: Switches to List Schedule EPG.
YELLOW: Switches to Timeline Schedule EPG.
BLUE: displays ltering options.
(RECORD): the TV will start to record the selected
progamme. You can press again to stop the recording.
IMPORTANT: To record a programme, you should first
connect a USB disk to your TV while the TV is switched off.
You should then switch on the TV to enable recording feature.
Otherwise, recording feature will not be available.
Note: Switching to a different broadcast or source is not
available during the recording.
Programme Options
In EPG menu, press the OK button to enter the Event
Options menu.
Select Channel
In EPG menu, using this option, you can switch to the
selected channel.
Record / Delete Record Timer
After you have selected a programme in EPG menu,
press the OK button and Options screen will be
displayed. Select “Record” option and press the OK
button. After this operation, a recording becomes set
to the selected programme.
To cancel an already set recording, highlight that
programme and press the OK button and select the
option “Delete Rec. Timer”. The recording will be
cancelled.
Set Timer / Delete Timer
After you have selected a programme in EPG menu,
press the OK button and Options screen will be
displayed. Select “Set Timer on Event” option and
press OK button. You can set a timer for future
programmes. To cancel an already set timer, highlight
that programme and press the OK button. Then select
“Delete Timer” option. The timer will be cancelled.
Note: It is not possible to record or set timer for two or more
individual events at the same time interval.
Recording a Programme
IMPORTANT: When using a new USB hard disk drive, it is
recommended that you rst format the disk using your TV’s
“Format Disk” option.
To record a programme, you should rst connect a
USB disk to your TV while the TV is switched off.
You should then switch on the TV to enable recording
feature.
For using recording function, you should connect a
USB disk or an external hard disk drive to the TV
and connected USB disk should have at least 1 GB
capacity and should have 2.0 speed compatibility.
If the connected USB device does not support 2.0
speed, an error message will be displayed.
Note: Recorded programmes are saved into the connected
USB disk. If desired, you can store/copy recordings on a
computer; however, these les will not be available to be
played on a computer. You can play the recordings only
via your TV.
Note: Lip Sync delay may occur during the timeshifting.
Radio record is not supported. The TV can record
programmes up to ten hours.
Recorded programmes are split into 4GB partitions.
If the writing speed of the connected USB disk is not
sufcient, recording may fail and timeshifting feature
may not be available.
Recordings of HD programmes can occupy bigger
size on the USB disk depending on the broadcast’s
resolution. For this reason it is recommended to use
USB hard disk drives for recording HD programmes.
Do not plug out the USB/HDD during the recording.
This may harm the connected USB/HDD.
Multipartition support is available. Maximum two
different partitions are supported. If the disk have more
than two partitions, crash may occur. First partition of
the usb disk is used for PVR ready features. It also
must be formatted as primary partition to be used for
PVR ready features.
Some stream packets may not be recorded because
of signal problems, so sometimes video may freezes
during playback.
Record, Play, Pause, Display (for PlayListDialog) keys
could not be used when teletext is ON. If a recording
starts from timer when teletext is ON, teletext is

English - 14 -
automatically turned off. Also teletext usage is
disabled when there is ongoing recording or playback.
Timeshift Recording
Press (PAUSE) button while watching a broadcast
for switching to timeshifting mode. In timeshifting
mode, the programme is paused and simultaneously
recorded to the connected USB disk. Press (PLAY)
button again to watch the paused programme from
the stopped moment. You will see the timeshift gap
between the real and the timeshifted programme in
the info bar.
Instant Recording
Press (RECORD) button to start recording an
event instantly while watching a programme. You can
press (RECORD) button on the remote control
again to record the next event on the EPG. In this
case, OSD will display the programmed events for
recording. Press (STOP) button to cancel instant
recording. Switching to a different broadcast or source;
and viewing Media Browser are not available during
the recording.
Note: While recording a programme or during the timeshifting,
a warning message appears on the screen if your USB device
speed is not sufcent.
Watching Recorded Programmes
In the main menu, use “ ” or “ ” buttons to select
Media Browser. Highlight Recordings Library item
by using “ ” or “ ” button and press OK button to
enter. Recordings Library will then be displayed.
Select a recorded item from the list (if previously
recorded) by using “ ” / “ ” button. Press OK button
to view Play Options. Select an option by using “ ”
/ “ ” or OK buttons.
Available playback options:
• Play from start: Plays the recording from the
beginning.
• Resume: Recommences the recordings.
• Play from offset: Species a playing point.
Note: Viewing main menu and menu items will not be available
during the playback.
Press (STOP) button to stop a playback and return
to return to Recordings Library.
Slow Forward
If you press (PAUSE) button while watching
recorded programmes, slow forward feature will be
available. You can use button to slow forward.
Pressing button consecutively will change slow
forwarding speed.
Recordings Library
To view the list of recordings, select “Recordings
Library” and press the OK button. Recordings Library
will then be displayed with available recordings. All the
recordings are kept in a list in the recordings library.
(Resume): Recommences the recordings.
RED button (Delete) :Erases the selected recording.
GREEN button (Edit): Makes changes on the
selected recording.
BLUE button (Sort): Changes the order of the
recordings. You can select from a wide range of
sorting options.
OK button: Activates play options menu:
INFO (Details): Displays the short extended programmes
in detail.
Recording Conguration
Select Recording Conguration item in the Settings
menu to congure recording settings.
Format Disk: You can use Format Disk feature for
formatting the connected USB disk. IMPORTANT:
Note that ALL the data stored on the USB disk will
be lost and then the disk format will be converted to
FAT32 if you activate this feature. If your USB disk
malfunctions, you can try formatting the USB disk. In
most cases formatting the USB disk will restore normal
operation; however, ALL the data stored on the USB
disk will be lost in such a case.
Note: If “USB is too slow” message is displayed on the
screen while starting a recording, try restarting the recording.
If you still get the same error, it is possible that your USB
disk does not meet the speed requirements. Try connecting
another USB disk.

English - 15 -
Teletext
“ ” Teletext / Mix: Activates teletext mode when
pressed once. Press again to place the teletext screen
over the programme (mix). Pressing again will quit
the teletext mode.
“BACK” Index: Selects the teletext index page.
“i” Reveal: Shows hidden information (e.g. solutions
of games).
“OK” Hold: Holds a text page when convenient. Press
again to resume.
“ ”/“ ” Subcode Pages: Selects subcode pages if
available when the teletext is activated.
P+ / P- and numbers (0-9): Press to select a page.
Note: Most TV stations use code 100 for their index pages.
Your TV supports both FASTEXT and TOP text
systems. When these systems are available, the
pages are divided into groups or topics. When
FASTEXT system is available, sections in a teletext
page will become colour-coded and can be selected
by pressing the coloured buttons. Press a coloured
button that corresponds to with your needs. The
coloured writings will appear, showing you which
coloured buttons to use when TOP text transmission
is present. Pressing “ ” or “ ” commands will request
the next or previous page respec tively.
Digital Teletext (for UK only)
• Press the “ ” button. The digital teletext information
appears. Operate it with the coloured buttons, cursor
buttons and OK button.
The operation method may differ depending on the
contents of the digital teletext. Follow the instructions
displayed on digital teletext screen.
When the “ ” button is pressed again, the TV returns
to television broadcasting.
Software Upgrade
Your TV is capable of finding and updating new
software upgrades over broadcast channels. For
broadcast channels search, TV looks the available
channels stored in your settings. So before software
upgrade search, it is advised to auto search and
update all available channels.
1) Software upgrade search via user
interface
• It is possible manually to check if there is a new
software upgrade for your TV set.
• Simply navigate on your main menu. Choose
Settings and select Other Settings menu. In
Other Settings menu navigate on to the Software
Upgrade item and press OK button to open
Upgrade Options menu.
• In Upgrade Options menu select Scan for upgrade
and press OK button.
• If a new upgrade is found, it starts to download the
upgrade. A progress bar indicates the remaining
download progress. When download completes
with success a message is displayed for reboot to
activate new software. Press OK to continue with
the reboot operation.
2) Background search and upgrade mode
• While TV is connected to Internet, in background it
searches for critical software upgrades. If a critical
software upgrade is found it downloads the upgrade
silently. When download completes with success a
message is displayed for reboot operation to activate
new software. Press OK to continue with the reboot
operation.
3) 3 AM search and upgrade mode
• If Automatic scanning in Upgrade Options menu
is enabled, TV wakes up at 03:00 and searches
broadcast channels for new software upgrade. If new
software is found and downloaded successfully, with
next power up TV opens with new software version.
Note on reboot operation: Reboot is the last step in software
upgrade operation if download of new software is nished
successfully. During reboot TV makes nal initialization. In
reboot sequence panel power is closed and front led indicates
the activity with blinking. Around 5 minutes later TV restarts
with new software activated.
• If your TV fails to restart in 10 minutes, unplug power
for 10 minutes and re-plug again. TV should open
with new software safely. If you still can not get
TV working, please kindly repeat unplug and plug
sequence a few times more. If your set still can not
operate, please call the service personnel to x the
problem for you.
Caution: While led is blinking during reboot do not unplug
your TV’s power. Doing this may cause your TV not to
re-open again and can only be xed by service personnel.
Troubleshooting & Tips
Image persistence - ghosting
Please note that ghosting may occur while displaying
a persistent image (still or paused image). LCD TV’s
image persistence may disappear after a short time.
Try turning off the TV for a while. To avoid this, do not
leave the screen in still picture mode for extended
periods.
No power
If your TV has no power, please check the power cord
plug is connect to the mains power socket.
Poor picture
1. Have you selected the correct TV system?
2. Is your TV or house aerial located too close to a
non-earthed audio equipment or neon lights, etc.?

English - 16 -
3. Mountains or high buildings can cause double
pictures or ghost images. Sometimes you can
improve the picture quality by changing the
direction of the aerial. Is the picture or teletext
unrecognisable?
4. Check if you have entered the correct frequency.
5. Please retune the channels.
6. The picture quality may degrade when two devices
are connected to the TV at the same time. In such
a case, disconnect one of the devices.
No picture
1. No Picture means that your TV is not receiving a
transmission. Have you selected the correct button
on the remote control? Try once more. Also make
sure the correct input source has been selected.
2. Is the aerial connected properly?
3. Are the plugs connected tightly to the aerial socket?
4. Is the aerial cable damaged?
5. Are suitable plugs used to connect the aerial?
6. If you are in doubt, consult your dealer.
No sound
1. Has the TV been set to mute? To cancel mute,
press the “ ” button, or increase the volume level.
2. Sound is coming from only one speaker. Is the
balance set to one extreme? See Sound Menu
section.
Remote control - does not operate
Your TV no longer responds to the remote control.
The batteries may be exhausted, if so you can still
use the control buttons on the TV. (* Is only possible
if they are not blocked by parental control.)
Input sources - can not be selected
1. If you cannot select an input source, it is possible
that no device is connected.
2. Check the AV cables and connections if you have
tried to connect a device.
Recording Unavailable
To record a programme, you should rst connect
a USB disk to your TV while the TV is switched
off. You should then switch on the TV to enable
recording feature. Otherwise, recording feature will
not be available. If you cannot perform recording, try
switching off the TV and then re-inserting the USB
device while the TV is switched off.
USB Is too Slow
If “USB is too slow” message is displayed on the
screen while starting a recording, try restarting
the recording. If you still get the same error, it is
possible that your USB disk does not meet the speed
requirements. Try connecting another USB disk.
Manufactured under license from Dolby Laboratories.
TRADEMARK ACKNOWLEDGMENT
“Dolby” and the double-D symbol are trademarks of
Dolby Laboratories.
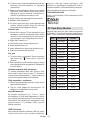
PC Typical Display Modes
The following table is an illustration of some of the
typical video display modes. Your TV may not support
all resolutions. Your TV supports up to 1920x1080.
Index Resolution Frequency
1 640x350p 60 Hz
2 640x400p 60 Hz
3 1024x768 60 Hz
4 1280x768 60 Hz
5 1360x768 60 Hz
6 720x400 60 Hz
7 800x600 56 Hz
8 800x600 60 Hz
9 1024x768 60 Hz
10 1024x768 66 Hz
11 1280x768 60 Hz
12 1360x768 60 Hz
13 1280x1024 60 Hz
14 1280x960 60 Hz
15 1280x1024 60 Hz
16 1400x1050 60 Hz
17 1920x1080 60 Hz
18 1600x1200 60 Hz

English - 17 -
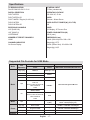
Specications
TV BROADCASTING
PAL/SECAM B/G D/K K’ I/I’ L/L’
DIGITAL RECEPTION
DVB-T MPEG2
DVB-T MPEG4 HD
DVB-T MHEG-5 Engine (for UK only)
DVB-C MPEG2
DVB-C MPEG4 HD
RECEIVING CHANNELS
VHF (BAND I/III)
UHF (BAND U)
HYPERBAND
NUMBER OF PRESET CHANNELS
10000
CHANNEL INDICATOR
On Screen Display
Supported File Formats for USB Mode
Media
File
Extension
Format
Remarks
Video Audio (Maximum resolution/Bit rate etc.)
Movie
.mpg .mpeg MPEG1,2 MPEG Layer 1/2/3
MAX 1920x1080 @ 30P 20Mbit/sec
.dat MPEG1,2
MPEG2
.vob MPEG2
.mkv H.264, MPEG1,2,4 EAC3/ AC3
.mp4
MPEG4
Xvid 1.00,
Xvid 1.01, Xvid 1.02, Xvid 1.03,
Xvid 1.10-beta1/2
H.264
PCM/MP3
.avi
MPEG2, MPEG4
Xvid 1.00,
Xvid 1.01, Xvid 1.02, Xvid 1.03,
Xvid 1.10-beta1/2
H.264
PCM
Music
.mp3 -
MPEG 1 Layer 1 /
2 (MP3)
32Kbps ~ 320Kbps(Bit rate)
32KHz ~ 48KHz(Sampling rate)
Photo
.jpg .jpeg Baseline JPEG - max WxH = 15360x8640 4147200bytes
. Progressive JPEG - max WxH = 9600x6400 3840000bytes
.bmp - - max WxH = 9600x6400 3840000bytes
Subtitle
.sub .srt - - -
RF AERIAL INPUT
75 Ohm (unbalanced)
OPERATING VOLTAGE
220-240V AC, 50 Hz.
AUDIO
German + Nicam Stereo
AUDIO OUTPUT POWER (W) (10% THD)
2x8
PANEL
16:9 display, 42” Screen Size
POWER CONSUMPTION (W)
160 W (max)
DIMENSIONS (mm)
DxLxH (With foot):220 x 990 x 648
Weight (Kg):15,75
DxLxH (Without foot): 39 x 990 x 608
Weight (Kg):14,25

Türkçe - 18 -
Güvenlik Önlemleri
Kurulum veya çalıştırma öncesinde bu
talimatları tam olarak okuyunuz.
Hazırlık
Cihazı sert ve dengeli bir yüzeye koyunuz.
Havalandırma için alet etrafında en az 10 cm boş
alan bırakınız. Bir hata oluşumunu önlemek ve güvenli
olmayan bir durumdan korunmak için cihazın üzerine
lütfen herhangi bir nesne koymayınız. Cihazı ılıman
iklimlerde kullanınız. Çalıştırma sıcaklığı ve nemi:
5ºC ila 45ºC, maks. %85 bağıl nem (havalandırma
açıklıklarını tıkamayacak).
Kullanım Amacı
Bu cihaz TV programlarını almak ve görüntülemek
için kullanılır.Farklı bağlantı seçenekleri, olası
kaynakların alımı ve görüntülenmesi için ilave
genişletme sunar (çeşitli harici cihazlar). Bu cihaz
sadece kuru mekanlarda çalışmaya uygundur. Bu
cihaz yalnızca özel ev kullanımı için üretilmiştir ve
sanayi ve ticari amaçlarla kullanılamaz. Eğer cihaz
kullanım amacının dışında kullanılırsa veya üzerinde
izinsiz değişiklikler yapılırsa prensip olarak cihazdaki
sorumluluğumuz kalkar. LCD TV’nizi aşırı ortam
koşullarında çalıştırmak cihaza zarar verebilir.
UYARI: Fiziksel, algısal veya zihinsel olarak
yetersiz veya deneyimsiz kişiler (çocuklar
dahil) güvenliklerinden sorumlu olan bir
kişinin gözetimi olmadan elektrikli bu cihazı
kullanmamalıdır!
Çocuklar tehlikelerin farkında olmayabilir!
Pillerin yutulması ölümcül olabilir. Pilleri küçük
çocukların erişemeyeceği yerlerde saklayın.
Piller yutulursa, derhal tıbbi yardım alınız.
Ambalaj malzemelerini çocukların erişebileceği
yerlerden uzak tutunuz. Boğulma tehlikesi.
Güç kaynağı
• TV yalnızca 220-240 V AC 50 Hz çıkışla
çalıştırılmalıdır.
• Uyarı: Evden ayrılırken TV’nizi bekleme
konumunda veya çalışır halde bırakmayınız.
TV’nin Konumlandırılması
• Havalandırma için TV etrafında en az 10cm boş
alan bırakınız.
• engellemeyiniz.
• TV’yi eğimli veya dengesiz yüzeylere koymayınız;
TV devrilebilir.
• TV’nin zarar görmesini engellemek için, TV üzerine
herhangi bir nesne koymayınız.
• Yalnızca ılıman iklimlerde kullanınız.
İçindekiler
Güvenlik Önlemleri ............................................... 18
Çevresel Bilgi ....................................................... 19
Dahil olan aksesuarlar .......................................... 20
TV - Özellikler ...................................................... 20
TV’nin Görüntülenmesi ......................................... 20
TV Kontrol tuşları ve Çalıştırma............................ 20
Uzaktan kumandaya pil yerleştirilmesi ................. 21
Güç ve Anten/Kablo/Uydu Bağlanması ................ 21
Uzaktan kumandanın görüntülenmesi ................. 22
Açma/Kapatma ..................................................... 24
İlk Kurulum............................................................ 24
USB Girişi yoluyla Medya Oynatma ..................... 26
Görüntü Boyutunu Değiştirme: Resim Formatları 26
Kanal Listesinin Kullanılması ................................ 26
Menü Özellikleri ve İşlevleri .................................. 27
Menü Özellikleri ve İşlevleri .................................. 28
Menü Özellikleri ve İşlevleri .................................. 29
Elektronik Program Rehberi (EPG) (Electronic
Programme Guide) ............................................... 30
Program Kaydetme............................................... 30
Zaman Kaydırmalı Kayıt ...................................... 31
Anında Kayıt ......................................................... 31
Kayıtlı Programları İzleme ................................... 31
Kayıt Yapılandırma ............................................... 31
Teleteks ................................................................ 32
Yazılım Yükseltme ................................................ 32
Sorun Giderme ve İpuçları.................................... 32
PC Tipik Ekran Modları ........................................ 33
Özellikler ....................................................................34
USB Modunda Desteklenen Dosya Formatları..... 34

Türkçe - 19 -
Güç kablosu ve ş
• Güç kablosu kolaylıkla erişilebilir olmalıdır. Fırtına
veya yıldırım düşmesi durumunda, tatile giderken
veya TV uzun bir sure boyunca kullanılmayacaksa,
güç kablosunu prizden çekin.
• Elektrik kablosu TV setinin elektrik şebekesi ile olan
bağlantısının kesilmesi için kullanılır, dolayısı ile hali
hazırda işleyebilir kalacaktır.
• bükmeyiniz.
• Güç kablosunu şten tutunuz, kablodan çekerek
prizden çıkarmayınız.
• Güç kablosuna/şe asla ıslak ellerle dokunmayınız;
bunu yapmak kısa devreye veya elektrik çarpmasına
neden olabilir.
• Güç kablosunu asla düğümlemeyiniz veya başka
kablolarla birlikte bağlamayınız.
• Güç kabloları, üzerlerine basılmayacak veya
üzerinden geçilmeyecek şekilde yerleştirilmelidir.
• Hasar görmüş bir güç kablosu/fiş yangına
veya elektrik çarpmasına neden olabilir. Hasar
gördüğünde, yalnızca yetkili personel tarafından
değiştirilmelidir.
Nem ve Su
• kullanmayınız (banyoda, mutfak lavabosu ve
bulaşık makinesi yakınlarında kullanmaktan
kaçınınız).
• bırakmayınız, tehlikeli olabilir.
• koymayınız. Su damlatmaktan veya sıçratmaktan
kaçınınız.
• Eğer kabinin üzerine herhangi sert bir nesne
düşecek veya sıvı dökülecek olursa, TV’nin şini
çekiniz ve tekrar çalıştırmadan önce vasıı eleman
tarafından kontrol ettiriniz.
Havalandırma
• TV seti üzerindeki yuva ve delikler havalandırma ve
güvenli çalışma için yapılmışlardır.
• Aşırı ısınmadan kaçınmak için bu delikler hiçbir
şekilde engellenmemeli veya kapatılmamalıdır.
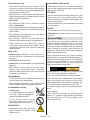
Isı Kaynakları ve Ateş
• bırakmayınız.
• TV, çıplak alevlerin veya elektrikli
ısıtıcı gibi yoğun ısı kaynaklarının
yakınına yerleştirilmemelidir.
• TV’nin üzerine, yanan mumlar
gibi hiçbir çıplak ateş kaynağının
koyulmadığından emin olunuz.
Kulaklık Sesi
• Kulaklıklardan gelen aşırı ses basıncı
duyma kaybına yol açabilir; lütfen
dikkatli olunuz.
Duvara Montaj (Opsiyonel)
• Yaralanmaları önlemek için, kurulum talimatlarına
uygun olarak sağlam şekilde duvara tutturulmalıdır
(bu seçenek mevcutsa).
LCD Ekran
• Ara sıra ekranda sabit noktalar halinde mavi, yeşil
veya kırmızı bir kaç ölü piksel belirebilir. Lütfen
bunun ürününüzün çalışmasını etkilemediğini göz
önünde bulundurunuz.
• Ekranı tırnaklarınızla veya sert cisimlerle çizmemeye
özen gösteriniz.
Temizlik
• Temizlemeden önce TV’nin şini prizden çekiniz.
• kullanmayınız. Yalnızca yumuşak ve kuru bir kumaş
kullanınız.
Çevresel Bilgi
Bu televizyon çevreyi korumak için daha az enerji
tüketecek şekilde tasarlanmıştır. Bu TV’nin enerji
tasarrufu özelliği sayesinde sadece çevrenin
korunmasına yardımcı olmakla kalmaz, aynı zamanda
elektrik faturanızı düşürerek para tasarrufu da
yapabilirsiniz. Enerji tüketimini azaltmak için aşağıdaki
adımları gerçekleştirmelisiniz:
Resim menüsünde bulunan Güç Tasarrufu Modunu
kullanabilirsiniz. Güç Tasarrufu Modunu açarsanız, TV
enerji tasarrufu moduna geçecek ve TV’nin parlaklığı
optimum seviyeye indirilecektir. TV Güç Tasarrufu
modunda olduğunda bazı görüntü ayarlarının
değiştirilemeyeceğine dikkat ediniz.
Kullanılmadığında TV’yi kapatınız ve şini prizden
çekiniz. Bu da enerji tüketimini azaltacaktır.
Uzun süre uzakta kalacaksanız prizden çıkarınız.
Yıllık enerji tüketiminizi azaltmak için Güç Tasarrufu
Modunu etkinleştirmeniz önemle tavsiye edilir.
Kullanmadığınızda enerji tasarrufu sağlamak için
TV’nin şinin prizden çekilmesi de tavsiye edilir.
Bu adımları izleyerek çevreyi korumamıza yardımcı
olunuz.
Onarım Bilgileri
Lütfen bütün servis işlemleri için yetkili personele
danışınız. TV’yi sadece kaliye personel onarmalıdır.
Daha fazla bilgi için bu TV’yi satın aldığınız yerel
bayinize başvurunuz.
Page is loading ...
Page is loading ...
Page is loading ...
Page is loading ...
Page is loading ...
Page is loading ...
Page is loading ...
Page is loading ...
Page is loading ...
Page is loading ...
Page is loading ...
Page is loading ...
Page is loading ...
Page is loading ...
Page is loading ...
Page is loading ...
Page is loading ...
-
 1
1
-
 2
2
-
 3
3
-
 4
4
-
 5
5
-
 6
6
-
 7
7
-
 8
8
-
 9
9
-
 10
10
-
 11
11
-
 12
12
-
 13
13
-
 14
14
-
 15
15
-
 16
16
-
 17
17
-
 18
18
-
 19
19
-
 20
20
-
 21
21
-
 22
22
-
 23
23
-
 24
24
-
 25
25
-
 26
26
-
 27
27
-
 28
28
-
 29
29
-
 30
30
-
 31
31
-
 32
32
-
 33
33
-
 34
34
-
 35
35
-
 36
36
-
 37
37


VESTEL 42PF6022 Operating Instructions Manual
- Category
- LCD TVs
- Type
- Operating Instructions Manual
Ask a question and I''ll find the answer in the document
Finding information in a document is now easier with AI
in other languages
- Türkçe: VESTEL 42PF6022
Related papers
-
VESTEL PERFORMANCE 20VH3032 Operating Instructions Manual
-
-
VESTEL Satellite 32PF5040 Operating Instructions Manual
-
-
-
-
VESTEL 22PF5021B Operating Instructions Manual
-
-
-
Other documents
-
Hitachi L46VG09U Instructions For Use Manual
-
-
Finlux 42F6030 User manual
-
-
-
Sanyo CE42FD17-B User manual
-
Andersson LED5581FDC PVR Operating Instructions Manual
-
 Grandin LV32W10 Operating Instructions Manual
-
JVC LT-32HC1BU Instructions Manual
-
