Page is loading ...

Applied Digital, Inc. 19315 North State hwy 413 Branson West, MO 65737
417-297-0361 Fax 816-337-3398 E-Mail: adiinfo@appdig.com web:www.appdig.com
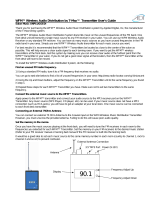
The T-Max® G2 Wireless Installation Guide
The T-Max® G2 wireless adapters allow you to connect an entire salon without running cables through the walls of your salon. The T-
Max® G2 also allows you to expand a current T-Max® Series without running additional cables throughout your salon.
The T-Max® G2 Series works by transmitting the T-Max® communications via a 900Mhz RF (radio frequency) signal. This allows
each timer in your salon to communicate with the T-Max® Manager or T-Max® Manager/Pro without the need of running cables
throughout your salon. The T-Max® G2 Wireless Series works with all Applied Digital, Inc. T-Max® products.
Important Installations Notes:
1) Make sure each G2 Access Point is installed upright with the antenna facing up.
2) All G2 Access Points units must be at least 2 feet apart even if separated by a wall. Make sure they are not right across from each
other on different sides on the same wall in adjacent rooms.
3) If connecting G2 Access Points on multiple floors, do not place an G2 Access Point directly above the G2 Access point connected
to the T-Max® Manager. Make sure they are offset by at least 2 feet.
4) Make sure the G2 Access Point is mounted above the highest point on the tanning bed (when the canopy is raised).
5) Make sure the G2 Access Point is not mounted next to metal such as metal studs in walls, vending machines, etc.
Connecting Two T-Max® 3As in Master/Slave
Set the address on the T-Max® 3As at the front desk to address 0 and the T-Max® 3As in the tanning rooms to address 1 as described
in the T-Max® 3A Users Guide. Connect the T-Max® 3A to the tanning bed as described in the T-Max® 3A and tanning bed user’s
guides. DO NOT run the provided modular cable from the front desk T-Max® 3A’s to the tanning room as described in the manuals.
Connect a T-Max® G2 System to each T-Max® 3As as shown here.
Connect the power supply to the power screw terminals on the back of the T-Max® 3A
(or connect the provided power supply with the Power Injector to the power input).
Connect the RJ22 cable between the T-Max 3A and the G2 Power injector. Then
Connect the RJ11 cable between the G2 Power Injector and the G2 Access Point.
Note: You do not have to connect the Power injector and T-Max® 3A to a common
power supply. You can provide power with separate power supplies if desired.
ADI PN:60000000053 (Optional)
T-Max® 3A at the front desk
T-Max® 3A in tanning room
Note: If the tanning bed has an in bed T-Max® timer,
simply connect the T-Max® G2 Access Point directly
to the RJ-22 port on the tanning bed. You don’t need
to add anything if there is an in bed T-Max® Timer
and G2 Access Point already in your tanning bed.
T-Max® 3A (rear view)
Pwr in 9
-
12V
G2
Acce ss
Point
G2 Power Injector

Applied Digital, Inc. 19315 North State hwy 413 Branson West, MO 65737
417-297-0361 Fax 816-337-3398 E-Mail: adiinfo@appdig.com web:www.appdig.com
Connecting Multiple T-Max® G2 Modules to a T-Max® Manager or T-Max® Manager/Pro
Decide where you want the T-Max® Manager and timers to be installed in the rooms. DO NOT run the modular cables through your
walls as described in your manuals.
Once the system is installed, auto address the system as described in your T-Max® Manager or T-Max® Manager/Pro manual.
Operate the system as normal.
Expanding an Existing T-Max® Installation with G2s
Using the G2 wireless system, you can expand a current T-Max® Series without running additional wires to your new rooms. Simply
connect a G2 system to the end of your current T-Max® daisy chain, then connect a G2 system to the new T-Max® 3A or tanning bed
with a T-Max® timer built in. If you are adding a tanning bed with the G2 Access point installed, you don’t need to add anything else.
Troubleshooting
If, after installing the system, you do not get communications between units:
1) M ake sure all units and timers are getting power and properly connected to the tanning units.
2) M ake sure the data lights on the G2 Access Points are flashing. If there are lights on but none are flashing rapidly, it may be necessary to move the
G2 Access Point unit to another location. M ove the G2 access Point unit until the data light starts flashing.
3) M ake sure the distance between the G2 Access Points connected to the T-Max® M anager and the furthest wireless module does not exceed 300
feet. You may need to move the G2 access Point.
4) M ake sure the G2 Access Points units are at least 2 feet apart from each other.
5) If you are connecting G2 systems units on multiple floor levels, make sure the G2 Access Points units are not directly above the G2 Access Points
unit that is connected to the T-M ax® Manager.
6) The Frequency of the G2 Access Points units may have to be changed. Contact Applied Digital Technical Support for instructions.
Note If the tanning bed has an in bed T-Max®
timer, simply connect the T-Max® G2 Access
Point directly to the RJ-22 port on the tanning
bed. You don’t need to add anything if there is
an in bed T-Max® Timer and G2 Access Point
already in your tanning bed.
You can either provide power to the T-Max Manager and the G2 Power Injector with the power supplies provided with each unit,
or you can use one power supply to power both. To do this, connect the power supply that provided with the T-Max Manager to
one of the power inputs on the G2 Power Injector. Then connect the optional power patch cable (PN 60000000053) between the
open power connector on the G2 Access Point and the power connector on the T-Max Manager or T-Max Manager/Pro.
Address the new timers as described in the T-Max® 3As or tanning bed users
guides. It may be necessary to set the maximum bed number in the T-Max®
Manager or Manager/Pro as described in their respective user’s guides.
Note: If the tanning bed has an in bed T-Max® timer, simply
connect the T-Max® G2 Access Point directly to the RJ-22 port on
the tanning bed. You don’t need to add anything if there is an in
bed T-Max® Timer and G2 Access Point already in your tanning
bed.
Connect the G2 system to the T-Max®
Manager using the modular cable
provided. Do not modify this cable in
any way.
Connect the G2 System to
each additional T-Max®
3A as described on page 1.
Connect the G2 system to the T-Max® 3A
or last timer in your current daisy-chain
Connect the G2 system to
each additional T-Max®
3A as described on page 1.
/