Page is loading ...

FULL TWO YEAR WARRANTY
Philips Electronics North America Corporation warrants each new Norelco
product, Model T-5500 (except cutters), against defects in materials or work-
manship for a period of two years from the date of purchase, and agrees to
repair or replace any defective product without charge.
IMPORTANT: This warranty does not cover damage resulting from accident,
misuse or abuse, lack of reasonable care, the affixing of any attachment not
provided with the product or loss of parts or subjecting the product to any but
the specific voltage.* Use of unauthorized replacement parts will void this
warranty.
PHILIPS ELECTRONICS NORTH AMERICA CORPORATION WILL NOT PAY
FOR WARRANTY SERVICE PERFORMED BY A NON-AUTHORIZED REPAIR
SERVICE AND WILL NOT REIMBURSE THE CONSUMER FOR DAMAGE
RESULTING FROM WARRANTY SERVICE PERFORMED BY A NON-AUTHO-
RIZED REPAIR SERVICE.
NO RESPONSIBILITY IS ASSUMED FOR ANY SPECIAL, INCIDENTAL OR
CONSEQUENTIAL DAMAGES.
In order to obtain warranty service, simply take or ship the product postage
prepaid to the nearest Authorized Norelco Service Location. It is suggested that
for your protection you return shipments of product by insured mail, insurance
prepaid. Damage occurring during shipment is not covered by this warranty.
NOTE: No other warranty, written or oral, is authorized by Philips Electronics
North America Corporation. This warranty gives you specific legal rights, and
you may also have other rights which vary from state to state. Some states do
not allow the exclusion or limitation of incidental or consequential damages, so
the above exclusion and limitations may not apply to you.
*Read enclosed instructions carefully.
Manufactured for: Norelco Consumer Products Company
A Division of Philips Electronics North America Corporation
1010 Washington Blvd., Stamford, CT 06912-0015
MADE IN AUSTRIA.
This symbol on the product’s nameplate means it is
listed by Underwriters’ Laboratories, Inc.
Norelco is a Registered Trademark of Philips Electronics North America Corporation.
One Touch Select is a Trademark of Philips Electronics North America Corporation.
PHILIPS and Philips Shield are Registered Trademarks of Koninklijke
Philips Electronics N.V.
© 1999 Philips Electronics North America Corporation. All Rights Reserved.
3. Never operate this Trimmer/Charging Base if it has a
damaged cord or plug, if it is not working properly, if it
has been dropped, damaged, or dropped into water.
Return the Trimmer to an Authorized Norelco Service
Location for examination and repair.
4. Keep the Trimmer/Charging Base and Cord away from
heated surfaces.
5. Never drop or insert any object into any opening.
6. Do not operate, charge Trimmer, or plug in Charging Base
outdoors or where aerosol (spray) products are being used
or where oxygen is being administered.
7. Do not use this Trimmer with a damaged or broken cutter,
as facial injury may occur.
8. Place Trimmer in Charging Base first, then plug Charging
Base into outlet. To disconnect, turn ON/OFF switch to
“OFF” position (switch is down), then remove Charging
Base plug from outlet.
9. To prevent possible damage to the cord, do not wrap cord
around the Trimmer or Charging Base.
10.Never put Trimmer in direct sunlight or store at a temper-
ature above 140˚F.
SAVE THESE
INSTRUCTIONS
IMPORTANT: YOUR TRIMMER CONTAINS NICKEL-
CADMIUM RECHARGEABLE BATTERIES. See Battery
Removal instruction sheet for battery disposal information.
IMPORTANT
SAFETY
INSTRUCTIONS
When using an electrical appliance, basic safety precautions
should always be followed, including the following:
Read all instructions before using this appliance.
DANGER
To reduce the risk of electric shock:
1. Do not reach for a Trimmer that has fallen into water.
Unplug Base immediately.
2. Do not use while bathing or in a shower.
3. Do not place or store Trimmer where it can fall or be
pulled into a tub or sink. Do not place in or drop into
water or other liquid.
4. Always unplug this Trimmer/Charging Base from the elec-
trical outlet immediately after using, except when
Trimmer is (re)charging.
5. Unplug Trimmer Base before cleaning.
6. When discarding Trimmer, unplug Base and remove
rechargeable batteries. See enclosed sheet for instructions.
WARNING
To reduce the risk of burns, fire or injury to persons:
1. Close supervision is necessary when this appliance is used
by, on, or near children or invalids.
2. Use this Trimmer for its intended household use as
described in this manual. Do not use attachments not
recommended by Philips Electronics North America
Corporation.
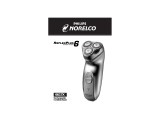
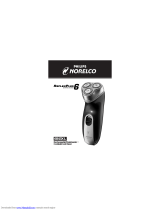
®
T-5500
Rechargeable
Cordless Beard
and Moustache
Trimmer
Instructions
for use
If you need help,
answers or service,
please call us at
1-800-243-3050 or
visit our website:
www.norelco.com
®
LISTED

IMPORTANT
Give your new Trimmer a chance! Like many new products,
your Norelco Trimmer may take a little getting used to. If you
are using a Trimmer for the first time, or if you’ve been using
a different brand, take the time to acquaint yourself with your
new Norelco Trimmer. Your Trimmer features One Stroke
Comb Adjustment, which slides to 4 pre-select hair length set-
tings, offering greater control and versatility when grooming
your beard.
Before using the One Stroke Comb Adjustment, always make
sure the Trimmer is in the OFF position. You may want to begin
by using the highest setting (#4) to prevent trimming too
much hair initially. Then, consecutively try the next setting(s)
until you find your preferred length. By learning to use the 4
position One Stroke Comb Adjustment feature properly, you
can achieve different lengths for your beard, moustache and
sideburns quickly and easily for precise trimming every time.
Product Assistance
For assistance or the Authorized Norelco Service Location
nearest you, call toll free:
Authorized Service Location information is available 24 hours
a day, 7 days a week.
®
60 - DAY MONEY-BACK
GUARANTEE
If you are not fully satisfied with your Norelco Beard and Moustache
Trimmer, send the product back and we’ll refund you the full pur-
chase price.
The Trimmer must be shipped prepaid by insured mail, insurance
prepaid, and have the sales receipt, indicating purchase price
and the date of purchase, enclosed. The Trimmer must be post-
marked no later than 60 days after the date of purchase. Norelco
reserves the right to verify the purchase price of the trimmer and
limit refunds not to exceed suggested retail price.
Send dated sales receipt, your complete name and address as indi-
cated below, and the Trimmer, prepaid to:
Norelco Consumer Products Company
A Division of
Philips Electronics North America Corporation
P.O. Box 1116
Skokie, IL 60076
Please allow 4-6 weeks for delivery of check. (Please Print)
Name
Address
City
State Zip
Telephone No.
( )
REASON FOR RETURNING
AREA CODE
Features
A. Removable Trimmer Guard Attachment
B. 3-Dimensional Rounded Chromium Steel Cutter Blades
C. One Stroke Comb Adjustment with 4 Pre-Select Positions
D. Selected Hair Length Setting Window
E. Swing-Away Cutter Blades
F. ON/OFF Switch
G. Charging Base with Indicator Light
H. Cleaning Brush
D
A
B
G
F
H
E
C
1-800-243-3050
or visit our website: www.norelco.com
Important Battery Disposal Information
WHEN DISCARDING YOUR TRIMMER: THIS NORELCO TRIMMER CONTAINS A NICKEL-CADMIUM RECHARGEABLE BAT-
TERY WHICH MUST BE RECYCLED OR DISPOSED OF PROPERLY. Refer to Battery Removal instruction sheet for direc-
tions on removing rechargeable battery.
CAUTION: • Battery should be removed only when trimmer is to be discarded.
• Remove Trimmer from Charging Base and unplug Charging Base from outlet before dismantling.
• All servicing should be performed by an Authorized Norelco Service Location only.

• Trimmer Guard
Attachment must be in
place on the Trimmer in
order to use the One
Stroke Comb Adjustment
feature.
• One Stroke Comb
Adjustment with Trimmer
Guard Attachment
ensures precise trimming
and has 4 adjustable
positions (see chart
below).
• Slide One Stroke Comb
Adjuster to desired set-
ting. Adjuster will “click”
into position (Fig. 4).
• Start at a longer setting
(#4) to prevent accidental-
ly trimming hairs too
short (Fig. 3).
• Trim against the direction
of hair growth (Fig. 6)
• As you become familiar
with the settings, slide
Adjuster to desired trim-
ming length.
To Remove
• Remove Trimmer Guard
Attachment if you are:
• Defining hair lines
• Trimming nape of neck
• Removing single, unwant-
ed hairs
1. Be certain Trimmer is in
the OFF position.
2. Hold Trimmer base with
one hand, grasp sides of
Trimmer Guard Attach-
ment and gently slide
Attachment off Trimmer
(Fig. 5).
NOTE: Attachment can be
removed while it is on any
setting.
To Replace
1. Be certain Trimmer is in
the OFF position.
2. Hold Trimmer in one hand
and replace Attachment
back onto Trimmer until it
“clicks” into position.
NOTE: The Trimmer Guard
Attachment can be placed on
Trimmer only one way. If it
does not fit properly, reverse it.
To Trim Beard
1. Comb hairs outward so
that they are at their maxi-
mum height and in the
same direction.
2. With Trimmer Guard
Attachment in place, set
One Stroke Comb
Adjuster to desired setting
(Fig. 4).
3. Slide ON/OFF switch to
the ON position and begin
trimming.
4. Turn Trimmer OFF.
IMPORTANT: If using
Trimmer without Trimmer
Guard Attachment, use a
slow, very light “skim-
ming” technique to prevent
trimming off more than the
desired amount of hair.
To Trim Outer Edge of Beard
& Add Definition
1. Remove Trimmer Guard
Attachment (Fig. 5).
2. Hold Trimmer diagonally
with front of Trimmer fac-
ing away from you (Fig. 7).
3. Turn Trimmer ON.
4. Start at chin and work
back toward ear.
5. Follow line of jawbone to
cut away longer hairs on
outer edge of beard.
6. Turn Trimmer OFF.
NOTE: Practice is best for
optimum results.
3
4
3
2
1
4
2
1
4
4
1
2
3
4
One Stroke Comb Adjustment
#1 Stubble Length or Closely Cropped .06 in./1.5 mm
#2 Short .12 in./3 mm
#3 Medium .2 in./5 mm
#4 Long .28 in./7 mm
5
6
4
Trimmer Guard Attachment
7
• Use only the Charging Base
provided.
• (Re)charge at tempera-
tures between 40˚F and
95˚F. Charging at lower or
higher temperatures
adversely affects lifetime
of battery.
• Charging requires a full
10 hours.
• Recharging longer than
the required period of time
will not harm Trimmer.
However, continuously
charging Trimmer will
reduce life of battery.
VOLTAGE
In North America, Central
America, and South America,
the most common voltage is
between 110 and 130V AC.
When traveling to other
countries, common voltage
may range to 240V AC. Your
new Trimmer Charging Base
may be used with voltage of
120V AC only.
1. Be certain Trimmer is OFF
(Fig. 1).
2. Plug the cord of Charging
Base into the electrical
outlet.
3. Charge the Trimmer in the
Charging Base.
4. Green Charging Indicator
Light will light
to indicate
Trimmer is (re)charging
(Fig. 2).
NOTE:
1. The Charging Base can
also be used to store the
Trimmer.
2. In order to ensure the
longest possible working
life of the battery:
• Do not charge for more
than 24 hours.
• Do not keep the Charging
Base permanently plugged
in.
• Plug in Charging Base
only when the trimmer
motor sounds like it is
running slower. This indi-
cates the rechargeable
battery will be empty
soon.
• Discharge the battery
completely once a year
by letting the motor run
until it stops.
3. If the battery is empty and
you want to trim your
beard, charge Trimmer for
at least 1.6 hours and you
will have enough power
for one use.
4. If the Trimmer hasn’t
been used for a long
period of time, Trimmer
must be recharged for a
full 10 hours.
To Charge/Recharge
1
2

To Define Beard Line
1. Hold Trimmer vertically
with front of Trimmer fac-
ing you (Fig. 8).
2. Start with trimmed edge
of beard and with down-
ward motions trim area
directly under the beard
line.
To Thin and Taper Beard
1. Use a small comb to hold
hairs in place while trim-
ming.
2. Hold Trimmer with front
of Trimmer facing away
from you (Fig. 7).
3. Trim hair ends using an
upward motion.
4. Turn Trimmer OFF.
To Trim Moustache with
Trimmer Guard Attachment
• Be certain Trimmer Guard
Attachment is on to pre-
vent trimming off too
many hairs.
1. Comb hairs outward so
they are at their maximum
height and in the same
direction.
2. Set One Stroke Comb
Adjuster to desired setting
(Fig. 4).
• Hold Trimmer vertically
with front of Trimmer fac-
ing you.
• Trim hairs using a down-
ward motion following the
direction of your hair
growth or you may trim
against your hair growth—
whichever is preferred.
NOTE: Since all hairs do
not grow in the same
direction, you may want
to try different trimming
positions (i.e. upwards,
downwards or across).
Practice is best for opti-
mum results.
To Trim Moustache without
Trimmer Guard Attachment
1. Remove Trimmer Guard
Attachment (Fig. 10).
2. Place a finger on upper lip
to lift hair up, away from
skin.
3. Trim hairs using an
upward motion.
4. After achieving desired
length, use a downward
motion to blend mous-
tache hairs (Fig. 8).
NOTE: Use a slow and
gentle pressure. Too
much pressure may trim
more hair than desired.
5. Turn Trimmer OFF.
To Trim Sideburns
1. Comb sideburns following
the direction of your hair
growth.
2. Be certain Trimmer Guard
Attachment is ON.
3. Hold Trimmer vertically
with front of Trimmer fac-
ing you.
4. Trim sideburns using a
downward motion.
5. Turn Trimmer OFF.
To Achieve The
“Stubble” Look
• The Trimmer Guard
Attachment is unique
because it has a small slot
between the two rows of
teeth enabling you to trim
hairs to only .06
in./1.5mm in length.
1. Be certain Trimmer Guard
Attachment is ON and One
Stroke Comb Adjuster is
on the lowest setting (#1).
2. Hold Trimmer horizontally
with front of Trimmer fac-
ing downwards or
upwards.
3. Trim hairs using a down-
ward or upward motion,
whichever is more com-
fortable, following the
direction of your hair
growth (Fig. 9).
4. Turn Trimmer OFF.
IMPORTANT
• Always switch Trimmer
OFF before cleaning.
• Never clean, remove or
replace Trimmer Guard
Attachment with motor on.
• Do NOT apply pressure to
cutters.
• Do NOT touch cutters
with hard objects as this
may damage them.
• DO NOT use while
bathing, showering or
immerse the unit in water
or other liquids as damage
to Trimmer may occur.
• NEVER use harsh or cor-
rosive cleaners such as
benzene or bleach.
During Use
• If cut hairs have accumu-
lated in the comb area,
pull Trimmer Guard
Attachment off Trimmer
(Fig.10) and remove hairs
by shaking and/or blow-
ing (Fig. 11).
Once A Week
1. Be certain Trimmer is in
OFF position.
2. Remove Trimmer Guard
Attachment (Fig. 10).
3. Hold Trimmer as shown
and gently pull cutter tab
(located beneath the cut-
ters) backwards (Fig. 12).
4. Lightly brush out cutters,
hair chamber and
Trimmer Guard Attach-
ment (Fig. 13 &14) with
cleaning brush provided.
To Replace Cutters
If your cutters become dam-
aged or worn, do not contin-
ue using the Trimmer.
Replace cutters immediately.
1. Remove the old cutters by
pulling cutting unit back-
wards (see Fig. 12) and
then pull it upwards off
Trimmer.
2. Place the two notches of
the new cutting unit into
the guide slots (Fig. 15).
3. Push the cutting unit back
until it “clicks” into place
(Fig. 16).
9
8
Trimmer Guard Attachment (continued) Maintenance
10
11
12
13
2
1
14
15
16
CLICK
2
1
/