Page is loading ...


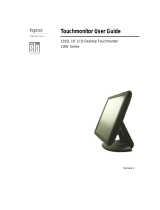
Elo Entuitive Touchmonitor
User Guide
15" LCD Panel Mount Touchmonitor
1566L Series
Revision B
P/N 008531
Elo TouchSystems, Inc.
1-800-ELOTOUCH
www.elotouch.com


i
Copyright © 2001 Elo TouchSystems Inc. All Rights Reserved.
No part of this publication may be reproduced, transmitted, transcribed, stored in a retrieval system,
or translated into any language or computer language, in any form or by any means, including, but not
limited to, electronic, magnetic, optical, chemical, manual, or otherwise without prior written
permission of Elo TouchSystems.
Disclaimer
The information in this document is subject to change without notice. Elo TouchSystems makes no
representations or warranties with respect to the contents hereof, and specifically disclaims any
implied warranties of merchantability or fitness for a particular purpose. Elo TouchSystems reserves
the right to revise this publication and to make changes from time to time in the content hereof
without obligation of Elo TouchSystems to notify any person of such revisions or changes.
Trademark Acknowledgments
IntelliTouch, SecureTouch, AccuTouch, Entuitive, and MonitorMouse are trademarks of Elo
TouchSystems, Inc.
Other product names mentioned herein may be trademarks or registered trademarks of their
respective companies. Elo TouchSystems claims no interest in trademarks other than its own.

ii

iii
Chapter 1
Introduction 1
Precautions . . . . . . . . . . . . . . . . . . . . 1
About the Product . . . . . . . . . . . . . . . . . 1
Chapter 2
Installation and Setup 3
Unpacking Your Panel Mount
Touchmonitor . . . . . . . . . . . . . . . . . . 4
Product Overview . . . . . . . . . . . . . . . . . 5
Main Unit . . . . . . . . . . . . . . . . . . . . 5
Rear View . . . . . . . . . . . . . . . . . . . 5
Bottom View . . . . . . . . . . . . . . . . . . 6
Remote OSD with Cable Attachment . . . . . 6
Mounting Your Touchmonitor . . . . . . . . . . . 7
Connecting Your Touchmonitor . . . . . . . . . . 8
Optimizing the LCD Display . . . . . . . . . . . 11
Installing the Driver Software . . . . . . . . . . 12
Installing the Serial Touch Driver. . . . . . . 13
Installing the Serial Touch Driver for Windows
2000, Me, 95/98 and NT 4.0 . . . . . . . 13
Installing the Serial Touch Driver for MS-DOS
and Windows 3.1 . . . . . . . . . . . . . 14
Chapter 3
Operation 15
About Touchmonitor Adjustments . . . . . . . . 15
Connecting the OSD Module . . . . . . . . . . 16
OSD Module Controls. . . . . . . . . . . . . . 17
Using the OSD Menus. . . . . . . . . . . . . . 18
Auto Adjustment. . . . . . . . . . . . . . . . . 18
First OSD Menu . . . . . . . . . . . . . . . . . 19
Contrast . . . . . . . . . . . . . . . . . . . 19
Horizontal Position . . . . . . . . . . . . . . 20
Vertical Position . . . . . . . . . . . . . . . 20
Horizontal Size . . . . . . . . . . . . . . . . 20
Tracking . . . . . . . . . . . . . . . . . . . 21
Second OSD Menu . . . . . . . . . . . . . . . 21
Display Mode. . . . . . . . . . . . . . . . . 22
OSD Off-Time . . . . . . . . . . . . . . . . 22
Language . . . . . . . . . . . . . . . . . . 22
Text-Graphic . . . . . . . . . . . . . . . . . 22
Reset. . . . . . . . . . . . . . . . . . . . . 22
Chapter 4
Troubleshooting 23
Solutions to Common Problems . . . . . . . . 23
Appendix A
Native Resolution 25
Appendix B
Touchmonitor Safety 27
Care and Handling of Your Touchmonitor. . . . 28
Appendix C
Technical Specifications 29
Compatibility Modes . . . . . . . . . . . . . . 29
Touchmonitor Specifications . . . . . . . . . . 30
15" LCD Touchmonitor (ET1566L)
Specifications . . . . . . . . . . . . . . . 30
AccuTouch Touchscreen Specifications . . . 31
CarrollTouch Specifications . . . . . . . . . 32
15" LCD Panel Mount Touchmonitor
(ET1566L-XSWA-X) Dimensions . . . . . 34
Panel Cutout. . . . . . . . . . . . . . . . . 36
Regulatory Information 37
Warranty 41
Index 43
Table of Contents

iv

1-1
C HAPTER
1
C
HAPTER
1
I
NTRODUCTION
Congratulations on your purchase of an Elo TouchSystems Entuitive LCD panel
mount touchmonitor. Your new high-resolution industrial touchmonitor
combines the reliable performance of Elo’s touch technology with the latest
advances in LCD display design. This combination of features creates a natural
flow of information between you and your touchmonitor.
Precautions
Follow all warnings, precautions and maintenance as recommended in this
user’s manual to maximize the life of your unit. See Appendix B for more
information on touchmonitor safety.
About the Product
Your LCD panel mount Touchmonitor is a 15" XGA TFT color display with the
following features:
• Direct analog RGB input
• 15.1" diagonal screen size
• 16.7 million displayable colors
• 1024 x 768 resolution
• XGA / SVGA / VGA / VESA / Mac compatible
• 24-60kHz horizontal scan
• 56-85Hz high refresh rate

1-2 Elo Entuitive Touchmonitor User Guide
• Auto adjustment capability
• High quality full screen re-scaling
• Multilingual OSD menus in four languages: English, German, Spanish, and
Japanese
• Corded remote OSD controller
• VESA DDC 1/2B data communication
• VESA DPMS power saving
• VESA flat panel monitor physical mounting interface (75mm)
• 19 inch computer hardware rack adaptor available. Contact the factory.
• Worldwide agency approvals that include UL*, CUL*, TÜV- Bauart, FCC,
CE, C-Tick, VCCI
• Certified by UL to NEMA 4, 4x and 12: ET1566L-7SWA-1*
• Designed to meet NEMA 4, 4x & 12: ET1566L-9SWA-1/5*
*ITE recognized component
For full Product Specifications refer to Appendix C.

2-3
C HAPTER
2
C
HAPTER
2
I
NSTALLATION
AND
S
ETUP
This chapter discusses how to install your LCD panel mount touchmonitor and
how to install Elo TouchSystems driver software.

2-4 Elo Entuitive Touchmonitor User Guide
Unpacking Your Panel Mount
Touchmonitor
Check that the following 10 items are present and in good condition:
LCD Display
Monitor power cable (US/Canada)
European monitor power cable
Video cable
Serial touchscreen
Brick power supply
cable
User’s Guide,
Quick Start Guide and software CD
Elo QuickStart
User
Guide
CD
Software
OSD module
AUTO/SEL DOWN UP MENU
(Note: shipments to the UK will
contain a UK power cord.)also

2-5
Product Overview
Main Unit
Rear View
LCD Display

2-6 Elo Entuitive Touchmonitor User Guide
Bottom View
Remote OSD with Cable Attachment
Customer Panel
AUTO/SEL DOWN UP MENU

2-7
Mounting Your Touchmonitor
N
OTE
:
You will need a 6mm allen socket and torque wrench (Hex) to attach the mounting
brackets.
Your panel mount touchmonitor comes with 6 mounting brackets (and 6
screws). You will need 6 brackets to mount your touchmonitor. Two brackets
attach to the top and bottom and one on each side.
To mount your touchmonitor to a panel, follow the steps below:
1 Prepare the opening in the panel (307mm x 398.2mm/12.08" x 15.68"). See
page C-36. Mounting panel thickness must not exceed 13mm.
2 Disassemble the 6 brackets and NEMA frame.
3 Verify that your touchmonitor will clear the opening as you attempt to front
mount it. The opening will be covered by the bezel flanges.
4 Mount the touchmonitor from the front side of the opening in the supporting
panel and temporarily secure it.
5 From the back of the panel opening, slip the NEMA frame over the rear
cover. Attach the 6 brackets into the slots. Use 2 brackets on top and bottom
and 1 on each side.
6 To secure the touchmonitor, turn the screws clockwise until a firm contact is
made with the NEMA frame. To assure a “flat” mount, screws should be
tightened “cris-cross” and not sequentially, i.e. tighten the upper left corner
screw first then the lower right screw. Torque screws to 35 in lbs. (4 Nm).

2-8 Elo Entuitive Touchmonitor User Guide
Connecting Your Touchmonitor
The following illustrations guide you step by step in connecting your
touchmonitor.
Before connecting the cables to your touchmonitor and PC, be sure that the computer
and the touchmonitor are turned off.
Serial
touchscreen
connector
Power
Female 15-pin
video
connector
Video cable
Connections on underside
Brick
power supply
US
power cable
European
power cable
OSD Module connector
Serial cable
AUTO/SEL DOWN UP MENU

2-9
STEP 1-Connecting the Video Cable
• Connect the 15-pin video cable (the ferrite bead end) to the video port on
your PC.
• Connect the other end of the video cable to the video connector on your
touchmonitor.
• Secure the cable to your touchmonitor and PC by turning the screws on the
connector clockwise.
Connections on underside
Female 9-pin serial
touchscreen
connector
Serial
touchscreen
cable

2-10 Elo Entuitive Touchmonitor User Guide
STEP 2-Connecting the Serial Touchscreen Cable
• Connect the female end of the serial (RS-232) cable to the serial port on the
back of your PC.
• Connect the male end of the cable to the serial touchscreen connector on your
touchmonitor.
• Secure the cable to your touchmonitor and PC by turning the screws on the
connector.
Connections on underside
Female 9-pin Serial
touchscreen
connector
Serial
touchscreen
cable

2-11
STEP 3-Connecting the Power Cable
Depending on where you live, you will use either the European or US/Canadian
power cable.
• Connect the female end of the power cable to the Brick power supply.
• Connect the Brick power supply into the power port on the touchmonitor.
To protect your equipment against risk of damage from electrical surges in the power
line, plug the brick supply’s power cord into a surge protector, and then connect the
surge protector to a grounded (three-pronged) AC electrical outlet.
• Power on your PC then your touchmonitor. After a brief pause the picture
should appear.
• The power can be turned on and off by the small white switch on the back of
the touchmonitor. The touchmonitor can also be turned on and off by
plugging and unplugging the power cable.
Optimizing the LCD Display
To ensure the LCD display works well with your computer, configure the
display mode of your graphic card to output 1024 x 768 resolution, and make
sure the timing of the display mode is compatible with the LCD display. Refer
to Appendix A for more information about resolution. Compatible video modes
for your touchmonitor are listed in Appendix C. Refer to Chapter 3 for more
information on adjusting your touchmonitor’s video characteristics.
Connections on underside
Brick power cable port
Power
cable
Brick power supply
Power switch

2-12 Elo Entuitive Touchmonitor User Guide
Installing the Driver Software
Elo TouchSystems provides driver software that allows your touchmonitor to
work with your computer. The enclosed CD-ROM contains drivers for the
following operating systems:
• Windows 2000
• Windows Me
• Windows 98
• Windows 95
• Windows NT 4.0
• Windows 3.x
• MS-DOS 2.x or later
Additional drivers and driver information for other operating systems (including
OS/2, Macintosh, and Linux) are available on the Elo TouchSystems Web site
at www.elotouch.com.
Your Elo touchmonitor is plug-and-play™ compliant. Information on the video
capabilities of your touchmonitor is sent to the video display adapter when
Windows starts. If Windows detects the touchmonitor, follow the instructions
on the screen to install a generic plug-and-play monitor.

2-13
Installing the Serial Touch Driver
To install your driver software, follow the instructions in the appropriate
following section.
Installing the Serial Touch Driver for Windows 2000, Me, 95/98
and NT 4.0
N
OTE
:
For Windows 2000 and NT 4.0 you must have administrator access rights to install the
driver.
1 Insert the Elo CD-ROM in your computer’s CD-ROM drive.
If the AutoStart feature for the CD-ROM drive is active, the system
automatically detects the CD and starts the setup program.
2 Follow the directions on the screen to complete the driver setup for your
version of Windows.
If the AutoStart feature is not active:
1 Click Start > Run.
2 Click the Browse button and locate the EloCd.exe program on the CD-ROM.
3 Click Open, then OK to run EloCd.exe.
4 Follow the on-screen directions to complete the driver setup for your version
of Windows.
/