Page is loading ...

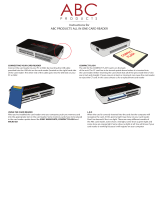
Worth Data
WDP Keyboard
Wedge Reader
Users Manual
For Model P11/12
For Models purchased prior to 8/00

i
Introduction
Worth Data' WDP Readers are versatile bar code readers that attach to the IBM
PC, XT and AT; all IBM PS/2 Models; any PC keyboard-compatible or bus-
compatible unit; and all Macintosh ADB models. The WDP provides bar code
input data to any host computer program exactly as if the data had been typed at
the keyboard, including function and control key support. WDP Reader features
include:
The WDP Reader automatically reads and discriminates between Code 39,
Full ASCII Code 39, Interleaved 2 of 5, Codabar, Code 128, EAN-13, EAN-
8, UPC-E, UPC-A (with or without supplements), MSI, LabelCode4,
LabelCode5, Code 93, and Plessey.
• Bar codes
• PC or Macintosh Interface
The WDP Reader is presently the only reader capable of internal or external
installation on PCs (External-only on Microchannel PS/2's and the
Macintosh.) For external mounting, its lightweight, unobtrusive case can be
attached to the side of the computer, monitor or desk with Velcro. For internal
mounting, the board is easily removed from the case and inserted into a PC's
ISA slot. If your MAC or PC has only a USB port for keyboard attachment,
the USB Wedge Saver bridges the WDP to a USB port.
• Scanner options
The WDP Reader comes with a high quality USA-made stainless steel wand
scanner. Additional scanner options include moving-beam laser scanners,
CCD scanners, MagStripe scanners for reading credit card magnetic strips,
and bar code slot scanners for badges and other thin, flat surfaces.
• Integrated Laser & Integrated CCD Wedge Reader
The Integrated Laser Readers and the Integrated CCD Readers are complete
WDP Readers with the decoder built into the scanner handle. Just plug the
unit in between your computer and keyboard and you're ready to go. They
work with any PC keyboard-compatible computer, all Macintosh ADB
models and USB computers (using the Wedge Saver).
• Configuration is easy
The WDP Reader is easily configured for your system by scanning a bar coded
Setup Menu. There are no dip switches to set. On the separate decoder
models, opening of the reader's case is required only for internal bus
installation, Track 1&2 Magstripe, and for setting the decode light on a laser
or CCD Scanner. The PC/PS2 Y cable can be switched from 5 pin to 6 pin
and vice versa.

1-1
Chapter 1
Installation
Components of WDP Reader
In the event the shipping box shows damage on arrival, please note the damage on
the carrier's receipt log. Open the box and inspect the contents for damage. If
there is visible damage, or if the unit fails to work, contact us with the details of the
trouble; we will be happy to send you a replacement.
The contents of your WDP Reader shipment should include the following:
1. A WDP Reader in a lightweight box, or an Integrated Laser Reader or an
Integrated CCD Wedge Reader.
2. Velcro strips which can be used to conveniently attach the reader to the
side of your computer, monitor or desk.
3. A "Y" cable for attaching the WDP Reader between your computer and
keyboard to a 5 pin din or 6 pin minidin keyboard connector; or if you
have a USB only computer, a straight cable with the USB Wedge Saver
for attachment to the USB port of your computer.
4. A rugged stainless-steel bar code wand (unless you have an Integrated
Laser or Integrated CCD Wedge Reader, or ordered a different input
device such as a laser scanner or slot scanner).
5. A plastic wand or laser-scanner holder.
6. A laminated Reader Setup Menu sheet (or slot-scanner card deck).
You probably didn't receive a power supply with your WDP - even though
your external WDP decoder box has a Power jack. Power supplies are rarely
needed. Using a power suppply other than a Worthington Data Power Supply,
(i.e. our part number F10 for 110v), will probably burn out the WDP circuit
board. Damage caused by non-Worthington power supply which is not
covered by warranty. DON'T PLUG OTHER POWER SUPPLIES INTO
THE WDP -- even if the connector does fit, you will fry the WDP board.

1-2
Installation
The several methods of WDP attachment are:
• External Wedge
The Reader is placed near the computer, and is connected between the
computer and keyboard. Velcro is included for convenient attachment to
your computer, monitor, desk, etc. Bar code data is received via the
computer's keyboard port.
• Internal Installation on PC (P11/12)
The WDP Reader Models P11/12/P01 have a printed circuit board
which can be removed from the case and mounted in any unused PC's
ISA slot.
Internal Wedge mounting uses the slot for physical mounting only -- it
doesn't communicate with the bus. Cables connect the board level reader
between the computer and keyboard; bar code data is received by the
keyboard port. DOS users can also install the WDP P11/12 so that it
communicates with the bus instead of the keyboard interface. If you
prefer Internal Installation, see Appendix B for details.
The Lasers and CCD are available in the decoder built into the scanner
housing, thereby eliminating the separate decoder. These models of the
WDP are:
• Integrated Laser WDP Readers
These readers have to be attached externally. The LZ100-WDP and
LZ200-WDP Readers are laser scanners with the decoder built into the
scanner housing. They are connected between the computer and
keyboard using a Y cable or the USB Wedge Saver. Decoded bar code data
is transmitted as though it has been keyed. These readers do not require
a separate decoder box; however there is no power supply option for low
powered PCs, and there is no second scanner attachment possible.
99.99% of PCs have sufficient power.
• Integrated CCD Wedge Reader
This reader has to be attached externally. The Integrated CCD Reader has
the decoder built into the scanner case. Connected between your
computer and keyboard, or to the USB Wedge Saver, it transmits decoded
bar code data to the computer's keyboard port. These readers do not
require a separate decoder box; however there is no power supply option
for low powered PCs, and there is no second scanner attachment possible.
99.99% of PCs have sufficient power.

1-3
External Wedge Installation on PC or Mac
1. Unplug the keyboard cable from where it plugs into the back of the
computer, and note its location. (Note: the PC's F30/1 Y cable is
convertible from a 5 pin cable to a 6 pin minidin by simply switching
the adapter from one side of the Y cable to another, so match your
keyboard requirement. Be sure not to plug into the mouse port by
mistake.
2. Plug the keyboard cable into the "Y" cable's round female DIN
connector.
3. With the power OFF on the computer, Plug the "Y" cable's male
DIN connector into the back of the PC where the keyboard
previously plugged into. For the Mac, plug into any ADB port; but,
preferably on the host.
4. Plug the modular telephone style jack at the Y end of the "Y" cable
into the WDP Reader's "Y" cable port. If you have an Integrated
Laser or Integrated CCD, the RJ45 telephone connector end of the
"Y" cable will plug into the Integrated Laser or Integrated CCD's
small black "coupling connector" instead.
5. If you have a decoder box, plug the wand, laser scanner, CCD touch
scanner or bar code slot scanner into the WDP Reader's Wand port.
(If you have a MagStripe slot scanner, see page 21 for its installation
instructions.)
6 Your computer, keyboard and reader
should now be cabled as shown here:
Notice how the WDP
Reader and wand
holder are shown
mounted on the side
of the monitor for
convenient access
without clutter.
Laser and CCD scanners can also be mounted on the side of your
monitor, computer or other surface using the laser scanner holder. Slot
scanners can be permanently mounted to a desk, wall or other surface by
using the threaded holes on the bottom. If have a Laser or CCD Scanner
attached to a decoder box, you may want to change the decode light
jumper. See page 37.

1-4
USB Installation on a PC or Mac
If you are attaching a WDP to a computer which doesn't have a traditional
keyboard port, (5 or 6 pin din on PC or ADB on Mac), and only has a USB port
for attaching a keyboard, you must use the Wedge Saver to bridge the WDP to the
USB port.
When you plug the Wedge Saver into the USB port, Windows-98 or the Mac will
sense the new device and proceed to install the necessary software. You don't need
any additional drivers other than what is already on Windows or Mac OS. After the
software installation completes, follow these instructions:
1. Plug the Wedge Saver into a USB port on the host computer, keyboard,
or a USB hub.
2. You can then plug the C20 cable, (a cable with an RJ45 telephone connector
on one side and a 6 pin minidin connector on the other), between the WDP
and the Wedge Saver.
• If you have a WDP with an external decoder box, plug the RJ45 end into
the WDP's "Y" Cable Port.
• If you have an Integrated CCD (WDP-P16) or Integrated Laser Reader
(LZ100-WDP or LZ200-WDP), plug the RJ45 end of the "Y" cable into
the black RJ45 Connector Block on the end of the Integrated Reader's
cable.
3. If you have an Integrated CCD or Integrated Laser Reader, you can begin
scanning immediately.
• If you have a WDP with an external decoder box, you may now plug your
scanner into the Wand Port of the WDP. If you also have a MagStripe
Scanner, plug it into the MagStripe Port, (if you have a dual track or triple
track scanner, you will need to change a jumper -- see page 21). If you are
using a "Y" Cable, you can plug you legacy keyboard into the other end of
the Y Cable, but to get the lights properly working on the legacy keyboard,
plug in the keyboard first and then plug in the USB Wedge Saver.
Wedge Saver
WDP
C21 Cable

2-1
Chapter 2
WDP Reader Setup
Configuring the WDP Reader for your computer
and application...
Turn on your computer: You should hear three beeps -- an
indication the WDP Reader is functioning correctly.
Find the laminated Reader Setup Menu sheet and look it
over. (For bar code slot scanners, the Reader Setup Menu
is a deck of bar coded cards.) This simple menu lets you
easily configure the WDP Reader to work with almost any
computer system, and tailor its bar code reading and data
format characteristics precisely to your needs. To scan
Reader Setup Menu bar codes and configure your reader,
you must know the right way to scan bar codes. If you are new to scanning, be sure
to read Appendix K - Scanning Instruction.
These are the WDP Reader's default settings. The WDP Reader is shipped
configured to these settings, and can be reset to them at any time by reading the
Start Setup and Reset bar codes on the Reader Setup Menu. If you need to change
any settings, or want to learn more about the WDP Reader options, the next pages
explain, step by step, how to set them and what they do.
WDP Reader Setup Menu
Code 39 Code 39 enabled MSI/Plessey MSI/Plessey disabled
Check Digit disabled Check Digits not transmitted
Start/Stop characters not transmitted Label Code 4/5 disabled
Accumulate Mode enabled
Caps Lock OFF
2 of 5 I 2of 5 disabled Code 128 Code 128 disabled
6 digit code length UCC-128/EAN disabled
Check digit disabled
UPC/EAN UPC/EAN enabled Code 93 Code 93 disabled
UPC Supplements disabled Full ASCII estension disabled
UPC-E compressed, NSC of 0
Transmit UPC-A in UPC-A format
ISBN conversion disabled
UPC-A NSC and EAN-13 first two characters and check digits transmitted
UPC-E NSC and EAN-8 first two characters and check digits not transmitted
General
Configuration AT with USA keyboard
Settings Data Transmission timing NONE
NO preamble or postamble set
CR as Terminator Character
Medium pitch beep tone
No MagStripe slot scanner attached
Parameter Default Setting Parameter Default Setting

2-2
Using the WDP Reader Setup Menu
1
If you have never scanned before, refer to Appendix K for Scanning
Instructions. To configure your reader using the Reader Setup Menu, you
must first scan the Start Setup code at the top left corner. Do this now.
You'll hear two beeps. During Setup, nothing will be transmitted to your
omputer; the Reader Setup Menu codes are strictly for configuring the reader.
If you did not hear two beeps, try scanning the code again, until you hear the
two beeps.
2
Next, choose the topic you want to change an option for, and scan its
code. Let's use Beep Tone, at the lower left corner of the menu, as an
example. Scan the Beep Tone code now. You'll hear two beeps.
3
Then, choose the option you want to change, from the list next to the
topic bar code you just scanned. For Beep Tone, the options range from
0 for the lowest pitch to 4 for the highest pitch. Using the "Barpad
Table" on the right side of the Reader Setup Menu, scan the number or letter
associated with the option you have selected. Let's change the beep pitch to
Highest. Now scan the 4 on the "Barpad Table". You will again hear two
beeps.
4
Now scan End Setup (at the top-right corner of the Reader Setup Menu
to complete the setup exercise. You'll hear three beeps. If you followed
the instructions correctly and successfully changed beep tone to
"highest", the three beeps will be higher in pitch than the other beeps had
been. If they aren't higher in pitch, repeat the steps on this page until you are
successful at changing the beep tone.
Now that your beep tone is at the "highest" pitch, you may want to change it
back to "medium" or a different setting. Repeat the steps above, selecting the
option you prefer to "highest" in step 3.
When you've successfully changed the beep pitch, and are ready to configure
the reader for your specific application, scan Start Setup again. Continue
scanning topics and options until you've made all the changes you desire, and
then scan End Setup to complete setup.
The next chapter will take you step by step through configuring each WDP
Reader option. Default settings are shown in bold in this manual and marked
with an * on the Reader Setup Menu.

2-3
WDP Setup Parameters
Beep Tone
Lowest 0
Low 1
Medium 2
High 3
Highest 4
Turn Beeper OFF 5
The WDP Reader gives you a choice of five different beep pitches. (Beep volume
is also adjustable -- see page 32 for the details.)
Code 39
Enable Code 39 0
Disable Code 39 1
Enable Full ASCII Code 39 2
Disable Full ASCII Code 39 3
Enable Code 39 Accumulate Mode 4
Disable Code 39 Accumulate Mode 5
Enable Start/stop character transmission 6
Disable Start/Stop character transmission 7
Enable Mod 43 Check Digit 8
Disable Mod 43 Check Digit 9
Enable Check Digit Transmission A
Disable Check Digit Transmission B
Caps Lock ON C
Caps Lock OFF D
For information about Code 39, Full ASCII Code 39 and Accumulate Mode, see
Appendix D.
Enabling Start/Stop character transmission means that the WDP Reader will
transmit the * Start/Stop characters to your computer along with the data. For
example, data of 1234 would be transmitted as *1234*. Most people don't need
this option, but it is useful if you want your software to be able to differentiate
between keyboard and bar code data.
Enabling the Mod 43 Check Digit requires the units position of your data to
match the calculation for the check digit explained in Appendix D. If you've
enabled the check digit, enabling Check Digit transmission causes the reader to
transmit the check digit to your computer along with the bar code data.
"Caps Lock ON" means that lower case letters read as data will be transmitted as
upper case, and upper case as lower. Numbers, punctuation and control characters
are not affected. "Caps Lock OFF" means that letters will be transmitted exactly as
read.

2-4
UPC/EAN
Enable UPC/EAN 0
Disable UPC/EAN 1
Enable UPC/EAN Supplements 2
Disable UPC/EAN Supplements 3
Enable transmission of UPC-A NSC and EAN-13 first two digits 4
Disable transmission of UPC-A NSC and EAN-13 first two digits 5
Enable transmission of UPC-A/EAN-13 Check Digit 6
Disable transmission of UPC-A/EAN-13 Check Digit 7
Enable transmission of UPC-E NSC and EAN-8 first digit 8
Disable transmission of UPC-E NSC and EAN-8 first digit 9
Enable transmission of UPC-E/EAN-8 Check Digit A
Disable transmission of UPC-E/EAN-8 Check Digit B
UPC-E Compressed C
UPC-E Expanded D
EAN-8 observes 9 and A above E
EAN-8 if forced to transmit 8 digits F
UPC-A transmitted in UPC-A format (see below)
UPC-A transmitted in EAN-13 format (see below)
ISBN conversion disabled (see below)
ISBN conversion enabled (see below)
For general information about UPC and EAN, see Appendix G.
Enabling supplements allows you to read 2 and 5-digit supplemental codes used
with magazines and books. This disallows right-to-left reading of UPC/EAN
codes, to assure that the supplement doesn't get skipped.
Enabling transmission of UPC or EAN NSC's (leading digits, 1 for UPC;2 for
EAN-13) or Check Digits means that these digits will be transmitted to your
computer along with the rest of the UPC or EAN data.
UPC-E Compressed Format transmits UPC-E codes as is; Expanded Format adds
zeros to make them the same length as UPC-A.
UPC-E can be used in either normal UPC-E format (implicit NSC of 0) or UPC-
E1 format (NSC of 1). UPC-E1 is enabled by wanding 2 of 5 Code and 8 (9
disables UPC-E1). It is very easy to read an EAN-13 bar code partially as UPC-E1,
so don't enable UPC-E1 when reading EAN-13.
If you wish the UPC-A data to be transmitted in EAN-13 format, (with an
additional leading 0 for the USA's country code), you should scan Terminator
Character and F. Scanning E, the default, sets UPC back to no country code
transmitted.
ISBN bar codes are EAN-13 bar codes where the first three digits are the
"Bookland" country code of 978 for books and 977 for periodicals, and the
following nine are the first nine digits of the ISBN. To enable transmission of ISBN

2-5
Code 93
Enable 0
Disable 1
Enable Full ASCII 2
Disable Full ASCII 3
For more information about Code 93, See Appendix J
2 of 5 Code
Enable Interleaved 2 of 5 0
Disable Interleaved 2 of 5 1
Enable Interleaved 2 of 5 check digit 2
Disable Interleaved 2 of 5 check digit 3
Enable check digit transmission 4
Disable check digit transmission 5
Enable Standard 2 of 5 6
Disable Standard 2 of 5 7
For information about Interleaved 2 of 5, see Appendix F.
Enabling the check digit requires that the data’s units position (last character) match the
calculation for the check digit explained in Appendix F. If you have enabled the check digit
and want to transmit the check digit to the computer along with the rest of the bar code
data, choose “Enable check digit transmission”.
2 of 5 Data Length
Default Length 06
2 of 5 Code is so susceptible to interpreting partial scans as valid reads that the
WDP Reader uses fixed-length data as a safeguard. To choose a data length, scan
it as a two-digit number using the Barpad Table. For example, to select 8-digit data
length, you would scan a 0 and then a 8. Because Interleaved 2 of 5 is required to
be an even number of digits in length, you must use an even number. If you're
unsure of your bar code length, temporarily set length to 00, read a bar code, and
count its digits. Variable-length 2 of 5 codes are not recommended.
bar codes in ISBN format (the nine ISBN digits plus a new calculated mod-11
check digit), scan Terminator Character and 11D. Scanning C, the default,
disables conversion to ISBN format.

2-6
Code 128
Disable Code 128 0
Enable Code 128 1
Disable UCC-128/EAN-128 2
Enable UCC-128/EAN-128 3
Enable Storage Tek Tape Label Code C
Disable Storage Tek Tape Label Code D
Bar Code ID’s transmitted E
Bar Code ID’s not transmitted F
Bar Code ID’s are characters assigned to each bar code type to identify that
particular type of code. These Bar Code ID’s can be used to identify what type of
bar code you are using when you are not sure or you want your application to
differentiate between the different types. The Bar Code ID’s are assigned as follows:
Codabar a Code 39 b
UPC-A c EAN-13 d
I 2 of 5 e 2 of 5 (standard) f
Code 128 g Code 93 i
MSI j magstripe data m
UPC-E(0) n UPC-E1 (1) o
EAN-8 p Storage Tek s
Plessey x LabelCode 4 y
LabelCode 5 z
Bar Code ID Bar Code ID
Codabar
Enable Codabar 0
Disable Codabar 1
Enable CLSI Codabar 2
Disable CLSI Codabar 3
Disable Start/Stop character transmission 4
Enable Start/Stop character transmission 5
For information about Codabar, see Appendix E.
CLSI format is a form of Codabar often used by libraries
Enabling Start/Stop character transmission means that the WDP will transmit the Start
and Stop characters to your computer along with the bar code data. Enable transmission if
you are varying the Start and Stop characters according to label type in order to differentiate
between bar code data and data from the keyboard. Most people do not need to transmit
the Start/Stop characters.

2-7
MSI and Plessey
Disable MSI and Plessey 0
Enable MSI with 1 Mod 10 check digit 1
Enable MSI with 2 Mod 10 check digits 2
Enable MSI with 1 Mod 11 and 1 Mod 10 check digit 3
Transmit no check digits 4
Transmit 1 Check digit 5
Transmit 2 Check digits 6
Enable Plessey Code 7
Enable LabelCode5 8
Enable LabelCode4 9
Plessey has two check digits which are not transmitted. MSI, Plessey, LabelCode4,
and LabelCode5 are mutually exclusive. For information about MSI codes, see
Appendix H.
If you've enabled the Mod 10 or Mod 11 check digit(s), enabling transmission of
one or two check digits causes the WDP Reader to transmit it/them to your
computer along with the bar code data.
Enabling check digit transmission (if check digit(s) are enabled) causes the WDP
to transmit it/them to your computer along with bar code data.
Computer Interface
XT 0
AT and IBM Compatibles 1
PS/2 Models 2
AT "learned timing" 3
PS/2 "learned timing" 4
Macintosh SE,II and Portable 5
Same as 1 But for Non-Dedicated Servers & Certain Clones 7
The WDP automatically senses if you have an AT. It cannot sense a PS/2 or a
Macintosh; if you have either, you will have to change the setting. Scan the number
on the Barpad Table corresponding to the type of system you're using. If you are
connecting to the USB Wedge Saver, you must use the AT Setting 1 even if you are
attaching to a Mac's USB port. Learned timing does not apply to a USB
connection of any kind.
If you have any doubt as to which category to use, and you get "garbage" reads, try
switching types. Test the keyboard first -- if it gets messed up by the wrong
keycodes, you'll need to reboot your PC before continuing.
The AT and PS/2 "learned timing" can learn your keyboard timing and save it.
Scan Start Setup, Computer Interface, 3 for AT or 4 for PS/2 and then press a
key on the computer keyboard (the WDP beeps once). Now scan End Setup and
the timing is captured by the WDP. Learning does not apply to USB attachment.

2-8
Preamble
A "Preamble" is a user-specified data string transmitted at the beginning of each bar
code. For example, if you specify the preamble @@ and read data of 123456,
"@@123456" would be transmitted to your computer.
The default is no preamble. To select a preamble, scan up to 15 characters from
the "FULL ASCII MENU" on the back of the Reader Setup Menu, and then scan
SET when you're done. To return to the no preamble setting, scan CLEAR here
instead of scanning SET or any characters from the FULL ASCII MENU.
You can trim 1-15 leading characters from bar code codes by scanning a ~ (tilde --
ASCII 126) followed by a single digit, 1 through F (A through F are for 10 to 15),
as part of the Preamble. (Bar codes which are shorter than the amount-to-trim are
transmitted with no trimming.) Consider the examples in the following table to
understand how trimming works:
Bar Code Data Preamble Data Transmitted
123 XYZ XYZ123
12345678 ~3XYZ XYZ45678
12345678 ~9 12345678
12345 ~A ~A12345
123456 ~5 6
You can also trim selectively by bar code type. For example, you can trim 2
characters from Code 39 and a different amount from other bar code outputs. This
is done by using the bar code ID character in conjunction with the tilde. A
preamble of ~b2~c1 says trim 2 characters from the front of Code 39 output and
trim 1 character from the front of UPC-A. Refer to the Code 128 parameter's
previous discussion for a list of the ID character associated with each bar code type.
For advanced PC users: Emulating special keys in the preamble:
Programmers and other advanced PC users can also embed keyboard hex scan codes
in the preamble, for emulation of key presses specific to their computers, such as the
left shift key or F12 key. This is done by specifying the make and break hex scan
codes for one or more keys enclosed in "left" and "right" apostrophes (` and ').
Make and break codes are hardware-specific -- see the keyboard section of your
computer's manual or tech references for descriptions of its make and break codes.
Break codes follow one of two conventions depending on which "keycode set" a
keyboard uses. Keycode set 1 (usually on XT-style systems) uses a two-digit break
code formed by adding hex 80 to the make code. Keycode set 2 (usually on AT-
style systems) uses two digit break codes: the first is F0 and the second is identical
to the make code.
For example, let's say you want to emulate the left shift key. First, using the FULL
ASCII MENU, you'd scan a left apostrophe, to identify subsequent characters as
keyboard scan codes. Next, the two-digit hex make code -- let's say it's 12. First

2-9
you'd scan a 1 and then a 2. Next, the break code. Let's say your computer uses
keycode 2 break codes of F0 followed by the make code. Finally, a right apostrophe
to mark the end of the scan codes. ` 1 2 F 0 1 2 ' (scanned from the Full ASCII
Menu) The preamble is limited to 15 characters. As the single scan code example
above uses eight characters, you can see that you can't put very many keyboard
scan codes in the preamble.
A final use of the Preamble/Postamble is to enter a minimum/maximum length
check for bar code data read. Use the Preamble or Postamble by entering |nnmm
where "|" is ASCII 124, "nn" is the two digit minimum to be read and "mm" is
the two digit maximum to be read.
Postamble
"Postamble" refers to a user-specified data string transmitted at the end of each bar
code. For instance, if you specify the postamble @@ and read data of 123456,
"123456@@" would be transmitted to your computer.
To select a postamble, scan up to 15 characters from the "FULL ASCII MENU" on
the back of the Reader Setup Menu, scanning SET when done. To return to no
postamble (the default setting), scan CLEAR here instead of scanning SET or any
characters from the FULL ASCII MENU.
You can trim 1-15 trailing characters from bar code codes by scanning a ~ (tilde -
- ASCII 126) followed by a single digit, 1 through F (A through F are for 10 to
15). (Bar codes which are shorter than the amount-to-trim are transmitted without
trimming.) Consider the examples in the following table to understand the
options of the Postamble:
123 XYZ 123XYZ
12345678 ~3XYZ 12345XYZ
12345678 ~9 12345678
12345 ~A 12345~A
123456 ~5 1
Bar Code Data Postamble Data Transmitted
Bar codes which are shorter than the sum of the Postamble trimming and Preamble
trimming will be transmitted without trimming.
You can also trim selectively by bar code type. For example, you can trim 2
characters from Code 39 and a different amount from other bar code outputs. This
is done by using the bar code ID character in conjunction with the tilde. A
postamble of ~b2~c1 says trim 2 rightmost characters from Code 39 output and
trim 1 rightmost character from the UPC-A. (Use m for trimming Magstripe).
Refer to the Code 128 parameter's previous discussion for a list of the ID character
associated with each bar code type.
For advanced PC users: Emulating special keys in the postamble

2-10
See the previous page's "emulating special keys in the preamble" section.
A final use of the Preamble/Postamble is to enter a minimum/maximum length
check for bar code data read. Use the Preamble or Postamble by entering |nnmm
where "|" is ASCII 124, "nn" is the two digit minimum to be read and "mm" is
the two digit maximum to be read.
Data Transmission Timing
None 0
Short 1
Short Medium 2
Medium 3
Long 4
Timing does not apply to Mac ADB or any USB attachment.
Before trying this, try the "learned timing" discussed on page 12.
For Computer Interfaces 0,1,and 2, the WDP Reader can transmit bar code data at
five different rates. Most computers work at the fastest speed ("None"), but some
systems require slower rates. Try the "None" setting, and (when you're done
configuring it) try reading some codes. If you get partial or garbled reads, try other
timing settings to solve the problem. (The Mac needs no timing adjustments.) Try
each timing rate (fast to slow); don't assume that if the slowest and fastest don't
work, the intermediate settings won't either. After each failing attempt at timing
setting, type "12" in the upper keyboard row to be sure the keyboard has not been
locked or confused; if the "12" doesn't type correctly, reboot before trying a new
timing setting.
Reset
Don't scan Reset unless you're sure you want to restore the WDP Reader to its
default settings (as described on page 7), erasing all changes you've made, because
that's exactly what Reset will do.
MagStripe
None (or triggered Integrated CCD) 0
Track 1 (or triggerless Integrated CCD) 1
Track 2 2
Track 3 3
Dual Track Scanner,Output both only 4
Dual Track Scanner,Output both or 2 only 5
Track 1 or 3 Only on Dual Track Scanner 6
Track 2 only output on Dual Track Scanner 7
Track 1&2&3 Scanner, all 3 or 1&2 only 8
Track 1&2&3 Scanner, all 3 or 1 only 9
Caps Lock Off (just for MagStripe) E
Caps Lock On (upper case alpha for mag) F

2-11
Use None (the default), if you don't have a MagStripe scanner. If you have a single-
track scanner, use 1, 2 or 3 to match its track. If you have a dual-track scanner and
want to read both tracks, use 4 for tracks 1 and 2, or 5 for 2 and 3.
Use 6, 7 or 8 if you have a dual-track scanner but want to read only track 1, 2 or
3 respectively.
For all Driver's licenses,(including California) use 8 or 9. See page 21 for more
information on the MagStripe scanner.
Characters
This setup option allows you to output ASCII characters different from the ones
scanned. (Don't use this option to configure the WDP Reader for your non-US
keyboard -- instead, use the Keyboard Country option described below.)
For example: Suppose you want the WDP Reader to output a hex 92 character
every time you scan a 1 (hex 31); you want to remap hex 31 to hex 92, (If you're
using 8 data bits, output of 80-F8 codes is possible.) Your Full ASCII Menu has
ASCII and hex values for the 128 characters.
1) Scan the Start Setup Bar Code
2) Scan the Characters Bar Code on the Setup Sheet.
3) Scan 3 1 and 9 2 to output hex 92 when reading a "1".
4) Scan up to 7 other pairs of character reassignments.
5) Scan Set when complete.
6) Scan End Setup to exit setup mode.
You can also eliminate characters by reassigning hex codes to FF. For example, to
strip all $ (dollar sign) characters from transmission, you would follow the above
instructions and scan 2 4 F F in step 3.
Magstripe output is frequently required to be changed to conform to some specific
software package's requirement. For example, you might want to change the = and
^ separator characters to spaces or CRs. Between trimming and replacement, you
should be able to reformat the Magstripe output to conform to most requirements.
Keyboard Country
This option configures the WDP Reader for your choice of 15 keyboard country
settings, such as USA (the default), UK, French, German, etc.
Scan the keyboard country bar code and then the two-digit code for your keyboard
country (listed on the Reader Setup Menu), such as 14 for UK.
USA 00 French 02 German 02 Belgian 03
Fr. Canadian 04 Danish 05 Dutch 06 Italian 07
Latin America 08 Norwegian 09 Portuguese 10 Spanish 11
Swedish 12 Swiss 13 U.K. 14

2-12
Terminator Characters
Enter (carriage return) 0
None 1
Tab 2
Depending on your application, you may wish the WDP Reader to transmit bar
code data to your computer with an Enter (carriage return), a Tab at the end, or
with no extra terminating character at all.
If you need a terminator character other than CR or HT (such as LF for UNIX),
you can get it by specifying None here and then selecting your desired terminator
character(s) through the Postamble specification.

2-13
Testing the WDP reader with your computer
Windows and Mac users should use the Notepad or a text editor so that the scanned test
data will be "typed" on the screen where you can see it. Similarly, DOS users should scan
at the DOS prompt or while in a text editor.
Bar-code wands, laser scanners and CCD touch scanners:
If you are new to scanning, read Appendix K -- Scanning instructions, and then
scan the Test Label at the bottom of the page.
Bar Code and MagStripe Slot Scanners:
For a bar-code slot scanner, take the Reader Setup Menu
"A" card and turn it so the A bar code is pointing down
and facing the lighted side of the scanner. Make a
continuous swipe motion through the slot in either
direction.
For a MagStripe slot scanner, take a magnetic-strip card of
the type you will be using, and turn it upside down so the
stripe is pointing down. Move the card through the
scanner in a continuous swipe in the direction of the arrow.
You should hear a beep, and see Test Label displayed on your
screen. (Or an A, if you're using a bar-code slot scanner, or your magnetic-
strip-card data, if you're using a MagStripe slot scanner.)You should also be able to
type on your keyboard and have the computer respond normally.
If you are unable to read the "TEST LABEL":
Re-check all your connections.
Unless you ordered a high-resolution, infrared-light wand, you should see a red
light coming out of the tip of the wand. If you don't see a red light, make sure
the wand's cable is firmly plugged into the WDP Reader.
Try scanning at several different speeds. The most common mistake is scanning
too slowly; be sure you are "drawing a line" quickly through the code.
Work through the troubleshooting section beginning on page 30.
••
••
••
••
TTEESSTT LLAABBEELL
Credit Card

3-1
Chapter 4
Scanners and Scanning Technique
Wands
Matching your wand to your bar code type
The WDP Reader comes with a low, medium or high-resolution bar code wand, or
a medium-resolution wand specially designed to read through plastic or glass,
depending on your application. The number and letters on your wand's cable
identify its resolution and the type of light it uses -- visible red or infrared (invisible):
10 MILRED Low-resolution visible-light
8 MILRED Medium-resolution visible-light
6 MILRED High-resolution visible-light
6 MILIR High-resolution infrared-light
These are the five types of wands and their associated characteristics:
Low-resolution visible-light wand
This is a low-resolution visible-red LED wand designed specifically for dot-matrix
printed bar codes. It reads any low or medium-resolution bar code printed by any
technology, but can't easily read high density codes.
Medium-resolution visible-light wand
A versatile, general-purpose medium-resolution visible-red LED wand which reads
well-printed dot-matrix bar codes and high-density codes up to 10 cpi for Code 39.
It reads well-printed dot-matrix codes with the same high read rate as the low-
resolution wand. With poorly-printed codes, however, the low-resolution wand
significantly outperforms it.
Refocused medium-resolution infrared-light wand
This is a medium-resolution infrared (invisible) light wand designed to read through
plastic or glass 1/100" (.025 mm) to 1/4" (6.35 mm) thick. This is especially useful
for applications such as reading compact disks with the bar codes under the cases. Bar
codes must be printed with infrared-quality ink. Bar codes printed on thermal
printers (not thermal-transfer printers) are often unreadable to infrared light wands.
There is an additional charge of $60 for this wand.
High-resolution visible-light wand
This is a high-resolution visible red light wand designed to read high-density bar
codes up to 13 cpi for Code 39. It can also read any well-printed dot-matrix or other
lower-density codes, providing there are no voids (white spots in the bars) in the
codes.
High-resolution infrared-light wand
This high-resolution infrared-light wand is designed to read high-density bar codes up to
13 cpi for Code 39. It also reads well-printed dot-matrix or other lower-density codes,
providing they're printed with infrared-quality ink (bar codes printed on thermal printers
are often unreadable to infrared scanners) and don't have any voids (white spots in the bars).
••
••
••
••
/