Page is loading ...

Owner's Manual
Model No. 486.24218
DETHATCHER FOR SWEEPERS
®
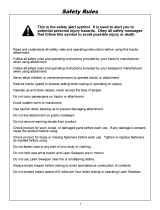
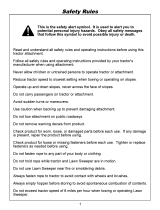
CAUTION:
Before using this product, read
this manual and follow all Safety
Rules and
Operating Instructions.
• Safety
• Assembly
• Operation
• Maintenance
• Parts
PRINTEDINU.S.A.
FORMNO.41268(7-21-09)
Sears,RoebuckandCo.,HoffmanEstates,IL60179U.S.A.
www.sears.com/craftsman
STOP
DO NOT RETURN TO STORE
For Missing Parts or Assembly
Questions Call 1-866-576-8388

2
Call1-866-576-8388formissingpartsorassemblyhelp
DONOTRETURNTOSTORE
SAFETY
Anypowerequipmentcancauseinjuryifoperatedimproperlyoriftheuserdoesnotunderstandhowtooperatetheequipment.
Exercisecautionatalltimes,whenusingpowerequipment.
TABLE OF CONTENTS
SAFETYRULES ..........................................................2
FULLSIZEHARDWARECHART ................................3
CARTONCONTENTS ................................................. 4
ASSEMBLY ..................................................................4
OPERATION ................................................................7
MAINTENANCE/STORAGE ........................................7
REPAIRPARTS .........................................................9
PARTSORDERING/SERVICE .....................BackPage
MODELNUMBER: 486.24218
SERIALNUMBER: __________________
DATEOFPURCHASE:__________________
Themodelnumberandserialnumberswillbefoundona
decal attached to the dethacther.
Youshouldrecordboththeserialnumberandthedateof
purchaseandkeepinasafeplaceforfuturereference.
WARRANTY
• Readthisownersmanualcarefullyforoperatingand
serviceinstructionsbeforeattemptingtoassembleor
operate the dethatcher. Be thoroughly familiar with the
proper use of the dethatcher.
• Readthevehicleownersmanualandvehiclesafety
rules,andknowhowtooperatethevehiclebefore
using the dethatcher.
• Readthelawnsweeperownersmanualandsafety
rules,andknowhowtooperatethelawnsweeper
beforeusingthedethatcher.
• Neverallowchildrentooperatethetractoror
dethatcher attachment, and do not allow adults to
operate without proper instructions.
• Thisdethatcherattachmenthassharptinepoints.
Alwayshandlewithcareandwearsubstantialfoot
wear when operating this dethatcher.
• Donotallowanyonetorideorsitonthedethatcher,
lawnsweeper or towing vehicle.
• Keeptheareaofoperationclearofallpersons,
particularly small children, and also pets.
• Alwaysbeginwiththetransmissioninrst(low)gear
and engine at low speed, and gradually increase
speed as conditions permit.
• Vehiclebrakingandstabilitymaybeaffectedwiththe
attachmentofthisequipment.Beawareofchanging
conditions on slopes. Refer to safety rules in the
vehicle owner's manual concerning safe operation on
slopes. STAY OFF OF STEEP SLOPES.
• Alwaysoperateupanddownaslope,neveracross
the face of a slope
• Thisequipmentshouldbeoperatedatreducedspeed
onroughterrain,alongcreeksandditchesandon
hillsides, to prevent tipping and loss of control. Donot
drivetooclosetoacreekoraditch.
• Followthemaintenanceinstructionsasoutlinedinthis
owners manual.
Lookforthissymboltopointoutimportantsafety
precautions. It means — Attention!!
Become alert!! Yoursafetyisinvolved.
CRAFTSMAN FULL WARRANTY
Whenoperatedandmaintainedaccordingtoallsuppliedinstructions,ifthisCraftsmanproductfailsduetoadefect
inmaterialorworkmanshipwithinoneyearfromthedateorpurchase,returnittoanySearsstoreorotherCraftsman
outletintheUnitedStatesforfreereplacement.
Thiswarrantyappliesforonly90daysfromthedateofpurchaseifthisproductiseverusedforcommercialorrental
purposes.
Thiswarrantydoesnotincludeitemsconsideredtoexpendablepartsthatcanwearoutfromnormalusewithinthe
warranty period.
Thiswarrantygivesyouspeciclegalrights,andyoumayalsohaveotherrightswhichvaryfromstatetostate.
Sears, Roebuck and Co., D817WA, Hoffman Estates, IL 60179
DONOTRETURNTOSTOREforMissingPartsorAssemblyQuestions
Call1-866-576-8388AttachmentHotline

3
Call1-866-576-8388formissingpartsorassemblyhelp
DONOTRETURNTOSTORE
HARDWARE PACKAGE CONTENTS
5
19
NOT SHOWN FULL SIZE
6 7
18
9
10
11
8
13
14
15
16
21
22
24
23
20
17
12
REF. PART NO. QTY. DESCRIPTION
5 46526 3 HexBolt,1/2-13x3-1/2"
6 44292 2 HexBolt,5/16-18x2-1/2"
7 43085 7 HexBolt,5/16-18x1-1/2"
8 48813 2 U-Bolt,1/4-20
9 48811 1 TransportHook
10 43081 2 Washer,5/16"
11 R19171616 2 Washer,1/2"
12 43070 14 Washer,3/8"
13 43055 2 HairCotterPin,3/32"
14 47189 4 NylockNut,1/4-20
REF. PART NO. QTY. DESCRIPTION
15 47810 9 NylockNut,5/16-18
16 43019 1 JamNut,Plain1/2-13
17 48115 3 JamNut,Nylock1/2-13
18 48812 2 ClevisPin,5/16"x1-3/8"
19 44481 2 VinylCap
20 48917 2 Clamp
21 25054 2 Bracket,U-BoltClamp
22 46499 2 Spacer
23 741-0248 4 Flange Bearing
24 42212 1 DoubleTransportHook

4
Call1-866-576-8388formissingpartsorassemblyhelp
DONOTRETURNTOSTORE
ASSEMBLY
FIGURE 1
NOTE:Onsweeperssmallerthan42",useonlyvespring
tines.
• Assembleavinylcapontoeachendoftheframetube.
Seegure1.
FIGURE 2
• Assemblea1/2"washer,thewheel,another1/2"
washerandthe1/2"plainjamnutontothe
1/2"x3-1/2"hexbolt.Seegure2.
• Inserttheboltthroughtheweldedbracketand
assemblethe1/2"nylockjamnutontothebolt.Adjust
the nuts so that there is no end play in the wheel and
then tighten the nuts securely against the welded
bracket.Makesurethewheelstillturnsfreely.See
gure2.
1/2" WASHER
1/2" x 3-1/2"
HEX BOLT
1/2" WASHER
1/2" NYLOCK
JAM NUT
Use this hole for
42" & 46" sweepers
Use this hole for
smaller sweepers
1/2" JAM NUT
TOOLS REQUIRED FOR ASSEMBLY
(1) 7/16"Wrench
(2) 1/2"Wrenches
(2) 3/4"orAdjustableWrenches
(1) Knife
• Removeallpartsandhardwarepackagesfromthe
carton.Layoutallpartsandhardwareandidentify
usingtheillustrationsonpages3and4.
• Turntheframeassemblyasshowningure1.
• Assemblesevenspringtinestothetopoftheframe
tube.Usea5/16"x1-1/2"hexbolt,two3/8"at
washersanda5/16"nylocknutforeachspringtine.
Placeone3/8"atwasherontopoftheframetube
andthesecond3/8"atwasherontopofthespring
tine.Seegure1.
REMOVAL OF PARTS FROM CARTON
1
2
3
4
CARTON CONTENTS
1. SpringTines(7)
2. FrameAssembly
3. GaugeWheel
4. MountBrackets(2)
5/16" NYLOCK NUT
3/8" WASHER
5/16" x 1-1/2"
HEX BOLT
VINYL CAP
VINYL CAP

5
Call1-866-576-8388formissingpartsorassemblyhelp
DONOTRETURNTOSTORE
FIGURE 5
• Connectthesweepertothetractor.Setthesweeper
heightadjustmenthandletoaboutthemiddleofit's
adjustmentrange.
• Placethedethatcherinfrontofthesweeperhousing,
underneaththehitchtubes.
• Connectthedethatchertotheconduitclampsusing
two5/16"x1-3/8"clevispins,5/16"washersand
3/32"haircotterpins.Seegure4.
CONDUIT
CLAMP
TRANSPORT
HOOK
HEIGHT ADJ.
TUBE
FIGURE 3
• Assembleaconduitclampontoeachendofthe
sweeperheightadjustmenttubesothatthestraight
partoftheclampisontopofthetube.
• Removethehitchbracketsfromthesweeper'shitch
tubes.SlidethetransporthookontotheL.H.hitch
tubeasshowningure3.
• Reassemblethehitchbracketsandboltstothehitch
tubes.Refertoyoursweeperowner'smanual.
3/32" HAIR
COTTER PIN
5/16" WASHER
5/16" x 1-3/8"
CLEVIS PIN
HEIGHT ADJUSTMENT
MIDDLE SETTING
If you have a 30" sweeper, skip to gure 6.
• Makesurethesweeperheightadjustmenthandleis
stillsettoaboutthemiddleofit'sadjustmentrange.
• Centerthedethatcherwiththesweeper.
• Assemblethekeeperbrackets(bendtotheinside)
tothesweeper'shitchtube,outsideoftheconduit
clamps.Useau-boltandtwo1/4"nylocknutsper
bracket.Positionthekeeperbracketsagainstthesides
oftheconduitclamps,approximatelyperpendicular
totheground.Tightenthenutswithoutbendingthe
keeperbrackets.Seegure5.
KEEPER BRACKET
U-BOLT
1/4" NYLOCK NUT
FIGURE 4 FIGURE 6
• Liftthefrontofthedethatcherandsecureitin
transportpositionusingthetransporthook.See
gure6.
• Tokeepthetransporthookfromslidingbackalong
thehitchtube,youcanfastenthesuppliednylontie
aroundthehitchtubebehindthetransporthook.See
gure6.
TRANSPORT HOOK
NYLON TIE
SWEEPERS WITH TWO HITCH TUBES
Skip to page 6 for sweepers with single hitch tubes.

6
Call1-866-576-8388formissingpartsorassemblyhelp
DONOTRETURNTOSTORE
FIGURE 7
SWEEPERS WITH A SINGLE HITCH TUBE
BEARING
BEARING
SPACER
CLAMP
NOTE:Thedethatcherattachestothesweeper'soffset
tube.Thispreventsyoufromoffsettingthesweeper.
FIGURE 8
1/2 x 3-1/2" HEX BOLT
1/2" NYLOCK
JAM NUT
• Assemblethefourbearingstothetwospacersand
then slide each through a clamp.
• Attacheachofthebearing,spacer,andclamp
assembliestoamountbracketusinga1/2x3-1/2"hex
boltand1/2"nylockjamnut.
3/32" HAIR
COTTER PIN
5/16" WASHER
5/16 x 1-3/8"
CLEVIS PIN
5/16" NYLOCK NUT
5/16" x 2-1/2"
HEX BOLT
FIGURE 9
FIGURE 10
FIGURE 11
DOUBLE TRANSPORT HOOK
• Fasteneachclamptothespringmountframe
assemblyusingone5/16x1-3/8"clevispin,5/16"
washer,and3/32"haircotterpin.
• Securethetwomountbracketstotheinnerholesofthe
drawbaroffsettubeofthesweeperusingtwo5/16x
2-1/2"hexboltsand5/16"nylocknuts.
• Placethedoubletransporthookontothesweeperhitch
tube.Liftupthefrontofthedethatcherandslideitinto
thedoublehookstosecureitinthetransportposition.

7
Call1-866-576-8388formissingpartsorassemblyhelp
DONOTRETURNTOSTORE
OPERATION
HOW TO USE YOUR DETHATCHER
RAISING/LOWERING THE DETHATCHER
• Toraisethedethatcherfortransport,liftuponthe
front of the dethatcher and secure it with the transport
hook.Lowerthedethatcherbyreleasingthetransport
hook.
SETTING THE OPERATING POSITION
• Theoperatingheightofthedethatcheriscontrolled
bythegaugewheelatthefrontofthedethatcher
andisnotadjustable.Thecorrectwheelposition
wasdeterminedingure2whenyouassembledthe
wheel.
• Setthesweepertothedesiredoperatingheight.(The
bestheightisusuallywiththebrushessetabout1/2"
downintothegrass.)Refertoyoursweeperowner's
manual.
USING THE DETHATCHER
Regular removal of thatch is critical to the maintenance
ofahealthylawn.Thatchislayerofstems,clippings,
runners, roots and leaves that have not decayed.
Excessivethatchpreventsair,waterandfertilizerfrom
reachingtheroots.Thedethatcherwilleffectivelydislodge
excessivethatchfromyourlawn.
• Startwiththetractorinlowgear.Varytheforward
speedtodeterminethebestspeedformaximum
dethatcher performance.
• Useacrisscrosspatterntoachievethemosteven
removal of thatch.
• Onslopes,alwaysoperateinanupanddown
direction only.
• Avoidextremelysharpturns.
• Avoidtowingthedethatcheracrosssuddensteep
dipsinthegroundwhiledethatching.Lossofground
contact with the gauge wheel could cause the
dethatchertobepulledbackunderneaththesweeper.
MAINTENANCE / STORAGE
ServiceDates
Checkforloosefasteners X
Checkforwornordamagedparts X X
Cleaning X X
MAINTENANCESCHEDULE
Fill in dates as you
complete regular service.
Before each use
Aftereachuse
Everyseason
Before storage
• Ifrustappearsonthespringtines,sandlightlyand
coat with enamel paint.
• Alwaysstoreinadryarea,andcoatexposedmetal
with light oil when not in use.
• Beforeeachuse,checkallnutsandboltsfor
tightness.
• Cleanaftereachusetohelppreventrust.
CUSTOMER RESPONSIBILITIES
• Readandfollowthemaintenancescheduleandthemaintenanceprocedureslistedinthissection.

8
Call1-866-576-8388formissingpartsorassemblyhelp
DONOTRETURNTOSTORE
NOTES

9
Call1-866-576-8388formissingpartsorassemblyhelp
DONOTRETURNTOSTORE
PARTS
REPAIR PARTS FOR MODEL 486.24218 DETHATCHER
8
6
15
5
17
22
4
18
10
13
23
23
20
21
14
19
19
5
11
11
16
17
1
15
24
12
12
18
10
13
20
7
2
3
9
REF. PART NO. QTY. DESCRIPTION
1 64650 1 SpringMountFrameAssem.
2 46761 7 SpringTine
3 48098 1 GaugeWheel
4 26624 2 MountBracket
5 46526 3 HexBolt,1/2-13x3-1/2"
6 44292 2 HexBolt,5/16-18x2-1/2"
7 43085 7 HexBolt,5/16-18x1-1/2"
8 48813 2 U-Bolt,1/4-20
9 48811 1 Hook,Transport
10 43081 2 Washer,5/16"
11 R19171616 2 Washer,1/2"
12 43070 14 Washer,3/8"
13 43055 2 HairCotterPin,3/32"
REF. PART NO. QTY. DESCRIPTION
14 47189 4 NylockNut,1/4-20
15 47810 9 NylockNut,5/16-18
16 43019 1 JamNut,Plain1/2-13
17 48115 3 JamNut,Nylock1/2-13
18 48812 2 ClevisPin,5/16"x1-3/8"
19 44481 2 VinylCap
20 48917 2 Clamp
21 25054 2 Bracket,U-BoltClamp
22 46499 2 Spacer
23 741-0248 4 Flange Bearing
24 42212 1 Hook(DoubleTransport)
41268 1 Owner'sManual

10
Call1-866-576-8388formissingpartsorassemblyhelp
DONOTRETURNTOSTORE

11
Call1-866-576-8388formissingpartsorassemblyhelp
DONOTRETURNTOSTORE

® Registered Trademark /
TM
Trademark /
SM
Service Mark of Sears Brands, LLC
® Marca Registrada /
TM
Marca de Fábrica /
SM
Marca de Servicio de Sears Brands, LLC
MC
Marque de commerce /
MD
Marque déposée de Sears Brands, LLC © Sears Brands, LLC
Get it fixed, at your home or ours!
Your Home
For expert troubleshooting and home solutions advice:
www.managemyhome.com
For repair – in your home – of all major brand appliances,
lawn and garden equipment, or heating and cooling systems,
no matter who made it, no matter who sold it!
For the replacement parts, accessories and
owner’s manuals that you need to do-it-yourself.
For Sears professional installation of home appliances
and items like garage door openers and water heaters.
1-800-4-MY-HOME
®
(1-800-469-4663)
Call anytime, day or night (U.S.A. and Canada)
www.sears.com www.sears.ca
Our Home
For repair of carry-in items like vacuums, lawn equipment,
and electronics, call anytime for the location of your nearest
Sears Parts & Repair Service Center
1-800-488-1222 (U.S.A.) 1-800-469-4663 (Canada)
www.sears.com www.sears.ca
To purchase a protection agreement on a product serviced by Sears:
1-800-827-6655 (U.S.A.) 1-800-361-6665 (Canada)
Para pedir servicio de reparación
a domicilio, y para ordenar piezas:
1-888-SU-HOGAR
®
(1-888-784-6427)
Au Canada pour service en français:
1-800-LE-FOYER
MC
(1-800-533-6937)
www.sears.ca
/