Page is loading ...

QLIGHT SERIES
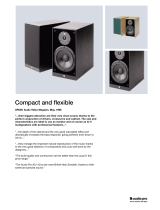
TQ-440SP
USER MANUAL
Turbosound Ltd.
Star Road, Partridge Green
West Sussex RH13 8RY England
Tel: +44 (0)1403 711447 Fax: +44 (0)1403 710155
web: www.turbosound.com
Issue 1.0 Copyright 2000 Turbosound Ltd.

user manual
QLight
series
TQ-440SP manual
page 2
08/06/2001 3:35 PMCONTENTS
Safety Information ............................................................................................................................ 3
Thanks................................................................................................................................................ 4
Unpacking.......................................................................................................................................... 4
Introduction ....................................................................................................................................... 5
Features ............................................................................................................................................. 5
Product Summary............................................................................................................................. 6
Connector Panel Functions............................................................................................................... 7
System Requirements....................................................................................................................... 8
AC Power Requirements................................................................................................................... 8
Power Amplifiers............................................................................................................................... 8
Audio Input........................................................................................................................................ 9
Limiting Functions............................................................................................................................. 9
Music / Speech Optimisation............................................................................................................ 9
Equalisation..................................................................................................................................... 10
Dispersion........................................................................................................................................ 10
Cooling............................................................................................................................................. 10
Mounting and fixing........................................................................................................................ 11
Arraying........................................................................................................................................... 15
Choosing the best location............................................................................................................. 16
Maintenance.................................................................................................................................... 17
Appendix A: Technical Specifications............................................................................................ 19
Appendix B: Spares and Accessories............................................................................................. 20
Appendix C: Warranty..................................................................................................................... 21

user manual
QLight
series
TQ-440SP manual
page 3
An example of this equipment has been tested and found to comply with the
following European and international Standards for Electromagnetic Compatibility
and Electrical Safety:
Radiated Emissions (EU): EN55013-1 (1996)
RF Immunity (EU): EN55103-2 (1996) RF Immunity, ESD, Burst Transient, Surge, Dips & Dwels
Electrical Safety (EU): EN60065 (1998)
Electrical Safety (USA): UL6500 3
rd
edition (1997)
Samples of this product have been tested and were found to comply with UL’s
safety requirements.
Important Safety Information
Do not remove Covers. There are no user serviceable parts inside, please refer servicing to
qualified service personnel. This equipment must be earthed.
CAUTION
RISK OF ELECTRIC SHOCK
DO NOT OPEN
DO NOT EXPOSE TO RAIN OR MOISTURE
ATTENTION
RISQUE DE CHOC ELECTRIQUE
NE PAS ENLEVER
NE PAS EXPOSER A LA PLUIE NI A L’HUMITE

user manual
QLight
series
TQ-440SP manual
page 4
Important Safety Information
Please read carefully and keep the following instructions and safety information. Heed all warnings
and follow all instructions.
• Do not remove covers. There are no user serviceable parts inside, please refer servicing to
qualified service personnel. This equipment must be earthed.
• Do not block any of the ventilation openings. Install in accordance with manufacturer’s
instructions.
• Clean only with a damp cloth.
• Do not defeat the safety purpose of the polarized or grounding-type plug. A polarized plug has
two blades with one wider than the other. A grounding type plug has two blades and a third
grounding prong. The wide blade or the third prong is provided for your safety. When the
provided plug does not fit into your outlet, consult an electrician for replacement of the
obsolete outlet.
• Protect the power cord from being walked on or pinched particulalry at plugs, convenience
receptacles, and the point where they exit from the apparatus.
• Only use attachments/accessories specified by the manufacturer.
• Use only with a cart, stand, tripod, bracket or table specified by the manufacturer, or sold with
the apparatus. When a cart is used, use caution when moving the cart/apparatus combination
to avoid injury from tip-over.
• Refer all servicing to qualified service personnel. Servicing is required when the apparatus has
been damaged in any way, such as the power supply cord or plug is damaged, liquid has been
spilled or objects have fallen into the apparatus, the apparatus has been exposed to rain or
moisture, does not operate normally, or has been dropped.
Thanks
Thank you for choosing a TURBOSOUND TQ-440SP self-powered loudspeaker product for your
application. Please spare a little time to digest the contents of this manual, so that you can obtain
the best possible performance from this unit.
All TURBOSOUND products are carefully engineered for world class performance and reliability.
If you would like further information about this or any other TURBOSOUND product, please
contact us. Detailed product information is available on our web site at www.turbosound.com.
We look forward to helping you in the near future.

user manual
QLight
series
TQ-440SP manual
page 5
Unpacking the TQ-440SP loudspeaker
After unpacking the unit please check carefully for damage. If damage is found, please notify the
carrier concerned at once. You, the consignee, must instigate any claim. Please retain all
packaging in case of future re-shipment.

user manual
QLight
series
TQ-440SP manual
page 6
Introduction
Congratulations, you have just purchased a professional loudspeaker system from the renowned
Turbosound range, designed to give you the best in audio quality and many years of reliable,
trouble free operation. It offers superior audio quality, unsurpassed vocal projection, full technical
documentation including EASE data, and comprehensive rigging and flying hardware options.
Please read through this manual carefully before you attempt to operate the loudspeaker system.
It contains valuable information enabling you to quickly and easily set up and connect the
loudspeakers, important system and set-up checks together with positioning and mounting
instructions.
Features
♦ Superb audio quality
Superb audio qualitySuperb audio quality
Superb audio quality: carefully designed and matched loudspeaker drive units are used
throughout to give you exceptional performance and many years of reliable, trouble free
operation.
♦ Controlled dispersion
Controlled dispersionControlled dispersion
Controlled dispersion: the TQ-440SP enclosure exhibits a tight, controlled dispersion pattern
which minimises room reflections and focuses the sound pressure directed at audience areas.
♦ Ease of use
Ease of useEase of use
Ease of use: the TQ-440SP is easy to set up and use with the minimum of technical knowledge
required. The built-in power amplifiers require only mains a power connection and signal
input for correct operation.
♦ Three way design
Three way designThree way design
Three way design: the exclusive use of cone transducers in the low and mid frequency bands
guarantees a seamless low/mid crossover, greater power handling, lower distortion and
minimal mechnical stress.
♦ Speech / Music optimisation
Speech / Music optimisationSpeech / Music optimisation
Speech / Music optimisation: user-selectable frequency response profiles are provided to suit
specific applications.
♦ Time aligned components
Time aligned componentsTime aligned components
Time aligned components: the mid frequency and high frequency drive units are physically
time-aligned within the enclosure to ensure perfect time arrival.
♦ Solid construction
Solid constructionSolid construction
Solid construction: all Turbosound QLight series cabinets are built from high grade birch
plywood, rebated, screwed and glued together for maximum rigidity and durability.
♦ Integral rigging points
Integral rigging pointsIntegral rigging points
Integral rigging points: fitted as standard, enabling use with many different types of optional
flying hardware.
♦ Compact enclosure
Compact enclosureCompact enclosure
Compact enclosure: custom designed 12”/1”co-axial driver allows this three-way enclosure to
be the equivalent size of many traditional two-way designs.

user manual
QLight
series
TQ-440SP manual
page 7
Product Summary
The TQ-440SP is a compact three-way self-powered full range enclosure including integral power
amplifiers and control electronics. The use of active power amplifier technology ensures an exact
match between amplifier and speaker for optimum acoustic output, and offers exceptional ease of
use by combining the entire electro-acoustic system in one convenient, easily transportable
physical package.
It incorporates a custom-designed co-axial 12"/1" combination LF/HF driver in an optimally tuned
vented trapezoidal enclosure handling the low and high frequency bands. The critical mid-range
frequencies are handled by a proprietary 6.5" cone transducer on a 60° horizontal by 40° vertical
nominal disperion waveguide, loaded with a TurboMid device.
The exclusive use of cone transducers in both the low and mid frequency bands produces a
seamless transition at the crossover frequency, with the result that all of the critical vocal range
right up to 8kHz is lower in distortion than compression driver-based designs. In addition the 6.5"
mid-range driver is a highly efficient device, and is able to handle large amounts of amplifier
power. The remaining high frequencies above 8kHz are effortlessly handled by a 1" compression
driver, operating in a relatively narrow pass band, and therefore subjected to minimal mechanical
stress. The mid and high components are physically time aligned within the enclosure, ensuring
perfect time arrival at the listener's ear. When compared to conventional two-way designs the TQ-
440SP is able to offer higher SPL, significantly lower distortion, and unsurpassed vocal projection
capabilities in an equivalently sized physical package.
A rear panel switch selects optimised profiles for speech or music applications, enabling real
flexibility of use.
The TQ-440SP is a full range loudspeaker, and used by itself will provide high quality audio for all
speech and many music reproduction applications. In order to extend the effective bass frequency
range of the loudspeaker by a further octave the use of the complementary TQ-425SP subwoofer is
recommended.

user manual
QLight
series
TQ-440SP manual
page 8
Connector Panel Functions
1. Signal link
Signal linkSignal link
Signal link – lockable 3-pin XLR line output socket links to additional cabinets. Fully balanced,
pin 2 Hot, pin 3 Cold and pin 1 not connected.
2. Signal input
Signal inputSignal input
Signal input – locking 3-pin XLR line input socket connects to audio mixer. Fully balanced, pin
2 Hot, pin 3 Cold and pin 1 screen (shield).
3. Protect
ProtectProtect
Protect – Red LED indicates that the amplifier module is in protect mode.
4. Speech / Music switch
Speech / Music switch Speech / Music switch
Speech / Music switch – selects between optimised frequency response profiles.
5. Limit (low)
Limit (low) Limit (low)
Limit (low) – orange LED indicates limiting threshold of the low frequency section.
6. Limit (high)
Limit (high)Limit (high)
Limit (high) – yellow LED indicates limiting threshold of the mid/high frequency section.
7. Fan
FanFan
Fan – 24 volt DC supply for the connection of an external cooling fan.
8. Fuse
FuseFuse
Fuse – AC line fuse. Replace only with same type.
9.
Power
PowerPower
Power - Blue LED indicates when AC power is applied to the amplifier module.
10. AC mains connection
AC mains connectionAC mains connection
AC mains connection - accepts Speakon Powercon 3-pin cable-end connector.
11. Mains switch
Mains switch Mains switch
Mains switch – turns AC power on to the unit.

user manual
QLight
series
TQ-440SP manual
page 9
System Requirements
The TQ-440SP is a self-powered loudspeaker system. It comprises two independent amplifier
channels: one channel to power the low frequency driver (LF) plus another channel to power the
midrange (MF) and high frequency (HF) together; and a frequency dividing network to split the
signal and feed it to the appropriate driver section. Additional features such as accurate and
optimised peak limiters for both high and low frequency sections are incorporated into the control
electronics. The TQ-440SP does not require the use of external amplifiers or crossover/limiters.
Additional TQ-440SP units may be daisy-chained together simply by linking the signal connections
throught the input / link XLR connectors. In this way exact coverage of an event or permanent
installation may be achieved using a number of self-powered loudspeakers. It is however
necessary to route individual power cords to each enclosure as it is not possible to daisy chain
through the power connectors.
AC power requirements
The TQ-440SP is equipped with a Neutrik Powercon AC mains connector, which mates with the
power cord supplied with your unit. The TQ-440SP operates with mains voltages either in the
range from 100 to 120 volts a.c. or from 220 to 240 volts a.c. The mains voltage on your unit will
have been preset at the factory prior to shipment. However for clarification please check that both
the product and the power cord match the mains supply available in your area before use.
Should it be necessary to alter the mains voltage setting, for example when touring a country with
mains voltage supply differing from that of the country of original shipment, the mains voltage
switch is located on the inside of the amplifier module adjacent to the mains transformer. Follow
the instructions given in the Maintenance section of this manual for removal of the amplifier
module, and change the voltage setting to match the available supply.
The mains fuse is a 3.15A 20mm anti-surge type for 230v mains supplies, and 6.3A 20mm anti-
surge type for 115v mains supplies. Should it ever be necessary, always replace the fuse with the
identical size and type.
Power Amplifiers
The TQ-440SP is equipped with two high power amplifiers designed with sufficient headroom to
handle large signal transients without break up or distortion, in contrast to other self-powered
designs which attempt to compromise using inadequately powered amplifiers. The LF amplifier
delivers 250 watts r.m.s., while the MF/HF amplifier delivers 150 watts r.m.s.

user manual
QLight
series
TQ-440SP manual
page 10
Audio Input
The signal input to the TQ-440SP is fully balanced, with an input impedance of 10kΩ. The input
XLR connector is wired pin 2 hot (+ve), pin 3 cold (-ve), and pin 1 screen (shield). The link XLR
connector is wired pin 2 hot (+ve), pin 3 cold (-ve), and pin 1 not connected. Multiple TQ-440SP
enclosures may be driven from a single audio console, up to a practical limit of 16 units. Any more
will cause unacceptable signal loss due to the loading of the console output.
Limiting Functions
The TQ-440SP is equipped with accurate peak limiters for both high frequency and low frequency
sections. Because the HF and LF limiters work independently of each other, there is no possibility
of either section compromising the performance of the other as is the case with a single broad-
band limiter. Furthermore, each limiter has its attack and release time constants independently set
and optimised according to the operating frequency range.
Music / Speech Optimisation
A rear panel switch modifies the overall response of the TQ-440SP in order to give you optimised
profiles for different applications. When the speech position is selected, the response of the
system will exhibit a reduced low frequency / low midrange content, which has the effect of
making the upper part of the frequency range more prominent. This results in exceptionally good
intelligibility, and therefore the speech setting is recommended whenever maximum voice
projection is required. Additionally, under most circumstances the speech setting will provide
higher perceived maximum sound pressure level.
When the music position is selected, the low frequency section is extended down to a nominal cut-
off frequency of 55Hz, which makes the TQ-440SP balanced for full range reproduction of a wide
range of music. The low frequency extension is achieved by using a combination of a 2
nd
order
high-pass filter and a dynamic EQ section, with the following benefits:
♦ Frequencies below 50Hz are attenuated, and the mechanical stress on the low frequency drive
unit is therefore maintained within safe limits.
♦ The use of dynamic as well as than fixed EQ reduces the loss of headroom on large signals.

user manual
QLight
series
TQ-440SP manual
page 11
Equalisation
Because the TQ-440SP features a smooth and even frequency response, it does not need
equalisation or correction to overcome the deficiencies often found in lesser designs.
Should extended frequency response be required at more than medium sound pressure levels, the
use of the complementary TQ-425SP self-powered subwoofer is strongly recommended
In order to compensate for the room acoustics, the TQ-440SP requires only minimal equalisation.
As in any system, over-equalisation introduces phase shifts, distortion and a reduction in
headroom, usually causing more problems than it cures.
Under most circumstances a 1/3 or 1/2 octave graphic equaliser will generally be adequate, with
the fader settings applied smoothly and as little as possible for the required room compensation.
Most rooms will have resonances that will be excited at particular frequencies needing some
cut
to
help tame the sound, these problems are most pronounced at the lower frequencies where
speakers generally exhibit very little directional control.
If you find that the system needs a lot of
boost
at lower frequencies you may need additional sub-
bass units as stated above. It is good practice to use as little equalisation as possible, aiming to cut
frequencies rather than adding large amounts of boost.
Dispersion
One of the design features of the TQ-440SP is its tightly controlled 60º horizontal by 40º vertical
nominal dispersion pattern at mid and high frequencies. This gives many user advantages and
eases placement decisions, being essentially a point and shoot system. A 60º horizontal polar
pattern equals an angle of 30º either side of the centre line at which the sound pressure level is
6dB down with respect to centre, (averaged over the whole frequency range of the loudspeaker).
Thus a 40º vertical dispersion gives an angle of 20º above and below the horizon.
Cooling
The TQ-440SP amplifiers are normally cooled by the action of convection from the large heatsink
mounted externally to the amplifier module at the rear of the enclosure. It is important to leave
sufficient space around and especially above the heatsink to allow the convection of heat away
from the loudspeaker. Under the majority of circumstances this cooling effect is sufficient to
maintain the amplifiers within a normal operating temperature range. In conditions of high
ambient temperature and/or in very confined spaces, the use of an external fan module is
recommended. A 24 volt socket is provided on the rear panel for that purpose.

user manual
QLight
series
TQ-440SP manual
page 12
Mounting and Fixing
A versatile range of mounting hardware is available for the TQ-440SP that allows it to be used in a
variety of ways, in either mobile applications or permanent installations.
A top hat stand type fitting
A top hat stand type fittingA top hat stand type fitting
A top hat stand type fitting is mounted in the base of the cabinet
for use with 35mm diameter loudspeaker stands with a load rating
of at least 37kgs (82lbs).
This top hat fitting may also be used to mount the TQ-440SP
cabinet at the correct height above the complementary TQ-425SP
subwoofer using a straight 35mm pole.
Internal metric threaded rigging points
Internal metric threaded rigging pointsInternal metric threaded rigging points
Internal metric threaded rigging points are provided
in several locations on the cabinet – on the top, bottom
and sides - enabling it to be flown using standard M10
shoulder eyebolts (available from Turbosound).
Downward inclination of the enclosure can be adjusted
using an additional rigging point on the rear of the
cabinet.
Side
SideSide
Side-
--
-mounted flying strips
mounted flying stripsmounted flying strips
mounted flying strips can be fitted to the sides of
the enclosure by removing the countersunk bolts on
the top and sides of the cabinet and replacing them
with the M10 bolts provided with the hardware. Two
FF-440 flying strips are required for each enclosure.
This method offers a simple and cost effective method
of flying single or multiple TQ-440SP enclosures, with
the load being taken through the steel strips rather
than through the woodwork of the enclosure.
Enclosures may be arranged in a vertical column by
coupling the flying strips together using QL-75
quicklinks or shackles.

user manual
QLight
series
TQ-440SP manual
page 13
The universal FB
The universal FBThe universal FB
The universal FB-
--
-12 flybar assembly
12 flybar assembly12 flybar assembly
12 flybar assembly enables the use of
several different fixing methods, shown in the diagram here.
The flybar is attached to to the cabinet using a pair of captive
M10 shoulder eyebolts (supplied). There are 12 attachment
points equally spaced along the length of the spine.
Depending on which point is chosen for the given attachment
system, a wide range of downward inclination can be achieved
over a range of approximately 70 degrees. The design of the
flybar even allows for upwards angles, for example for
coverage of balconies that are higher than the loudspeaker
location.
The FB-12 flybar assembly comes supplied with a U
U U
U-
--
-6 Unilock
6 Unilock 6 Unilock
6 Unilock which provides a single attachment
point. The point at which the Unilock is attached to the flybar determines the vertical angle of the
loudspeaker as shown in the table following.
A PP
PPPP
PP-
--
-440 pic
440 pic440 pic
440 pick
kk
k-
--
-up point adaptor
up point adaptorup point adaptor
up point adaptor offers a further single attachment point. This option provides fast
adjustment of vertical angle. The point at which the eyebolt adaptor is attached to the flybar
determines the vertical angle of the loudspeaker as shown in the table following.
The SC
The SCThe SC
The SC-
--
-440 aluminium scaffold clamp adaptor
440 aluminium scaffold clamp adaptor440 aluminium scaffold clamp adaptor
440 aluminium scaffold clamp adaptor is attached to the T-bar by means of a simple
clevis coupler. It is designed to rotate horizontally through 360° in order to enable accurate

user manual
QLight
series
TQ-440SP manual
page 14
positioning of the loudspeaker. The point at which the scaffold clamp is attached to the flybar
determines the vertical angle of the loudspeaker as shown in the table following.
The following table gives the predicted downward angle of the enclosure using the various
attachment points on the FB-12 flybar assembly.
Attachment position Vertical angle (negative angle denotes upwards)
Hole number 1 (front of cabinet)
-29°
Hole number 2
-23°
Hole number 3
-17°
Hole number 4
-10°
Hole number 5
-3°
Hole number 6
4°
Hole number 7
11°
Hole number 8
18°
Hole number 9
24°
Hole number 10
30°
Hole number 11
35°
Hole number 12 (rear of cabinet)
40°
The FH
The FHThe FH
The FH-
--
-440
440440
440 is a complete flying frame and harness
which enables the TQ-440SP to be installed with
the maximum of security. It provides unlimited
variation of horizontal and vertical inclination, and
is very easy to re-position and angle once rigged.

user manual
QLight
series
TQ-440SP manual
page 15
Modular flybar assembly
Modular flybar assemblyModular flybar assembly
Modular flybar assembly The key element in flying
multiple TQ-440SP enclosures is a versatile Flying
Bar Assembly (FB-58), manufactured by
Turbosound, that will support a vertical column of
up to three enclosures deep. Fly bars can be linked
in the horizontal plane using the index pins
provided to form arched arrays with adjustable
(horizontal) angles from 0º to 45º at 5º increments
per cabinet. This allows arrays and clusters of
almost any angle to be configured with the ability
to change array angles without dismantling and
whilst suspended. This useful feature allows for
fine tuning of speaker positions for best coverage,
throw and SPL’s.
On each side of the TQ-440SP cabinet you will find
keyhole type quick-release flying plates, plus top
and bottom rear brackets for pull-up straps and
linking plates. Single cabinets are suspended with
short fixed length steel cables (FS-40) and pull up
straps (TS-440) to align the downward angle. When
flying more than one cabinet in the vertical plane
the second row of speakers is flown on longer
fixed length steel cables (FS-61).
Any installation, whether temporary or permanent, must be securely attached to the structure of
the building using chain, steel wires or web straps which are certified and load rated for the
purpose. The combined weight of the sound system, its cables and the rigging system must be
safely carried by the points at which attachment is made to the building or structure. Great care
must be taken in selecting the attachment points and methods, being absolutely sure of the load
carrying capacity of points chosen.
NOTE: The rigging of loudspeaker systems is an extremely serious matter with potentially lethal
consequences should anything go wrong. It is of vital importance that you, or other people rigging
the system, are suitably qualified to do so and have a full understanding of all the factors involved
with safety as a number one priority. Turbosound accepts no responsibility for any accident,
damage or failure of any rigged system. This rigging information is specifically related to the
requirements of the TQ-440SP only. For more detailed information on the whole topic of rigging
various handbooks are available. If you are in any doubt contact your Turbosound dealer who will
be able to refer you to an experienced rigging company.

user manual
QLight
series
TQ-440SP manual
page 16
Arraying
The TQ-440SP has a side-wall angle of 16º. Use this position for smooth horizontal dispersion that
is ideal for many applications. With the high dynamic range capability and low power compression
of the TQ-440SP you should find this wide angle arrangement adequate for all but the most
demanding long throw requirements. It also has the advantage of needing fewer cabinets to cover
the required area.
When speakers are mounted together in close proximity either stacked on top of each other or
arrayed the output increases due to the coupling effect. For instance, stacking two cabinets on top
of each other with the top one inverted gives around 4.5 dB increase in the mid/high section, ideal
for long throw in large halls, sports stadiums, etc. Mounting the bass drivers close to each other
gives the same gain at the low end. When the system is arrayed for wider angle coverage with
cabinets side by side the gain is in the order of 3db.

user manual
QLight
series
TQ-440SP manual
page 17
Choosing the best location
It was stated earlier that the TQ-440SP’s tightly controlled directivity gives it essentially
point and
shoot
qualities. Every room has its own unique set of characteristics that affect any sound
introduced into the room. These include reverberation reflections and decay time, sound
absorption of materials used, temperature and humidity, etc. A degree of experimentation with
different locations (if possible) is best, especially if you are permanently installing the speaker and
have particular requirements where you want to concentrate the sound into a specific area.
Any boundary like a wall or floor will lift certain frequencies. If you are fixing the unit to a wall, or
in a corner then a lift at the bass end is to be expected and it may sound rather boomy. Either
reduce the low end by means of a graphic equaliser or move the speaker.
Rooms with a lot of soft furnishings, curtains and drapes will absorb sound, especially at high
frequencies. These rooms can sound rather dead and may appear to need more amplifier power to
generate high SPL’s but have the advantage that the sound needs less equalisation and is easier to
control. In this case the listener receives mainly
direct
sound, that is the sound emanating directly
from the loudspeaker, with little
reflected
sound.
If the room has a lot of hard, exposed surfaces such as wooden floors, brick or plaster walls or
glass windows, these will reflect the sound, causing it to bounce around the room and sounding
over bright. These rooms also tend to have various resonances that will be excited by high SPL’s.
Listening in the middle of the room you will hear a lot of
reflected
sound in comparison with the
direct
sound. Care is needed with speaker positioning, SPL’s and equalisation. If the room is large
and very reverberant then bass roll-off below about 250 Hz may be required to ensure a
reasonable level of intelligibility.
For long, narrow rooms the traditional left and right stacks (floor, wall mounted or flown) can
suffice with good stereo imaging in the centre of the room. For multi-tier venues such as theatres,
speakers should be flown or wall mounted to project into each tier. In highly reverberant rooms
often a central cluster is the best option. This acts as a virtual point source with all the sound
emanating from one point in the room, but path lengths should be carefully calculated.
The relationship between sound pressure level and distance is an “inverse square law” so
remember that every time the distance from the sound source is doubled the sound level
decreases by 6dB. For every 3dB increase of speaker output you need a doubling of input power
and you can work out the Wattage input needed to give the required SPL levels at various
distances from the loudspeaker(s).
When speakers are flown in free space then boundary effects are minimised. The result is a
smooth frequency response without any boost at odd frequencies, but the bass end may appear
subjectively light. In this case you will need floor mounted sub-bass, to bring the low end up.

user manual
QLight
series
TQ-440SP manual
page 18
Maintenance
Should a fault develop with the amplifier module, we recommend that you remove the module as
described below and return it to a qualified Turbosound service centre for repair. The module
contains no user-serviceable parts, and the warranty will be invalidated if unauthorised repairs are
carried out.
If one of the drive units in the cabinet should cease functioning and needs a replacement recone or
diaphragm you are advised to remove the faulty unit from the cabinet and send it to a professional
recone service authorised to recone Turbosound loudspeakers. This will ensure the continued high
performance of your TQ-440SP.
Removal of the Amplifier module
1. Release the four M5 Allen head bolts securing the amplifier module to the rear of the cabinet
and disconnect the Molex 4-way connector from the PCB. The module can now be lifted clear
of the cabinet and set aside.
2. Replacement is a straightforward reversal of the above procedure. Take care to connect the
Molex connector securely to the PCB (it is polarised and cannot be connected incorrectly)
before replacing and tightening the four M5 Allen head bolts.
Removal of the 12”/1” driver
1. Unscrew the eight countersunk screws from the two vertical battens which hold the protective
grille in place. Be careful when removing the grille as it is under tension and may spring
outwards when released. Set the battens, grille and fixing screws aside for later re-assembly.
2. Undo the eight M6 x 30mm Allen head bolts holding the driver in place and carefully pull it
out and away from the cabinet. WARNING - This unit is heavy! You will notice that the 1” high
frequency driver is attached to the back of the 12” low frequency driver by its screw adapter.
Disconnect the cables from both HF and LF units and completely remove the driver assembly
from the cabinet. Make a note of the driver polarity for later reconnection.
3. Separate the drive units by unscrewing the high frequency driver anti-clockwise and lift it
away from the low frequency driver. Depending on which section needs servicing, the
appropriate drive unit should be returned to an authorised Turbosound service centre.
4. To reinstate the drivers, simply reverse the above procedure making sure you observe the
correct polarity when reconnecting the cables back into the terminals of the drive units.

user manual
QLight
series
TQ-440SP manual
page 19
Removal of the midrange drive unit
If the midrange drive unit requires maintenance, it will first be necessary to remove the amplifier
module. The midrange driver is held in place by a M10 x 25mm bolt through the rear of the
cabinet into the back plate of the drive unit underneath the amplifier module. Once this is released
the midrange horn and drive unit assembly can be removed.
1. Remove the amplifier module as described above and set it aside.
2. The M10 bolt securing the midrange driver will now be accessible in a recess in the enclosure
rear panel. Using a 17mm socket, unscrew the bolt and set aside for later re-assembly.
3. Unscrew the eight countersunk screws from the two vertical battens which hold the protective
grille in place. Be careful when removing the grille as it is under tension and may spring
outwards when released. Set the battens, grille and fixing screws aside for later re-assembly.
4. The midrange horn is secured through the mounting flange with four #10 x 1/12” pan head
wood screws. Unscrew these and lift out the horn and driver assembly.
5. Disconnect the cables, making a note of the polarity, and carefully lift the driver clear.
For any other servicing requirements please contact your Turbosound dealer or authorised service
centre.

user manual
QLight
series
TQ-440SP manual
page 20
APPENDIX A
Technical Specifications
Dimensions 558mm x 409mm x 363mm (23.1” x 16.1” x 14.3”)
Net weight 37.5kgs (82.5lbs)
Components 12”/1” LF/HF co-axial driver, 6.5” MF driver on a TurboMid device
Frequency response 55Hz – 20kHz ±4dB
Nominal dispersion 60°H x 40°V @-6dB points
Maximum SPL 128dB continuous, 134dB peak
Construction 15mm (5/8”) birch plywood throughout; rebated, screwed and glued.
Finished in black semi-matt textured paint. Two recessed carrying
handles. Integral 35mm pole mount. Two keyhole flyplates
Grille Reticulated foam on expanded steel mesh
Connectors Input: (1) XLR female; (1) XLR male, wired pin 2 hot
Mains connection Neutrik Powercon
Options TurboBlue semi-matt textured paint
Amplifier Type: Class AB
Power output: HF: 150 watts r.m.s.
LF: 250 watts r.m.s.
THD: typically 0.01%, 20Hz – 20kHz
Input impedance: 10k, electronically balanced
Power requirements: 230V AC 50Hz, 115V AC 60Hz
Due to continuing product improvement the above specifications are subject to change.
/