Page is loading ...

EN
DE
FR
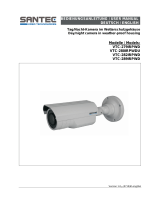
Quick Installation Guide
1/2.8” HD-TVI Camera, Day&Night,
1920x1080, WDR 2.8-12mm,
Infrared, 12/24V
TVB-2080V2812IR

2
Table of content
Parts supplied ...............................................................................................................5
Part names .....................................................................................................................6
Installation instructions ...............................................................................................7
Pan & Tilt adjustments .....................................................................................................................................................8
Zoom & Focus adjustments .......................................................................................................................................... 9
Power supply connections .......................................................................................................................................... 10
Operating instructions ...............................................................................................11
Using OSD controller..................................................................................................................................................... 11
Description of the joystick operation ....................................................................................................... 11
Description of the D-ZOOM adjustment ................................................................................................ 11
OSD menu startup ......................................................................................................................................................... 12
Direct control menu ...................................................................................................................................................... 12
Further information ....................................................................................................14

3
EN
Safety instructions
General safety instructions
• Before switching on and operating the system, rst read this safety advice and the operating instructions.
• Keep the operating instructions in a safe place for later use.
• Installation, commissioning and maintenance of the system may only be carried out by authorised
individuals and in accordance with the installation instructions - ensuring that all applicable standards and
guidelines are followed.
• Protect the devices from water penetration and humidity, since these can cause lasting damage.
• Should moisture nevertheless enter the system, under no circumstance switch on the devices under these
conditions, instead send them for examination to an authorised specialist workshop.
• The system must never be used outside of the technical specications, since this can destroy it.
• The device must be protected from excesses of heat, dust, humidity and vibration.
• When separating the system from the voltage supply, only ever use the plug to pull out the cable. Never
pull directly on the cable itself.
• Lay the connecting cables carefully and check that they are not mechanically stressed, kinked or damaged
and that no humidity can penetrate into them.
• In the event of a malfunction, please inform your supplier.
• Maintenance and repairs may only be carried out by authorised specialist personnel.
• The system must be isolated from the power supply before opening the housing.
• The device may only be opened by qualied service personnel. Unauthorised access invalidates any
warranty claim.
• Connection cables should always be exchanged through Videor E. Hartig GmbH.
• Use only original spare parts and accessories from Videor E. Hartig GmbH.
• The housing should only be cleaned using a mild domestic cleaning agent. Never use solvents or petrol as
these can permanently damage the surface.
• During installation, it is essential to ensure that the seals provided are correctly installed and that they are
not displaced during installation. Damaged seals must not be installed and will invalidate any warranty.
• The installer is responsible for the maintenance of the enclosure as per the technical data, e.g. by sealing
the cable outlets with silicone.
• Wire end ferrules should be used when shortening the exible connection cables.
• The devices may only be operated in the temperature range indicated in the data sheet and within the
dened air humidity range.
Product - Specic Safety Instructions
• The camera may never be pointed directly at the Sun with the aperture open (this will destroy the sensor).
• It is unavoidable that during manufacture and to a certain extent during later use, humidity will be present
in the ambient air within the device’s housing. In the event of large temperature uctuations, this humidity
may condense inside the housing.
• To avoid this condensation inside the very tightly sealed housing, the manufacturer has inserted silica gel
sachets in the housing of the various camera types.
• It is however a physical given, that these silica gel bags will reach saturation after a certain amount of time.
They should therefore be replaced with new silica gel sachets.
• During installation, it is essential to ensure that the seals provided are correctly installed and that they are
not displaced during installation. Damaged seals must not be installed and will invalidate any warranty.
• A multipolar, easily accessible isolation device should be installed in the proximity of the IR Spotlight, in
order to disconnect the device from the power supply for service work.
• The earth connection must be made according to the low impedance requirement of DIN VDE 0100.
• Subsequent painting of the equipment surface can impair the function.
• Any warranty claim is invalidated by subsequent painting.
• A safety margin of > 1m from the spotlight must be maintained when viewing directly into the IR Spotlight
in a darkened environment.
• Do not look directly at invisible LED radiation using optical instruments (e.g. a reading glass, magnifying
glass or microscope), since this can endanger the eyes, LED Class 1M.
• Operation of the IR spotlight with a defective cover or during repair is prohibited.

4
Class A device note
This is a Class A device. This device can cause malfunctions in the living area; in such an event, the operator may
need to take appropriate measures to compensate for these.
WEEE (Waste Electronical & Electronic Equipment)
Correct Disposal of This Product (Applicable in the European Union and other European countries with separate
collection systems).
This marking shown on the product or its literature, indicates that it should not be disposed with
other household wastes at the end of its working life. To prevent possible harm to the environment
or human health from uncontrolled waste disposal, please separate this from other types of wastes
and recycle it responsibly to promote the sustainable reuse of material resources. Household users
should contact either the retailer where they purchased this product, or their local government
oce, for details of where and how they can take this item for environmentally safe recycling.
Business users should contact their supplier and check the terms and conditions of the purchase
contract. This product should not be mixed with other commercial wastes for disposal.
Graphical symbols
Please pay attention to the safety instructions, and carefully read through this instruction guide before initial
operation.
Important points of warning are marked with a caution symbol.
i
Important points of advice are marked with a notice symbol.

5
EN
Parts supplied
• Camera
• Plastic Anchor: 6 x 30mm (4pcs)
• Mounting Screw: 4 x 30mm (4pcs)
• Cable Signal Sticker
• Operating Instruction
• Mounting Template
• Assembly Screw: 4 x 15mm (4pcs)
• Torque Wrench: 3mm (1pc)
• Wiring Connector: (1pc)
• Video Sub-out Cable (1pc)
• Easy Bracket

6
Part names
Sunshield bolt
Power cable
OSD setup control cover
Dual window
Front case
Rear case
Lock/unlock screw
Bracket
Easy bracket
Sunshield
Focus Zoom
Torque wrench
Lock/Unlock screw

7
EN
Part names
Sunshield bolt
Power cable
OSD setup control cover
Dual window
Front case
Rear case
Lock/unlock screw
Bracket
Easy bracket
Sunshield
Focus Zoom
Torque wrench
Lock/Unlock screw
Installation instructions
CAUTION: The camera’s base should be attached to a structural
object, such as concrete, hard wood, wall stud or ceiling rafter
that supports the weight of the camera. If necessary use appro-
priate mounting material (e.g. anchors) instead of the material
enclosed with the camera.
1. Locate the mounting template at the installation position and drill the ceiling or
wall if needed.
i
The easy bracket can not be installed on the ceiling.
2. Place the easy bracket on pre-drilled position and x it through using mounting
screws(4x30mm). Skip this step when an easy bracket is not installed.
3. Route the power cable to the connecting place. Hook up the camera bracket with
the easy bracket as illustrated below.
4. Fix the camera bracket through using assembly screws (4x15mm).
5. Set the camera’s viewing angle.
6. Put the sunshield to the camera unit and tighten the sunshield-bolts.
1
2
3
4
Assembly Screw: 4x15mm
Torque Wrench
Mounting Screw 1: 4x30mm
Cable exit

8
CAUTION:
Extreme care should be taken NOT to scratch the window in front
of lens.
Care should be taken the cable is NOT to be damaged, kinked or
exposed in the hazardous area.
Do not expose the camera directly to a strong light source such
as the sun or spot light.
Pan & Tilt adjustments
• Unlock the screw on the camera bracket through using the torque wrench supplied
• Set the camera’s viewing angle then lock the screw on the bracket.
Adjustment of viewing angle with a bracket
1. Pan limit: Pan is limited to +/- 90°.
90
°9
0°
Torque wrench
Lock/Unlock Screw

9
EN
2. Tilt limit: Tilt is limited to 0°(2°) min ~ 90° max. for wall(ceiling) installation respec-
tively with reference to the wall(ceiling) when the inclination of camera module is
0°, that is, the image is aligned horizontally.
90°
88°
on the wall on the ceiling
3. Inclination limit (Horizontal image alignment): Inclination limited to +/-90° max.
±90°
Zoom & Focus adjustments
Use the torque wrench supplied.
• Turn the Focus gear to “N” (Near) or “∞” (Far) until the sharpest focus is made.
• To widen the viewing angle, turn the Zoom to “W” (Wide) and to obtain a closer
view, turn it to “T” (Tele)

10
Power supply connections
Make sure the power is removed before the installation. Camera can work with either
24AC or 12VDC, dual voltage power. Primary and secondary grounds are completely
isolated to avoid the possible ground-loop problems.
Attach the Signal Assignment Sticker in a visible spot for wiring reference.
VIDEO (BNC)
AC24V/DC12V (Red wire)
AC24V/GND (Black wire)
RTX+/RS485 (White wire)
RTX-/RS485 (Gray wire)

11
EN
Operating instructions
Using OSD controller
Setup menu can be accessed and controlled by OSD control joy stick on the side of cam-
era unit. Five commands are available with the joy stick.
SUB-OUT
ZOOM
Description of the joystick operation
1. SET Key (●) : Access to the menu or enter the setting. To enter the main menu,
press the Set Key down for about 1.5sec
2. UP/DOWN Key (▲/▼) : Choose the desired sub-menu and to move the cursor up or
down.
3. LEFT/RIGHT Key (◄/►) : Set up the value of the selected menu. Used to adjust the
desired menu selection and to move the cursor left or right.
4. ‘☟’ denotes the long press down straightly for about 2 seconds
Description of the D-ZOOM adjustment
i
Works only when OSD Menu is inactive.
1. ▲ : Zoom In
Video Sub-out Connector
Cover Open
OSD Control Joy Stick

12
2. ▼ : Zoom Out
OSD menu startup
Press ‘●’ (OSD menu Joy stick key) down for about 2 seconds to access the setup menu
mode.
• RET: Returns to the previous menu.
• EXIT: Exits the menu setting without save.
• SAVE&EXIT: Exits the menu setting with save.
MENU V3.xx
1. EXPOSURE
2. LENS
3. FOCUS ASSIST
4. SCENE ENHANCE
5. 3D-NR
6. DAY/NIGHT
7. PICT ADJUST
8. SPECIAL
9. SYSTEM
A. EXIT
NORMAL
MID
EXT
SAVE&EXIT
DC
Direct control menu
MAIN DEFAULT DESCRIPTION
EXPOSURE - Sets SHUTTER MODE, BRIGHTNESS, SENS-UP and AGC.
LENS DC Sets Lens types
FOCUS ASSIST - Sets Focus Adjustments.

13
EN
MAIN DEFAULT DESCRIPTION
SCENE ENHANCE NORMAL
SCENE ENHANCE provides the several ways to enhance the video in the
various environments with the settings in NORMAL, WDR, D-WDR, BLC
and HLC.
NORMAL – Optimized for the normal indoor and outdoor in the
good lighting condition.
WDR – Improves the visibility for the high bright area and the darka-
rea by the double captures of image with LONG and SHORT exposures.
With WDR ON, the frame rate becomes half by the double captures.
WDR level can be selected from LOW, MID and HIGH. Care should be
taken to select this mode because video may lose its quality in some
environments by the over compensation.
CVBS video signal: Connecting 2nd video to CVBS port disables WDR
function temporary. It should be considered when installer adjusts the
video with installation monitor via CVBS video signal.
D-WDR – Improves the visibility by compensating the video gain for
the dark area. Noise can increase in the dark area accordingly.
BLC – Improves the visibility for the dark object by the bright back
light. Outside area of BLC window can over saturate. BLC has a target
window for compensation and its size and position can be set by H-POS,
V-POS, H-SIZE and V-SIZE.
HLC – Cuts out the highlight area with black mask and excludes it from
compensation. Lower HLC LEVEL cut out video from the lower level.
3D-NR MID Enables to set OFF, LOW, MID and HIGH
DAY/NIGHT EXT or AUTO
Sets DAY / NIGHT to EXT, AUTO, COLOR and B/W. SMART IR can be set to
reduce the saturation by the strong IR illumination in the night in any
menu of EXT, AUTO and B/W(NIGHT) Setting SMART IR in any menu is
identically applied to other menu. Zero(0) turns o SMART IR and High
setting avoids the saturation strongly but the corners will be darker
accordingly. IR LED Control(AUTO/OFF) is available with IR LED model
only. If IR LED is set to OFF, IR LED will be turned OFF but DAY or NIGHT is
still determined by the built-in light photo sensor.
EXT – DAY or NIGHT is determined by the built-in light photo sensor.
Camera with IR LED must be set to EXT.
AUTO – Used when DAY or NIGHT is determined by light level through
the lens and DAY from/to NIGHT is switched automatically by the scene
brightness. D<-->N THRESHOLD, D<->N DELY and SMART IR can be set
in the menu. When EXPOSURE>AGC is less than 12, DAY/NIGHT AUTO is
disabled and forcibly switches to ___(DAY) to avoid the malfunction.
EXT, B/W(NIGHT) and COLOR(DAY) is independent on AGC level. When
EXTERNAL IR LED is used with NON IR LED model, please set to IR LED
MODE ON.
B/W(NIGHT) – Forcibly removes IR cut lter and switches to B/W
regardless of light level.
COLOR(DAY) – Forcibly DAY/NIGHT is disabled and outputs color
video.
PICT ADJUST Sets WHITE BAL, SHARPNESS, COLOR GAIN, GAMMA, SHADING.
SPECIAL
Sets MIRROR/FLIP, PRIVACY, MOTION, PIXEL DEFECT, TITLE SET, DISPLAY,
DEFOG, POINTING ZOOM, PRESET ZOOM
SYSTEM
Sets TV SYSTEM, RESOLUTION, COMM.SETUP, UTC CONTROL, LANGUAGE,
OUTPUT SELECT and FACTORY DEFAULT
EXIT
SAVE & EXIT – Exits the menu after saving the parameters. EXIT – Exits
the menu without saving the menu.

14
Further information
The manual is also available from the eneo web site at www.eneo-security.com.

eneo® is a registered trademark of
VIDEOR E. Hartig GmbH
Exclusive distribution through specialised
trade channels only.
VIDEOR E. Hartig GmbH
Carl-Zeiss-Straße 8
63322 Rödermark/Germany
Tel. +49 (0) 6074 / 888-0
Fax +49 (0) 6074 / 888-100
www.videor.com
www.eneo-security.com
Technical changes reserved
© Copyright by VIDEOR E. Hartig GmbH
Version 10/2015
/