Page is loading ...

QUESTIONS, PROBLEMS, MISSING PARTS?
Before returning to your retailer, call our customer service
department at 1-800-265-9960 9 a.m.-5 p.m., EST, Mon-Fri.
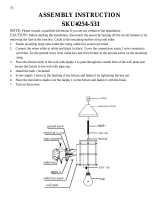
8 LIGHT CRYSTAL SPHERE CHANDELIER
• TURN OFF ELECTRICITY at main fuse box (or circuit breaker box) before beginning installation by switching circuit
breaker off or removing fuse.
• If in doubt about electrical installation, consult a licensed electrician.
PREPARATION
Before beginning assembly and installation of product, make sure all parts are present. Compare parts with package
contents list and diagram above. If any part is missing or damaged, do not attempt to assemble, install or operate the
product. Contact customer service for replacement parts.
Estimated Assembly Time: 30 minutes
Tools Required for Assembly: Phillips screwdriver and electrical tape (not included)
Helpful Tools: Wire cutter (not included)
1
PACKAGE CONTENTS
REPLACEMENT PARTS AVAILABLE MARKED BY :
PART #
A 1 x Fixture unit 14
B
C
1 x Mounting bracket with threaded nipple and green screw
7,12, 31
D
3 x Wire nuts
5
E
F
1 x Canopy 29
G
1 x Chain with c loops
26, 24, 33
1 x Coupling with coupling screws 38, 39
A.
B.
C.
D.
E.
F.
G.
H.
I.
WARNINGS AND CAUTIONS
ITEM/ARTICLE/ARTICULO: #10951-15
H
1 x Light body with light body tube
15,17
I
1 x Fixture unit tube
1 x Collar loop, with screw
27, 28
16

2
ASSEMBLY INSTRUCTIONS
Step 1: Carefully remove package contents on top
section of foam.
Step 2: Locate fixture unit door (36), and detach by
removing fixture unit screws (37). FIG. 1
Step 3: Slip electrical and ground wires from light
body (15) through light body tube (17). Thread
light body tube (17) into coupling (13) on light
body (15). FIG. 2
Step 4: Fit the light body (15) through the open
section of fixture unit (14) and slip electrical and
ground wires up through top center hole of fixture
unit. Secure light body (15) to fixture unit coupling
(38), by tightening bottom coupling screw (39A)
FIG. 3
Step 5: Slip electrical and ground wire through
fixture unit tube (16). Screw fixture unit tube (16)
into fixture unit coupling (38) and tighten with
upper coupling screw (39B). Install light bulbs.
Only use 40 watt type B10 candelabra base bulbs.
Screw fixture unit door (36) back onto fixture unit
(14) and tighten using the fixture unit screws (37).
FIG. 4
NOTE: (Remember section on opening and closing
fixture unit door for future bulb replacement).
FIG. 1
FIG. 3
Light body (15)
FIG. 2
FIG. 4
Light body tube (17)
Fixture unit (14)
Fixture unit door (36)
Fixture unit
screws (37)
Light body (15)
Fixture unit
tube (16)
Upper
coupling
screw (39B)
Fixture
unit door (36)
Fixture unit
screws (37)
Fixture unit
coupling (38)
Fixture
unit (14)
Bottom coupling
screw (39A)
Fixture unit
coupling (38)
Bottom coupling
screw (39A)
Coupling (13)

Canopy (29)
Screw on collar loop (28)
Black (hot) (3)
Ground supply wire (10)
Ground fixture wire (11)
Chain (26)
Threaded ring (30)
Outlet box (8)
Green screw (12)
3
CARE AND MAINTENANCE
• Clean with soft dry cloth. Do not use abrasives.
• Bulb replacement uses 8 x 40 watt type B10 candelabra base bulbs. Shut off main power supply before
replacing bulbs.
TROUBLESHOOTING
Printed in China
Problem Possible Cause Corrective Action
Bulb won’t light. 1. Bulb is burnt out. 1. Replace light bulbs.
2. Power is off. 2. Check if power supply is on.
3. Faulty wire connection 3. Check wiring.
4. Faulty wall on/off switch 4. Test or replace wall on/off switch.
"c" loop (24)
Fixture unit tube (16)
Black (hot) (3)
White (neutral) (4)
Mounting bracket (7)
Wire nuts (5)
White (neutral) (4)
Outlet box screws (9)
Threaded nipple (31)
Fixture unit
door (36)
Fixture unit
screws (37)
Coupling screws (39)
"c" loop (33)
Fastener screws (6)
Fastener(5)
Step 1: TURN OFF ELECTRICITY at main fuse box (or circuit
breaker box) before beginning installation by switching
circuit breaker off or removing fuse.
Step 2: Fasten mounting bracket (7) with pre-assembled
threaded nipple (31) onto the outlet box (8) using two
outlet box screws (9). Slip canopy(29) over threaded nipple
(31) and set in lowest position with fastener (5) by
tightening fastener screws (6). Attach collar loop (27) into
threaded nipple (31) and lock tight with screw on collar
loop (28).
Step 3: Open "C" loop (33) by unscrewing the threaded
collar (34). Insert one end of chain(26), and then attach “C”
loop (33) to the threaded ring (30). Close the threaded
collar (34).
Open "C" loop (24) by unscrewing the threaded collar (25).
Insert other end of the chain (26) into the "C" loop (24), and
then attach “C” loop (24) to the collar loop (27). Close the
threaded collar (25). (If shorter chain is desired, adjust
chain to desired length by taking out chain links).
Step 4: Carefully feed fixture unit cord and ground wire up
through chain (26), weaving it through chain links. Feed
remaining wire through collar loop (27) and through the
threaded nipple (31) into outlet box (8).
Step 5: Strip ¾ in. of insulation from end of fixture wire and
supply circuit wires. Attach ground supply circuit wire (10)
and ground fixture wire (11) together with wire nut (5).
Never connect ground wire to black or white power supply
wires. Twist stripped wire ends of fixture and supply circuit
wires together ribbed wire to black (hot) (3) and smooth
wire to white (neutral) (4). Twist on wire nuts (5). Tape wire
nuts and wires together.
Step 6: Make sure all wires are tucked in place inside outlet
box (8). Slip canopy (29) up against ceiling, and lock with
fastener screws (6).
Collar loop (27)
INSTALLATION INSTRUCTIONS
Threaded
collar (25)
Threaded
collar (34)
Fixture unit (14)
Coupling (38)

4
WARRANTY
Checkolite International Inc, a New Jersey Corporation, having its principal place of business at 142 Charles
St., Jersey City, NJ 07307 (Checkolite) warrants its products (the “Products”) as follows:
1. Limited Warranty.
Manufacturer warrants that the Products sold hereunder will be free from defects in material and
workmanship for a period of one (1) year from the date of purchase. If the Products do not conform to this
Limited Warranty during the warranty period (as herein above specified), Buyer shall notify Manufacturer in
writing of the claimed defects and demonstrate to Manufacturer’s satisfaction that said defects are covered
by this Limited Warranty. If the defects and proof of purchase are properly reported to Manufacturer within
the warranty period, and the defects are of such type and nature as to be covered by this warranty,
Manufacturer shall, at its own expense, furnish replacement Products or, at Manufacturer’s option,
replacement parts for the defective Products. Shipping and installation of the replacement Products or
replacement parts shall be at Buyer’s expense.
2. Exclusive Obligation.
THIS WARRANTY IS EXCLUSIVE. The sole and exclusive obligation of Manufacturer shall be to repair or
replace the defective Products in the manner and for the period provided above. Manufacturer shall not
have any other obligation with respect to the Products or any part thereof, whether based on contract, tort,
strict liability or otherwise. Under no circumstances, whether based on this Limited Warranty or otherwise,
shall Manufacturer be liable for incidental, special, or consequential damages.
3. Other Statements.
Manufacturer’s employees or representatives’ ORAL OR OTHER WRITTEN STATEMENTS DO NOT CONSTITUTE
WARRANTIES, shall not be relied upon by Buyer, and are not a part of the contract for sale or this limited
warranty.
4. Entire Obligation.
This Limited Warranty states the entire obligation of Manufacturer with respect to the Products. If any part
of this Limited Warranty is determined to be void or illegal, the remainder shall remain in full force and
effect.
/