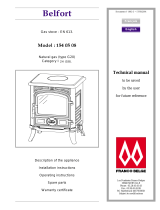
FRANCO BELGE Belfort 154 05 08 Technical Manual

Category
Stoves
Type
Technical Manual

This manual is also suitable for

Technical manual
to be saved
by the user
for future reference
Document n° 1044-2 ~ 17/05/2001
Les Fonderies Franco-Belges
59660 MERVILLE
Phone : 03.28.43.43.43
Fax : 03.28.43.43.99
RC Hazebrouck 445750565B
Subject to modifications
Belfort
Gas stove - EN 613.
Model : 154 05 12
Propane (type G31)
Category I
3P.
Français
English
Description of the appliance
Installation instructions
Operating instructions
Spare parts
Warranty certificate
Product information . . . . . . . . . . . . . . . . . . . . . . . . . . . . . . . . . . . . . . 3
Package . . . . . . . . . . . . . . . . . . 3
General characteristics . . . . . . . . . . 3
Description . . . . . . . . . . . . . . . . . 3
Principle of operation . . . . . . . . . . . 3
Installation instructions . . . . . . . . . . . . . . . . . . . . . . . . . . . . . . . . . . . . 4
Siting the appliance . . . . . . . . . . . . 4
Clearance requirements . . . . . . . . . . . . 4
Hearth......................4
Flue connection . . . . . . . . . . . . . . 5
Smokeexitonthetop .............5
Smokeexitatrear ...............5
Ventilation (G.B. Only) . . . . . . . . . . 5
Connecting the gas supply . . . . . . . . 5
Pressure testing . . . . . . . . . . . . . . 5
Coals layout . . . . . . . . . . . . . . . . 6
Test for spillage . . . . . . . . . . . . . . 7
Service section . . . . . . . . . . . . . . . 7
Troubleshooting chart . . . . . . . . . . . . . 7
Servicinginstructions .............7
User instructions . . . . . . . . . . . . . . . . . . . . . . . . . . . . . . . . . . . . . . . . 8
Important Notes . . . . . . . . . . . . . . 8
Data information . . . . . . . . . . . . . . 8
Arranging the layout of the coals. . . . . 8
Operating the stove . . . . . . . . . . . . 8
Igniting the permanent pilot light . . . . . . . 8
Running the stove at low setting . . . . . . . 8
Extinguishing the stove back to permanent
pilotsetting...................8
Extinguishing the stove fully . . . . . . . . . . 9
Safety mechanisms . . . . . . . . . . . . 9
Flame supervision device . . . . . . . . . . . 9
Thermostaticswitch(ttb)............9
Ignitionmechanism...............9
Cleaning . . . . . . . . . . . . . . . . . . 9
Servicing . . . . . . . . . . . . . . . . . . 9
List of components . . . . . . . . . . . . . . . . . . . . . . . . . . . . . . . . . . . . . . 10
CONTENTS Page Page
Gas stove "Belfort" Ref. 154 05 12
2 Technical manual
1.Product information
1.1. Package
1 package : Stove complete. The ceramic coals are
supplied inside the combustion chamber.
1.2. General characteristics
1.3. Description
The Belfort stove has been individually designed to add
traditional charm and characterto yourhome. Providing
a highly efficient heat source, the Belfort has the look
and charm of a ‘real’ stove coupled with the
convenience of clean burning gas.
The stove is designed to run LPG gas. It is important to
note that once a type of gas has been specified the
stove cannot run off any other type. The type of gas
which your stove is capable of burning is stated on the
data information panel (See Paragraph 3).
1.4. Principle of operation
THERMOSTATIC SWITCH (TTB) : The TTB is a
normally closed bi-metallic switch which is designed to
open at a pre-set temperature (90°C) and reset to the
closed position when the temperature falls to a reset
level (normally 15°C below the operating temperature).
The system is not adjustable, and should not be
rendered inoperative.
If parts of the system require replacement only original
parts must be used.
4 2 0
5 5 0
4 0 9
Ø 1 2 5 i n t .
3 4 0
1 3 1
Figure 1 - Dimensions in mm
Product informationRef. 154 05 12 Gas stove "Belfort"
Technical manual 3
2.Installation instructions
These instructions have been compiled in accordance
with EN 613 1995.
It is required by law that any appliance using natural or
LPG gas is installed by a competent person (e.g.
CORGI registered), in conjunction with the these
instructions and the requirements as laid down in the
following Regulations and British Standards :
The Gas safety (Installation and Use) Regulations
1994.
The Building Regulations (issued by the department of
the Environment).
The Building Standards (Scotland) (Consolidation)
Regulations.
APPLIANCE TO BE INSTALLED ACCORDING TO
NATIONAL REGULATIONS.
The Belfort is a gas stove designed to run LPG.
The stove is a radiant convector fuel effect stove. The
Belfort can be placed directly inside any fireplace
opening of the dimensions noted within the installation
instructions.
Ensure that the stove corresponds to the type of gas it
is to be used with. This can be confirmed by checking
the data badge located on the rear face of the
appliance.
Prior to installation it is essential that the chimney
should be sweptand itsconditionandsuitabilityforuse
with the appliance checked.
All surfaces except the control knob are considered to
be working surfaces.
2.1. Siting the appliance
The gas supply connection to the appliance is at the
rear right hand side. The connection requires 8 mm
diameter semi-rigid pipe, not more than 1 metre in
length.
The appliance can be installed in any adequate area
suitable for solid fuel fires and stoves.
The flue pipe required iseither a singleor doublewalled
pipe of 126 mm diameter.
2.1.1. Clearance requirements
If the appliance has to be located in an opening, there
must be a clearance of at least 50 mm at the left hand
of the appliance, 50 mm at the back of the appliance
and 50 mm above from any non-combustible materials
(as shown in figure 2).
This distance mustbe extendedto a mininum clearance
of 80 mm from any combustible materials.
There should ideally be a minimum gap of 150 mm at
the right hand side of the stove (this will ensure the best
possibleaccessto the controlknob).Thismeasurement
may be reduced to a minimum gap of100 mm if needed
however extra care should be taken when operating the
control knob when the appliance is hot.
A combustible shelf may be fitted over the appliance,
provided thatinthecase of a 150mmorless deep shelf,
there is at least 250 mm clearance above the top of the
stove. The shelf depth may increase at the same rate
as the increase in clearance ; i.e. a shelf depth of
200 mm would require a clearance of 300 mm.
AB
100 250
150 250
200 300
250 350
300 400
2.1.2. Hearth
Thestovemuststandonafireproofhearth.
To comply with the Building Regulations issued by the
Department of the Environment, the following points
should be noted when choosing a hearth :
The hearth must be made of non combustible material
of thickness 12 mm minimum.
The hearth must protrude at least 150 mm in front of
the stove and 150 mm each side.
Installation instructions
1 5 0
1 5 0
1 5 0
5 0
n o n - c o m b u s t i b l e = 1 0 0
1 0 0
5 0
D E P T H
A *
c o m b u s t i b l e = B *
S h e l f
5 0
Figure 2
Minimum clearances to non-combustible materials, hearth
and shelf (in mm)
Gas stove "Belfort" Ref. 154 05 12
4 Technical manual
The hearth must not be capable of inadvertent
covering by a carpet or rug. This should be achieved
by either :
- the hearth being 50 mm above the level of the room
floor.
- a fender or kerb around the edge of the hearth to a
height of at least 50 mm above the floor.
2.2. Flue connection
The Belfort is suitable for both Class 1 and 2 flues (the
building Regulations 1984).
The appliance is also suitable for pre-cast flues,
pre-cast chimney block, pre-cast flue block and ridge
tile vent.
It is the responsibility of the installer to ensure that the
flue to be connected is suitable for the conditions
experienced when burning LPG gas.
Ideally it is recommended that a minimum height of
610 mm from the stove should be established before
any significant change in the direction of the flue.
Horizontal or negative gradients in the flue pipe should
be avoided.
It is recommended that the flue has a minimum height
of 3 metres. Prior to installation the installer should
ensure that the flue is free from obstruction and ideally
a chimney should be swept and subsequently smoke
tested. Ensure that any dampers are fixed in a
permanently open position, and that the chimney/flue
is, in the professional opinion of the installer, of an
overall suitability for the purpose intended.
The stove is supplied with a connection flue spigot with
an inner diameter of 125 mm or an outer diameter of
139 mm.
2.2.1. Smoke exit on the top
Figure 3
- Remove the top plate, first remove the2 screwson the
sides of the appliance.
- Fit the sealing rope in the groove and attach the flue
spigot using the three bolts and washers supplied.
- Check that the two blanking plates are fixed to the
back wall.
- Refit the top plate, ensuring there is a good seal.
2.2.2. Smoke exit at rear
Figure 4
- Remove the top plate, first remove the2 screwson the
sides of the appliance.
- Remove the two blanking plates fixed at the back, fix
the sealing ropein thegrooveon thetop and fitthetwo
blanking plates on the top, ensuring there is a good
seal.
- Fix the sealing rope in the groove on the rear and fit
the flue spigot, using the three bolts and washers
supplied, ensuring there is a good seal.
2.3. Ventilation (G.B. Only)
The Belfort has no requirementfor additional ventilation
in the room in accordance with BS 5871 part II.
2.4. Connecting the gas supply
The 8 mm diameter semi rigid gas inlet pipe should be
connected to the inlet of the gas valve using the nut and
8 mm olive supplied. Support the control whilst finally
tightening the supply pipe. The gas supply to the fire
should be terminated near the fireplace with a safety
type service tap.
2.5. Pressure testing
The gas pressure to the stove must be measured at the
burner test nipple.
For Propane this is 35.5 mbar measured with the
appliance in the full rate position.
Figure 3 - Smoke exit on the top
Figure 4 - Smoke exit at the rear
Installation instructionsRef. 154 05 12 Gas stove "Belfort"
Technical manual 5
2.6. Coals layout
Only the ceramic coals supplied with this appliance are
to be used. The coals should only be laid as shown on
this page. Replacement coals and ceramic are
available from your dealer, but should be installed by a
competent person (e.g. Corgi registered).
Please ensure that when fitting the matrix and coals,
that you DO NOT OBSTRUCT THE PILOT
FRANCO BELGE accept no responsibility for any injury
sustained whilst handling hot ceramics.
Instructions for the layout of the prefixed ceramic
matrix and loose coals for Belfort fitted with gas
burner unit.
Parts : 1 Ceramic mat, 9 Ceramic coals.
Figure 5
- Place the ceramic matrix (rep. 3) above the ceramic
mat, on the supports, onto the top of the burner body.
Figure 6
- Place 4 coals on top of the matrix (A)asshownin(B).
- Place the remaining 5 coals as shown in (C).
1
2
3
5
4
3
3
A
B
C
Figure 5 - Fitting the ceramic matrix
1 - Back wall of the combustion chamber
2 - Burner
3 - Matrix
4 - Burner holes
5 - Pilot
Figure 6 - Fitting the medium ceramic coals and the
upper ones
Installation instructionsGas stove "Belfort" Ref. 154 05 12
6 Technical manual
2.7. Test for spillage
A spillage test must be performed before the installed
fire is left with the customer.
Carryout the testfirstby closing alldoors and windows
in the room containing the fire.
Ensure that the stove has been burning at full rate for
a minimum of 5 minutes.
Using a smoke match run along the top edge of the
draught diverter.
If most of the smoke is not drawn into the draught
diverter leave for a further 10 minutes and repeat the
test. If the same results are achieved then the
appliance has passed the spillage test.
If there is a fan in a nearby room the spillage test must
be repeated with the fan running and all connecting
doors between the fire and fan left open.
If there are still problems the chimney may require
attention.
2.8. Service section
2.8.1. Troubleshooting chart
Piezo-electric igniter : The spark between the
electrode and the head of the pilot light is not
clean ; there is no spark when the lighter is operated.
- Check the contact of the high tension cable of the
spark plug. When the end of the cable is held at about
3 mm from the end of the spark plug, a spark should
be produced when the piezo-elertric igniter is
operated.
- Check that the insulation of the spark plug is not
cracked, and replaoe the spark plug if necessary.
The thermocouple : When the unit is started up, the
pilotlight flame goes out when the handle is turned from
the “ignite” position to the “pilot light” position.
The thermocouple is not at a high enough
temperature, the pilot light flame is too short.
- Check that the injector (rep. 10, fig. 9, p. 10) is not
partially blocked.
To gain access to the injector, the coals and the burner
must first be dismounted (3 screws).
Bad contact at the connection of the thermocouple
to the valve.
- Check the tightness of the screw. It should be
reasonably tight.
Carbon deposit on the end of the thermocouple,
which reduces temperature transmission.
- Clean the end of the thermocouple with emery paper.
2.8.2. Servicing instructions
These instructions are meant to be used in conjunction
with the normal servicing practices which an installer
would normally use.
- Open the stove door by releasing the door latch.
- Remove the coals carefully and replace any which are
damaged or broken.
- Clean any deposition of lint off the burner. This can be
done with a vacuum cleaner.
- Inspect the burner unit.
- Relay the fire in line with the instructions “arranging
the layout of the coals”.
- There should be no need to service the burner. If
however this is required, a CORGI registered fitter
should check the setting pressure at the nozzle on the
gas inlet of the burner. The correct pressure required
is stated on the data information plate.
Please explain to the customer the lighting and
extinguishing procedures.
1
2
3
Figure 7 - Door lock
1 : Safety screw
2 : Male spanner
2,5(6face)
3 : Lock
Installation instructionsRef. 154 05 12 Gas stove "Belfort"
Technical manual 7
3.User instructions
It is very important to read these instructions
thoroughly before lighting the stove
3.1. Important Notes
Ensure that the stove corresponds to the type of gas it
is to be used with. This can be confirmed by checking
the data badge located on the rear face of the
appliance.
Remember at all times this product is concerned with
high temperatures, and appropriate care should
always be taken.
Bear in mind that heat given off by the appliance may
affect articles placed close to it. Curtains should not be
positioned above the appliance at a distance less than
12” (30 centimetres) from the top
The appliance was not designed to be used as a dryer.
It is therefore not recommended that the appliance is
used in such a manner.
Under no circumstances should the appliance be
operated with the door open or the door glass
damaged.
A combustible shelf may be fitted over the appliance
provided that in the case of a 150 mm or less deep
shelf, there is atleast 610 mm clearance above the top
of the fire (measured from its highest point).
Please remember that parts of the appliance become
hot during and after use. If young children, the elderly,
or infirm are likely to be near the stove, ensure a
suitable fire guard (BS6539 or BS6778) is erected.
Whilst the appliance is called a ‘stove the Belfort is not
designed to be used in any way as a cooker. The
stove should not be used for any other purpose
than as a room heater and decorative stove.
3.2. Data information
The data badge is located on the rear face of the
appliance.
3.3. Arranging the layout of the coals.
The coals should be arranged as shown on the coal
layout given in the installer instructions.
DO NOT OBSTRUCT THE PILOT
FRANCO BELGE accept no responsibility for any injury
sustained whilst handling hot ceramics.
3.4. Operating the stove
The Belfort gas stove operates with a traditional
permanent pilot light.
The knob forignitionand powercontrol islocatedon the
lower right hand side of the stove (fig. 8).
The pilot light is located at the front middle of the coal
matrix.
If the Flame Supervision Devise Actuating Flame (the
Pilot Light) is extinguished either by intention or not, no
attemptshould be made to re-light until 3 minutes have
elapsed.
3.4.1. Igniting the permanent pilot light
-
Depress control knob fully
- Whilst depressed, turn knob sharply 90 degrees
anticlockwise to ‘PILOT’ setting. Repeat until pilot light
is visibly lit
KEEP KNOB DEPRESSED AT THIS POINT FOR 15 -
20 SECONDS.
- Upon releasing the knob, the permanent pilot light will
be lit.
Important : Immediately after lighting, the stove must
be left on maximum setting for five minutes in order to
warm up the chimney.
3.4.2. Running the stove
-
Ignite permanent pilot as shown above
- With control knob at ‘PILOT’ setting, depress and turn
in an anti clockwise direction between the ‘LOW‘
setting and the high setting.
- Release the knob. The stove is now burning at its
desired operating output.
Important : Immediately after lighting, the stove must
be left on maximum setting for five minutes in order to
warm up the chimney.
3.4.3. Extinguishing the stove back to permanent
pilot setting
-
From any heat setting, depress control knob fully and
turn clockwise to ‘PILOT’ position.
- Release.
1
2
3
4
5
6
Figure 8 - Control knob and burner test nipple
1 : Stop position
2 : Ignition device
3 : Pilot setting
4 : High setting
5 : Low setting
6 : Burner test nipple
User instructionsGas stove "Belfort" Ref. 154 05 12
8 Technical manual
3.4.4. Extinguishing the stove fully
From any heat setting or the permanent pilot, depress
control knob fully and turn clockwise to ‘OFF’ position.
3.5. Safety mechanisms
The Belfort in both natural gas and LPG, incorporates a
number of safety mechanisms.
3.5.1. Flame supervision device
Since 1st January 1996, under the new European
standard EN5613, all stoves are required to have a
‘Flame Supervision Device’ (FSD). If the pilot should
become accidentally extinguished, there exists a
potential for a build up of unburned gas. In this situation
the FSD will automatically cut off the gas supply to the
pilot and main burner.
The FSD device works on a thermocouple basis. Next
to the pilot flame on the appliance is a small sensor
containing the thermocouple. This sensor responds to
heat and is linked directly to the gas inlet supply on the
appliance. When lighting the stove, there is a need to
keep the control knob depressed for about 15 - 20
seconds. This allows the thermocouple to reach its
operating temperature. The device will not allow any
gas to enter the burner until the pilot flame has heated
the sensor up to this operating temperature.
If the pilot is extinguished the gas supply will be
automatically cut.
3.5.2. Thermostatic switch (ttb)
The appliance is fitted with a thermostatic switch (TTB)
which senses any excess temperature due to a flue
blockage. In the event of a partial or total blockage the
gas supply will be automatically cut. Should this occur
turn the control knob to the off position and wait
approximately 10 minutes for the switch to
automatically reset.
Re-light the stove in accordance with section 5
‘Operating the stove’.
On repeated operation of the thermostatic switch the
stove should be turned off and under no circumstances
re-lit untilspecialistadvice has been obtainedfrom your
dealer.
3.5.3. Ignition mechanism
Many gas stoves have electric ignition which requires
mains (240V) supply. This can create problems both
with the presence of water or absence of mains supply.
The Belfort has a Piezo ignition which requires no
external power source. The piezo works on the same
principle as a cigarette lighter, providing a spark when
required.
3.6. Cleaning
Ensure that the stove is turned off before cleaning and
do not attempt to clean if the unit is still hot.
The coals within the appliance are manufactured from
high quality ceramic fibre and should only be arranged
as shown in the coal layout diagram.
After continued use there may be a build up of soot on
the coals which will require removal. Any form of
deposits will reduce the performance of the appliance
and should be removed using a soft brush. Cleaning
should be undertaken with a soft brush or alternatively
with a vacuum cleaner; care should of course be taken
to ensure the aperture of the vacuum is smaller than the
smaller coal size.
Care should also be taken to ensure deposits from the
chimney do not fall into the appliance. If this does occur
then cleaning should be undertaken promptly and the
cause investigated before further use.
The Belfort Stove is supplied with ceramic coals, which
are to be arranged by the fitter in strict accordance with
the installation instructions. There should be no need
for the purchaser to alter the layout of the coals and it is
recommended that such a practice should be avoided if
at all possible.
Should however any coals become broken during the
cleaning process it is essential that replacements are
purchased, as there is an optimum number of coals for
a satisfactory functioning of the stove and the flame
picture.
To clean the appliance open the door by releasing the
door latch (rep. 1, fig. 7, p. 7). The door should be
shut correctly before use of the appliance.
3.7. Servicing
It is essential that the appliance is regularly serviced
and maintained by a qualified person, and the chimney
or flue system checked annually.
If the appliance is heavily used is advisable to
undertake more regular servicing, however under
normal circumstances annual servicing should be
sufficient.
User instructionsRef. 154 05 12 Gas stove "Belfort"
Technical manual 9
4.List of components
When ordering spare parts,specifythestove typeand
serial number, including the colour index, the name of
the part and the part number, includingthe colour index.
Example :
“Belfort" stove, Ref. : 154 05 12 Y,top352136 EF.
A : 1540512Y = *EF
B : 1540512J = *79
C : 1540512K = *MJ
D : 1540512C = *MK
Codes Description ..............Type.........A .....B......C..... D....... Qty
1 100917 Cam pin ...............12x20M7........A......B......C..... D....... 01
2 106038 Switch ..............................A......B......C..... D....... 01
3 109244 Cable ................2,5mm2........A......B......C..... D...... 0,74m
4 110404 Hinge pin ............... 6x30 .........A......B......C..... D....... 02
5 113105 Male spanner ..........................A......B......C..... D....... 01
6 122204 Winged nut ............. diam.8 ........A......B......C..... D....... 01
7 122701 Nut ................................A......B......C..... D....... 01
8 124371 Electrode ............................A......B......C..... D....... 01
9 134258 Bushing .............................A......B......C..... D....... 01
10 139596 Injector LPG ..............18/120.........A......B......C..... D....... 01
11 142301 Adhesive rope ..........................A......B......C..... D...... 0,90m
12 142433 Gasket ..............................A......B......C..... D....... 01
13 159014 Test nipple ...........................A......B......C..... D....... 01
14 161027 Touch-up paint .............(J).................B..................... 01
14 161031 Touch-up paint .............(K)........................C.............. 01
14 161032 Touch-up paint .............(C).............................. D....... 01
15 162665 Descriptive plate ........................A......B......C..... D....... 01
16 166745 Gas valve + piezo .......................A......B......C..... D....... 01
17 109723 Ceramic coal ..........................A......B......C..... D....... 04
18 174651 Coal support ..........................A......B......C..... D....... 01
19 179036 Thermostat ...........................A......B......C..... D....... 01
20 179224 Thermocouple ..........................A......B......C..... D....... 01
21 181602 Ceramic rope ............. Ø8 .........A......B......C..... D....... 1m
22 181614 Ceramic rope .............d.9,5.........A......B......C..... D...... 1,42m
23 181615 Ceramic rope .............d.12 .........A......B......C..... D...... 1,35m
24 181617 Ceramic rope ............. 15x2 .........A......B......C..... D...... 1,60m
25 188315 Pilot ...............................A......B......C..... D....... 01
26 188798 Glass ................267x205 ........A......B......C..... D....... 01
27 189825 Screw .................M5x6.........A......B......C..... D....... 01
28 189849 Screw .................M6x16.........A......B......C..... D....... 01
29 236007 Burner plate ...........................A......B......C..... D....... 01
30 243404 Draught diverter .........................A......B......C..... D....... 01
31 243505 Supplementary diverter ....................A......B......C..... D....... 01
32 259015 Fixing plate ...........................A......B......C..... D....... 04
33 276006 Plate ...............................A......B......C..... D....... 01
34 300118 MJ Leg ..............................................C.............. 04
34 300118 MK Leg .................................................... D....... 04
34 300118 EF Leg ................................A............................ 04
34 300118 79 Leg .......................................B..................... 04
35 300480 Base ...............................A......B......C..... D....... 01
36 301541 MJ Door lock ..........................................C.............. 01
36 301541 MK Door lock ................................................ D....... 01
36 301541 EF Door lock ............................A............................ 01
36 301541 79 Door lock ...................................B..................... 01
37 303718 MJ Blanking plate ........................................C.............. 01
37 303718 MK Blanking plate .............................................. D....... 01
37 303718 EF Blanking plate ..........................A............................ 01
37 303718 79 Blanking plate .................................B..................... 01
38 303860 MJ Flue collar ..........................................C.............. 01
38 303860 MK Flue collar ................................................ D....... 01
38 303860 EF Flue collar ............................A............................ 01
38 303860 79 Flue collar ...................................B..................... 01
39 306281 EF Back wall ............................A......B......C..... D....... 01
40 307437 EF Fuel retainer ..........................A......B......C..... D....... 01
41 309886 MJ Front plate ..........................................C.............. 01
41 309886 MK Front plate ................................................ D....... 01
41 309886 EF Front plate ............................A............................ 01
41 309886 79 Front plate ...................................B..................... 01
42 309997 MJ Main door ..........................................C.............. 01
42 309997 MK Main door ................................................ D....... 01
42 309997 EF Main door ............................A............................ 01
42 309997 79 Main door ...................................B..................... 01
43 310725 MJ R. side panel ........................................C.............. 01
43 310725 MK R. side panel .............................................. D....... 01
43 310725 EF R. side panel ..........................A............................ 01
43 310725 79 R. side panel .................................B..................... 01
44 310823 MJ L. side panel ........................................C.............. 01
44 310823 MK L. side panel .............................................. D....... 01
44 310823 EF L. side panel ..........................A............................ 01
44 310823 79 L. side panel .................................B..................... 01
45 327801 Clamp ..............................A......B......C..... D....... 01
46 327902 MJ Tray .............................................C.............. 01
46 327902 MK Tray ................................................... D....... 01
46 327902 EF Tray ...............................A............................ 01
46 327902 79 Tray ......................................B..................... 01
List of componentsGas stove "Belfort" Ref. 154 05 12
10 Technical manual
1
2
7
8
9
1 0
1 1
1 2
1 3
1 6
1 9
2 0
2 4
2 2
2 3
2 5
2 6
2 8
3 0
3 1
3 2
3 4
3 5
3 6
3 7
3 8
3 9
4 1
4 2
4 3
4 4
4 5
4
6
4 7
4 8
5 1
5 2
5 4
5 5
3
4
4
2 4
2 4
2 1
2 1
2 9
5 0
5
4 9
2 7
3 4
3 4
3 4
4 0
1 4
1 8
1 7
1 5
6
5 7
3 3
5 8
5 6
5 3
Figure 9 - Stove - Exploded view
Exploded viewRef. 154 05 12 Gas stove "Belfort"
Technical manual 11
47 352136 MJ Top plate ..........................................C.............. 01
47 352136 MK Top plate ................................................ D....... 01
47 352136 EF Top plate ............................A ........................... 01
47 352136 79 Top plate ...................................B..................... 01
48 467527 Test line .............................A .....B......C..... D....... 01
49 237203 Bracket .............................A .....B......C..... D....... 01
50 974602 60 Injector support LPG ......................A .....B......C..... D....... 01
51 982644 Pilot line .............................A .....B......C..... D....... 01
52 982646 Feed line regulator-burner ...................A .....B......C..... D....... 01
53 905927 Complete burner LPG .....................A .....B......C..... D....... 01
54 905926 Burner LPG ...........................A .....B......C..... D....... 01
55 149862 Knob ...............................A .....B......C..... D....... 01
56 109724 Ceramic coal ..........................A .....B......C..... D....... 05
57 124412 Strut ...............................A .....B......C..... D....... 01
58 158272 Control plate ..........................A .....B......C..... D....... 01
List of componentsGas stove "Belfort" Ref. 154 05 12
12 Technical manual
Notes
Ref. 154 05 12 Gas stove "Belfort"
Technical manual 13
Warranty certificate
Legal warranty
Our products are guaranteed for twelve months against any
defect,flaw or imperfection. During this time, allparts judged
defective by our Warranty control department may be
replaced in our workshops. Incidental costs of transportation
and packing payable by the buyer.
Some parts or components have a longer warranty period :
- Cast-iron shell of boiler : 3 years
- Steel shell of boiler : 3 years
- Removable or independent stainless steel hot water
cylinder : 5 years
- Independent enamelled steel hot water cylinder : 3 years
- Incorporated circulating pump : 2 years.
Terms of the warranty
This warranty is only valid if :
- The unit has been installed and checked by a professional
installer before operating,
- All installation and adjustment instructions listed in the
technical manual supplied with the unit have been followed,
- All operation and maintenance instructions have been
followed.
This warranty does not cover :
- Lamps, fuses, spark plugs, cast iron parts directly in
contact with burning coal and wood, firebricks, flue baffles,
glasses .
- Any damage resulting from the use of fuel not
recommended in our instructions ;
- Parts which are damaged by external causes such as
unadapted chimneys, thunderstorms, damp, faulty pressure
or fail in pressure, thermic anomalies, explosions, etc...
- Electrical parts which are deteriorated by any connection
or use on a supply circuit with voltage within 10% of the
indicted voltage (230 V in EU).
Material subject to modifications without prior notice. This
manual does not engage the responsibility of
FRANCO BELGE.
Nameandaddressoftheinstaller: _____________________________
______________________________________________
Telephone: _______________________________________
Nameandaddressofthecustomer: ____________________________
______________________________________________
Dateofinstallation: ____/____/________
Model of the appliance :
Color :
Serial number : ___ ___ ___ ___ ___ ___
• This certificate has to be completed and kept carefully.
In case of claims, send a copy of this to :
Les Fonderies Franco-Belges, rue Orphée Variscotte, 59660 MERVILLE, FRANCE.
154 05 12
C J K Y
  • Page 1 1
  • Page 2 2
  • Page 3 3
  • Page 4 4
  • Page 5 5
  • Page 6 6
  • Page 7 7
  • Page 8 8
  • Page 9 9
  • Page 10 10
  • Page 11 11
  • Page 12 12
  • Page 13 13
  • Page 14 14

FRANCO BELGE Belfort 154 05 08 Technical Manual

Category
Stoves
Type
Technical Manual
This manual is also suitable for

Ask a question and I''ll find the answer in the document

Finding information in a document is now easier with AI