Page is loading ...

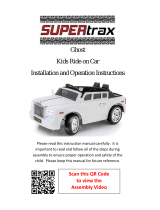
Thar
Kids Ride on Car
Installation and Operation Instructions
Please read this instruction manual carefully. It is important to
read and follow all the steps during assembly to ensure proper
operation and safety of the child. Please keep this manual for
future reference.
Scan this QR Code
to view the
Assembly Video

SPECIFICATIONS:
Battery Type:
1 - 12V7AH
Avg. Speed:
Approx.: 2 – 5 MPH
Age Range:
2 – 6 Years
Charging time:
8-12 hrs -MAXIMUM
Minimum 1 Charge
per month
Max. Weight:
70 lbs.
Avg. Use Time:
48-90 Minutes
(depending on use)
Product Size:
51”L x 30”W x 25”H
Remote Battery:
2 - AAA (not
included)
IMPORTANT
• Assembly of car and charging of
battery is only to be done by an
adult.
• WARNING!! NOT TO BE USED
ON STREETS or IN TRAFFIC.
• Never modify the electric
circuit system or tamper with
electric system. Can cause
permanent damage.
• Please check the product
regularly for any loose parts or
wires to ensure proper
operation.
• Adult supervision is
recommended during
operation by child to avoid
injury. Safety equipment is
recommended.
• Please make sure that the child
uses caution to avoid falls and
collisions which could cause
injury to the child or third
party.
• Do not pick up vehicle by
steering wheel.
• Do not pick up battery by wires
or charger.
• Keep all plastic bags out of the
reach of young children.
• Not recommended for children
under the age of 2 yrs. due to
small parts that could cause a
choking hazard.
• Battery must be charged for a
minimum of 8-12 hours prior to
first use of the car to avoid
damage to the battery. Power
switch must be in off position
when charging.
• Battery charger should be
examined for damage prior to
each use. It is important to
inspect the cord and both ends
for damage. If damage is
found, DO NOT USE THE
CHARGER! Contact us for
replacement charger.
• Please retain instruction
manual for future reference.
• Please retain packaging in the
event it is necessary to return.
If the charger is plugged into the charging port, the car will not
power up regardless if the charger is plugged into the wall
outlet or not.

PARTS LIST
#
Name
Qty
#
Name
Qty
1
Seat
1
7
Jeep Doors
2
2
Steering Wheel
1
8
Windshield
1
3
Wheels
4
9
Charger
1
4
Axle Blocks
2
10
Wheel Nut Wrench
2
5
Light Bar
1
11
Bag of Hardware
1
6
Remote
1
12
Side Mirrors
2
13
Hand Rails
2
All assembly videos can be found on
YouTube under “SPORTrax”
1: Install rear axle assembly:
Disconnect the 2 rear wheel motors from the vehicle. Turn car
upside down. Locate the rear axle with the 2 axle blocks. Screw the
2 axle blocks into the bottom of the vehicle’s body with supplied
screws (total of 8 screws). Once axle is installed, locate the 2 rear
motors and slide onto axle.

2: Installation of the wheels:
Locate the 4 hub adaptors and screw adaptors into back of each tire
with supplied screws. (you will need 4 screws per tire, total 16
screws) Once hub adaptors are installed, slide tires onto axle, and
align with gear box. Locate 4 washers, and place on axle after each
tire. Install 4 lug nuts on top of each washer. Tighten with 2 lug nut
wrenches (supplied) until axle protrudes slightly from lug nut. Do
not overtighten as this could cause motor failure. Place center caps
over lug nuts, and snap into place. Turn vehicle over, to its upright
position.
3: Front and rear motor connection:
Check to make sure the front motors on the vehicle are connected.
They should come connected from the factory. Reconnect rear
wheel motors. Blue and yellow wired plug connects into driver side
of vehicle. Green and yellow plug connects into passenger side of
vehicle. Check to make sure the motors are turning in the proper
direction (forward/reverse) by powering the car on, selecting
forward or reverse, and pressing the gas pedal. If the wheels are not
turning in the proper direction, switch the plugs on each motor, and
check again.

4: Installation of the seat:
Locate the seat of the vehicle. Make sure the seat belt is not
covered by the seat. Install seat by sliding tabs into the body of the
vehicle, and secure with 2 screws.
5. Installation of doors and windshield:
Slide doors into place, and secure them to body of the vehicle with 2
screws. Locate the windshield. Install the windshield by lining up
with the body of the vehicle, and snap down into place.

6. Installation of light Bar, mirrors, and handrails:
Install 4 AA batteries into the light bar. Check to make sure it is
operating correctly before installing it. Snap into place on the body
of vehicle. Locate 2 rear black trim pieces (these are the hand rails),
and snap into place behind the light bar. Install mirrors to the door
by pressing firmly inward, and snapping into place.
7. Installation of steering wheel:
Ensure the steering rod is properly seated into steering motor guide
on the bottom of the vehicle. Failure to do this step will result in the
inability to secure the steering wheel to the vehicle. Remove the nut
and bolt from steering wheel. Connect the steering wheel wires and
slide the steering wheel onto the steering rod. Place bolt through the
steering wheel column and replace nut to secure. The steering wheel
should never be used to pick-up the vehicle.

8. Functions on the vehicle:
A) On/off button located to the left of the steering wheel – round
red button.
B) Forward/reverse switch to the right of steering wheel – black flip
switch (if switch is in the middle position, the car is in neutral and
will not move)
C) Sound control:
1. Mode – use to switch music genre
2. Pause/Play – stop and start the play of music
3. Next – forward to next song
4. Previous – go back to the last song played
5. SPK – horn
D) Digital Display Screen – will read the voltage of the battery.
(battery is fully charged if digital readout shows 11-13)
E) Optional ports located below digital display.
1. Aux port
2. SD Card slot
3. USB connection
Switching between AUX, SD, and USB is automatic once device is
connected.

Charging the battery:
The charging port is located under the seat of the vehicle. Plug the
charger into the charging port first, then plug the charger into a wall
outlet.
Please Note: As a safety precaution and to avoid damage to the
charger, the car will not power up while charger is plugged into the
charging port of the car.
*******!!!!DO NOT LEAVE THE CAR ATTACHED TO THE
CHARGER ANY LONGER THAN 12 HOURS TO AVOID
DAMAGE!!!!!!********
BATTERY MUST BE CHARGED FOR A MINIMUM OF 8-12 HOURS
BEFORE INITIAL USE TO AVOID DAMAGE TO THE BATTERY. ONLY AN
ADULT SHOULD CHARGE AND RECHARGE THE BATTERY!
BATTERY REPLACEMENT AND DISPOSAL:
The battery will eventually lose the ability to hold a charge. Depending
on the amount of use, and varying conditions, the battery should
operate for one to three years. Follow these steps to replace and/or
dispose of the battery:
• Disconnect the battery connectors
• Remove the battery bracket
• Carefully lift the battery - you may want to wear protective
gloves before removal - Do Not lift the battery by its
connectors or cables
• Place the dead battery in a plastic bag
• Replace the battery and reconnect the connectors
Reinstall the battery bracket
Please give us a call for your battery replacement needs
or visit our website to place an order.

Remote Control Function
Remote Control Instructions: It is necessary for the remote to sync
to the car prior to first use and after batteries are replaced. Follow
steps below to sync the remote control to your car.
A) Install the batteries into the remote control (AA not
included).
B) Hold the frequency button (Large button at top of remote)
2-4 seconds, the Low speed LED light should be flashing.
C) Turn on the car by pressing the Power button. The Low
speed LED light should still be flashing and then turn to a
steady light. If the sync was successful.
D) If the syncing failed (Low speed LED light still flashing),
remove the batteries and repeat steps a – b.
E) The remote control indication light will go off and go into
power saving mode after 10 seconds of non use.
F) Button Descriptions:
Forward Backward Turn Right Turn Left
S = Speed – Push button P = Emergency brake, press to stop motion
for speed selection. of car. Pressing it again will release the
3 speed selections emergency brake, restoring the functions
of the car.

WARNING:
- Use only the rechargeable battery and charger supplied with
your vehicle. NEVER substitute the battery or charger with
another brand. Using another battery or charger may cause
damage.
- NEVER modify the electric circuit system. Tampering with the
electric system may cause permanent damage to the system.
- Do not allow direct contact between battery terminals.
- Do not allow any type of liquid on the battery or its
components.
- Charge the battery in a well-ventilated area ONLY. Do not
charge near or around flammable materials.
- NEVER pick up the battery by the wires or charger. Damage can
occur to the battery and may cause a fire. Pick up the battery by
the case ONLY.
- Charge the battery in a dry area ONLY.
Wash hands after handling.
- Do not open the battery. Battery contains lead acid and other
materials that are toxic and corrosive.
- Do not open the charger. Exposed wiring and circuitry inside
case could cause electric shock. NEVER allow a child to handle
or charge the battery. Battery is heavy and contains lead acid
(electrolyte).
- Do not drop the battery. Permanent damage to the battery
could occur or cause serious injury.
- Before charging the battery, check for wear or damage to the
battery, charger, its supply cord and the connectors. DO NOT
charge the battery if any damage to parts has occurred.
- Do not allow the battery to drain completely. Recharge the
battery after each use or once per month if not used regularly.
- Do not charge the battery upside down.
-Always secure the battery with the bracket. Battery can fall out
and injure a child if vehicle tips over.
- The Power Switch must be turned in the OFF position when
charging.
- When the car begins to run slowly, recharge the battery.

GENERAL MAINTENANCE:
It is the parent’s responsibility to check main parts of the toy
before using. Regularly examine the car for potential hazard,
such as damage to the battery, charger, cable or cord, and plug,.
Also check that all screws are tightened throughout the car. In
the event of such damage, the toy must not be used until that
damage is repaired or replaced.
• Make sure the plastic parts of the vehicle are not cracked or
broken.
• Occasionally use a lightweight oil to lubricate moving parts
such as wheels.
• Park the vehicle indoors or cover it with a tarp to protect it
from wet weather.
• Keep the vehicle away from sources of heat, such as stoves
and heaters. Plastic parts may melt.
• Recharge the battery after each use. Only an adult should
handle the battery. Recharge the battery at least once a
month when not being used.
• Do not wash the vehicle with a hose. Do not wash the vehicle
with soap and water. Do not drive the vehicle in rainy or
snowy weather as water will damage the motor, electric
system and battery.
• Clean the vehicle with a soft, dry cloth. To restore shine to
plastic parts, use a non-wax furniture polish. Do not use car
wax. Do not use abrasive cleaners.
• Do not drive the vehicle in loose dirt, sand or fine gravel
which could damage moving parts, motors or the electric
system.
• For extended times when the car will not be used, the power
switch needs to be in the off position and the electrical
connections should be disconnected from the battery.

TROUBLE SHOOTING GUIDE:
Problem
Possible Cause
Possible Solutions
Car will not move
1. Battery voltage is low.
2. Battery connector or wires
are loose.
3. Battery is damaged or
dead.
4. Electrical box or motor is
damaged
Charge the battery
Re-connect the battery
connector to the car
Replace battery
Replace motor
The battery will not
charge.
1. Battery connector may
have come apart or have a
bad connection.
2. Battery charger plugged
into a bad wall outlet.
3. Battery charger is
damaged.
Re-connect the battery
connector to the car
electrical connector
Try another wall outlet
Replace battery charger
Shortened battery life
Battery was not charged fully
Battery is old
Charge battery fully
Change battery
Some Noise and heat
when charging battery
Chemical reaction
Normal
Low Speed
Battery is old
Battery is low on charge
Weight limit exceeded
Uneven or uphill path
Vehicle is being used in harsh
conditions
Change the battery
Charge the battery
Do not exceed max weight
limit
Use on flat surfaces
Avoid using car in harsh
conditions
Noise coming from
motor/gearbox
Gear in motor/gearbox broken
Call for replacement
motor
The car shakes when
moving
Bad Connection of the motor
wires
Possible motor failure
Reconnect wires
Call for replacement
motor
Car needs a push to go
forward
Poor contact of wires and/or
connectors
“Dead Spot” on motor
Check that the battery
connectors are firmly
plugged into each other. If
wires are loose around
the motor, contact the
distributor’s service
department
A dead spot means the
electric power is not being
delivered to the terminal
connection. Call our
service department
Self-Resetting Breaker – The vehicle is equipped with a self-
resetting breaker. In the event the power is tripped the breaker
will reset itself in approximately one minute.
If you are unable to solve a problem, please feel free to contact us.
Phone: 402-477-0541 or Email: customerservice@rollinghillstrading.com
/