Hyundai HYCH7070E-2 User manual

Category
Garden shredders
Type
User manual

This manual is also suitable for

1
HYCH7070[E]-2
HYCH1500E-2
FOR YOUR SAFETY
You must Read and understand
this manual before use.
Keep this manual for future
reference.
User manual
Petrol Wood Chipper
FOR YOUR SAFETY
You must read and understand
this manual before use.
Keep this manual for future
reference.
Licenced by Hyundai Corporation, Korea
2
INDEX
CONTENTS PAGE NO.S
1 SAFETY
3 - 9
2 ASSEMBLY
10 - 15
3 QUICK START
16 - 17
4 STARTING PROCEDURE
18 - 22
5 STOPPING PROCEDURE 23
6 USING THE MACHINE
24 - 30
7 MAINTENANCE
31 - 37
8 TROUBLESHOOTING
38 - 39
9 SPECIFICATION
40
10 DECLARATIONS OF CONFORMITY
41
11 RECYCLING AND PRODUCT DISPOSAL
41
12 CONTACT DETAILS
42
13 WARRANTY
42
3
1. SAFETY
1.01 General safety notes.
1.02 The operator of the machine is responsible for, and has a duty of care in making sure
that the machine is operated safely and in accordance with the instructions in this
user manual. Keep the manual safe and pass it on if the machine is loaned or sold to
another user.
1.03 Please note the following safety points.
1.04 The machine should never be left it in a condition which would allow an untrained or
unauthorised person/s to operate this machine.
1.05 All due care and diligence should be taken by the operator for the safety of, and with
regard to those around whilst using the machine.
1.06 Some or all of the following - warning signs, symbols and/or PPE pictograms may
appear throughout this manual. You MUST adhere to their warnings. Failure to do so
may result in personal injury to yourself or those around you.
DANGER
Indicates a hazard, which, if not avoided, could result in serious injury or death.
WARNING
Indicates a hazard, which, if not avoided, could result in serious injury.
CAUTION
Indicates a hazard which, if not avoided, might result in minor or moderate injury.
NOTE
Indicates a situation that could easily result in equipment damage.
READ and keep the manual safe and pass it on if the machine is loaned or sold to another user.
You MUST fully read instructions to make sure you use and operate machine safely.
Appropriate Personal Protective Equipment (PPE), MUST be worn at all times when machine is in
use or being repaired.
4
1.10 Carbon monoxide (where applicable).
1.11 Carbon monoxide is a colourless and odourless gas. Inhaling this gas can cause
death as well as serious long term health problems such as brain damage.
1.12 The symptoms of carbon monoxide poisoning can include but are not limited to the
following;
Headaches, dizziness, nausea, breathlessness, collapsing or loss of consciousness.
1.13 Carbon monoxide poisoning symptoms are similar to flu, food poisoning, viral
infections and simply tiredness. It is quite common for people to mistake this very
dangerous poisoning for something else.
1.14 To avoid carbon monoxide poisoning DO NOT use Petrol/Diesel powered equipment
inside any of the following; Home, garage, tent, camper van, mobile home, caravan
or boat.
This list is not exhaustive and if you are in any doubt contact your dealer.
1.15 If you think you have or someone around you has been affected by carbon monoxide
poisoning;
1.16 Get them fresh air immediately, by leaving the affected area or by opening doors and
windows. If safe and practical to do so make sure that the machine is turned off.
DO NOT enter a room you suspect of having carbon monoxide present – instead call
the emergency services.
1.17 Contact a doctor immediately or go to hospital - let them know that you suspect
carbon monoxide poisoning.
1.18 DO NOT use in an enclosed area or a moving vehicle
1.20 General fuel safety (where applicable).
1.21 Fire hazard - keep fuel away from all sources of ignition for example heaters, lamps,
sparks from grinding or welding.
1.22 DO NOT carry out hot work on tanks that have contained fuel it is extremely dangerous.
1.23 ALWAYS keep work area clean and tidy.
1.24 ALWAYS clean up all spills promptly using correct methods i.e. absorbent granules and a
lidded bin.
1.25 ALWAYS dispose of waste fuels correctly.
CAUTION
ALL FUELS ARE FLAMMABLE
5
1.30 Fueling/De-fueling (where applicable).
CAUTION
ALL FUELS ARE FLAMMABLE
1.31 ALWAYS fuel and defuel in a well-ventilated area outside of buildings.
1.32 ALWAYS wear correct, suitable and fit for purpose Personal Protective Equipment
(PPE), suggested items are but not limited to safety gloves and overalls.
1.33 When fueling/de-fueling ALWAYS avoid inhaling fumes.
1.34 When de-fueling ALWAYS use a propriety fuel retriever.
1.35 ALWAYS carry fuel in the correct and clearly marked container.
1.40 Electrical safety (where applicable).
1.41 Electricity can kill - NEVER work on LIVE/ENERGISED equipment.
1.42 Prior to carrying out any maintenance work you MUST Identify electrical isolation
methods and isolate all electrical supplies,
1.43 Prior to use and with all electrical supplies isolated You MUST check all electrical
cables, plugs and connections for the following;
1.44 Are intact and have no signs of damage, to include but not limited to bare wires,
chaffing, cuts and loose wiring.
1.45 If there are any signs of damage, the damaged item MUST be taken out of service
until the damage has been repaired by an electrically competent person.
1.46 All trailing cables should be routed so as not to cause any kind of trip hazard.
1.47 NEVER work on or near electricity with wet hands, wet clothing, and wet gloves.
6
1.50 Batteries (where present).
1.51 Batteries present a risk if they become damaged by the possible leaking of
electrolyte. This electrolyte is an acid and can cause serious burn injuries. Care
should be taken when working on or near them. NOTE the electrolyte may be
in liquid or gel form.
1.52 Should you come into contact with electrolyte you should;
1.53 Remove all clothing contaminated with electrolyte. If you cannot remove then saturate
in water.
1.54 Get medical assistance as soon as possible. You must advise the medical staff of the
type acid.
1.55 Lead/acid battery = dilute sulphuric acid
1.56 Nickel/cadmium = potassium hydroxide alkali electrolyte.
1.57 Use fresh running water to wash off excess electrolyte, continue this until medical
assistance arrives. Make sure that you do not wash the electrolyte to another part of
the face or body.
1.58 If electrolyte comes into contact with Eyes the electrolyte needs to be immediately
washed away with large amounts of water. Make sure that you do not wash the
electrolyte to another part of the face or body.
1.59 Gasses from charging batteries are highly flammable and great care should be taken
to charge in well ventilated areas.
1.59.1 There is an explosion risk if the battery terminals are short circuited, when
connecting / 0dis-connecting ALWAYS exercise great care so that the terminals or
battery leads are NOT allowed to touch and cause a spark. ALWAYS use suitable
insulated tools.
1.60 Vibrations (where applicable).
1.61 Prolonged use of hand held (operated) machines will cause the user to feel the
effects of/from vibrations. These vibrations can lead to white finger (Raynaud’s
phenomenon) or carpal tunnel syndrome. This condition reduces the ability of the
hand to feel and regulate temperature, causing numbness and heat sensations and
may cause nerve damage and circulatory tissue death.
1.62 Not all factors that lead to white finger disease are known, but cold weather, smoking
and other diseases that affect blood vessels and blood circulation as well as large
and long-lasting impact of shocks are considered factors in the formation of white
finger. Note the following to reduce the risk the white finger and carpal tunnel syndrome:
1.63 Wear gloves and keep your hands warm
1.64 Take regular breaks
1.65 All of the above precautions may help reduce the risk of white finger disease but not
rule out carpal tunnel syndrome. Long-term and regular users are therefore
recommended to observe the condition of your hands and fingers. Seek medical
attention immediately if any of the above symptoms should occur.
7
1.70 Noise (where applicable).
1.71 The operating noise of the machine can damage your hearing. Wear hearing
protection such as earplugs or ear defenders to protect your hearing. Long- term and
regular users are advised to have hearing checked regularly. Be especially vigilant
and cautious when wearing hearing protection because your ability to hear alarm
warnings will be reduced.
1.72 Noise emissions for this equipment is unavoidable. Carry out noisy work at approved
times and for certain periods. Limit the working time to a minimum. For your personal
protection and protection of people working nearby it is also advisable for them to
wear hearing protection.
1.73 See CERTIFICATE of CONFORMITY section for Outdoor Noise declaration of
conformity.
1.80 Machine specific safety.
1.81 Working with the chipper - The chipper is designed solely for chipping all kinds of
newly cut tree branches of diameters up to 100 mm for HYCH1500E-2 or 70mm for
HYCH7070[E]-2
1.90 Usage restrictions.
1.91 You should NOT use the chipper for chipping metal, stones, and plastics and other
hard materials that may damage your machine. If you are going to chip tree roots
check that the diameter is less than 70 / 100mm and remove all earth, sand, stones
etc.
1.92 After the first hours use check that the bolts of the blades and counter blade are firm
ly fixed and that the gap between blades and counter blade is 1 - 2mm adjust as
required.
1.A Description of machine - This chipper is a machine for chipping newly cut wood.
1.A1 The rotor has 2 blades each with a 300 mm width and is powered by a petrol engine.
Transmission is through two parallel drive belts. The chips of wood are discharged
through the discharge chute by the centrifugal force of the rotor. Because of the angle
of the blades and the positioning of the counter blade branches are pulled inside the
machine automatically. Side branches greater than 30mm should be sawn off before
loading into machine.
8
1.B Safety notes.
1.B1 The user of this machine MUST be over 18 years of age.
1.B2 The machine should be positioned on a firm and level surface.
1.B3 The user MUST wear safety gloves, ear-protection and safety goggles - not supplied
with machine.
1.B4 When working in a confined area, always make sure there is sufficient space around
the machine to reduce the risk of injury and there is good ventilation from exhaust
fumes.
1.B5 Only one person at a time should operate the machine.
1.B6 Pieces jamming the feed hopper can only be removed safely when the engine has
been stopped and the spark plug HT lead disconnected.
1.B7 If necessary, unbolt and tip the feed hopper and output chute to facilitate access to
the rotor. Use a wooden pole to remove pieces stuck in the rotor. NEVER under any
circumstances use your hands to remove stuck wood.
1.B8 NEVER leave the machine running whilst unattended.
1.B9 Changing the blades of the rotor or the counter blade and checking blade bolts
should only be done when the engine and rotor are stopped and the spark plug
HT lead is disconnected.
1.B11 Use only original parts for maintaining your chipper, otherwise the warranty will be
void.
1.B12 The chipper should ONLY be repaired by a skilled dealer / service-point.
1.B13 When in operation the chippers noise will exceed 90 dB (A). Therefore all users and
onlookers must wear ear-protection.
1.B14 Before use, make sure that the bolts on the blade and fixed blade are tight. After the
first one hour of use check that all nuts, bolts and fixing are still secure.
9
This series of highly efficient wood chippers have been designed with safety protection, reliability
and long operating life in mind. Main body parts are all made from high quality steel, blades are
made from high speed steel HSS, sharp cutting edges from hardened steel for durability and effi-
ciency.
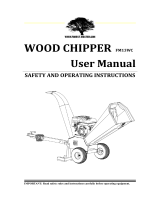
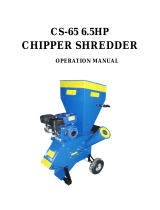
The machine consists of main body 1, Feed hopper 9, discharge chute 10, wheels 2, front leg 4,
please see diagram. The chipping cylinder, belt drive and engine are all mounted to the main body.
Operating instructions and warnings
Please read carefully and understand the engine instruction manual before use.
The engine is shipped from factory without lubricant and fuel.
The HYCH1500E-2 requires 1.1L of 10w30 or 15w40 engine oil and the HYCH7070[E]-2 requires
0.6L of 10w30 or 15w40 engine oil.
On initial start-up, run the machine for 5 minutes without feeding any wood into it to warm the
engine up and allow the belts to bed in. Do not overload the machine by forcing too much or too
large diameter wood into the hopper.
Keep minors away from the machine.
Do not put hands or other body parts into hopper.
Do not get close to the discharge chute, the chips are expelled from discharge chute at high speed
and may cause injury.
If the machine produces abnormal vibration or unusual noises, immediately turn the machine off
and check it.
If the machine is failing to cut properly the blades may need to sharpened or adjusted, the blade
clearance should be 1-2mm.
Choice of chipping material: Fresh cut tree branches can be chipped directly. Due to different
hardness and moisture content, the engine may slow midway or the machine body may shake
during chipping, if this happens, reduce the amount of wood being fed into the hopper. The
recommended maximum chipping capacity is for soft wood, for hardwood the maximum chipping
diameter should be reduced by 30%. The ideal chipping for this machine is suitable for fresh cut
with 80% moisture content plant. During the chipping process, you should obey the rule: largest
diameter first followed by the smaller branches. In order to get good chipping, it’s better to put
branches and leaves together. Leaves and thin vegetation may not chip well. Do not feed in large
diameter logs.
Maintenance instructions
This series of machine requires regular greasing of the main cutting shaft bearings. See section 7.
for full maintenance instructions
10
Assembly.
During assembly, to avoid injury, do not touch the rotary cutting wheel or blades. As the machine is
heavy, it is recommended that the assembly is a two person operation.
Illustration 1. Frame assembly HYCH1500E-2
Part No. 1 2 3 4 5 6 7
Description Main
body
Wheel Axle
bracket
Front
Leg
Towbar
bracket
Towbar Towbar
bolt
Installation procedure:
Lay the main body (1) on a support or platform that is about 30cm above the ground, and leave
some space at the sides of the main body for the installation of the wheels (2) and front leg (4), as
shown in the picture above, fix the wheels (2) with suitable fasteners to axle bracket (3), then fix the
finished structure to main body (1). Install towbar bracket (5) to the corresponding position on the
main body, and then connect and fix front leg (4) and towbar bracket (5) and mount tow bar (6) and
towbar bolt (7). After this process is complete, the support or platform can be removed.
2. ASSEMBLY
11
Illustration 2. Feed hopper and Discharge chute assembly HYCH1500E-2
Part No. 8 9 10 11
Description Safety Lever Feed Hopper Lower section
discharge chute
Upper section
discharge chute
Installation procedure:
Fix safety lever (8) with bolts and shaft sleeve into the corresponding position on feed hopper (9),
ensure the long shaft passes through the duct and spring on the lower side of the feed hopper.
Then bolt the feed hopper (9) to the main body (1), due to the heavy weight, use a lifting device or
2-3 people. Bolt the lower section of the discharge chute to the main body, then connect and fix the
upper rotating section of the discharge chute (11) to the lower section (10). The upper section can
be rotated to allow the wood chippings to be discharged in the direction required.
12
Illustration 3. Installation of 12v Battery and Toolkit HYCH1500E-2
Part No. 12 13 14 15
Description Battery Cover Battery tray Toolkit Toolkit strap
Installation procedure:
Using the bolts supplied, fix the battery tray (13) to the corresponding place on the main body (1),
and connect the battery terminals with starter motor positive and negative cables, taking care not
to short the positive to earth, and then place the battery on the battery tray (13), place the battery
cover over the battery and secure with the bolts provided. Place the toolkit on corresponding
bracket, connecting one end of the toolkit strap to the retaining ring on the main body (1), while the
other end is attached to the anchor point on the towbar bracket.
1
3
Illustration 4. Frame assembly HYCH7070[E]-2
Part No. 1 2 3 4 17
Description Main Body Wheel Axle bracket Front Leg Hand bar
Installation procedure:
Lay the main body (1) on a support or platform that is about 30cm above the ground, and leave
some space at the sides of the main body for the installation of the wheels (2) and front leg (4), as
shown in the picture above, fix the wheels (2) with suitable fasteners to axle bracket (3), then fix the
finished structure to main body (1). Install front leg (4) to the corresponding position on the main
body and mount hand bar (17) to the front leg (4). After the installation is complete, the support
platform can be removed.
1
4
Illustration 5 Hopper and Discharge port Installation HYCH7070[E]-2
Part No. 8 9 10 11 16
Description Safety lever Feed hopper Lower section
discharge
chute
Upper section
discharge
chute
safety cut-out
switch
Installation procedure:
Fix safety lever (8) with pivot bolts and shaft sleeve into the corresponding position on feed hopper
(9), ensure the long shaft passes through the duct and spring on the lower side of the feed hopper,
adjust the spring to correct height. Then bolt the feed hopper (9) to the main body (1), due to the
heavy weight, use a lifting device or 2-3 people. Bolt the lower section of the discharge chute to the
main body, then connect and fix the upper rotating section of the discharge chute (11) to the lower
section (10). The upper section can be rotated to allow the wood chippings to be discharged in the
direction required.
1
5
Illustration 6. Installation of 12v Battery and the Toolkit HYCH7070[E]-2
N.B. HYCH7070-2 does not have electric start, so no battery to be fitted*
Part No. 12 13 14 16 17
Description Battery cover Battery holder Toolkit Safety switch Electric start
switch*
Installment steps:
Fix the battery tray (13) to the corresponding place on the main body (1) with the bolts provided
and connect the battery terminals to the positive and negative starter motor cables, taking care not
to short out the positive to earth, then place the battery on the battery tray (13), place the battery
cover over the battery and secure with the bolts provided. Place the toolkit on the handrail and bolt
it securely. Finally, unscrew the 2 nuts on the tank as is shown with mark C on the illustration to
create a 3-4 mm gap to allow the electric start switch (17) to be inserted, and then re-tighten the
nuts.
16
3.01 This guide is meant to serve as a quick reference for operating your Hyundai Wood
chipper it is for convenience and the user should read the safety section first.
FOR OUTDOOR USE ONLY.
This Wood chipper produces carbon monoxide - a poisonous, colourless & odourless
gas that can cause death or serious injury. Petrol is highly flammable, always handle
with extreme care and in a well ventilated area.
Always remove HT lead from spark plug when checking machine or changing parts.
3.02 Adding fuel.
Unscrew the fuel tank filler cap and carefully add fresh straight unleaded petrol DO
NOT overfill and allow a 25 mm gap at the top of the tank. Once full replace and
correctly tighten the fuel cap.
Fuel tank capacity is 6.5L for 420cc engine and 3.6L for 210cc engine ONLY USE
straight unleaded petrol.
3. QUICK START
You can also check out our online video at www.youtube.com/hyundaipowerequip.co.uk
17
3.03 Adding oil.
Unscrew the oil filler cap (dipstick) and fill with 1100ml for 420cc engine and 600mb for 210cc
engine of SAE15W40 oil fill to the top thread of the filler neck. N.B. There may be residual oil
in crankcase so be careful not to overfill when filling with oil. If you overfill with oil just pour
excess oil into a suitable container.
DO NOT dispose of oil down drains or onto the ground.
18
4. STARTING PROCEDURE
Before starting make sure machine is clear of materials and all non-essential persons.
NOTE: The machine is shipped without oil, therefore you MUST fill the engine with oil before
starting the engine. Failure to do so will result in engine damage which will not be
covered by warranty.
Fill with SAE15W40 oil and fresh unleaded petrol. Make sure the fuel and oil caps are
secure – See section 3.03
4.01 Recoil starting procedure.
Set the ignition key switch on the key start module to the ON position or for recoil
only machines, switch to ON.
Check that the emergency STOP bar is not jammed in the STOP (down) position.
It should be up to start.
19
4.10 (cont) For COLD start move choke lever left to START position (LEFT)
Move the fuel tap right to the ON position (RIGHT). Move the throttle lever right to the
MIDDLE position.
N.B. For a WARM/HOT start you will not need to use full choke. If the engine is warm, use
half choke. If the engine is hot, do not use the choke. (Lever in RIGHT position)
COLD start refers to an engine that has not been run recently, hence the engine is cold.
Place one hand on the machine, and using the other hand pull the recoil until you
feel a resistance, then pull briskly. Repeat until machine starts. DO NOT let go of the
recoil handle instead return handle slowly. When the engine has started you need to
reduce the choke by slowly moving lever to the right to the RUN position if engine
falters move choke between START/RUN positions and adjust until engine runs
smoothly.
20
4.01 (cont) Once the engine has been started and allowed to warm up you can move the throttle
lever to left accelerate the engine speed.
4.02 Electric start procedure (Where fitted)
Set the ignition key switch on the key start module to the ON position.
  • Page 1 1
  • Page 2 2
  • Page 3 3
  • Page 4 4
  • Page 5 5
  • Page 6 6
  • Page 7 7
  • Page 8 8
  • Page 9 9
  • Page 10 10
  • Page 11 11
  • Page 12 12
  • Page 13 13
  • Page 14 14
  • Page 15 15
  • Page 16 16
  • Page 17 17
  • Page 18 18
  • Page 19 19
  • Page 20 20
  • Page 21 21
  • Page 22 22
  • Page 23 23
  • Page 24 24
  • Page 25 25
  • Page 26 26
  • Page 27 27
  • Page 28 28
  • Page 29 29
  • Page 30 30
  • Page 31 31
  • Page 32 32
  • Page 33 33
  • Page 34 34
  • Page 35 35
  • Page 36 36
  • Page 37 37
  • Page 38 38
  • Page 39 39
  • Page 40 40
  • Page 41 41
  • Page 42 42
  • Page 43 43
  • Page 44 44

Hyundai HYCH7070E-2 User manual

Category
Garden shredders
Type
User manual
This manual is also suitable for

Ask a question and I''ll find the answer in the document

Finding information in a document is now easier with AI