Page is loading ...

b
5t
Wateractivity Display
HygroPalm AW1
Owners Manual
General Description:
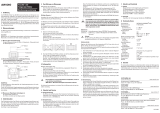
The HygroPalmAW1 is a handheld display instrument for water activity. The
measurement itself is performed by a water activity probe HygroClip AW-DIO or another
ROTRONIC digital probe.The probe always measures relative humidity, and all
displayed values are calculated based on the temperature and the relative humidity.
This manual is a shortform excerpt of the full manual. It contains the most important
operating steps. The complete manual may be looked up in the internet and may also
be downloaded. See www.rotronic-humidity.com
HygroPalm AHygroPalm A
HygroPalm AHygroPalm A
HygroPalm A
W1 DisplayW1 Display
W1 DisplayW1 Display
W1 Display
Power SupplyPower Supply
Power SupplyPower Supply
Power Supply
The HygroPalm AW1 may be operated either with a standard 9V-alkaline battery or
with a rechargeable 9 V accumulator.
Important: The instrument is delivered with a standard 9 V alkaline battery and the
battery charge-function is set to off. If you intend to make use of a rechargeable
accumulator, (Dockingstation required), you should configure the charge function to
on.(see menu SETTINGS). Whenever you use normal batteries afterwards, do not
forget to reconfigure the charge function to off. A normal alkaline battery may explode
when charged and destroy the instrument.
Dockingstation PalmDock (Option)Dockingstation PalmDock (Option)
Dockingstation PalmDock (Option)Dockingstation PalmDock (Option)
Dockingstation PalmDock (Option)
An optional dockingstation for the HygroPalm is available. For the charging of the
accumulators, it must be connected to the 230V network by a mains adaptor (AC1207)
The RS232 interface of the dockingstation is not to be used with the HygroPalm AW1
It is reserved for other HygroPalm models.
Probe connectionProbe connection
Probe connectionProbe connection
Probe connection
The HygroPalm AW1 may be operated with all digital HygroClip probes. However, the
water activity probe AW-DIO is normally used .
The status line displays information regarding the battery status.When the message
“Low Batt” appears, you can proceed for another 10 minutes before the battery becomes
too weak.
DisplayDisplay
DisplayDisplay
Display
Probe-indicator
(probe 1 active only)
Humidity & Temperature
Display
physical
Unit
Status-line
❚❚ 8.8:8.8❚❚❚❚
❚❚ 8.8:8.8❚❚❚❚
❚❚❚❚❚❚❚❚❚❚❚❚❚
Dockingstation (PalmDock)Dockingstation (PalmDock)
Dockingstation (PalmDock)Dockingstation (PalmDock)
Dockingstation (PalmDock)
Probe connector: Binder 5-pin
Supply
RS232
The detailed description is to be found below.
Operating modesOperating modes
Operating modesOperating modes
Operating modes
The HygroPalm Aw1 may be operated in three different modes:
Standard Mode: It is used to measure in normal water activity mode (equilibrium
mode), and for probe- calibration. Both require typically 40 to 60 minutes of measuring
time.
In the standard mode, the HygroPalm AW1 displays the water activity and the
temperature that are measured by the connected probe. After one minute, the trend
indicators (Up/Down arrows) will appear. These are used to indicate the equilibrium
condition, e.g. for probe calibration. The probe is in equilibrium, when both arrows
appear at the same time.
Upon powering the HygroPalm AW1, it will start up in the mode that was last used.
When AwQuick, Standard mode or AwE mode are selected, the instrument will switch
to the respective modes after pressing the ENTER key.
AwE Mode: In general, this mode is the same as the standard mode, but with the
difference that equilibrium condition is recognised and the display will freeze to indicate
equilibrium.
AwQuick Mode: This mode accelerates the water activity measuring and produces
accurate results in typically 5 minutes. If the temperature conditions are stable for
product sample and probe, the calculated value is within ± 0.005 aw of the value that
is measured at equilibrium.
Function-Keys
Battery
➘
Battery:Battery:
Battery:Battery:
Battery:
Type: 9V / 6AM6
or 8,4V Accu TR 7/8
Battery compartment:Battery compartment:
Battery compartment:Battery compartment:
Battery compartment:
To open: turn and pull
On/Off: This key turns the instrument on
and off. It also controls the HOLD function.
Menu: This key serves for activating of the
functions menu.The different menu items appear
in the staus line of the LC display. Pressing the
button again quits the menu.
Arrow-keys: These two keys toggle between
menu options and change values.
Enter: This key confirms a selection within a menu
and executes functions.
Key-Operations of Hygropalm AW1
Power on/off, measuring, HOLD-functionPower on/off, measuring, HOLD-function
Power on/off, measuring, HOLD-functionPower on/off, measuring, HOLD-function
Power on/off, measuring, HOLD-function
Palm-Model
➔
➔
Measuring ValuesDisplay-Test
AA
AA
A
W1W1
W1W1
W1
– –.–
A A
A A
A
ww
ww
w
– –.–
°C °C
°C °C
°C
~ 1 sec
~ 1 sec
HOLD-Function On/Off:
press shortly
Power On/Off
press for 2 seconds
Note: The HOLD function is inactive during measuring in AwE or AwQuick mode
❚❚ 8.8:8.8❚❚❚❚
❚❚ 8.8:8.8❚❚❚❚
❚❚❚❚❚❚❚❚❚❚❚❚❚
5t
Menu-Selection Menu MODE
Menu SYS-STMenu SYS-ST
Menu SYS-STMenu SYS-ST
Menu SYS-ST
AA
AA
A
TUSTUS
TUSTUS
TUS
The menu SYS-STATUS provides information regarding the actual firmware release,
serial number and user text (if any) of the instrument.
User defined Text
User Text
SYS-STATUS
SW Release
Serialnumber
XXXXXXX
ENTER
➔
➔
ENTER
Vx.x
ENTER
➔
➔
u
u
Menu PROBE
The menu PROBE provides probe version and probe serial-number
Probe
VX.X
Probe-Version
u
XXXXXXXX
Probe-Serialnumber
ENTER
Setting of Dwell Time, Temperature- and Humidity Stability
Preparation of the product samplesPreparation of the product samples
Preparation of the product samplesPreparation of the product samples
Preparation of the product samples
The AW-DIO probe may be used with two different sample cups. (WP-14: shallow /
WP-40: deep), which accept the respective one-way sample cups. (PS-14: shallow /
PS-40: deep). In order to calibrate the probes with the certified ROTRONIC humidity
standards, only the shallow type should be used. Use the 14 mm cups for liquids,
powders, or paste; the deep ones are preferrably used for coarse-grained bulk goods.
The one-way sample cups serve two purposes:
a) as container for acclimatisation of the samples before measuring
b) prevention of cross contamination with other samples. Fill a few of the one-way
sample cups with the material that is to be measured.
Menu SETTINGS
Take care to proceed till the end of the procedure; else the values will not be registered.
SETTINGS
Trend
ENTER
u
On
Off
ENTER
➔
➔
➔
➔
ENTER ENTER
Save ? Save ?
u
ENTER ENTER
u
u
On
Off
ENTER
➔
➔
➔
➔
ENTER ENTER
Save ? Save ?
ENTER ENTER
Accu charge
Units
u
English
Metric
ENTER
➔
➔
➔
➔
ENTER ENTER
Save ? Save ?
ENTER ENTER
MODE
Q AW QUICK
E Aw E
Standard
u
u
ENTER
MENUMENU
SETTINGS
ADJUST 1PT
ADJUST MPT
SYS-STATUS
PROBE
u
u
u
u
u
MODE
u
MODE
Q AW QUICK
0.02
Q TS[°C/min]
ENTER
3
Q DWELL [MIN]
MENU
ENTER
u
u
1...20
ENTER
ENTER
MODE
E AwE
ENTER
0.001
E HS [Aw/MIN]
MENU
ENTER
0.01...0.1
u
u
0.0001...0.001
u
u
0.01...0.1
0.02
E TS[°C/min]
ENTER
ENTER
u
u
Battery

b
ADJUST 1PT
RHS
35.0%rh
Humidity RHS
ENTER
ENTER
ENTER
Sure?
ENTER
to quit
if ok
t
➔➔
MENU
➔
all values of ROTRONIC
Humidity standards selectable
Menu ADJUST MPT
For multiple-point adjustments select the menu item ADJUST MPT. The procedure is
in principle the same as for a one point adjustment. Make sure to use the textile pad
only once. Also use a new one-way sample cup for each humidity standard.
When calibrating humidity (2, 3 or 4 points) with the ROTRONIC humidity standards,
always follow the sequence 35 %rh, 80 %rh, 10 %rh or 5 %rh, 0 %rh. When using a
reference other than the ROTRONIC humidity standards, use reference conditions
that are within the following brackets and observe the sequence:
>25 %rh...<=55 %rh
1)
used to compute the calibration offset
>55 %rh
1)
used to compute the calibration gain
>1 %rh…<=25 %rh sensor linearity adjustment
<= 1 %rh sensor linearity adjustment
1) For best accuracy, we recommend using values close to 35 %rh and 80 %rh
Grindelstrasse 6, CH-8303 Bassersdorf,
Telefon +41-1-838 11 11, Fax +41-1-837 00 73
www.rotronic.com
m
ess
g
e
r
ä
te
g
mbh
®
Einsteinstrasse 17-23, D-76275 Ettlingen
Telefon +49-7243-383 250, Fax +49-7243-383 260
www.rotronic.de
56, Bld.de Courcerin, Bât 43, F-77183 Croissy Beaubourg,
Tél. +33-1 60 95 07 10, Fax +33-1 60 17 12 56
®
sa
r
l
www.rotronic.fr
Vector Point, Newton Road, Crawley, West Sussex RH10 2TU
Phone +44-1293-57 10 00, Fax +44-1293-57 10 08
i
nstrum
e
nts u
k
ltd
®
www.rotronic-humidity.com
160, East Main Street, Huntington N.Y. 11743 USA
Phone +1-631-427 38 98, Fax +1-631-427 39 02
i
nstrument cor
p
®
www.rotronic-usa.com
Menu ADJUST 1 PT
1-point adjustment
Humidity Calibration/AdjustmentHumidity Calibration/Adjustment
Humidity Calibration/AdjustmentHumidity Calibration/Adjustment
Humidity Calibration/Adjustment
Make sure that the probe, sample cup and humidity standard are prepared and
acclimatized for a sufficient period of time before you start calibrating or adjustment.
When you use a digital instrument, calibration and adjustment is usually done in one
step: If you calibrate with a 35 %rh standard and press Enter, the probe is automatically
adjusted in the same time.
TT
TT
T
emperature Calibration/Adjustmentemperature Calibration/Adjustment
emperature Calibration/Adjustmentemperature Calibration/Adjustment
emperature Calibration/Adjustment
Note: the stability of the Pt100 RTD sensor used to measure temperature is such that
temperature calibration in the field is seldom required.
In order to be able to correctly evaluate the accuracy of the temperature measurements
provided by the probe, you should be able to meet the following requirements:
a) Both the probe and a reference thermometer should be ventilated with the same
stream of air. Any dust filter used to protect the sensors should becarefully
removed from the probe. If the probe has a protective slotted cap, this may be left
on the probe.
b) Air velocity at the sensor should be within the limits of 1 to 2.5 meters/second. Any
comparison between two instruments at a velocity under 1m/minute may not be
valid. Air velocity above 2.5m/minute may damage the unprotected humidity sensor.
c) The temperature of the air stream should be practically constant.
If you cannot meet the above requirements, you should not attempt to calibrate
temperature.
Technical data
Operation 9V alkaline battery
12...15 VDC adapter (100 mA) C (+) Tip
9V rechargeable battery, 110 mAh
Max. current consumption 20 mA (with Aw-DIO probe)
Operating limits
of electronics 0…99 % rh (non- condensing)
-10…+50 °C (14...122°F)
Measured parameters
Water Activity 0.000…1.000 Aw
Temperature -99,9…+999,9 °C or °F
System accuracy
at 23 °C/73 °F ± (0.005 Aw +1.5 %) of the displayed value
Number of probe inputs 1
Probe Type Digital Probe HygroClip; AwV-DIO
Display Alphanumeric LCD
Hold-function yes
Housing material ABS
Housing dimensions 230 x 30 x30 mm
Weight (without probe) 200 g
AwE Mode
In the AwE mode, the temperature- and humidity-signals of the probe are permanently
monitored. If temperature- and humidity values are stable during a few minutes, the
measurement automatically ends. Depending on the product to be measured and on
the temperature-stability, the normal measuring time is between 30 and 60 minutes.
Press the ENTER Key. The display shows:
Further basic instructionsFurther basic instructions
Further basic instructionsFurther basic instructions
Further basic instructions
To make sure you get precise and repeatable results, please do follow the instructions
below:
a) Wateractivity should be measured only in temperature-stabilized rooms. Do not
place the arrangement near a heater or an open window. Avoid to expose the
arrangement to direct sunlight.
b) Fill the material samples into the one way sample cups and put the cover on it. The
samples should be stored in the same climatic environment as the probes. Let the
samples acclimatize to the room conditions. An often made mistake is to measure
samples that have been stored overnight in a refrigerator, without letting the material
acclimatize. Neither should samples be measured that come directly from the production
line. When water activity is to be measured at another than room-temperature, both
probe and samples should be placed in an incubator, which allows to set the desired
temperature precisely.
c) Avoid warming up of probe, sample cup and sample material by touching with your
hands. Do not hold for longer time than necessary!
d) If you use an AW-DIO probe, please check wheter or not the probe is switched on.
This is normally the case, when the probe is connected to the HygroPalm AW1 and the
instrument is powered up. The red LED on the top cover of the probe is blinking when
the probe is powered. The probe is not working and the instrument will not get a signal
when the LED is not blinking. If necessary, switch the probe on by pressing the red
button.
AA
AA
A
wQuick ModewQuick Mode
wQuick ModewQuick Mode
wQuick Mode
In the AwQuick mode, the HygroPalm AW1 uses an algorithm to project the final
Aw- value of the samples. The measurement will automatically be ended and usually
requires about 5 minutes.
HygroPalm AHygroPalm A
HygroPalm AHygroPalm A
HygroPalm A
W1 fulfills the following tasks:W1 fulfills the following tasks:
W1 fulfills the following tasks:W1 fulfills the following tasks:
W1 fulfills the following tasks:
1) permanent checking of humidity-signal stability humidity
2) permanent checking of temperature-signal stability
3) After a dwell time, the instrument calculates the final value according to the available
data and projects the value. Measurement stops, when the projected value stays stable.
The dwell time is set to 3 minutes as a default value. With this value, an Aw measurement
typically requires ca. 5 minutes. The difference in the final values between AwQuick
and standard mode is typically 0.005 Aw or less.The dwell time may be set by the
user. ( see Setting of Dwell time and Temperature Stability)
The temperature-value is the average temperature-value during the measurement.
HygroPalm AW1 has got a trend indicator next to the temperature display. It is used to
verify the temperature stability during the measurement.
Once the HygroPalm AW1 is in the AWQuick mode, pressing ENTER starts the
measurement.
Display Details (example)
After 60 seconds, the trend indicators will appear. Two arrows mean stable values for
the respective parameter. (according to the definition at the start of the process)
When equilibrium is reached and maintained for a few minutes, HygroPalm AW1
freezes the display. Black rectangles at the left margin of the display indicate the end
of the measurement.
Standard ModeStandard Mode
Standard ModeStandard Mode
Standard Mode
In the standard mode, no further operator-actions are required or possible. The trend
indicators may be set to off.
Adjustment with ROTRONIC Humidity Standards and AAdjustment with ROTRONIC Humidity Standards and A
Adjustment with ROTRONIC Humidity Standards and AAdjustment with ROTRONIC Humidity Standards and A
Adjustment with ROTRONIC Humidity Standards and A
WW
WW
W
-DIO-DIO
-DIO-DIO
-DIO
A one point calibration/adjustment cannot replace a full calibration/adjustment (with 2
or more points). It may improve accuracy in a certain area of the scale. But out of this
range, there will be a fault in linearity and thus less accurate measurements.
The details regarding the handling of the humidity standards and their use may be
found on the reverse side of the certificate that comes with the ampoules.
To prevent cross-contamination, do not fill over the fill-line
Fill-line
PS 40PS 40
PS 40PS 40
PS 40
0 . 2 9 5 A w 0 . 2 9 5 A w
0 . 2 9 5 A w 0 . 2 9 5 A w
0 . 2 9 5 A w
v
2 4 . 8 3 2 4 . 8 3
2 4 . 8 3 2 4 . 8 3
2 4 . 8 3 °
CC
CC
C
Q Q
Q Q
Q
1 0 0 : 0 0 : 0 0 S 1 0 0 : 0 0 : 0 0 S
1 0 0 : 0 0 : 0 0 S 1 0 0 : 0 0 : 0 0 S
1 0 0 : 0 0 : 0 0 S
Aw QMode
selected
Projected
Aw-value
Actual
temperature
Value
Measuring -Time
Measurement
terminated
Measurement
terminated
Porbe 1
vv
vv
v
0 . 2 9 5 A w 0 . 2 9 5 A w
0 . 2 9 5 A w 0 . 2 9 5 A w
0 . 2 9 5 A w
vv
vv
v
2 4 . 8 3 2 4 . 8 3
2 4 . 8 3 2 4 . 8 3
2 4 . 8 3
°°
°°
°
CC
CC
C
E E
E E
E
1 0 0 : 0 0 : 0 0 R1 0 0 : 0 0 : 0 0 R
1 0 0 : 0 0 : 0 0 R1 0 0 : 0 0 : 0 0 R
1 0 0 : 0 0 : 0 0 R
AwEMode
selected
Current
Aw-value
Current
temperature
Value
Measuring - Time
AwE mode
running
Trend
Indicators
Probe 1
displayed
PS 14PS 14
PS 14PS 14
PS 14
/


