1. Stake Out Wall and Create Trench. Begin by using stakes with a string line (or a garden hose for curved walls) to mark the location of the wall, using the
desired location of the back of blocks as the guide. Use the information below to determine the size of the trench needed, and then dig the trench.
The width of the trench should be twice the depth (front to back) of the block.
Example: For block that is 6 inches deep make the trench 12 inches wide.
The depth of the trench should be equal to the height of the block plus compacted base depth (Table 1).
Example: For an exposed wall height of 1'6" and using a 6" high block, dig the trench a total of 9 inches in depth.
2. Add and Compact Base. Remove loose soil and rmly compact the soil in the bottom of the trench with the tamper. Base material can be paver base or
an equivalent to
3
/
4
-inch minus (with nes) aggregate. Add a 2-inch layer of base material in the bottom of the trench; rake out and rmly compact
(Fig. 1). Repeat as needed for recommended compacted base depth (reference Table 1).
3. Level Base. Tip: The more level the base material the easier it is to level the block when building the wall. Use a carpenter’s level to level base material
along the trench; check the level every few feet. Add more base material and repeat the process as needed until appropriate compacted base depth is
achieved (reference Table 1).
4. Base Course. Tip: This is the most important step in the installation process. Bury the base course block. Use a hammer and chisel to remove the rear
lips from all base course blocks (if applicable). Starting at the lowest elevation, place the rst block, making sure the block is level front to back and
side to side; lay subsequent blocks in the same manner (Fig. 2). Adjust blocks with a rubber mallet if necessary. For a straight wall, use string line along
the back edge of block to check for proper alignment. Fill cores of blocks (if applicable) and backll trench behind base course with base material.
Compact backll with hand tamper. Fill trench in front of wall with soil and compact. Clean any debris off the top of the blocks before beginning
next course.
For slopes, you may need to step up the base (Fig. 3). Make sure the base block is below grade at step-up with adequate base material below block.
5. Lay and Level Wall Blocks. Begin next course by laying a block with the rear lip (if applicable) facing down, in a staggered relationship (running bond)
to the course beneath. Pull each block forward until the lip is securely in contact with the blocks below (Fig. 4). Check each course for levelness and
make adjustments with a rubber mallet before continuing. Incorporate drain tile, if required, per building code or site conditions. After each course, ll
cores of blocks (if applicable) and backll behind blocks with drainage aggregate (such as
3
/
4
-inch angular/crushed free draining aggregate), extending
12 inches behind the wall. Compact backll with hand tamper. Repeat until wall height is reached. The last course of blocks can be backlled with soil
to allow for plants or sod.
6. Split/Cut Block. Cutting or splitting blocks may be required for your project.
• To split a block: Use a hammer and chisel to score the block on all sides of the split. Continue to pound the chisel on all score lines until the block
splits (Fig. 5).
• To cut a block: Use a circular saw or tub saw with a diamond blade designed for cutting concrete wall blocks.
• To create a 90-degree mitered corner: Cut a 45-degree angle on two blocks. Glue cut sides together with exterior-grade concrete adhesive so the
two faces form the nished outside corner.
Always wear eye protection when sawing blocks.
Read and understand the operating manual before using a saw.
7. Mark, Cut and Glue Cap. To cap the wall, slide the cap forward so the face of the cap overhangs the face of the wall approximately 1 inch or as desired.
• For capping straight walls, use a string line as a guide to keep alignment.
• For capping curved walls, cut the caps to follow the radius of the wall. Place a cap at the beginning of the curve, skip a space and place the next
cap in the third position. Rest a cap on top of the original two, aligning the face with the adjacent caps. Mark the bottom of the cap along the edges
(Fig. 6). Use a circular saw or tub saw with a diamond blade to cut the marked cap.
On a 90-degree corner, two caps need to be saw-cut at a 45-degree angle. At the end of the wall, cut and place the cap so the manufactured edge is
exposed. Use an exterior-grade concrete adhesive to secure the caps. If not nishing with caps, glue the top wall course with exterior-grade concrete
adhesive. Tip: Planting grass or other vegetation in front of the wall and behind the top of wall will help to reduce the chance of erosion.
Maximum gravity wall heights assume no slope below or above the wall; no surcharge loads (e.g., driveway, parking pad, pool, etc.); block cores (if applicable) are
filled; and all replaced soil is well compacted.
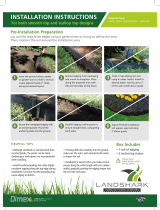
DIY Retaining Wall Installation
Call 811, Common Ground Alliance, to have utilities marked before starting your project.
Read all instructions prior to installation. Refer to last page for reference images of installation materials and tools.
* For exposed wall height limits, follow product’s total wall height (reference product page) and subtract height of block to account for buried base course.
Fig. 1
Fig. 2
Fig. 3
Fig. 4
Fig. 5
Fig. 6
Table 1 Trench Depth Reference Chart
Exposed Wall Height*
1'6" 2' 3'
Block
Height
Compacted
Base Depth
Total Trench
Depth
Compacted
Base Depth
Total Trench
Depth
Compacted
Base Depth
Total Trench
Depth
6"
3" 9" 4" 10" 6" 12"
5"
3" 8" 4" 9" N/A N/A
4"
3" 7" N/A N/A N/A N/A
3"
3" 6" N/A N/A N/A N/A
<
<